
It is not without irony that I am posting the mending my old ‘mended hearts’ metal embroideries.


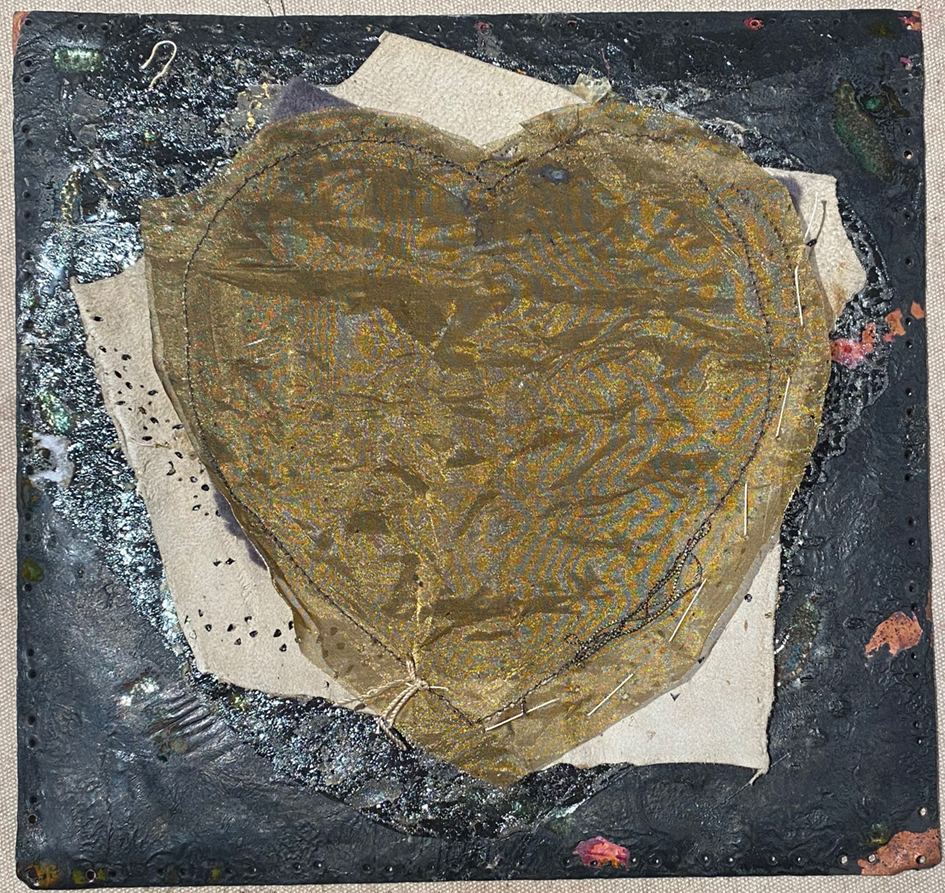
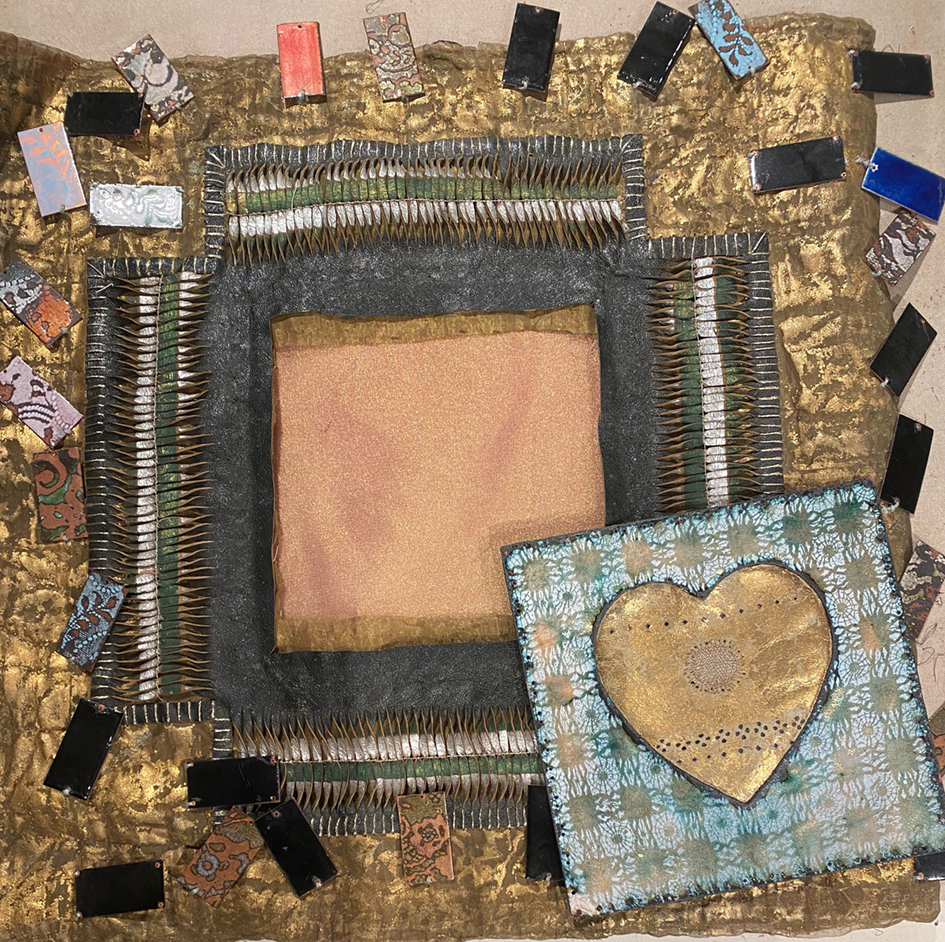
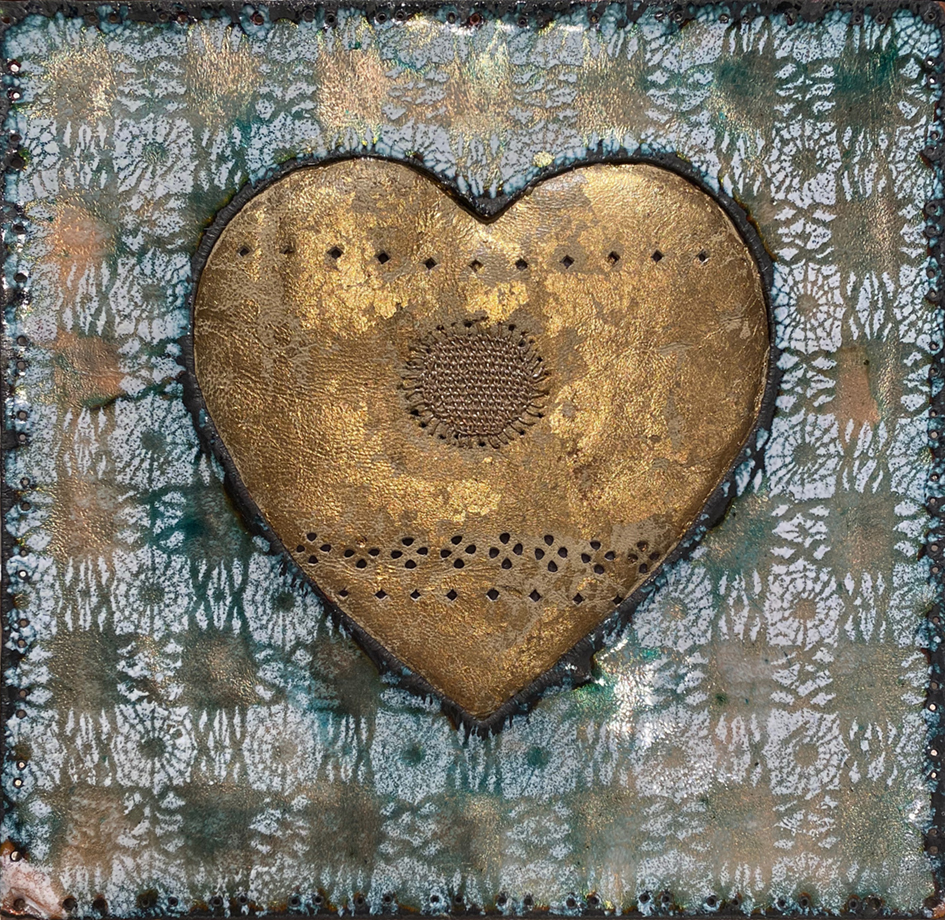
Above are the original images of 2 pieces of old work (circa 2010), left is Discarded Heart, and right Crossed Heart. They are just 2 of the outcomes of much experiment with some challenging materials – I was interested that these metal fabrics would last for a long time – far longer than the natural fabrics that I usually use…..how wrong I was!
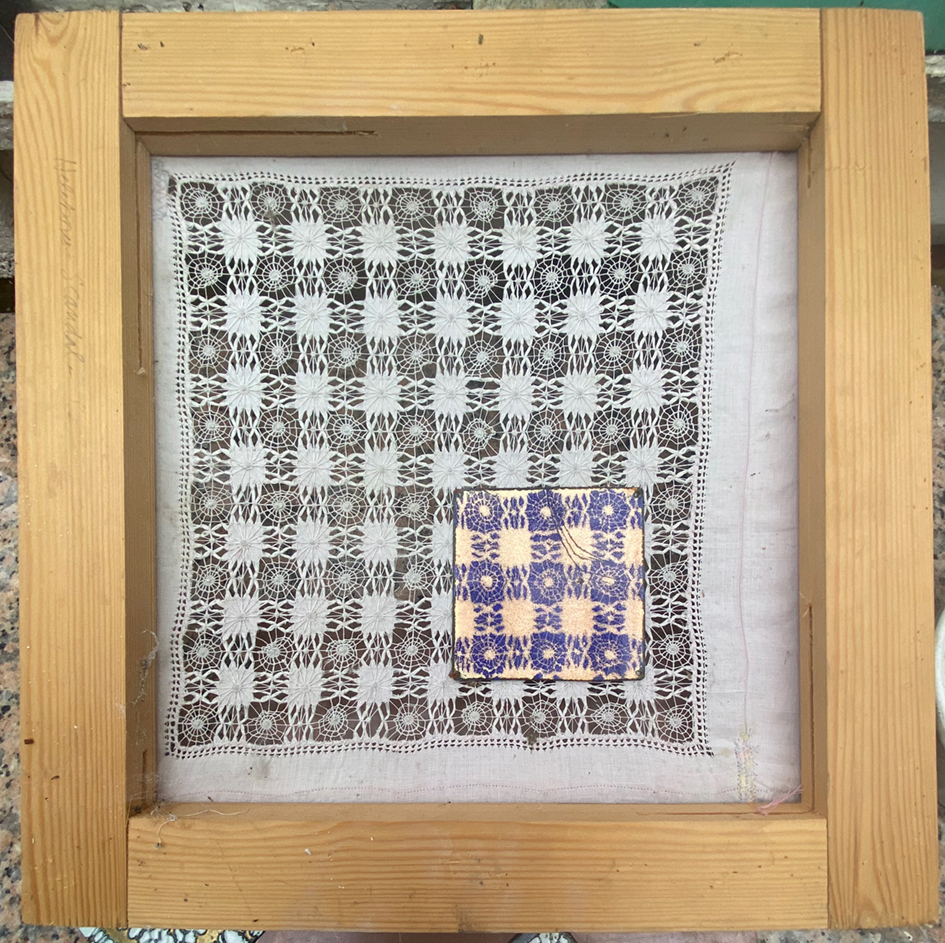
Searching in my studio I found a drawer full of old ‘fabric enamel‘ samples, that I had made use of for Discarded Heart. I had often used drawn thread-work as stencils and amazingly found the original stencil fabric , stretched and ready for use.
The most difficult thing I had to do was to repair the cracked enamel square. I wasn’t sure I could do this as it needed to be re-enamelled in exactly the same place as the original – fat chance! I carefully removed the gilded and stitched leather heart and re-gilded it. SO taking courage in both hands I re-stencilled it using a strong white enamel, then fired it at a very high heat and this made both the pattern very feint, and the cracks filled up – result!
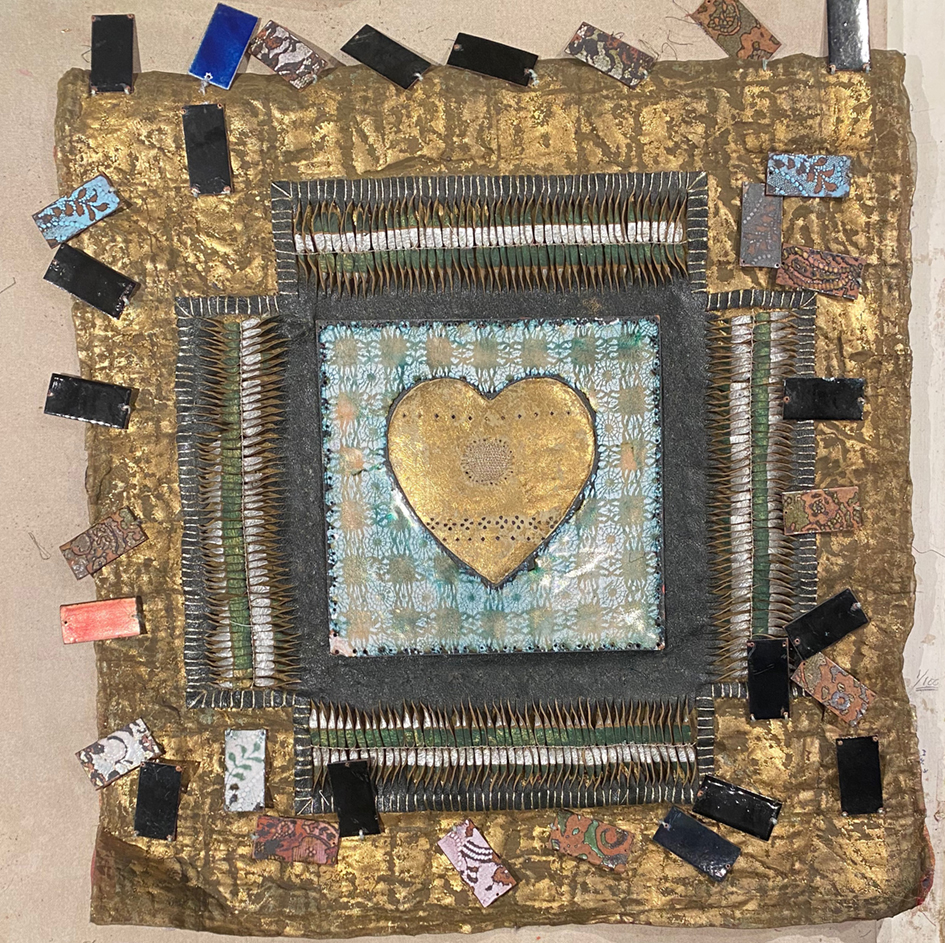
To get it back into postition I had to re-excavate and re-drill the stitching holes, so that I could painstakingly stitch the whole square by hand using real metal threads, ( trying hard to stick to my intention of NOT buying new materials but recycle anything I already own). I had several real Japanese gold and some copper wrapped threads to choose from, but this thread had to be strong and resilient for stitching through metal and leather.

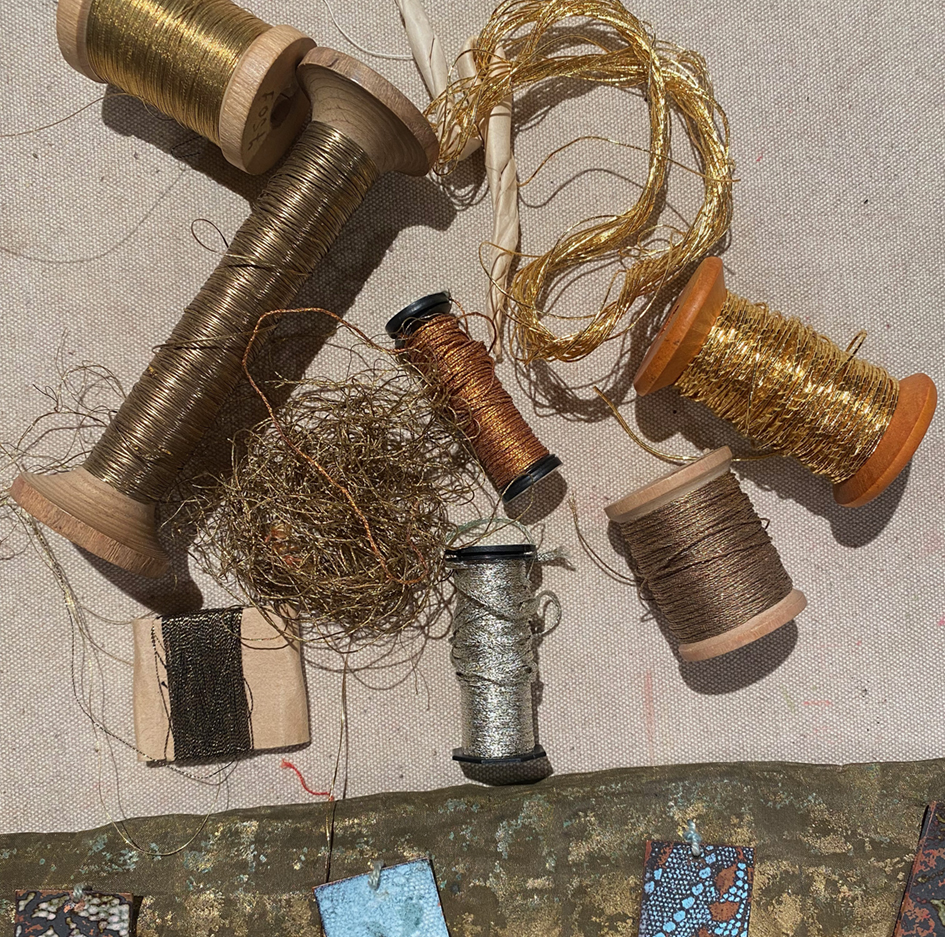
After several half days of really awkward stitching, I managed to herringbone a wrapped copper thread all around the square.


Relief, as I had already offered the Discarded Heart (as it was it was originally made from lots of my. unsuccessful samples ) to the Welsh Quilt Centre as part of my 6 months exhibition called Hearts and Flowers in 2024.
So far so good, but the next piece, “Crossed Heart” was really badly damaged – mostly by fading but seemingly anything it had been in contact with over the last 10 years….including my hands while working it! Everything seems to mark these refined woven metal fabrics (and I suspect Boysie, an ex fox terrier stud dog). And I thought that these fabrics would be as hard wearing as they are tough to stitch! I didn’t offer this piece for exhibition as I was not at all sure if I could make it look worthy of being exhibited again.
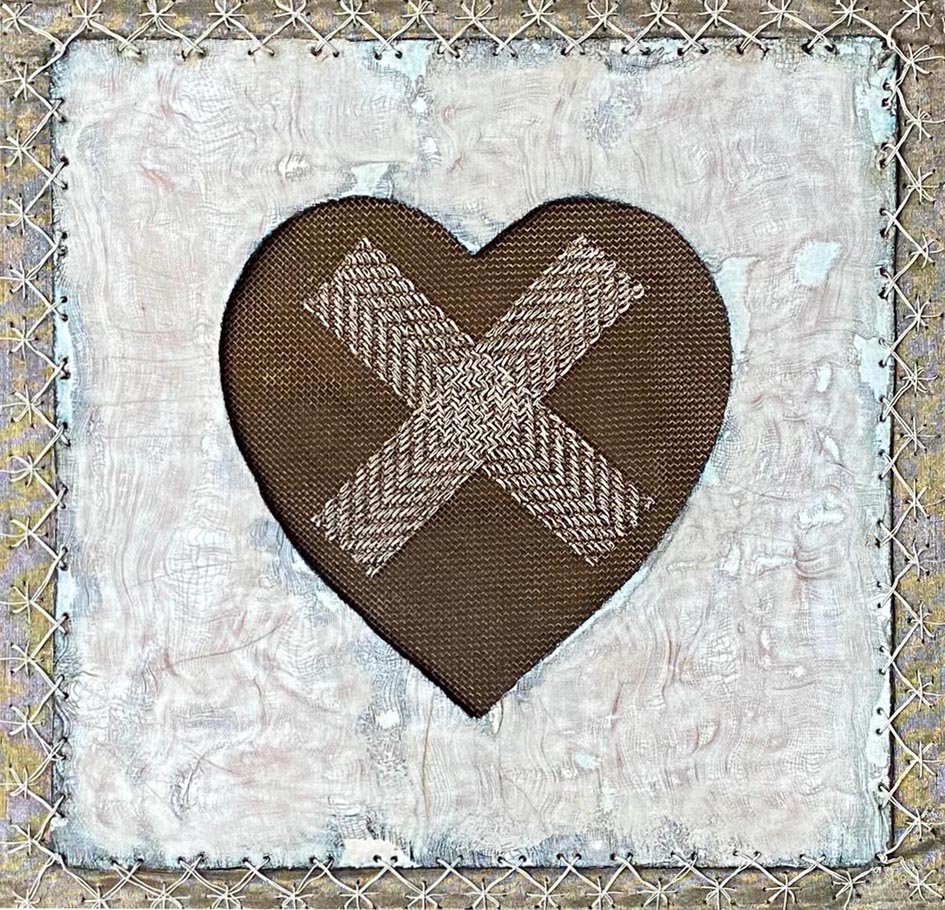

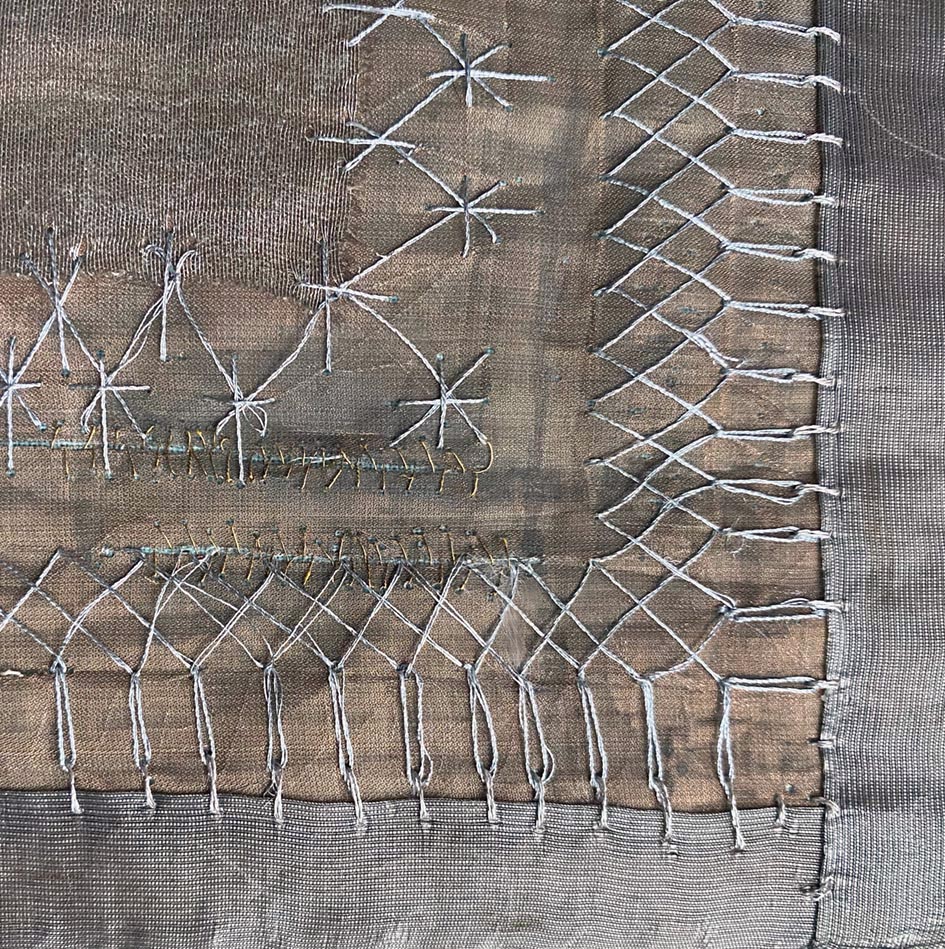
The only area not stained, faded or split was the centre panel of a decorative cross darn in white wire into a heavy copper mesh I had copied from a Darning Sampler in the Bristol City Museum and Art Gallery which has one of the most famous Sampler collections in the world. I kept this, but now had decide just what to keep as signs of legitimate wear and what I just couldn’t aesthetically live with!

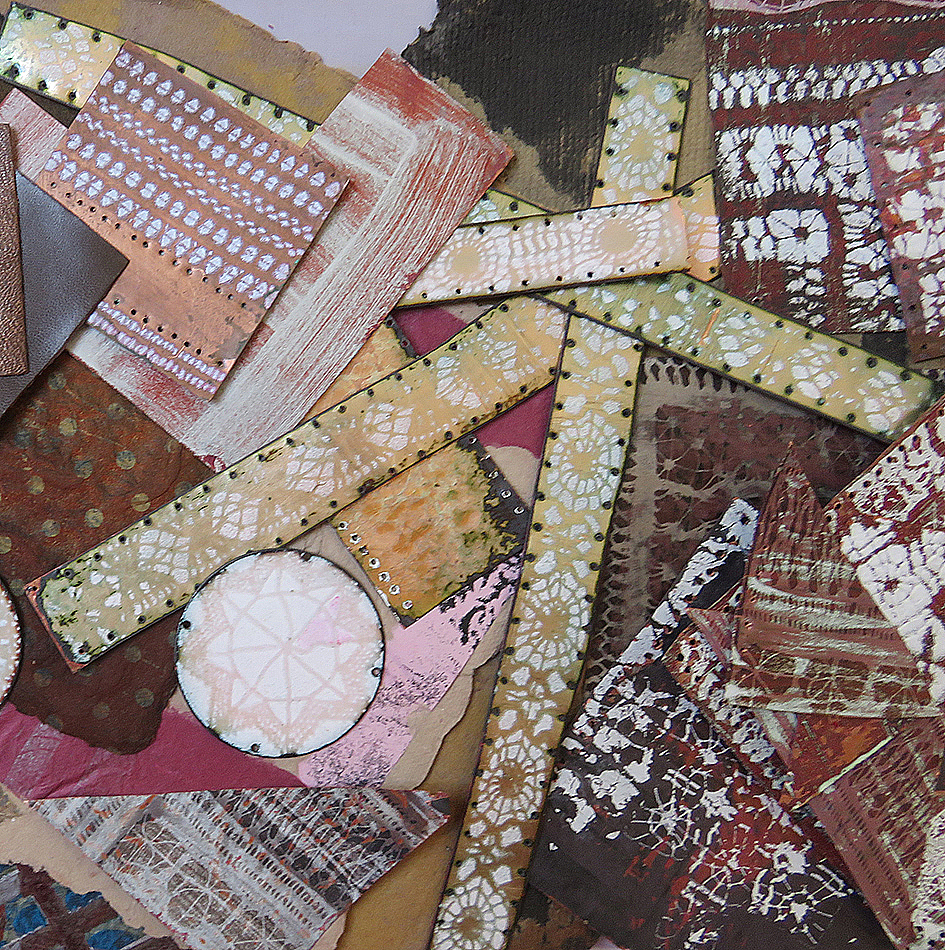
The whole sorry embroidery put onto my worktable and pinned into place – the metal fabrics have a tendency to roll up on themselves when left alone; a metal memory even after 10+ years of being stretched on a fame. The staining is plain to see with the general fading and tarnishing, but what you can’t see are the splits on the background fabrics underneath the rows of herringbone stitches.


The first area I felt confident to work was a rip and I cut away the fraying fabric – a mistake – but hey ho, nothing ventured…and started to darn the gap in the metal and nylon woven fabric with 1 thread from a stranded silver hank of 6 strand….very tricky – I may yet go back and rework this!


I was not very confident to continue, but I had started and I am of the sign of the crab…..very tenacious. Here are various ruined areas of the work, with different mends : a proper running stitch strengthener over a pulled thread area, sewing an extra border in a nylon and probably lurex woven fabric (once a very glamorous skirt worn to a 1 very glamorous occasion)to hide the worst of the staining on the outermost edge of the piece ( Boysie?) and then surrepticious stitches to draw the edges of the split fabric together. The herringbone stitches had started to unravel – and by this time so had I.

but eventually they are finished enough for safely re-stretching and possibly have their place in the lay-out for the gallery as part of a group of stitched metal mended hearts…


Discover more from JANET HAIGH: HER WORK
Subscribe to get the latest posts sent to your email.

To see the mending process of your enamel hearts is fascinating, a true labour of the love that was put into the design of the initial work 🧡
LikeLike
well thank you it is a labour to deal with old work that is so damaged – but feel very worthy now!!!!
LikeLike
My fingers started to ache as I read this and looked at the photographs of your beautiful work. What a painstaking process. It must be very difficult to stitch into metal fabric, but what a wonderful result!
LikeLike
Yes – my fingers, wrists and thumb were all complaining, in fact I could only stitch the metal in small stretches of around 1 – 2 hours at a time…and there is no flow in stitching these materials, which is a big part of the joy in my practice. It was a lot easier to manage when I was making it as it was all flat metal on metal, and herringbone stitches are my favourite to work as well.
interesting to look back over the old work though and realise you are travelling in circles!
LikeLike