Beading a Face

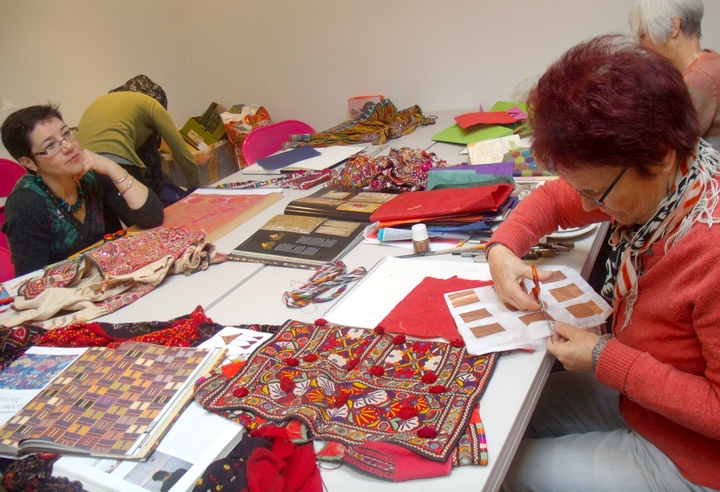
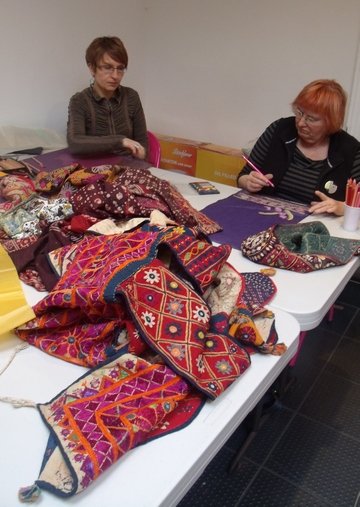
Heart Space Studios has been host to a fascinating set of artists this week, Native Americans who are exhibiting their work at an exhibition called Messengers 2012 at Rainmaker, a Bristol gallery specialising in native art from south west America, mainly jewellry, but also prints, sculpture, paintings and textiles. Rain maker hired the studios for 2 events, a master class in bead-work “Making a Face” by Marcus Amerman, and also for a day of lectures given by several other artists in the exhibition, all of whom are renowned makers and scholars.

Marcus lecturing with an image of one of his beaded pieces, Indian Country

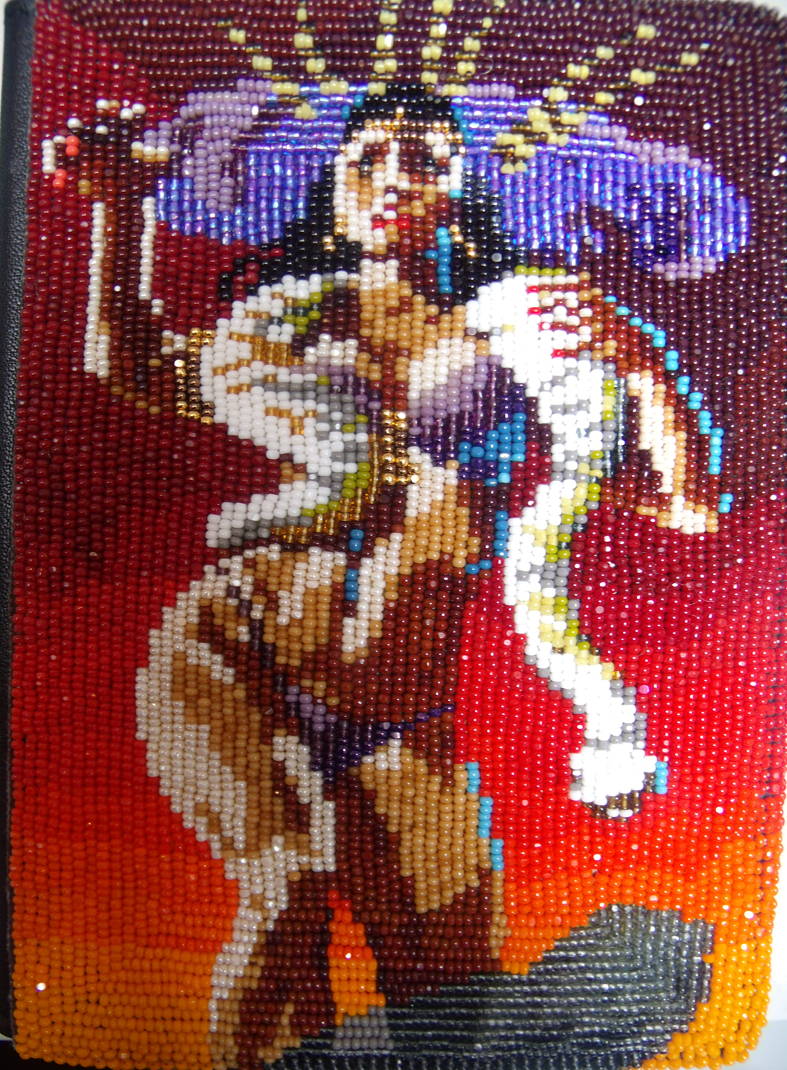
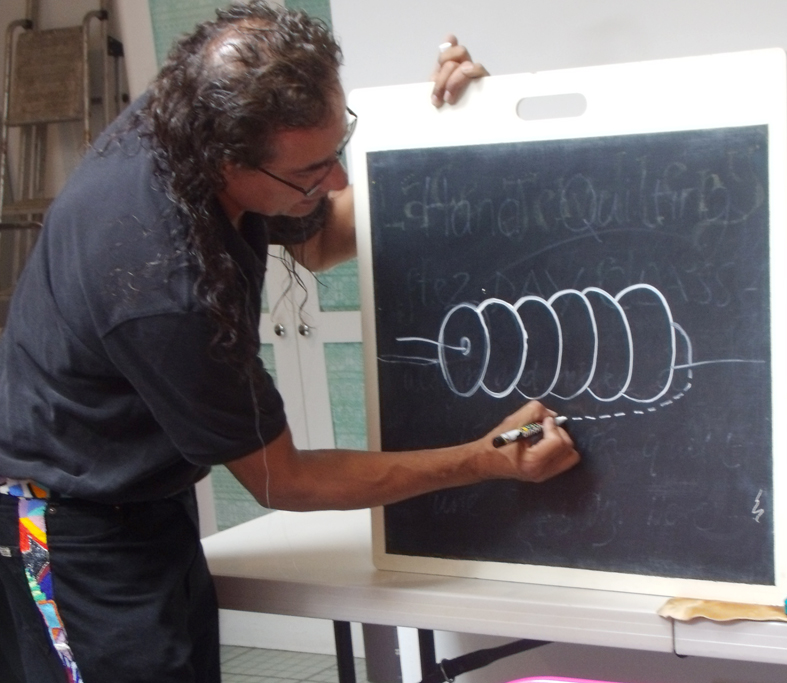
Marcus Amerman is an innovator in Photo-Realism in bead-work; he demonstrated how to develop a portrait in beads from a photograph, a technique that updates the bead-work tradition of Native Americans, where the beading is largely used for ceremonial costumes. He showed how the portraits can be used for personal adornment as brooches, pendants or bracelets.

selection of beaded pieces, including a bracelet and a money clip

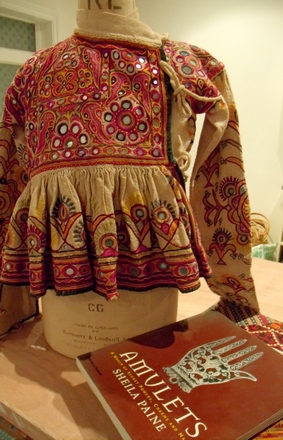
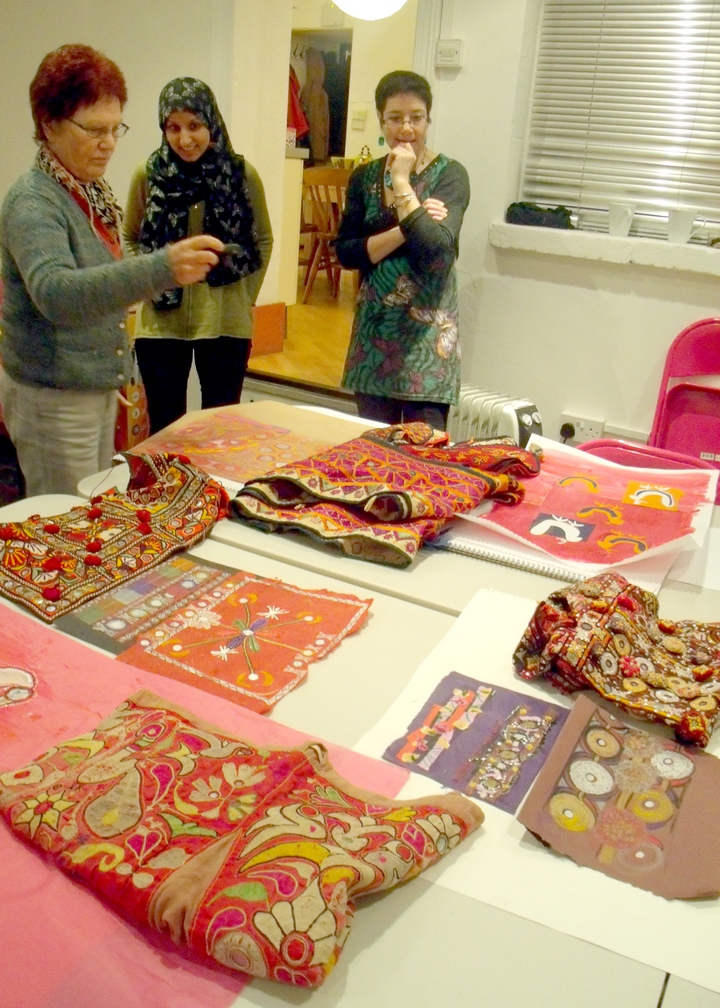
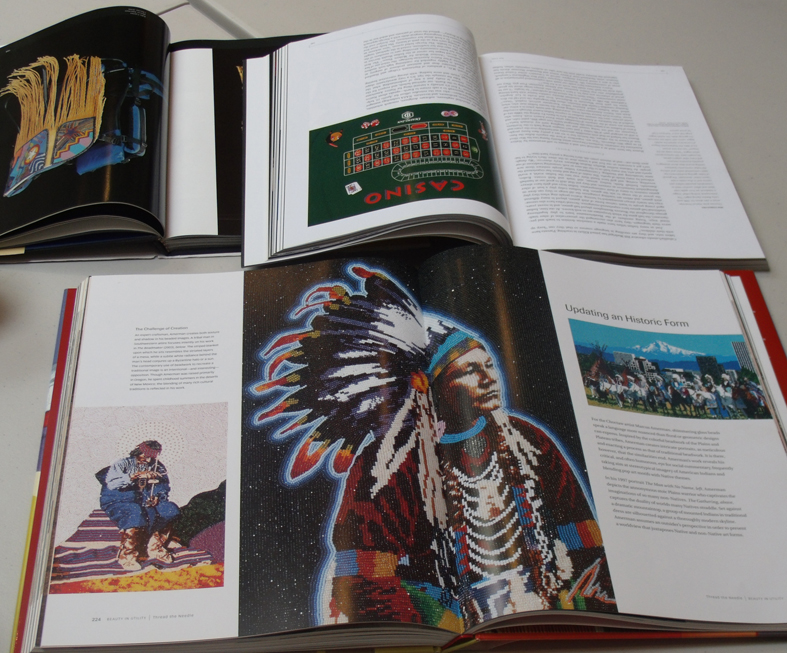
He started the class by showing a selection of his work and several books to illustrate various aspects of the craft traditions he has used in his career as an artist. He was born in Phoenix Arizona to an Eastern European father and a Native American mother and is a member of the Choctaw nation. The bead-work tradition that he practices is, however,  a specialism of the Hopi nation and his brother- in- law is a Hopi man – so this is where and he feels he has been influenced to adopt this beading method.

American books showing contemporary arts and crafts

He talked at length about duality within his work, and how beading, for him,  embodies both masculine and feminine attributes; the beaded ceremonial pieces worn are by men to show strength and dominance, defying the world –  but are made by women who “embrace the world” by their skills.  He also spoke of when he teaches this class to women who stitch traditional bead-work on reservations, how they invariably make very personal portraits of their own children so they can wear them everyday.

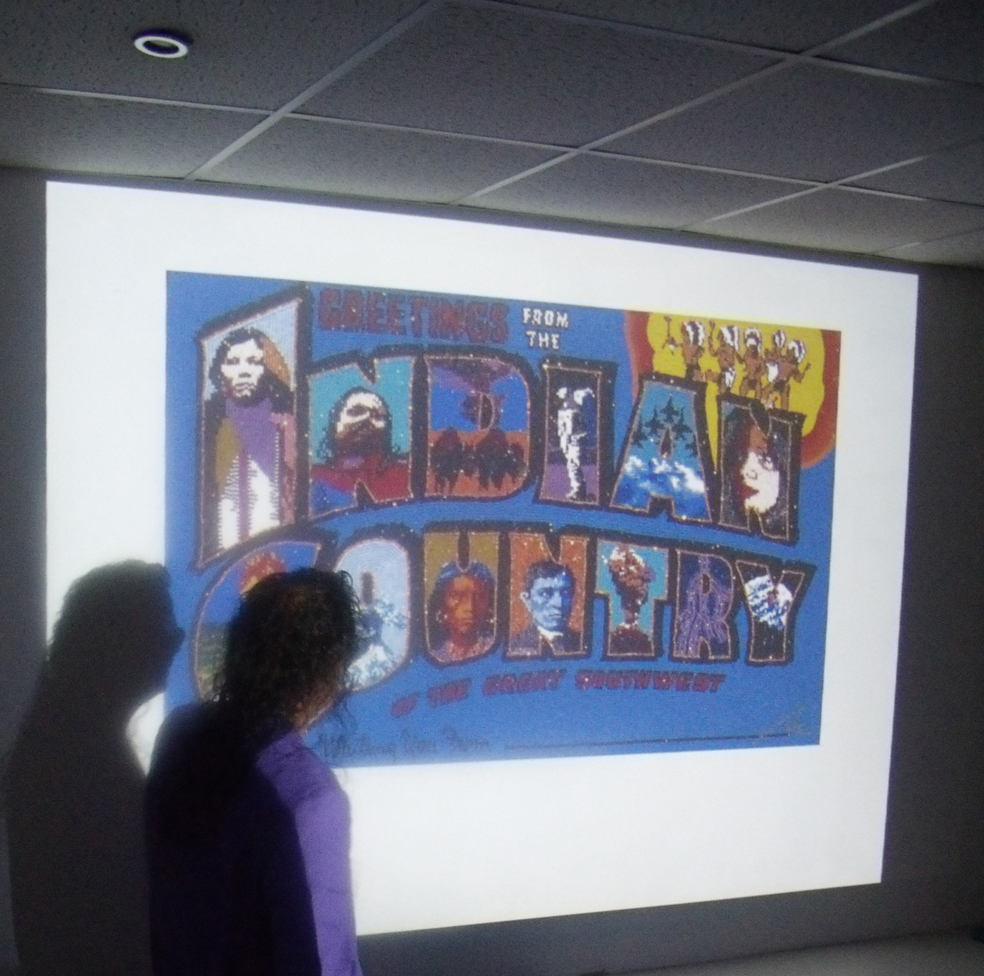
Like all the Artists that Rainmaker exhibits Marcus mixes different cultures within his work; he uses imagery from  films, fashion, other crafts all bound together in a figurative manner that can make varied visions from popular culture to subtle political statements.

Salma Hayek in Dusk Till Dawn beaded onto a passport holder.

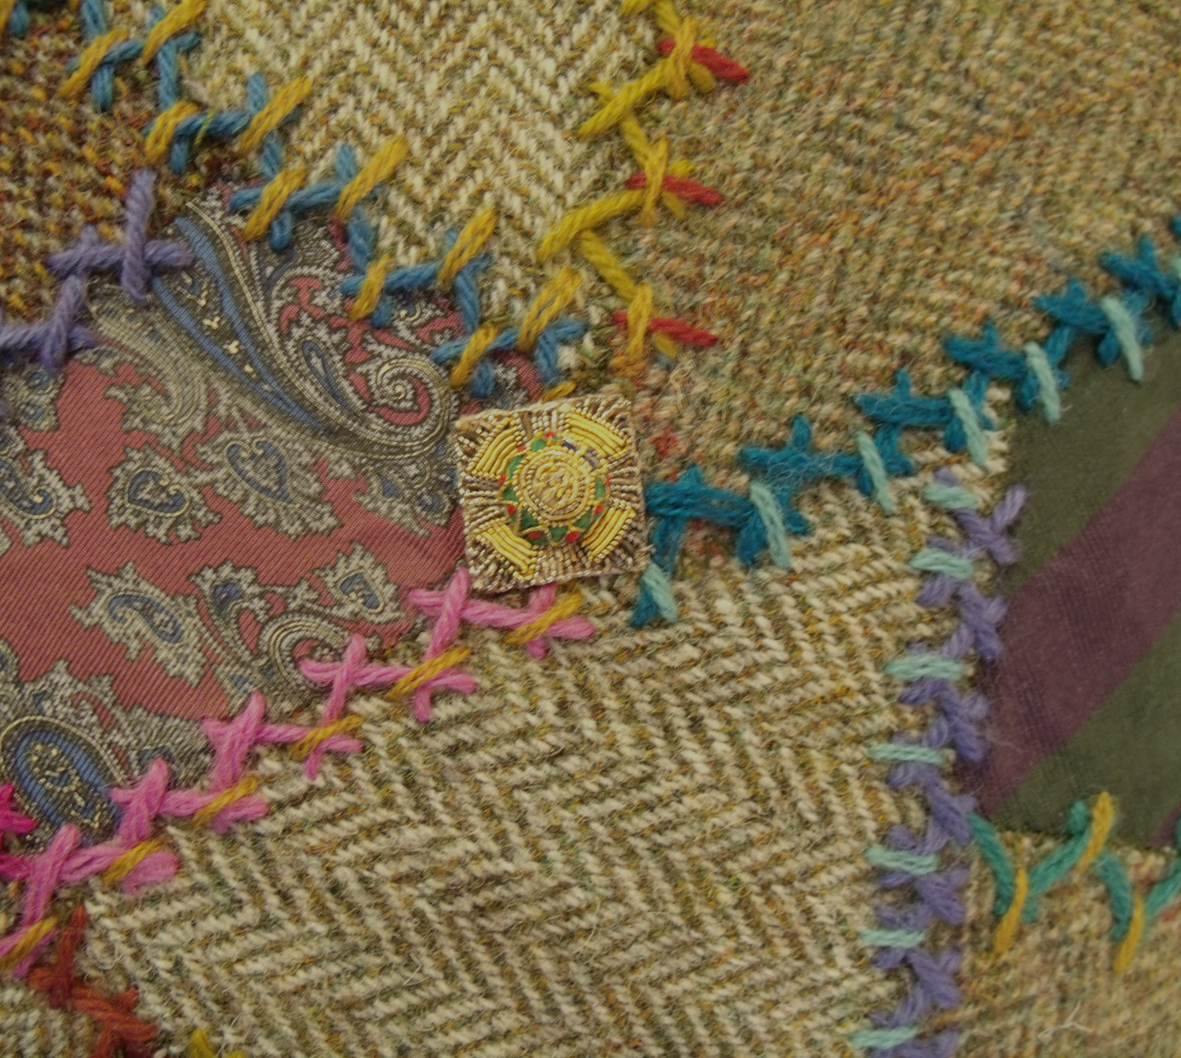
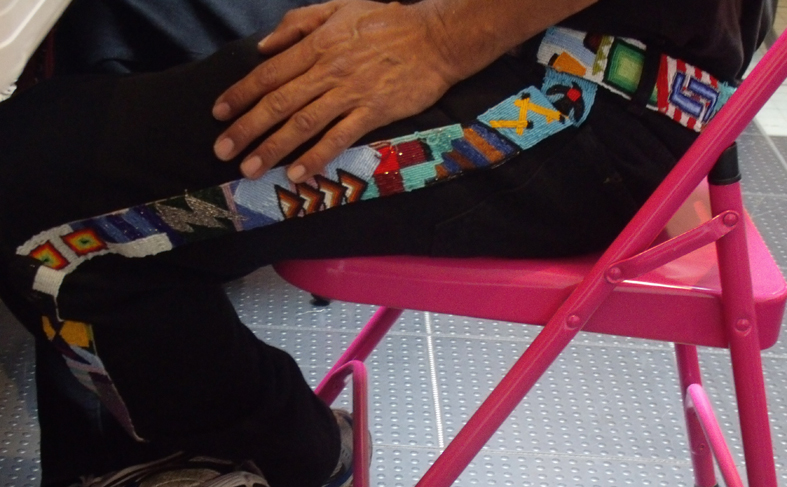
 He also makes clothes and costumes for his performance art and first started embroidering and beading his denim jackets when he was a young man – he still wears beads today, and practices several different crafts including enamel and kiln fired glass. I really admire the way that whatever Marcus makes, be it a passport holder, note clip or a subversive art work, he is at ease with himself and his chosen media and message.

Marcus’ beaded belt and trousers

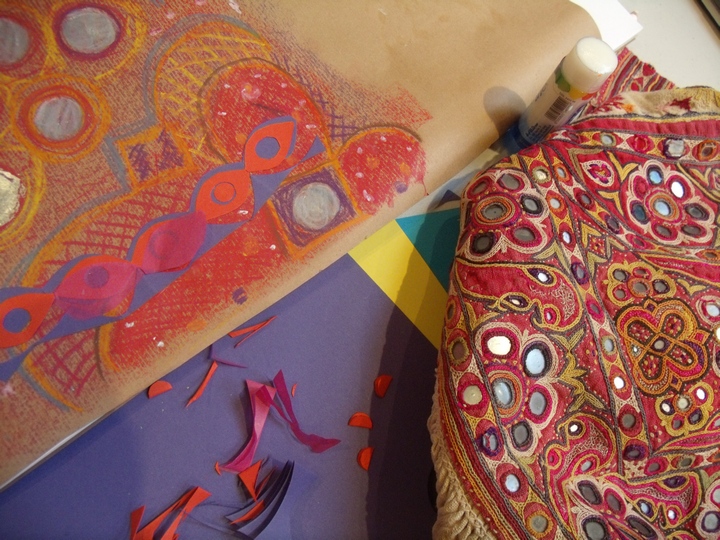
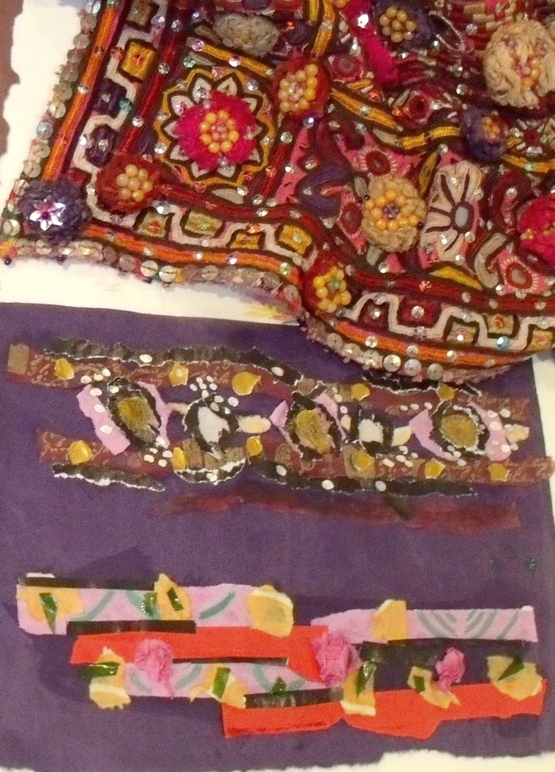
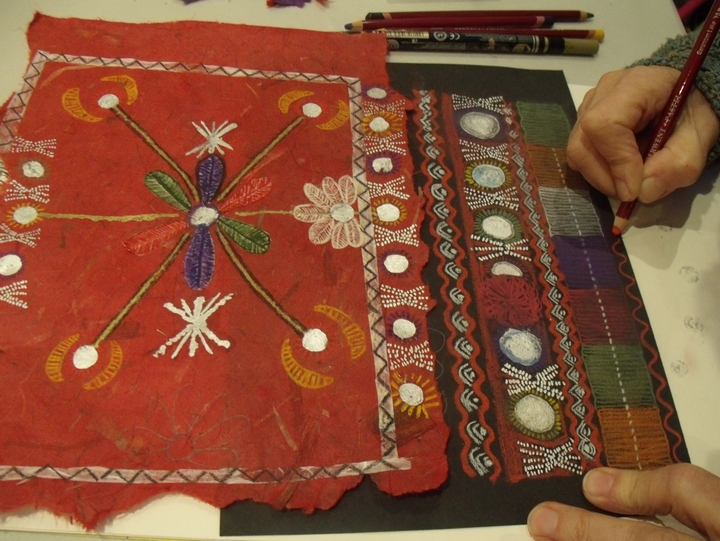
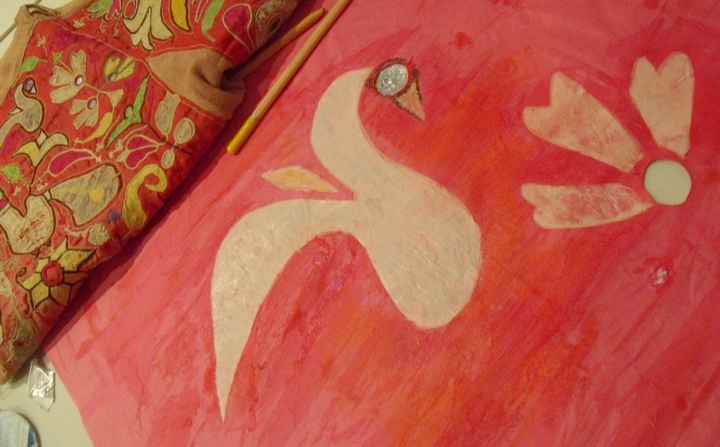
What I did find surprising about his work, having only seen it in books before, was its small scale  –  it looks monumental when illustrated, but it is full of detail, pattern and colour – you can hold it in your hands and it is a glinting, brilliant, faceted  fabric…. truly remarkable.

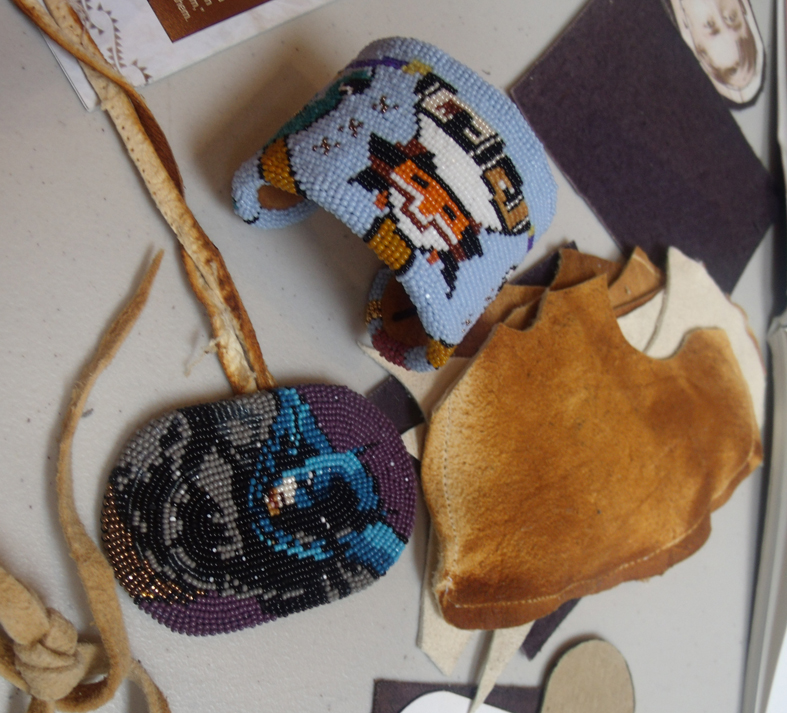
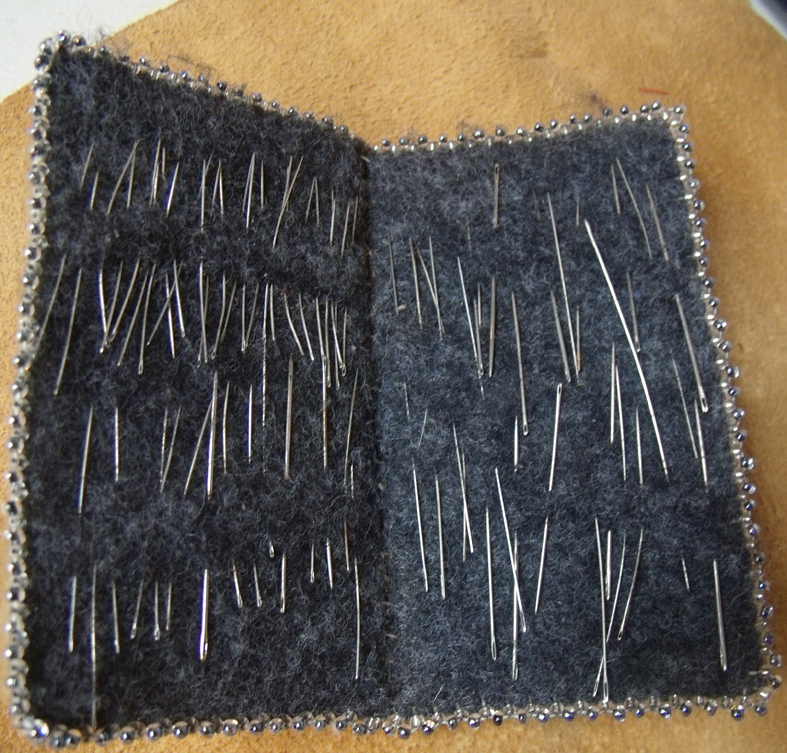
Now to the workshop – Marcus started everyone beading by first introducing them to the tiny beads he had brought with him and the smallest needles I have ever seen. They were stored in an animal hide needle case outlined in beads, the needle were sized from 11 – 13 and were very fine and very short for a beading needle.

hide needle case adorned with beads.
tiny needles in a hand made case

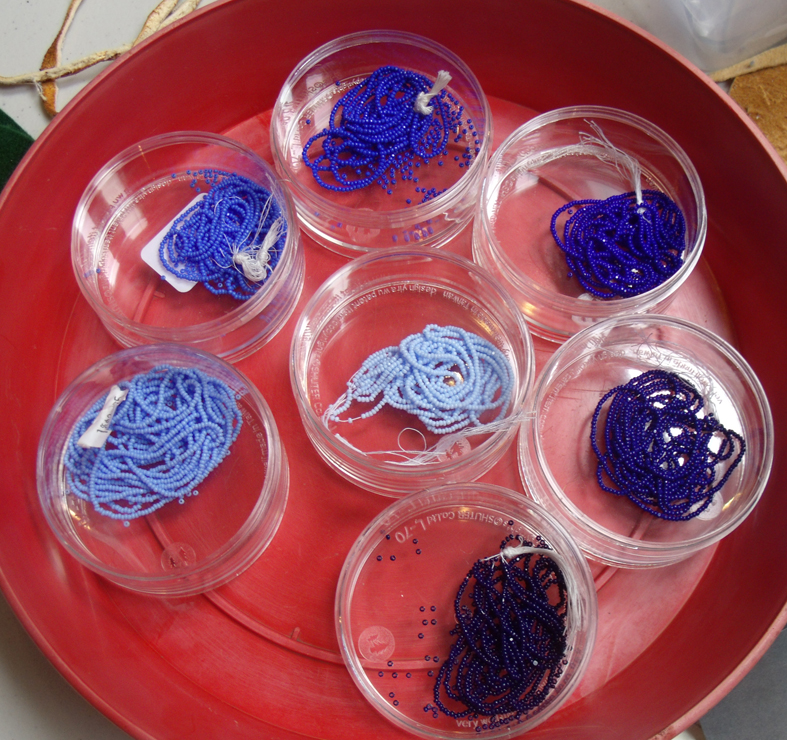
He brought 7 shades of blue beads to use for the faces and a length of each colour was given to everyone. Next they had to learn how to map out the facial contours for each shade, staring with the darkest tone. He gave everyone the same photograph to work with, stating with the darkest tone of blue they had to draw in all 7 tones.

seven shades of blue beads for tones of face

The image that was given to the students was a photographic  portrait of another of Rainmaker’s artists, Shonto Beday, a Navaho painter and print-maker, who has work in the current exhibition as well. Each person had to draw around or shade in each isolated contour of the face – the results are so entirely different and you can see at once how everyone has their own way of seeing and perceiving.

picture of a student’s daughter with the coloured drawing contour guide

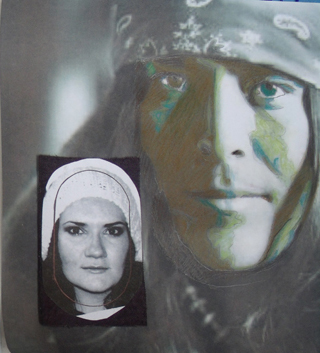
I really like these drawings, they make such an impact and clearly show that even when working from the same photograph everyone has a different perception and interpretation entirely of their own.

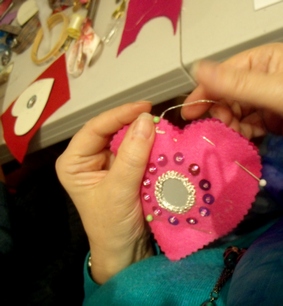
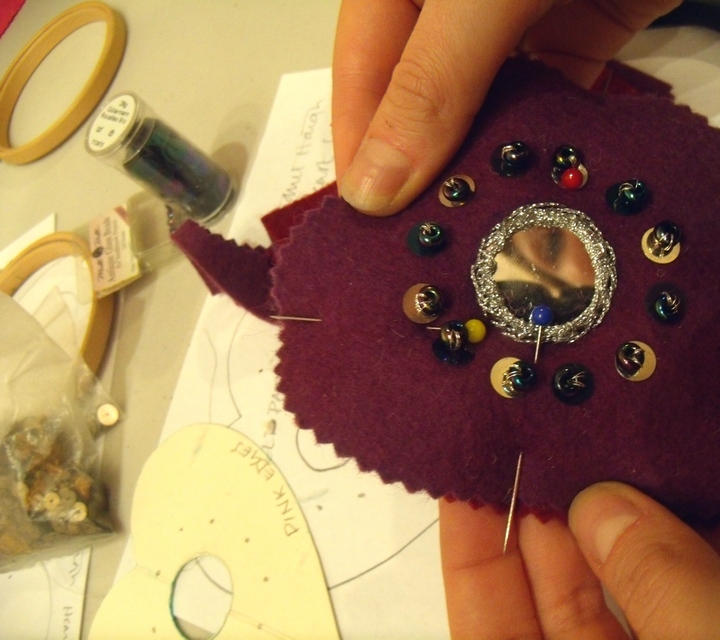
Now the students had to start stitching their own images, with only the contour map for a tonal guide – BUT not before they were shown the technique for stitching the beads straight onto the photographs in a spiral pattern. The photographs had been prepared for this by bonding them onto a specially reinforced paper backing made by brushing a thin card with several coats of a bonding solution.

Marcus draws the stitch diagram for the spiral beading.

The method of attaching the beads ensures an even and straight line of beads that can be manipulated around shallow and eventually tight bends – if you get the tension right.

Beading the photograph starts from outside the face

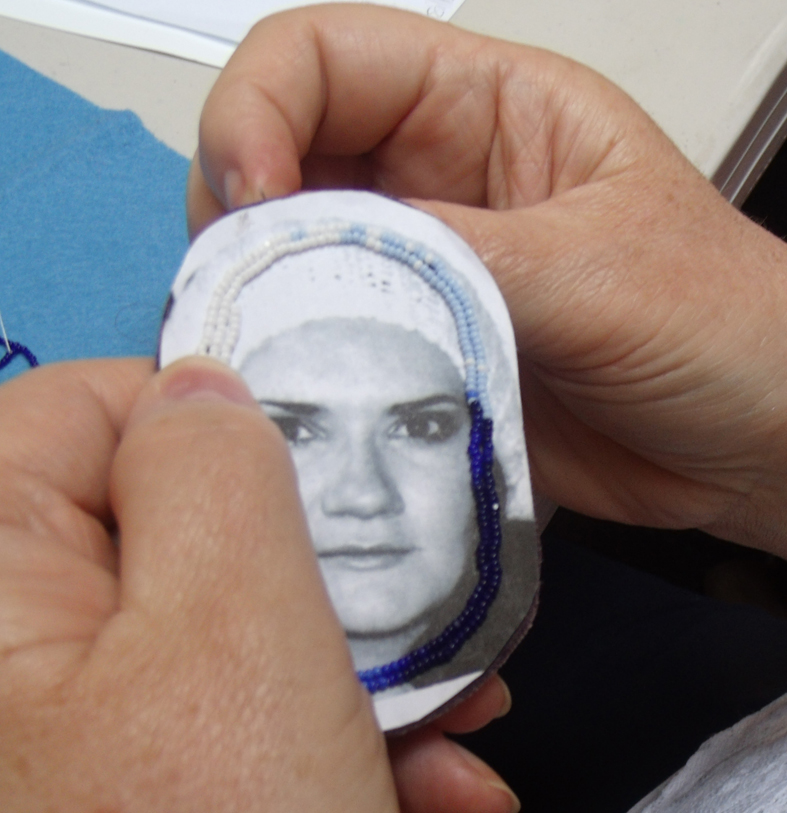
The maker than has to use their own judgement when to change the tones in the row of 6 beads – so that they cover the face exactly. Not so easy as it first appears. And now it becomes obvious why the beads have to be so tiny. And just one bead needs to be stitched to show the bright reflective point in the eye – this gives the face life…and Marcus says that every beader he has ever taught uses a different colour  or type of bead to represent this point.

I am hoping to show some of the finished pieces at a later date….meanwhile I am trying hard to stop myself from going into my studios and trying my own version of this technique – I will wait till I have an idea that suits the system as it has a lots of potential for enriching my fabric enamel work

Put Out More Flags

red white and blue

The weekend of the Queen’s diamond jubilee here in England has  brought out the bunting and as this is a textile blog – let’s celebrate….

strings of the union flag bunting along the main road to work

On the way to Bristol to work at Heart Space Studios, I kept stopping the car to take pictures of the patriotic red white and blue bunting strung out in front gardens,  – the local neighbourhood streets  had tastefully dressed windows

window dressing in Bristol

Families had decorated their homes for this one weekend….

vintage style bunting

even scaffolding got the a dressing of flags

decorated scaffolding in Westbury Park

and while waiting for the wisteria to bloom,  bring out the bunting …

wisteria vine with bunting

The shops really got into the spirit

a charity shop window in Clifton
reflected awning with bunting galore in a local cafe and craft shop
knitted bunting in a vintage clothes shop

But for really proper patriotism go for the Union Flag – this vintage flag is in the window of my favourite vintage clothes shop Clifton Vintage Boutique.

vintage union flag

and my favourite red white and blue bunting was in the window of a clothes shop in Clifton village it is authentic stitched and appliqued cotton i am very jealous that I didn’t think to make up some like this for Heart Space.

union flag bunting in cotton patchwork – the real thing

All very tasteful… but back in the  Somerset town of Portishead, where I live, the bunting is full – on and fabulous – all ready for a street party

Portishead garden with bunting

Almost every house and garden in the centre of the town is dressed for the celebrations

Portishead town garden..

and one more just to show you how colour co-ordinated we are here, the perfectly matching red roses of England

red roses & bunting line

and how’s this for real patriotism? bunting with toning red white and blue washing.

ebunting and mix & match washing line

Skin

Fingers and arms lasered for translucent vellum

I have become fascinated by skin as a material to work with. This has come about, no doubt, by my recent project to develop a piece of work for Pairings II for the Stroud International Textile exhibition. I used a huge skin that had been prepared as vellum – or parchment –  a hide, possibly reindeer in this case, treated in such a way as to make a smooth, hard, fine grained surface after removing the pelt, either  fur or  hair – don’t let’s forget that all animal leather and suede is simply skin with the fur or hair shaved off.

coloured drawing, dyed, stitched and lasered onto vellum

What is really exciting me about working with vellum is that I can draw onto it as well as stitch into it. There are other things to do with it as well but drawing and stitching really are the backbone of my textile practice, and here is a new material redolent with all sorts of symbolism that I can start to mine. So maybe this will lead to more drawn imagery with stitch to enhance the drawing – not sure yet – but hand stitching this material needs long and slow preparation.

drilling the vellum to stitch it together

Recently I have been working with all types of other skins, mostly calf skins, some with the hair still on…

shaded mottled calf skins

I have done quite a lot of work with fine leather and suede, most recently at a workshop in Finland at the University of Ostrobothnia, at the faculty of Applied Sciences, where I first experienced the large scale sheets of vellum as an option to work with. However I chose metallic leathers, cow hides and farmed fur to create an embroidered seascape, embellished with silver leaf. But I had remembered the large vellum skin and how beautiful it was and so used it for the Daphne Tree metamorphosis piece.

hand stitching fine metallic skins to hide
sample of stitched leather and calf skin

The company who farmed and manufactured the vellum, were generous in sending me a whole skin to work with; it has caused much interest in the exhibition, most people seem to think that vellum is just some esoteric writing-paper and keep asking me where is the animal?

But what is really exciting is that the leader of the Finnish workshop, Basil Kardasis, is conducting another workshop at Heart Space Studios, but  this time using one of the most unusual and beautiful of skins –  fish.

He is introducing this material for a master class for experienced makers, called Surf, Turf and Sky, using fish skins, leathers and feathers – all of which are by-products of the food industry, so think eel….

dyed and stitched eel skins

water snake (they eat these in Scandinavia)……

un-dyed stitched water snake skins

and smaller whole dyed fish skins….like salmon, trout, pike….

dyed salmon and trout skins

and also some specially hand – tanned skins from Sweden, perch, cat fish, and plaice.

a variety of tanned fish skins

the individual skins are small but call out to be combined with other materials to enable us to make fabrics out of them..

tanned catfish
tanned perch

but my favourite fish sample is a tiny single side of Knot, it already appears to be embroidered.

beautiful preserved Knot skin – about the size of a sardine

Ribbon Flower Corset for Vintage Weddings

hand drawn poster for new classes

It takes a lot of lovely textiles to make a good wedding! Think about it ….. the dress – obviously, the veil, the bridesmaids’ frocks ( it’s rare to see a good bridesmaid’s frock – Pippa Middleton’s proved the rule)!  But there are also the garters, the waistcoats, the ties or cravats, the suits, then the the napiery, and the flowers -so think silk ribbons…..

hand embroidered silk flowers

Well yes of course you thought I meant the bouquet and I do, eventually; but just for now I have embroidered some silk flowers onto a cupped corset for a wedding gown that has made  me realise that we can develop all kinds of different products perfect for sumptuous weddings and everlasting memories, not forgetting the Hen Party.

ribbon embroidered bridal corset with Catherine Keating, Lisa's youngest daughter, peeking out

I have been working with Lisa Keating, who conducts out very popular corset making courses, and together we have invented new designs for the ultimate romantic wedding that you can make yourself at Heart Space Studios– or maybe send someone else to make it for you. The ribbon embroidered wedding corset and skirt are made to measure – this is the ultimate in hand – made retro chic.

We showed the dress at the latest Vintage Wedding show held in Bristol last weekend.

back view of corset modelled at the Vintage Wedding Fair in Clifton Bristol

Heart Space tutors had made several accessories that we can teach people how to make in short classes ..small beaded hearts and hair accessories, buttonholes and party favours.

wedding gifts and favours made at Heart Space Studios: shoes by Lisa Keating

We feel that is is a good way for a Bride’s family and friends to get involved in making a bespoke wedding, and much of it can be made with recycled and vintage materials. Debbie Bird came up with a lovely idea for  making bouquets made from old love letters…well who writes those these days? But it will still work using a romantic novel or a book of love poetry – I recommend John Donne for the most unashamed  ideas on what it is like to be in love .

recycled paper bouquet using pages from a love story, by Debbie Bird

At the venue after I had set out the samples of what people can make with us with Heart Space, I took a good look around the rest of the stands, absolutely fascinating, so many really desirable things…starting with the cakes…..

Chocolate Delores makes chocolate look like fabrics

I was delighted to find the Chocolate Delores stand with wedding cakes that all looked like they were made from fabrics – and they were made from chocolate…how fabulous is that? those swirls of white chocolate just look like tulle and look at the sprigged rosebud pink print on the wrapped cake.

Other stands were more conventional using real lace, beads and silks, there were so many good ideas for textile jewellry that I wanted to get the makers to come and do workshops for us at Heart Space, some may come and teach with us in the future.

the Lilygrace stand with lovely romantic sentimental fabric jewellry

the Lilygrace stand was full of hand made fabrics beaded and embellished by the maker, Hazel Mathiot was actually stitching pieces at the fair. I particularly liked her very richly beaded wrist band, a case of  the “more is more”  school of design.

embroidered wrist band by Lilygrace

There were lots of lovely embroidered lace accessories throughout the whole show, mostly head dresses with embroidered lace stitched onto Alice bands, Bridezillas were particularly stunning

in fact their stand was mesmerizing so many lovely desirable things, really all this vintage wedding stuff brings out the hidden girly in everyone….

Bridezillas sumptuous stand at the fair

even me!

Making Fabric Beads

starting off with lots of inspirational materials and samples

Heart Space Studios is one year old this week, so we repeated our first ever class, Making Fabric Beads with Patricia Brownen, and the results are as desirable as always. This is one of our most popular classes and the original report also receives many hits on this blog, so I  thought I would show the successful process of designing and making the beads.

coloured ribbons and felts for fabric bead-making

Patricia always brings in lots of lovely fabrics and unusual materials, as well as her own jewellry, as inspiration.  She uses a simple device for designing and making a whole set of co-ordinating coloured beads  for a single necklace: –  picture postcards.

picture postcard for colour co-ordination

Students get to choose from whole range of different postcards, from impressionist paintings to modern textiles, anything where colour is paramount and abstract images are better than figurative, but you could make your own inspirational cards…..

materials chosen to tone with the piece of decorated paper that inspired the necklace

There are 2 types of bead made in the workshop, one involves rolling pipe cleaners with fabric and threads and then stitching through the roll to hold everything into position, the second type is rolled felt that can be needle felted and wrapped and secured with coloured threads.

a whole range of different materials for bead making on skewers.

These 2 simple systems used to make the beads means that choosing colours and experimenting with textures is a an exciting and immediate process.

rolling fleece and ribbons round a pipe cleaner start off the bead.

To ensure colour co-ordination several rolls of pipe cleaners can be made together before rolling onto a wooden skewer to form separate beads.

several wrapped pipe-cleaners ready to be wound round skewers to form beads

Making the beads is really easy – peasy and  playing with the different scraps of threads ribbons and tiny glass beads is a real textile maker’s pleasure,

several stages of making pipe cleaner beads.

Working to the postcard colours ensures a good range of co-ordinating beads, below are samples of both the wrapped felt ( white long bead)  and pipe-cleaners( 2 blue knobbly beads.)

a successful co-ordinated colour scheme in the making

The long felt beads can be made in very subtle shades when they are needle felted first with scraps of fleece.

softly coloured needle - felted rolled beads toning with water coloured card

At the end of the day’s session everyone displayed their beads with the inspirational card,the class discussed the next steps – making more at home, then stringing them together.

end of day discussion

Patricia showed the group a simple stringing system using a pretty toning ribbon.

toning ribbon for the string

I was so impressed by the results of the colours achieved by working with the postcards that I have made a small selection of the finished beads and their cards. They almost formed a rainbow – soft blues and turquoise…

greens, yellows and orange…

to fiery reds and blacks…

rich rosy pinks and purples…

lively browns and neutrals….

Stitching Corsets Galore

Florrie finishes first.

The Corset Making courses at Heart Space Studios are very popular and always fascinating to watch.  They take 2 days of solid making, from marking up the 3 layers of fabrics

copying the patterns onto the chosen fabrics

then cutting out the 10 pattern  pieces that go into a traditional boned corset,

pattern pieces for the top layer spread out ready to stitch together

plus the linings and the interlinings which all have to be prepared before hand,  so that means 30 pieces of pattern to be cut and sewn together…

sorting out the pattern pieces into the right order

Holly gets to grips with the machining

It takes some sorting out before embarking on the mammoth task of sewing the whole lot together; we do say that the makers need to be used to using a sewing machine to participate in the course and that by the end of it they will be able to stitch straight lines perfectly and be ready to tackle any other garment making with confidence.Practice after all makes perfect.

Once the basic shape has been stitched together, in order to get a first fitting everyone has to get the fastening organised and they start with precise marking of calculated measurements/

marking up the eyelet postition

at this stage it starts to look more like engineering than dress making – and in a way I suppose that is what a corset is… a rigid structure for enforcing or reinforcing – the body into another shape.

working with a bradawl to puncture the layers of fabric

then the detailed application of the eyelets begins.. after the bradawl  – the hole punch and eyelet thingimyjig is applied

suddenly by lacing the eyelets with ribbons, we can get the garment on the body to see how it looks…but first the tight lacing….

possibly my favourite picture on the whole of my blog, this is an under-bust corset, perfect for wearing over outer garments for those burlesque episodes in a modern girl's life.

and this is all before they have to sew in the actual stays, or stiff rods that will take over rigid shaping of the body

Lisa sorting out the rigid stays that will be encased into the corset.

Lisa Keating, the Heart Space tutor,  looks so mischievous on these pictures; but this is where all her promises are delivered. This fitting is on the second day of the course and everyone is just about stitched out, but she knows that she can get them all enthused again with this first fitting.

I can’t resist showing these pictures of women being laced into their corsets for the first time. This is the fantasy moment blended with the total satisfaction of making something difficult to achieve but beautiful and completely transformative in every sense of the word.

this is the eventual use of a beautiful silk fabric bought on holiday

moments of self -help and introspection – did I make the right measurements?

how can anyone be so small?

as opposed to moments of true grit.

this picture says it all - magnificent!

But eventually after several more hours of work and another tight lacing try -on, the effort is all worth while

a finished laced gold and black corset, all ready to go to the ball.


Heart Space Knit and Stitch Club

Debbie Bird’s embroidered landscape

The new Heart Space Knit & Stitch Club had its second meeting with a “Show and Tell” session, meaning everyone was asked to bring a piece work, preferably textile, either something or their own making, or something inspirational, held memories that they could talk about.

Debbie Bird, who is one of the our regular tutors ( and has agreed to be a leader for some of the club’s stitching sessions) showed 2 completely different textiles. One was a richly embroidered, patch-worked landscape that she had made at a weekend workshop run by Ineke Berleyn the colours sang out and Debbie told us that she was thought it very inspirational as she had lots more ideas to develop from this workshop. The other piece she had brought could not have been more different…

Debbie Bird’s patchwork quilt – the Hungry Caterpillar

It is a patchwork quilt made for a child, out of scraps she had left over from patchwork commission; she just pieced it together from what she could find quickly and because she enjoyed making the first quilt so much. What I liked about her ‘show and tell’ was that she showed 2 sides of her work,  she brought them to explain that if you love textiles you tend to love all manner of different textiles, so the club should be varied in its approaches to what we have to make together.

Clare Griffel’s knitted scarf with rolling edge

Clare Griffel who is also a leader for the club, showed some very simple knitting, a long scarf knitted lengthways to look like a woven fabric, and talked about the problems of casting off. The method she had used  for this was too rounded and caused the scarf to roll, this started her on a quest for different methods to achieve flat edges – something she will be able to help others with on the knitting nights.


Knitted silk necklace

But she also brought a purposely rolled piece of silk knitting that makes an unusual necklace (we sell these in our shop Space) and everyone including the stitchers wanted learn how to make this. And she showed a book that had inspired her and recommended to us all, an knitters almanac by Elizabeth Zimmermann, I will get more details about this at the next knitting session of the club.

Not everyone brought along things they had made, Clare showed us 2 lovely rolls of cotton she had bought from my favourite Bristol craft shop, Creativity,  she intended to make summer bunting with it and we all agreed we would have been tempted by them as well, they were so beautifully but simply presented.

Sophie showed some images she had learned to print onto fabric at a recent series of Teresa Searle’s evening class at Heart Space, she intends to embroider into them.

Sophie’s choice – sorry – couldn’t resist it.

After the ‘show and tell session, both Clare and Sophie went into the large studio and started making…with plenty of pink fizzy fuelled advice from the rest of us. Yes I know that we shouldn’t have a drink on the work table but it was a pre – Christmas get together.

Debbie gives bunting advice to Clare

Meanwhile we had other wonderful things to look at, Jan Connett, a stitch club leader showed embroidered shoes she had bought in rural South West China….

embroidered Chinese slippers, the insoles have flowered fabric to tread on.

we were all intrigued by these and spent a long time inspecting the needlework, including pattern darning, couching, chain stitched fillings with heavily quilted soles, everything hand stitched and then sequined!

detailed view of the brilliant embroidery

Then another embroidery made at a workshop, Carol brought in a proper old-fashioned needle-case, made at a Kelly Aldridge class.

proper hand embroidered needle-case by Carol Clarke

I am very intrigued in who goes to classes and who doesn’t – I don’t, it has never occurred to me go to another embroiderer’s class (except when I check into Heart Space classes) I just go to books or museums to study other embroideries for information; maybe I am too insular in my outlook. I have however gone to many other types of workshop in pursuit of my own development, jewellry, metalwork, enamelling, photography, all things I can’t imagine how to do at home alone.

But a real advocate of workshops, particularly ours, is Libby, she couldn’t make our first workshop so sent her sister instead, and then using the diagrams and notes that I had provided for the mirrored hearts, brought in her versions and also some sock pigs….she was laughing, rather sheepishly, as she was pulling these out of her bag  – it must have been my face – what on earth was she going to show us – here was I thinking how wonderfully eclectic everything has been and now – Sock Pigs?

Libby Butler’s sock pigs

Well what a surprise, they were adorable, and what is more very exquisitely made. Libby is a really good needle woman, she had re-made the pinned and beaded heart some months ago so I know how much care she takes, but these funny little pigs were her version of some she had been taught to do elsewhere –  I especially liked the tails….

backsides of Libby’s pigs

and what did I show?  Well they are things already contained in the blog the mended white Edwardian blouse from my very first post and the Bleeding Flowering Heart. which is in the Heart pages. I am so looking forward to the stitch club developing, we seem low on knitters and this is reflected in the post. But next time I will redress this and concentrate on the knitting members. We plan to meet every week on a Thursday night  so there should be plenty to report on judging by the variety shown by members at these start-up sessions.

Drawing Embroidery

This little heart has been made for a project for the new Heart Space Stitch Club. I designed several small felt hearts that could be made in an evening and taken home. I offered everyone a choice of colours between bright pinks and rich reds with sequins and beads and silver thread embroidery, it is Christmas after all.

One of the makers was amused at the frivolity of her choice of materials, excusing herself by saying it was a only a gift for a child. But then I explained that she had made a perfect symbol for protecting a child, the heart is now a universal symbol for love and the mirror would divert the ‘evil eye’; traditionally shisha mirrored embroideries were used to decorate children’s garments

So imagine my feeling when looking carefully at the images I had taken throughout the evening I saw the maker’s eye gazing out of her tiny stitched mirror.

This struck me as the perfect way to introduce the collection of embroidered garments I had organised for the Drawing Club the following weekend.

The fabrics I had chosen for the drawing class were an wonderful array of embroidery in wools and cottons and silk and silver, mirrors, buttons, shells and coins on dyed and printed grounds, all made by hand and traditionally worn for festive occassions by people of the desert communities in Pakistan and Rajahsthan and Gugarat in India. I had also brought in some books that deal with the symbolism for these fabrics, amongst them one of my favourite resource books, Amulets by Sheila Payne.

But where to start with such a myriad of pattern, texture and colour, I said to try to be faithful to the colour and the students soon set to work colouring and cutting to form backgrounds for the detailed drawings.

These are all worn and faded fabrics, so some of the first studies were surprisingly subtle, chalks applied to darker grounds give a broken faded effect. For the first exercise I asked the class to describe the embroidery in as much detail as they could, just to get them focused. This is after all, primarily, an observational drawing class.

Describing the details made lively descriptive drawings and collages. I liked the inventiveness when students started to make 3D collages for describing tufts and fringes.

However not all the colours were difficult to attain, several people had brought in their own materials and some of the hand-made papers were really good colour matches. As one member of the group had requested a workshop featuring collage I had provided lots of coloured tissue papers with paints and inks in silver, plus silver- well silver coloured, metal leaf.

Then the drawings, themselves  started to become collages, so they were being made in a similar way to the fabrics – by being separate pieces stitched together and then embroidered.

I had asked the class consider how to recreate the effects of the light bouncing from the mirrors, several different techniques were tested, silver inks, paints, foils and fibre tipped pens, that all gave different results.

the application of silver foil was particularly successful at rendering the reflecting light.

There were several fabrics that were not mirrored, but with strong embroidery patterns that were developed into bold drawings.

and also some very large but subtle collages captured the beauty of worn fabrics

Eventually new and fresher studies started to emerge, the students were starting to express more than the look but also the spirit of the materials.

 But at the end of the afternoon, we looked at all the studies alongside the actual fabrics and were amazed at the way that they belnded together, it was difficult to tell which were fabrics and which papers, not the intention of the exercise but interesting, considering the free way in which the drawings had been assembled.

Commemorative Crazy Cushions Completed

2 Commemorative Crazy cushions

The most hits my blog has ever received in its entire life span of 18 months, was shortly after the Commemorative Crazy post, and many people contacted me saying how much they liked the content and story. So I was delighted when Jane called in to Heart Space Studios to show me the finished cushions that she had made in time for Christmas for her 2 children.

cushions showing tartan fabric backing

They were so beautifully made, using fabrics from her late husband’s sports jackets and ties, and Jane had been able to use the small piece of  tartan fabric, that was her husband’s clan tartan as the backings to the cushions. (did I say that I have a tartan as well – the Hay tartan – all brilliant  red and greens overlaid with a very noisy white check –  nowhere near as tasteful as this one)

close up of the lively wool plain and tied herringbone stitches

She had embroidered “DAD” on one, at her daughter’s request, it is in whipped running stitch, very subtle and almost merges with the tweed background.

whip stitched commemoration

And amongst some other memorabilia, Jane found her husband’s  ‘pips’, these are badges usually in the shape of  a star or a crown and worn by army officers on the epaulettes of their uniforms.  These particular ‘pips’ are actually stitched onto fabric in  gilded thread so two of them they were put to good use at the seam joins of the crazy stitches. Usually a star is stitched  at such points by the embroiderers of the  traditional crazy patchworks.

gilded ‘pip’ used as a foil for the collision of several rows of embroidery

Jane has enough fabric to make another cushion for herself and even some smaller gifts for other members of the family…. and then she may decide to design and make the large throw from the remaining tweeds. I will keep a record of this progress.