detail of lamp-worked glass beads based on fossilised dung – Ilsa Fatt
The intricate hand made beads shown in the detail above are based on Coprolite – icthyosaur dung, or more simply – fossilised poo...Ilas Fatt has developed these beads as part of a collaboration with Lyme Regis Museum where artists have been asked to work from specimens from the museum’s collection to be shown in an exhibition in 2013 – so a sneak preview at Heart Space Studios
Ilsa brings in her exhibits to the empty exhibition wall at Heart Space Studios
We have concentrated on bead work to advertise the next Master Class given by Ilsa – she describes it as being in ‘Freeform Sculptural Peyote Stitch’ I describe it as an absolutely amazing jewellry – making opportunity where using a variety of bead-work techniques a densely embellished bracelet will be formed – with integral fastening – my favourite aspect of Ilsa’s jewellry – she really has designed elegant and workable fastenings for her bead – work – for this alone, it would be worth taking the class.
A table full of gold and black beaded exhibits
Putting together this beading exhibition was fascinating, seeing how different designers had managed to make such contrasting pieces by using simple beadwork techniques. Ilsa Fatt uses Peyote stitch and Janis Taberner and Kristina Ferron use square stitch. When all the pieces different pieces were assembled they looked wonderful just draped and jumbled together over the tables – I was in favour or showing them draped on the wall, but when we saw the hangers for the Janis’ scarves we realised that formality would reign… but how to place all the disparate work together for a successful exhibition?
Blue and turquoise colour story
Sophie, Heart Space’s administrator and general genie, thought we should colour co-ordinate them – well I wasn’t going to deny that so we grouped everything together in ‘colour stories’. This made life much simpler and meant that at least the different types of work would hang together well
gold and bright colour story
First we placed everything on the floor in the colour groups.
the black and gold group on the floor
the long scarves made perfect borders for the boxes of necklaces. The rich colours of each designer’s work really enhanced each other.
hand made Lamp-worked glass beaded necklace based on Coprolite – Ilsa Fattblack squared scarf – Janis Tabernerblack and grey squared scarf – Janis Taberbnerdetail of Carnival necklace – Ilsa Fatt
Ilsa is offering students her own lamp- worked beads as part of her Master Class ensuring everyone makes a unique piece of work.
blue group with deco necklace by Janis Taberner and ethnic inspired pieces by Kristina Ferron
The Blue grouping was easy-peasy – we used small stands and simple boxes to show the work, the brilliant blues and turquoises of Kristina’s ethnic necklaces, Kristina explained that she really likes “Big Jewellry” – a woman after my own heart.
blue square stitch scarf – Janis Tabernerstrings of beads necklace – Kristina Ferron
The next group along the wall is in brilliant colours with gold; 2 scarves and a necklace that is based on the tumbling blocks patchwork design – Janis’ background in embroidery shows in her wide range of textile inspiration for these works.
Brilliant gold group – Janis Tabernerdetail of the tumbling blocks designdetail of edging on patchwork design
and the last group is a series of different items in gold and autumnal colours made by all three makers, including another collar this time in what appears to me to be a hounds-tooth check pattern.
autumn gold group by all three makers.
plus a beautiful frilled pendant by Janis where she has also braided the cord and tassell using a Japanese technique.
frilled pendant – Janis Tebernerbeaded bag – Kristina Ferron
and also this sumptuous and subtle necklace by Ilsa.
autumn colours and gold beaded necklace – Ilsa Fatt
Free form Peyote stitch beaded bracelet incorporating hand made beads – Ilsa Fatt
Heart Space Studios has gone totally beaded – an exhibition was preceded by introductory beading classes is being followed by a beading Master Class, held by Ilsa Fatt, where students will make a magnificent glass beaded bracelet incorporating Ilsa’a hand made beads.
The beading classes have been run by popular demand from Heart Space followers, because so many people wanted the opportunity to attempt this project but felt they needed a short introduction to basic beading.
pots of multi-coloured glass beads ready for stringing
Ilsa showed everyone how to make a small square using peyote stitch, a simple and stable backing
assembling the beaded square using Peyote stitch
to enable you to start decorating it to your heart’s content
starting the decorations
Ilsa then demonstrated 3 separate beaded drop formations and the students could experiment with many types of different shapes and sizes of beads.
starting to develop the pendants
The finished pieces can be made into brooches or pendants
So far so good, now the students can feel more confident about joining a master class as they will come prepared with the basics stitch with which to develop their own ideas from their personal practice by using beads – and they will really appreciate the accompanying exhibition at Heart Space Studios which is displayed on my next post….
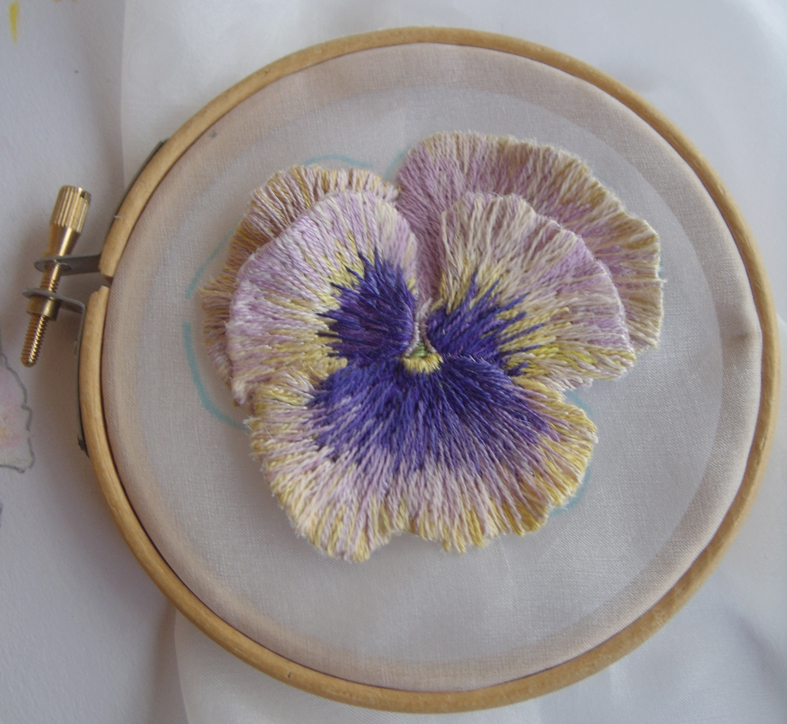
Stitching 3 dimensional flowers is a strange mix of observational drawing, refined stitching and alchemy; the transition of the flat stitched petals freed from their background and applied to form a flower is slightly surreal. I developed this particular skill while making the Flora Embroideries, using the pansy to metamorphose into different forms to develop faces.
winter flowering pansies
I had been asked by a regular Heart Space Studio student and volunteer, Libby Butler, to teach her to stitch a 3 dimensional pansy – her favourite flower, and knowing that she was a skilled embroiderer I agreed. What I did not know was if she could draw the flowers from life; this is the first essential stage as learning to select the colours and study the growth lines of the petals is most important to develop natural petal patterns – and looking really carefully to draw each petal really concentrates the mind for the stitching that follows.
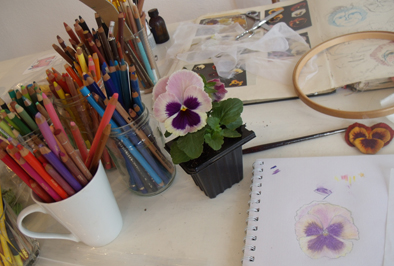
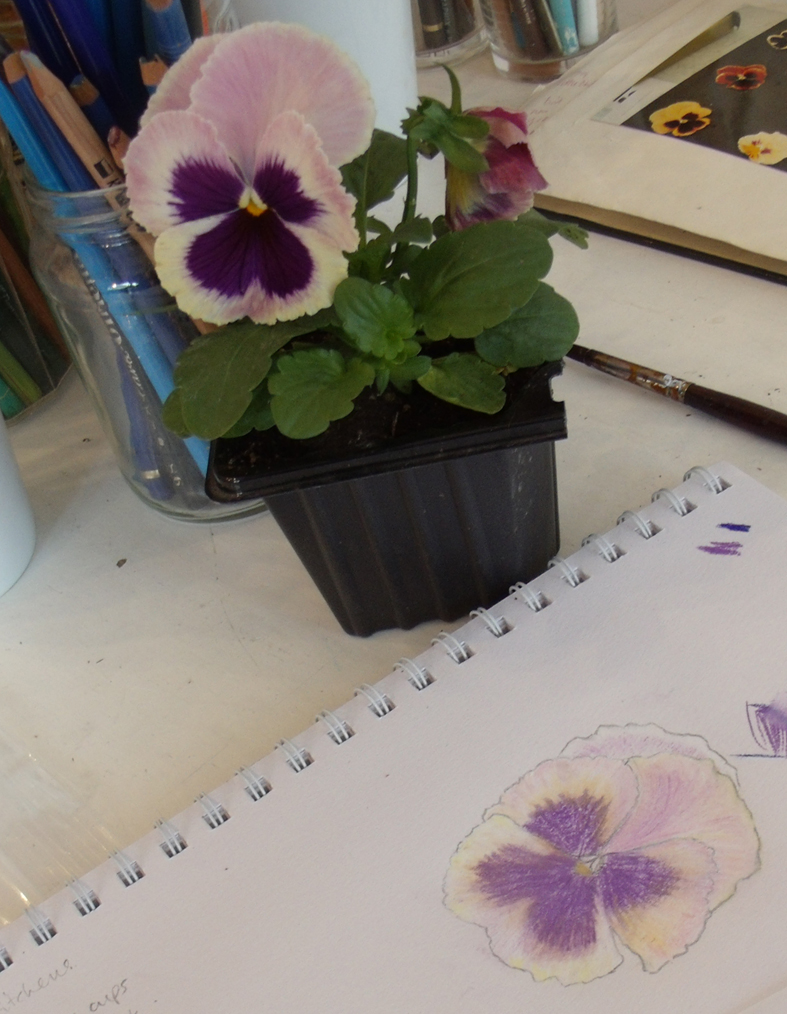
selected pansy and the drawing equipment
Libby looked a little nervous when I handed her the jars of crayons after selecting her pansy – however after a nervous start she achieved a simple working drawing from which we could establish petal shapes and colourings, now to move to the fabrics….
simple drawing of the Pansy face
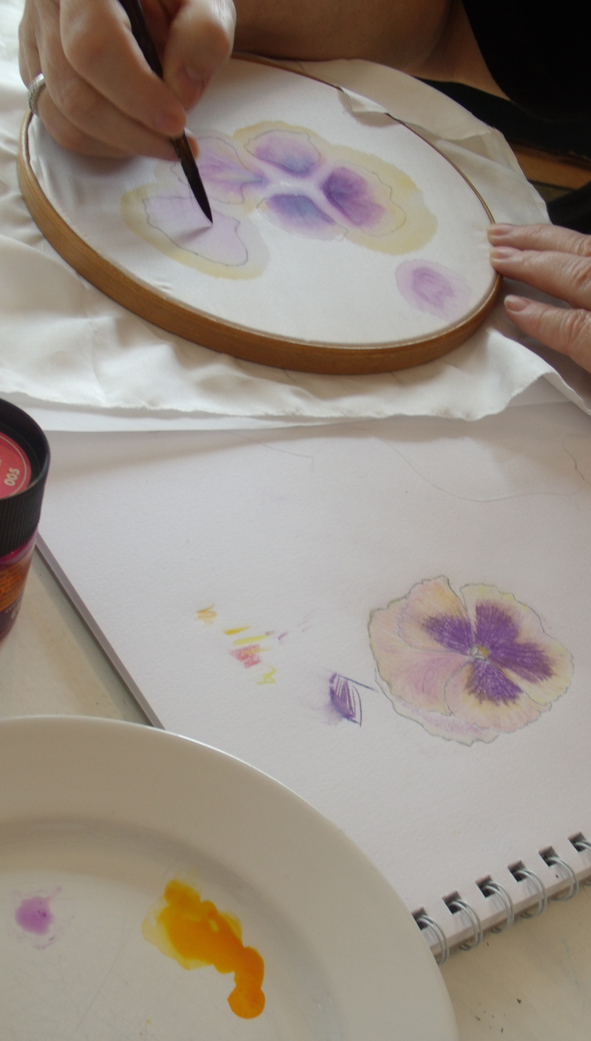
Now to the fabrics – first a thin silk fabric was selected and the individual petals from the drawing were traced onto it in pencil, a light dye was then applied with a paintbrush to give a background colour.
dyeing the background fabric for the petals
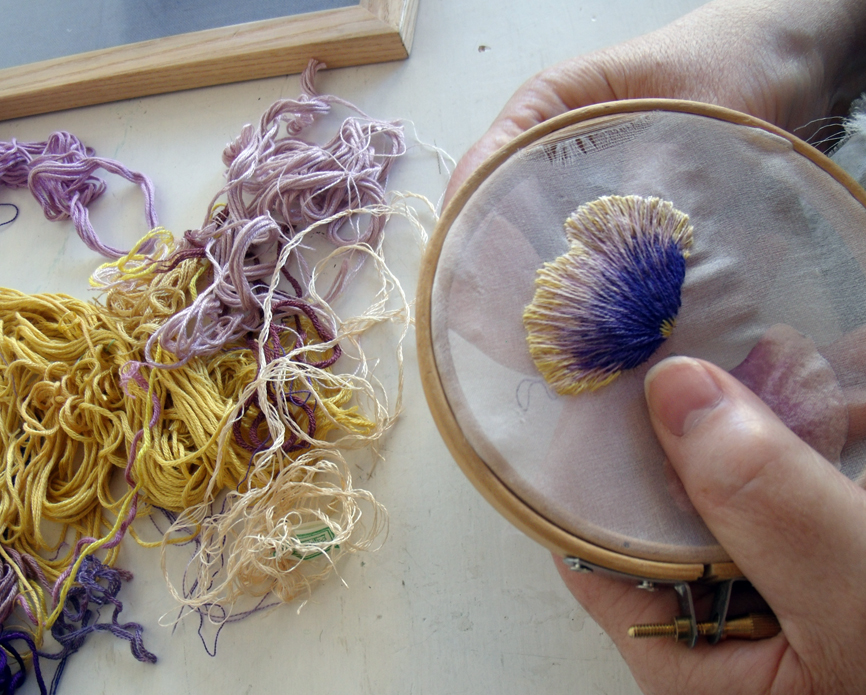
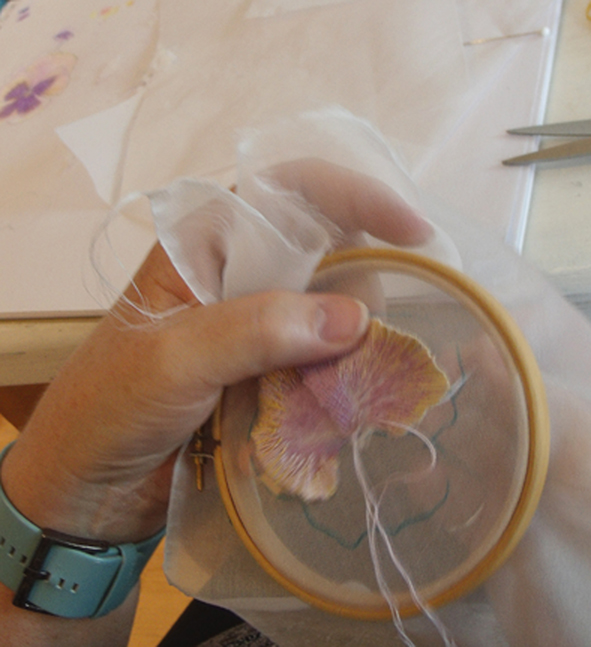
When the dye was dry, a heat transfer fabric adhesive was ironed onto the back of the fabric and each petal was cut out and ironed onto a very fine silk gauze and placed in a small embroidery hoops ready for embroidery – the edge of the silk petal means that the stitches have very strong definition which will be needed later for cuttung out. The silks were matched to the drawing colours and using one strand only, the embroidery was started…
embroidering the individual painted silk petals
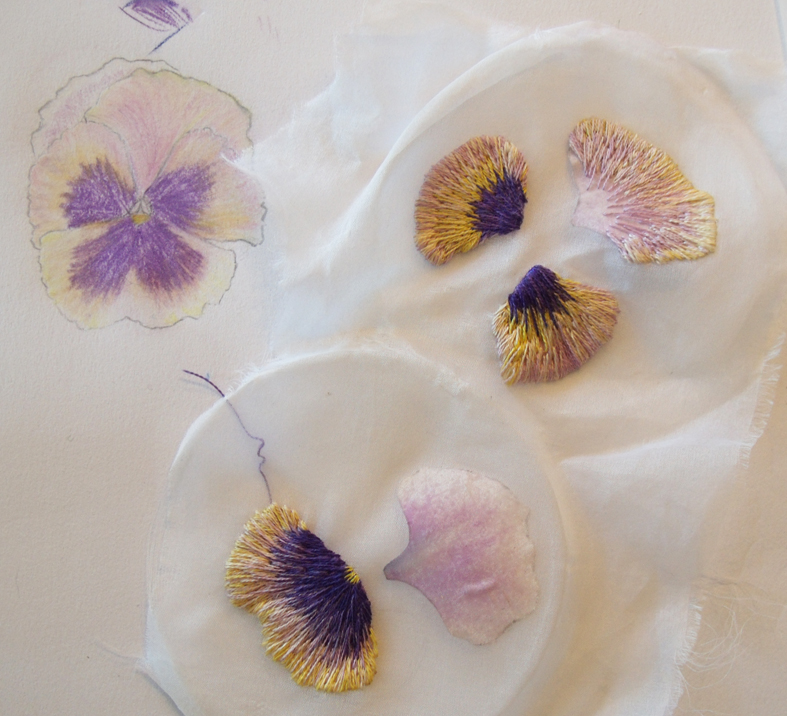
Libby worked one whole petal (see above) by the end of the first day of the 2 day workshop, she then had 1 week to complete the rest of the petals…..she took the drawing home to work from – the drawing is what she is following not the real flower – this is why the drawing needs to be really carefully observed
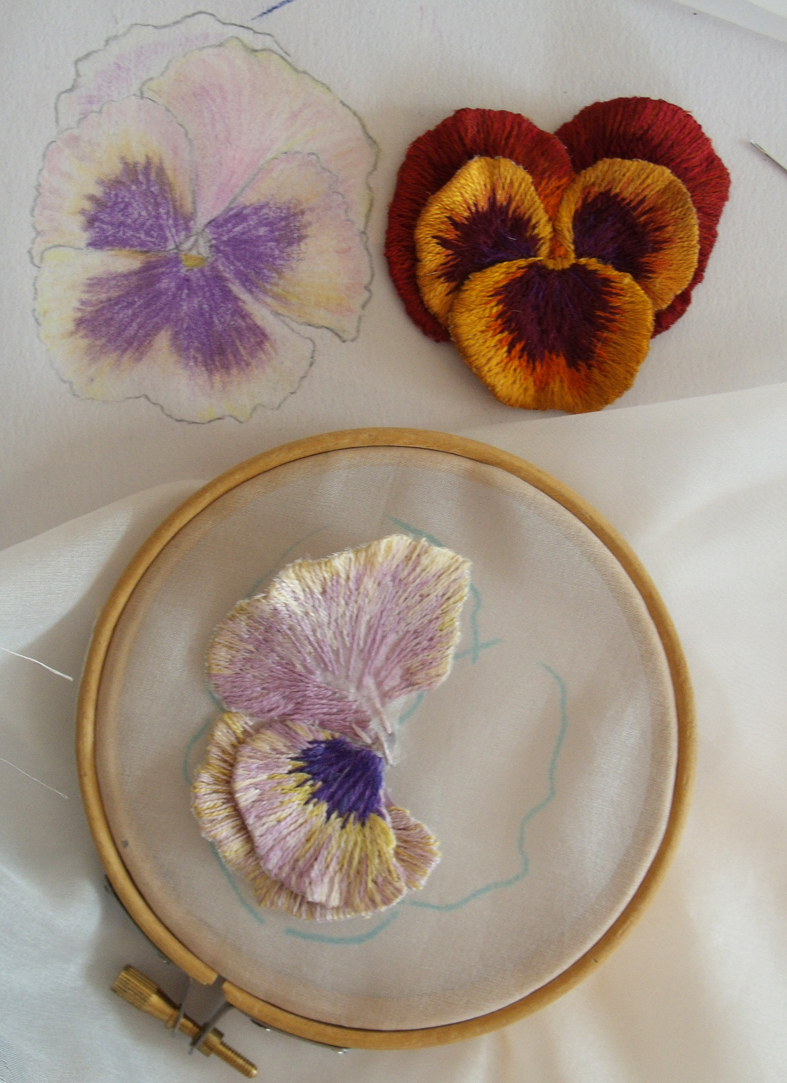
stitched work brought in to the second session
On her return I found that she needed to work a fine blending thread over the transition between the dark purple and light yellow of the pansy to make it look natural but this was quickly achieved – attention needs to be given for the direction of all the stitches so that they follow the lines of growth of the petal – but it is easy to see in bi-coloured pansies.
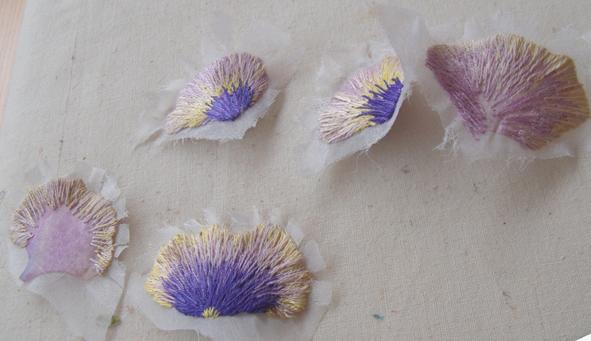
the embroidered petals are cut out
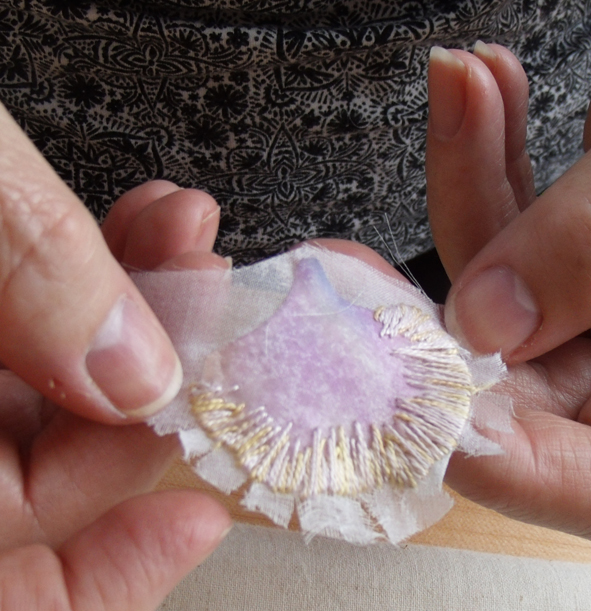
Once the embroidery was complete, the back of the fabrics was once again bonded with heat transfer adhesive and each petal cut out leaving a small area of surrounding silk. Each petal was then pressed from the back while being stretched around the its edge, this sets the stitches and gives a very life – like undulation to the petal edge – but the stitching needs to be very dense to allow this to happen…..then taking courage in both hands the extra fabric is VERY carefully cut away – the bonding keeps the threads in place.
holding the back petal snipped and waiting to be pressed.
Now the flower formation can begin. On a fresh and final background fabric the original drawing was traced using a water-soluble pen, then each petal is embroidered into position starting from the back, only the middle area needs to be attached – the petals must be left free from the ground
attaching the petals to form the flower
The actual assembly does not take very long but it must be carefully structured so that each petal overlaps the one below it, the original drawing is again of vital importance to this process.
work in progress with an old embroidered sample we used as a stitching guide
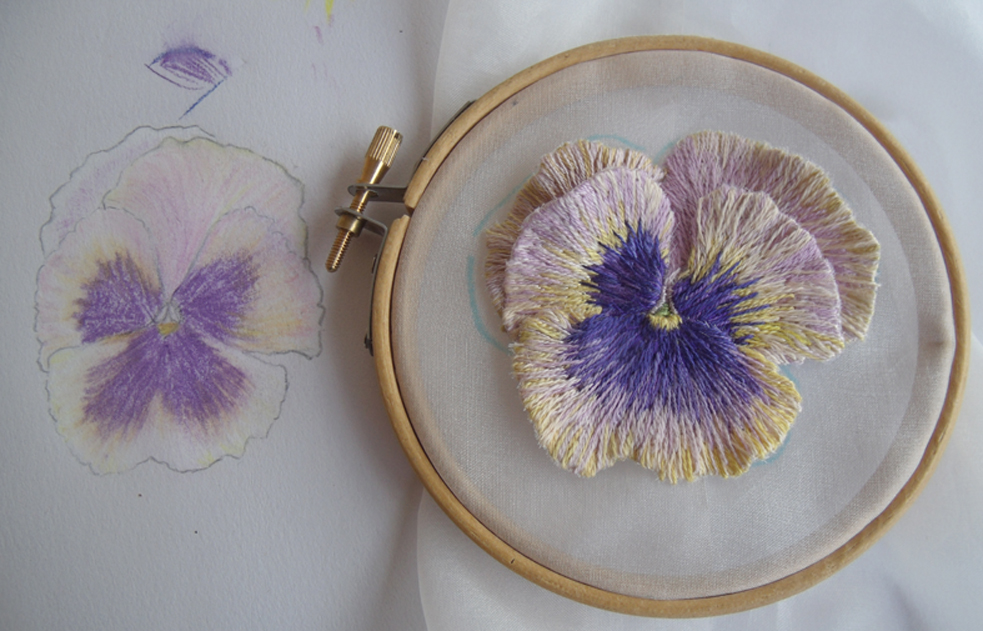
Eventually each petal is placed and the inside edges of the of the petals are is built up and over-sewn and a single central stitch finishes it – Da Da!
the final flower seen against the original drawing
Heart Space Studios attracts all sorts of different people, but sometimes we have to invite them in because one of us has spotted work that they feel is really exceptional and that we should try to exhibit or, even better, get the maker work to with us. Sophie, Heart Space’s administrator, has been raving about Jennie Barnett’s needle felted figures for months since she saw them at a Vintage Fabric fair, and finally we managed to lure her over last week and this is what we saw…..
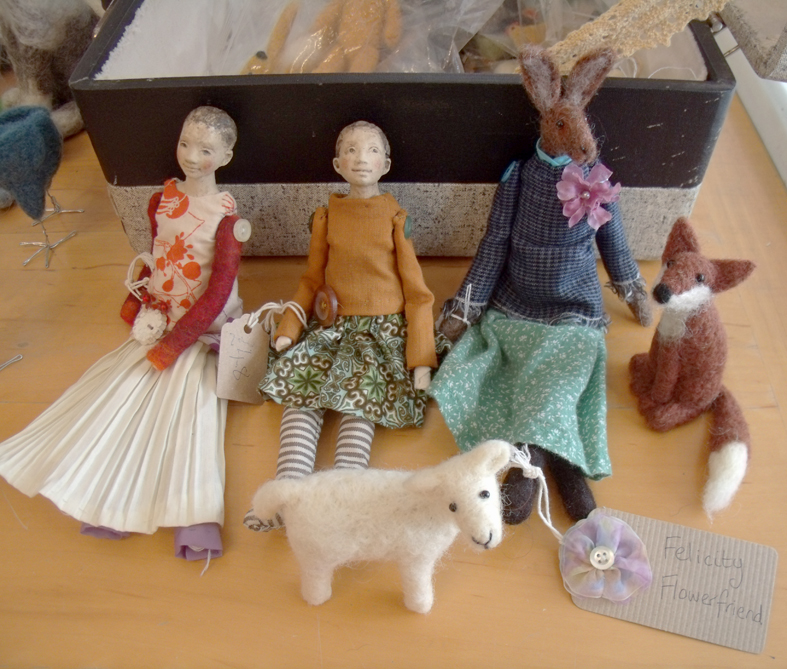
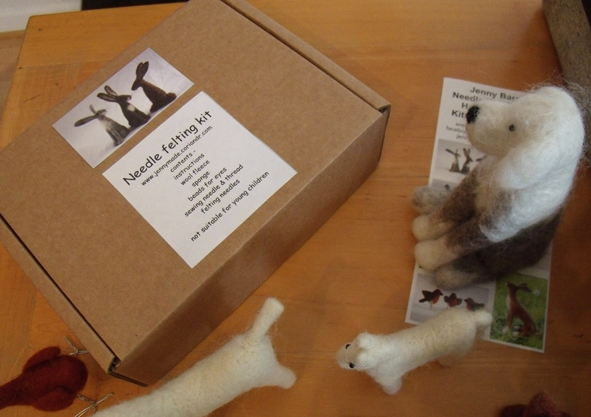
ceramic and cloth dolls with some odd felted animals
First out of a very battered, old-fashioned and customised suitcase came 2 dolls, well miniature figures would be a better description, they had ceramic heads that were beautifully modelled with cloth bodies and dressed in some lovely old printed cotton clothes. Jenny was a model maker in the ceramics industry before she took up a life living on a canal barge and working in needle felting.
detail of the modelled heads of the 2 small figures
Now I have to admit that needle felting seems like purgatory to me, poking a ball of woollen fleece with barbed sticks until it surrenders itself into a fluffy something or other is not my idea of a good time …but when Jenny started to unpack her felted animals and other creatures, I could suddenly see why she had chosen this discipline, apart from the obvious constraints of firing up kilns on boats.
2 needle felted and frocked animals.
It was obvious that her sculpting sensibilities were fully expressed in this simple medium – and she could have some fun while recreating gestures and stances that have surely come from her own acute observation. It is easy to see why she has started to name some of the figures, above Felicity Flowerfield and Bethany Breadbake are delightful little characters.
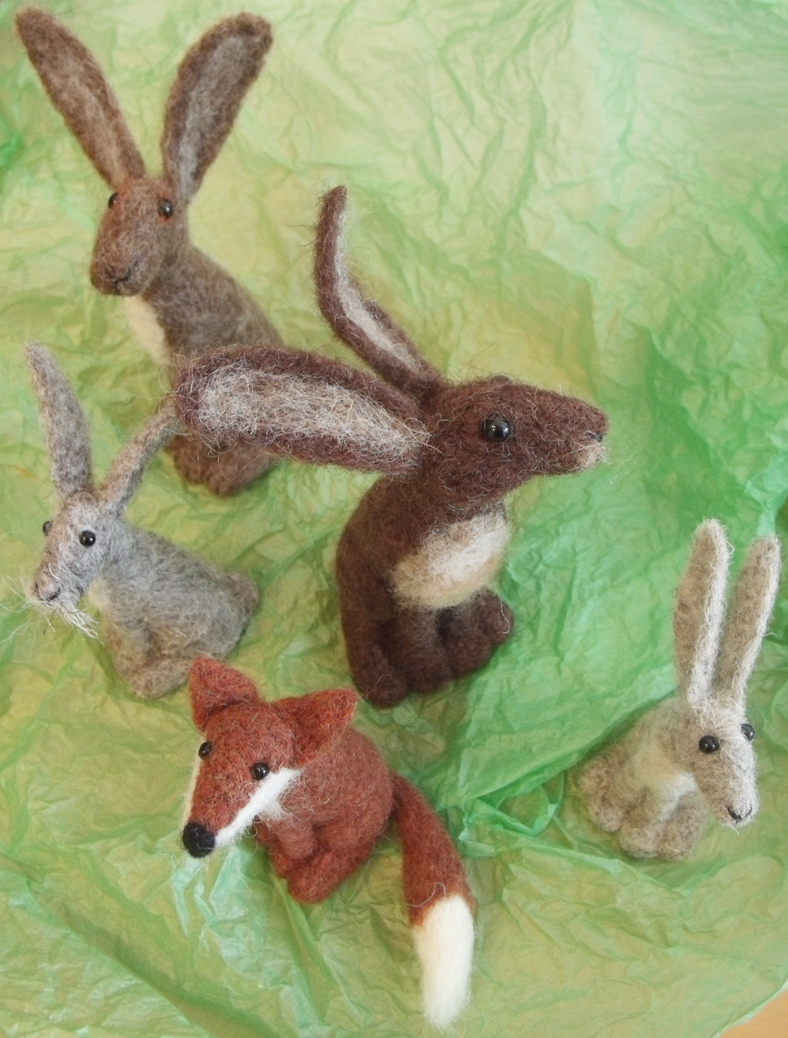
warty watchful wild animals
These animals aren’t just cute though, they possess characters that are recognisable – I have seen these attitudes in my own dogs (fox terriers) particularly the look on the large brown hare in the centre of the image above – that sort of ‘ can I trust you?’ specially when they are unsure of my attitude towards some mischief as yet undiscovered. Jenny has many such creatures and her most popular selling animals,the sheep,the hares and the foxes she now produces as needle felting kits.
Jenny Barnett’s needle felted Hare kit
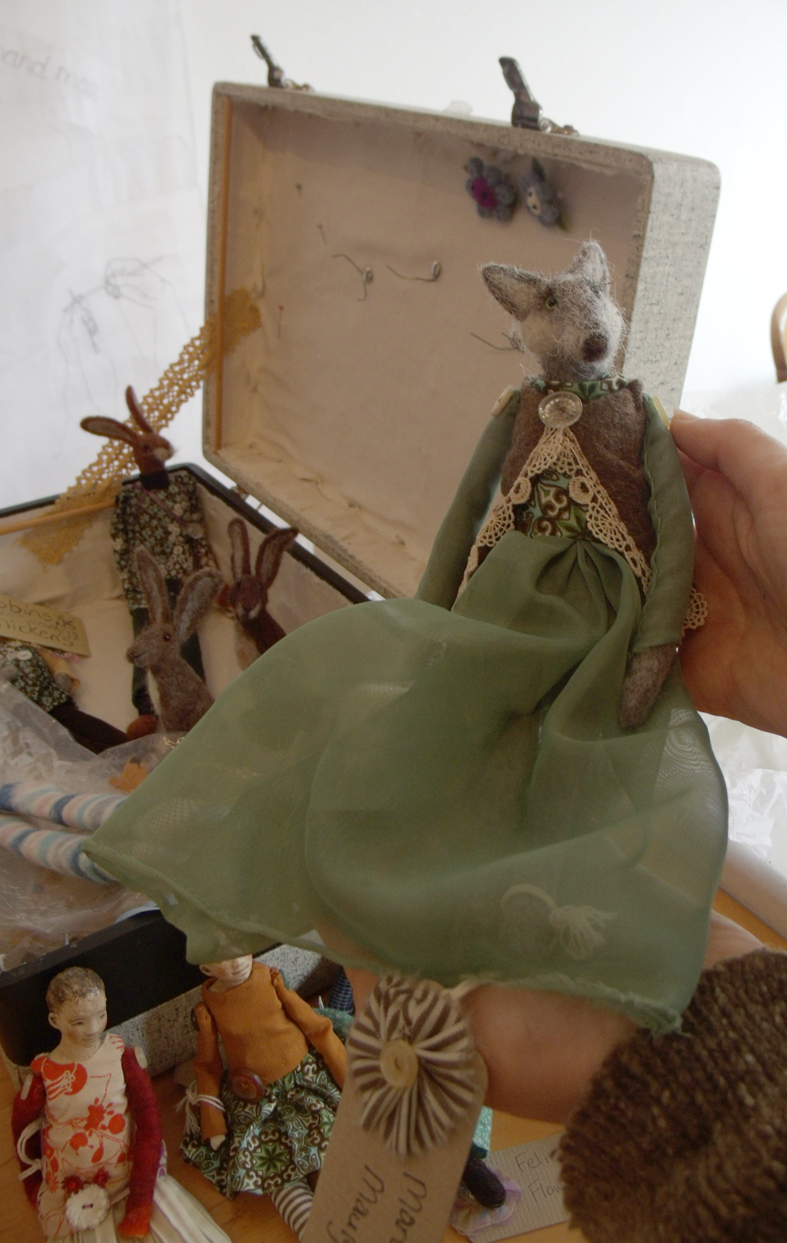
But back to the suitcase, out came another creature, a very foxy looking character, but she was grey and dressed in a sinister green translucent skirt from which her tail stuck out at the back. She was a wolf in Victorian clothing and her name gave the game away, Martha May Maulyou – you wouldn’t turn your back on her…..
Martha May Maulyou makes her appearance
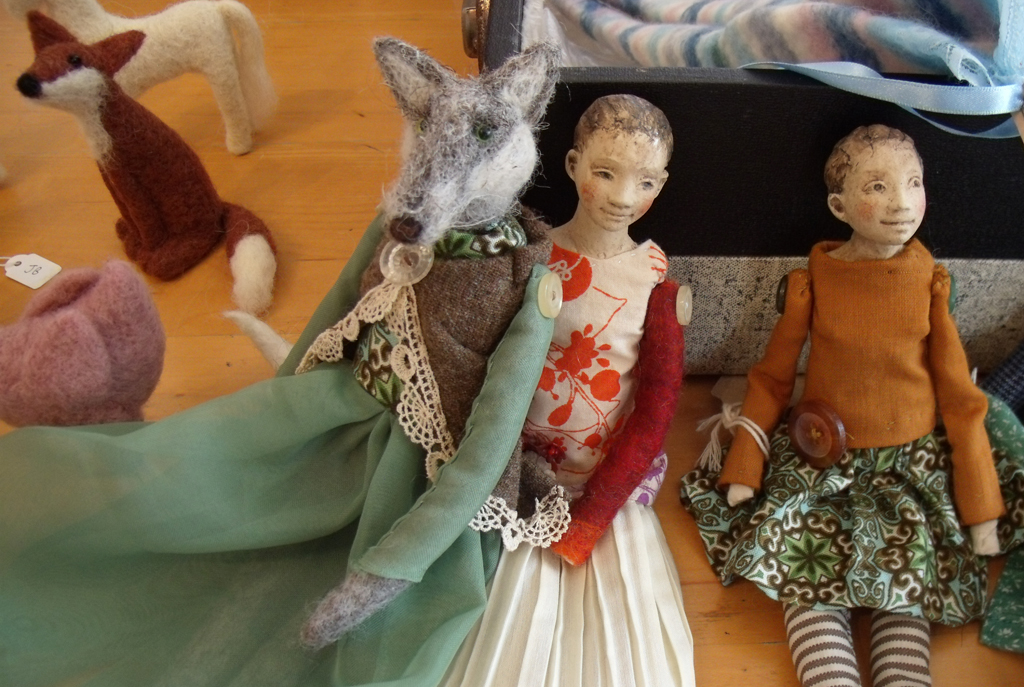
Now I was intrigued and started to play with the animals – so easy to develop a story with them all – watch out girlies…
Martha Maulyou sidles up to the girls…..the fox is minding his own business
However to the rescue hopefully comes Harvey Hipslinger…he looks a proper gent.
Harvey Hipslinger to the rescue?
But should we trust a gent who wears such flamboyant clothes?
I had intended this post to be about Jenny’s small animals (she has agreed to teach some half day workshops to make some of her popular Christmas Robins and Mermaids with us later in the year) but having realised that her creatures are perfect for inspiring stories I am really pleased that we persuaded her to sell some of her character animals in the Heart Space shop.
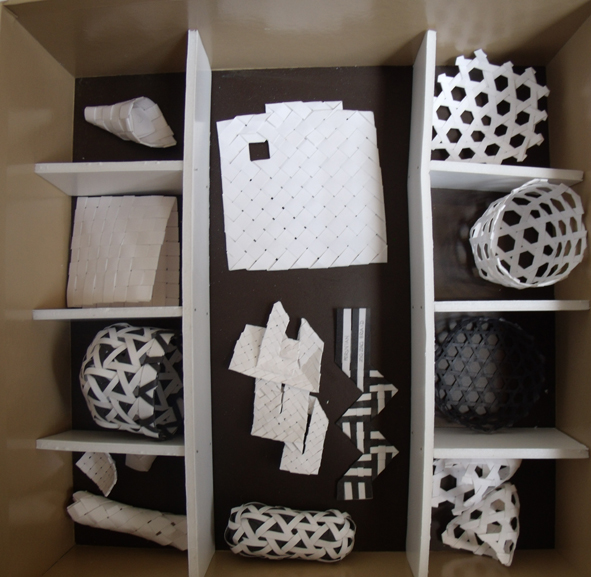
Dail Behennah’s collection of personal and traditional plaited forms.
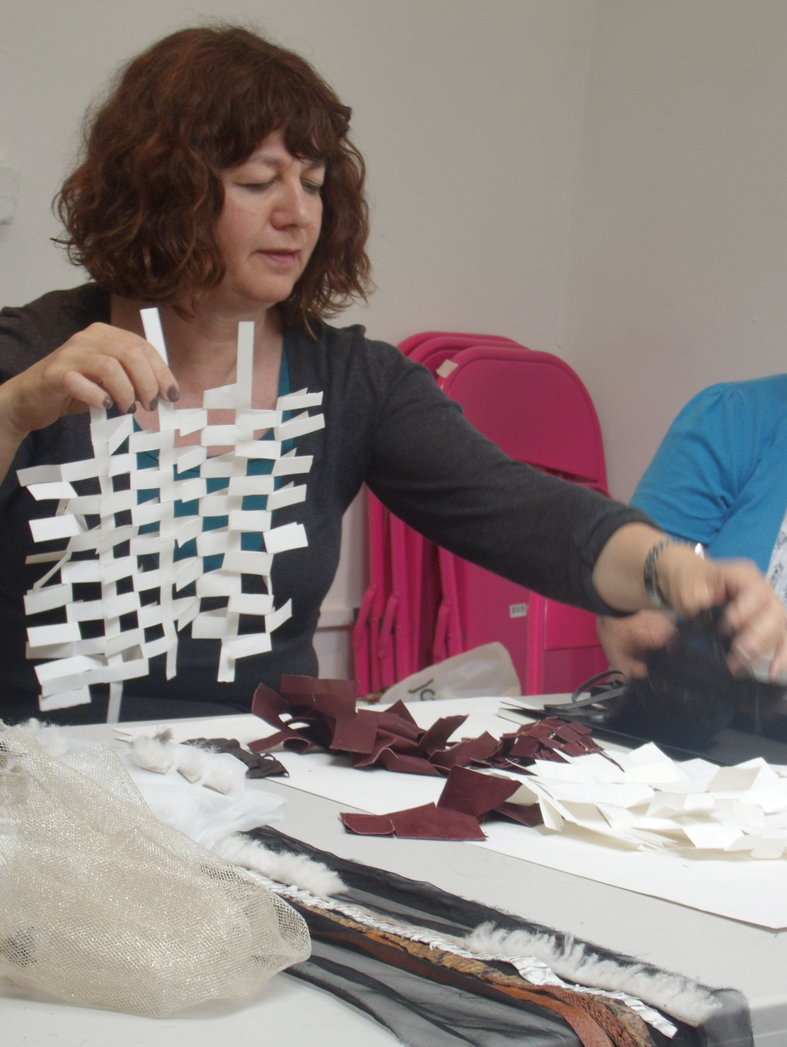
Dail Behennah recently conducted a fascinating 2 day master class developing 3D structures out of paper at Heart Space Studios. She brought with her prepared strips of black and white paper to get everyone started quickly so that they could move swiftly onto the really wonderful papers we had collected for the group to experiment with; however the group had different ideas!
Dail’s collection of small plaited paper samples.
I feel that these exquisite samples swayed most members of the group to stick with the simple black and white theme, but also they each confessed to not wanting to waste any precious time cutting up the experimental papers into strips.
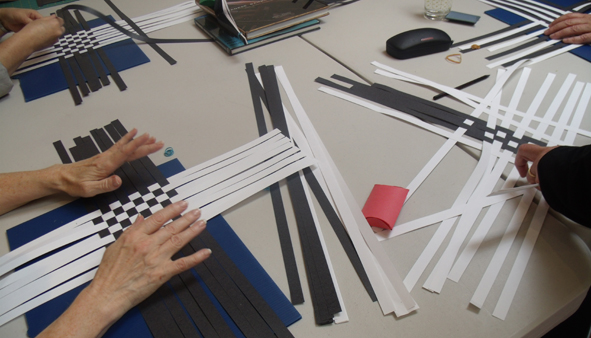
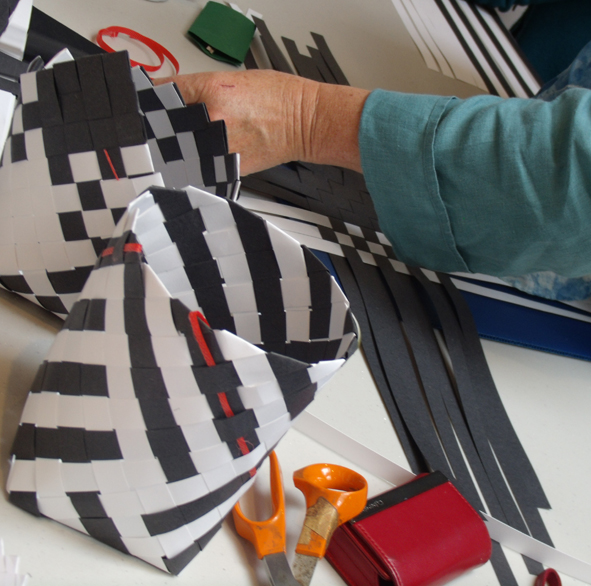
starting to plait the paper strips.
Dail also gave everyone a set of miniature clothes pegs, they were all intrigued..
the miniature clothes peg in action
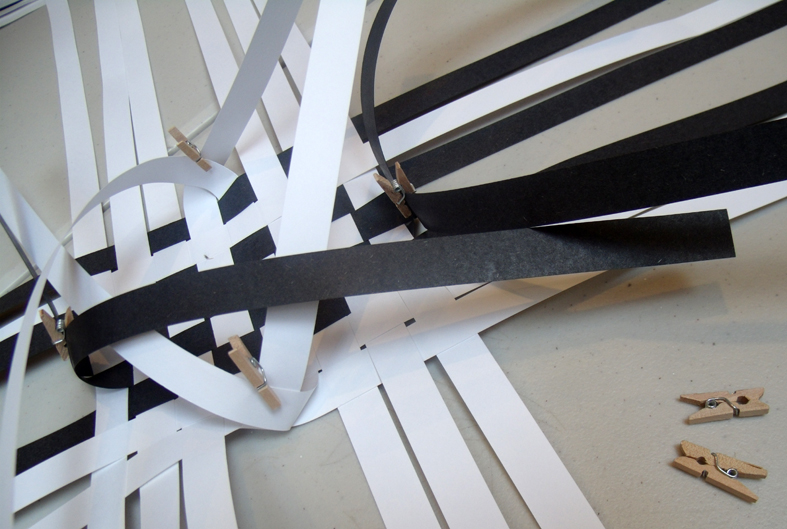
It transpired that these pegs are perfect for holding the paper strips in place once a corner has been turned from the flat woven base, and once a corner has been turned the 3 dimensional shape starts to develop.
4 corners folded and pegged
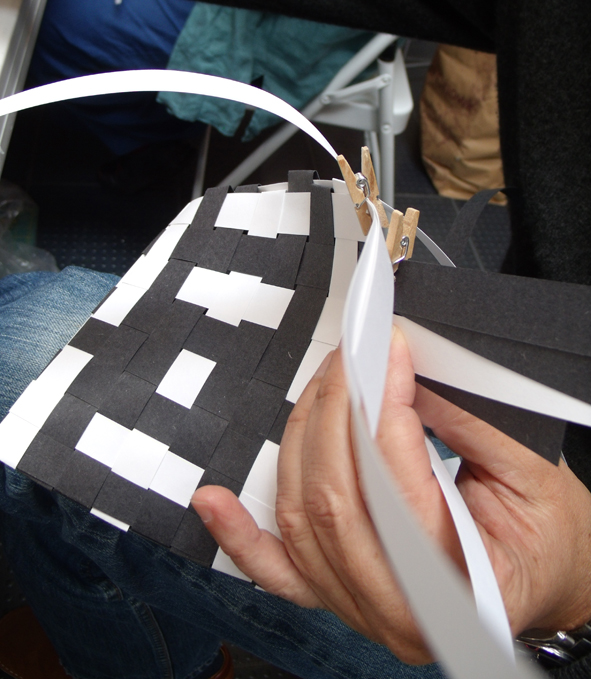
Although Dail had said to everyone to feel free to plait the square base in any order, most people did a simple alternating black and white placement…it now became clear that the initial placement largely controlled the resulting pattern for the structure’s ‘walls’…..
silence reigned as the structures emerged
the patterns of black and white started to be developed on the sides of the 4 cornered shapes…
differently patterned ‘walls’ begin to emerge
another ‘wall’ pattern..
eventually fresh strips were added to interweave with the basic plait structure – red seemed to be the favoured colour.
embellishing the vessels with slim red paper strips
However when these basic structures were viewed they revealed wonderful geometric patterns from this simple 4 cornered structure.
first precise shape – an inside view – from mathematician Heather Lucy
Next the class were given free reign to just start off again, now knowing how to build up from a simple solid foundation and turn a corner – where would they take this new knowledge?
a book like form emerges – Liz Hewitt.
And here we started to see the preferences of the different people in the class; their own practices stared to influence what they made; so Liz Hewitt, who amongst other things is a book binder and textile, plaited a concertina form that was reminiscent of pages of a book opening up…..
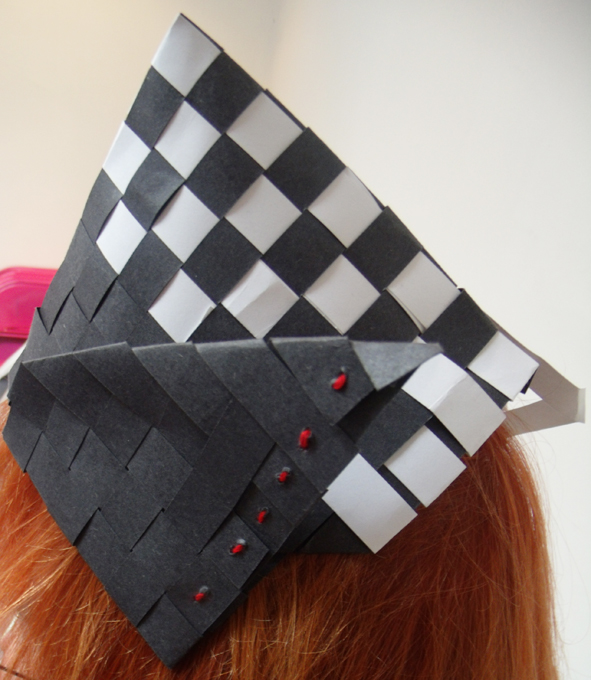
a triangular hat from 4 corners – Shirley Paskes
Shirley Paskes, who is a an enameller and felt maker made a small hat to wear, she also makes felt clothes. The only person to get away from the black and white range was weaver, Deborah Paul, who chose to remake a smaller version of the original shape in a new material – grass green plastic.
green plastic ‘grass’ plaited form – Deborah Paul
On the second day Dail introduced the group to another structure, Hexagonal Plaiting, this looked remarkably Japanese to me, although it was explained that these structures are universal and timeless – found on everything from fishing creels to engineered steel structures and it is the plait that is known also as Shaker Cheese Basket
So following Dail’s elegant diagrams everyone started to make another plait either in pure white paper…or dramatic black and white. Once the hexagonal base has been turned more strips are woven in to grow and strengthen the shape.
looking at the hexagonal plaited black and white base
Eventually a firm rim is plaited in to finish the structure.
finished plaited form
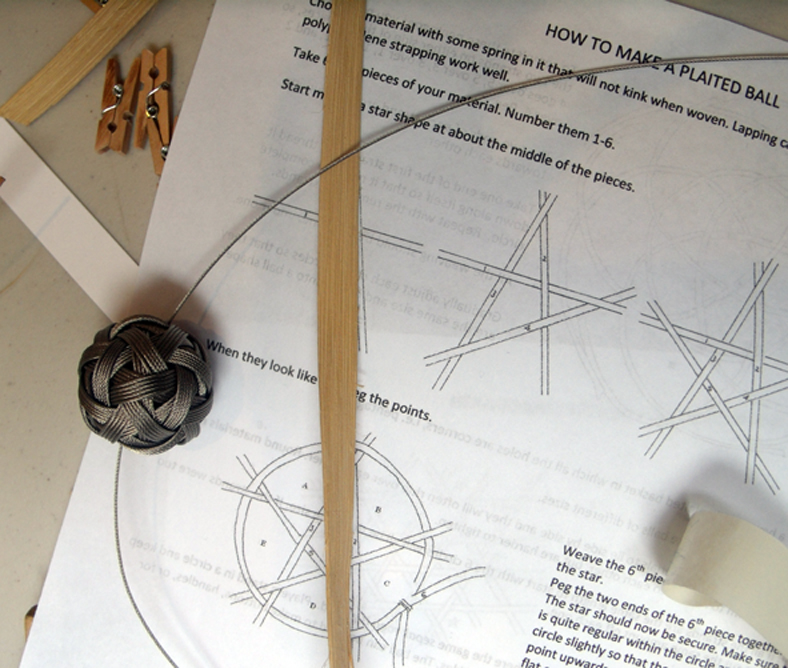
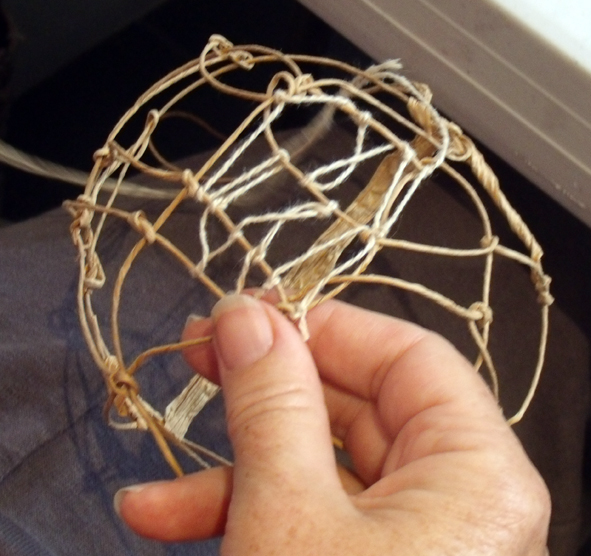
For the final session of this master class, everyone was given a choice to continue making these open-ended forms or to attempt Dail’s signature object, a plaited ball made of steel rope…
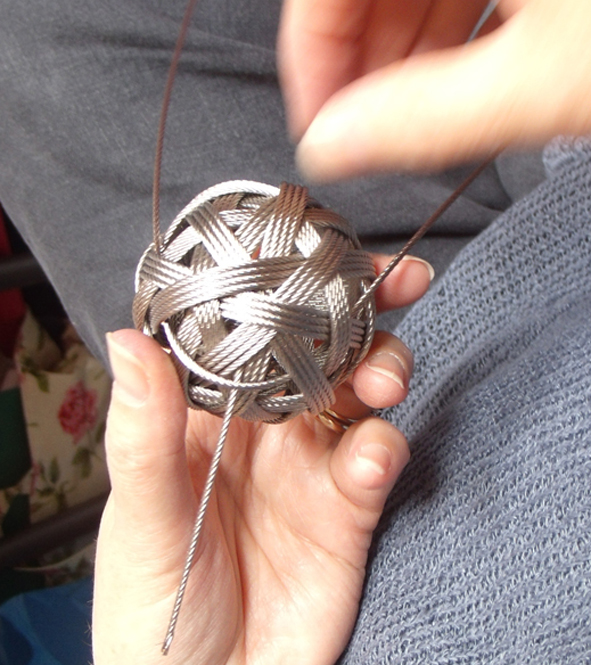
plaited steel ball small enough to be worn as a necklace
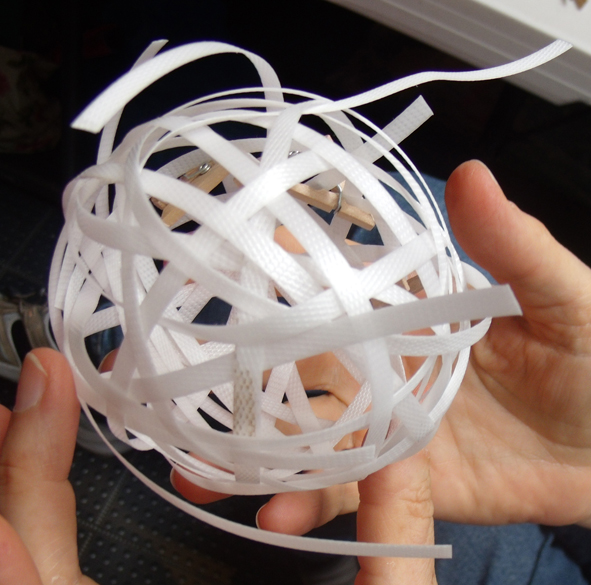
Several people wanted to try the steel rope ball, but others attempted the closed structure in alternative materials…and some with alternative plaiting patterns – let’s just call them free – form.
the free form ball released from its pegs
It appears to me that if you have not got a strongly developed left- brain grasp of spatial mathematical awareness, the convoluted plaiting is a really difficult thing to attempt – I say this as a totally right- brained maker. However, free – formed or perfectly symmetrical, the moment the pegs are released from the plaited structures is a moment of truth for everyone…
Interestingly a couple of people went back to their own practice and plaited the balls using knotting and stitching to secure the structures.
interlaced free – form structure
I think that these samples are starting to develop lace like structures and I suddenly saw a way that I could possibly stitch into these shapes with a needle and thread. The interlacing stitches cast intricate shadows from the final structure. This very delicate structure made by Debbie Paul is made in string and straw ribbon.
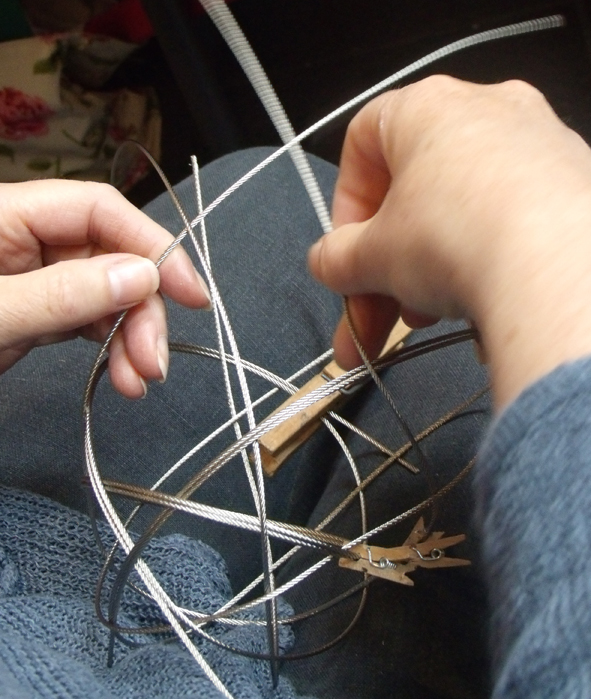
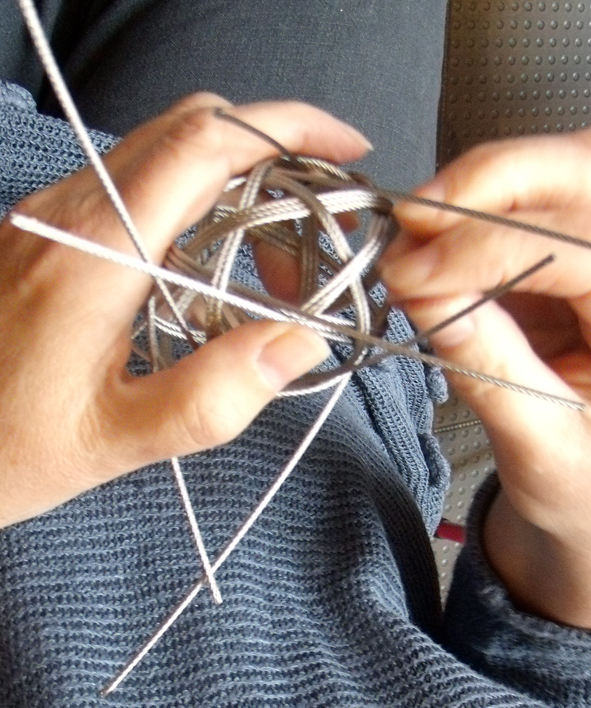
However the steel ball proved to be the ultimate challenge, and it was interesting to see how the were formed. I had thought they were made from a single length of stainless steel wire – but in fact the wires are all cut to size first, curiouser and curiouser.
bundles of stainless steel wire cut to size for small plaited balls
the following images show the slow and strong construction in progress :-
stainless steel and aluminum plaiting – Dail Behennah
I have a confession to make – I am a 2D person; I work best on flat surfaces, paper, fabric, copper plate. Basically I draw, stencil or stitch images onto stable sheets of material. Occasionally I take the images for walks round bodies or vessels, but although I studied, taught and worked in both fashion and textile design, my strength is in surface decoration, and the flatter the surface the better……so it is always perplexing but fascinating when I work with makers who are sculptural.
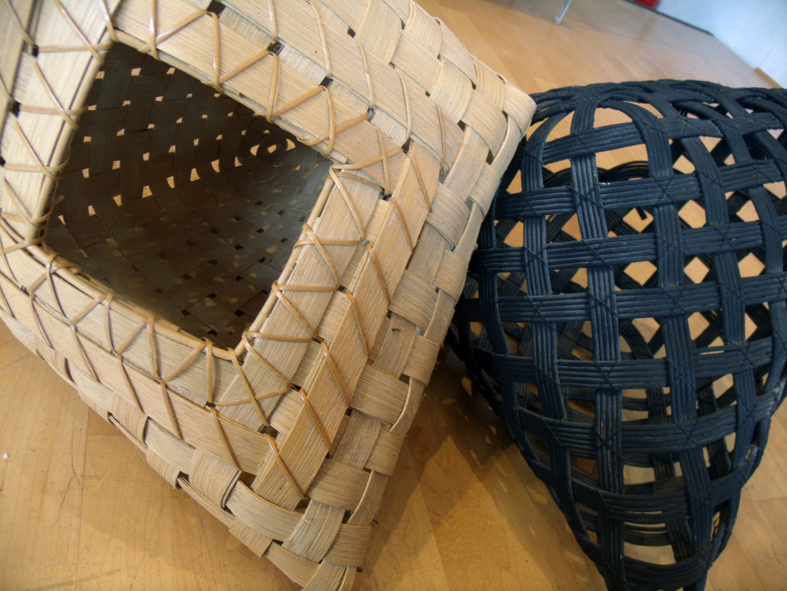
plaited containers – Dail Behennah
Dail Behennah, is a 3D maker at heart, although she does work in several divergent materials ranging from cane, through enamelled steel and copper, via stone and fabric. And for Heart Space Studios she is conducting the next Master Class using re-cycled paper for a 3D plaiting technique. “Plaiting is a way of weaving in three dimensions in which all the elements are active. (In most weaving techniques there is a passive set of warp threads and active weft threads weave between them). The thin-walled elegant forms which result may be viewed as vessels or sculpture.”
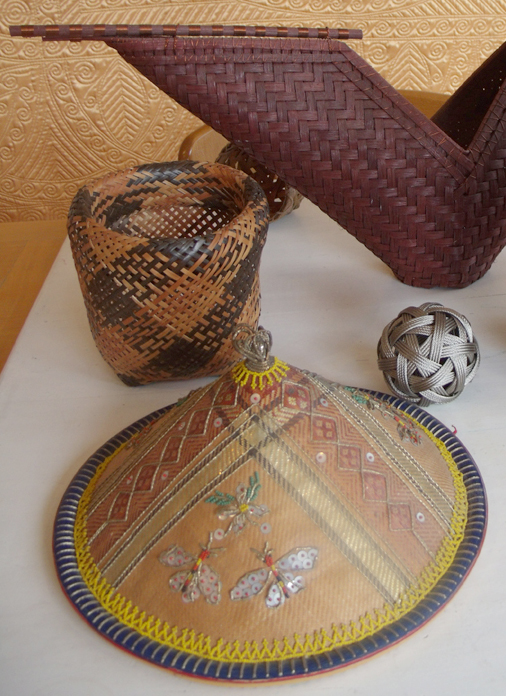
plaited forms – traditional baskets and hat with steel wire ball and triangular basket by Dail Behennah
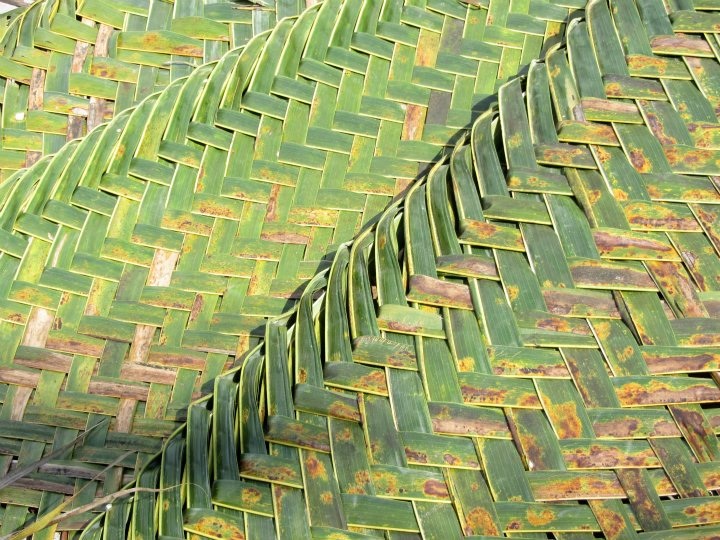
The technique is common throughout the world wherever flat, ribbon-like materials are available. These include palm leaves, grasses, rush, bark and split bamboo. It is used to make flat mats
plaited leaf mat from Zanzibar.
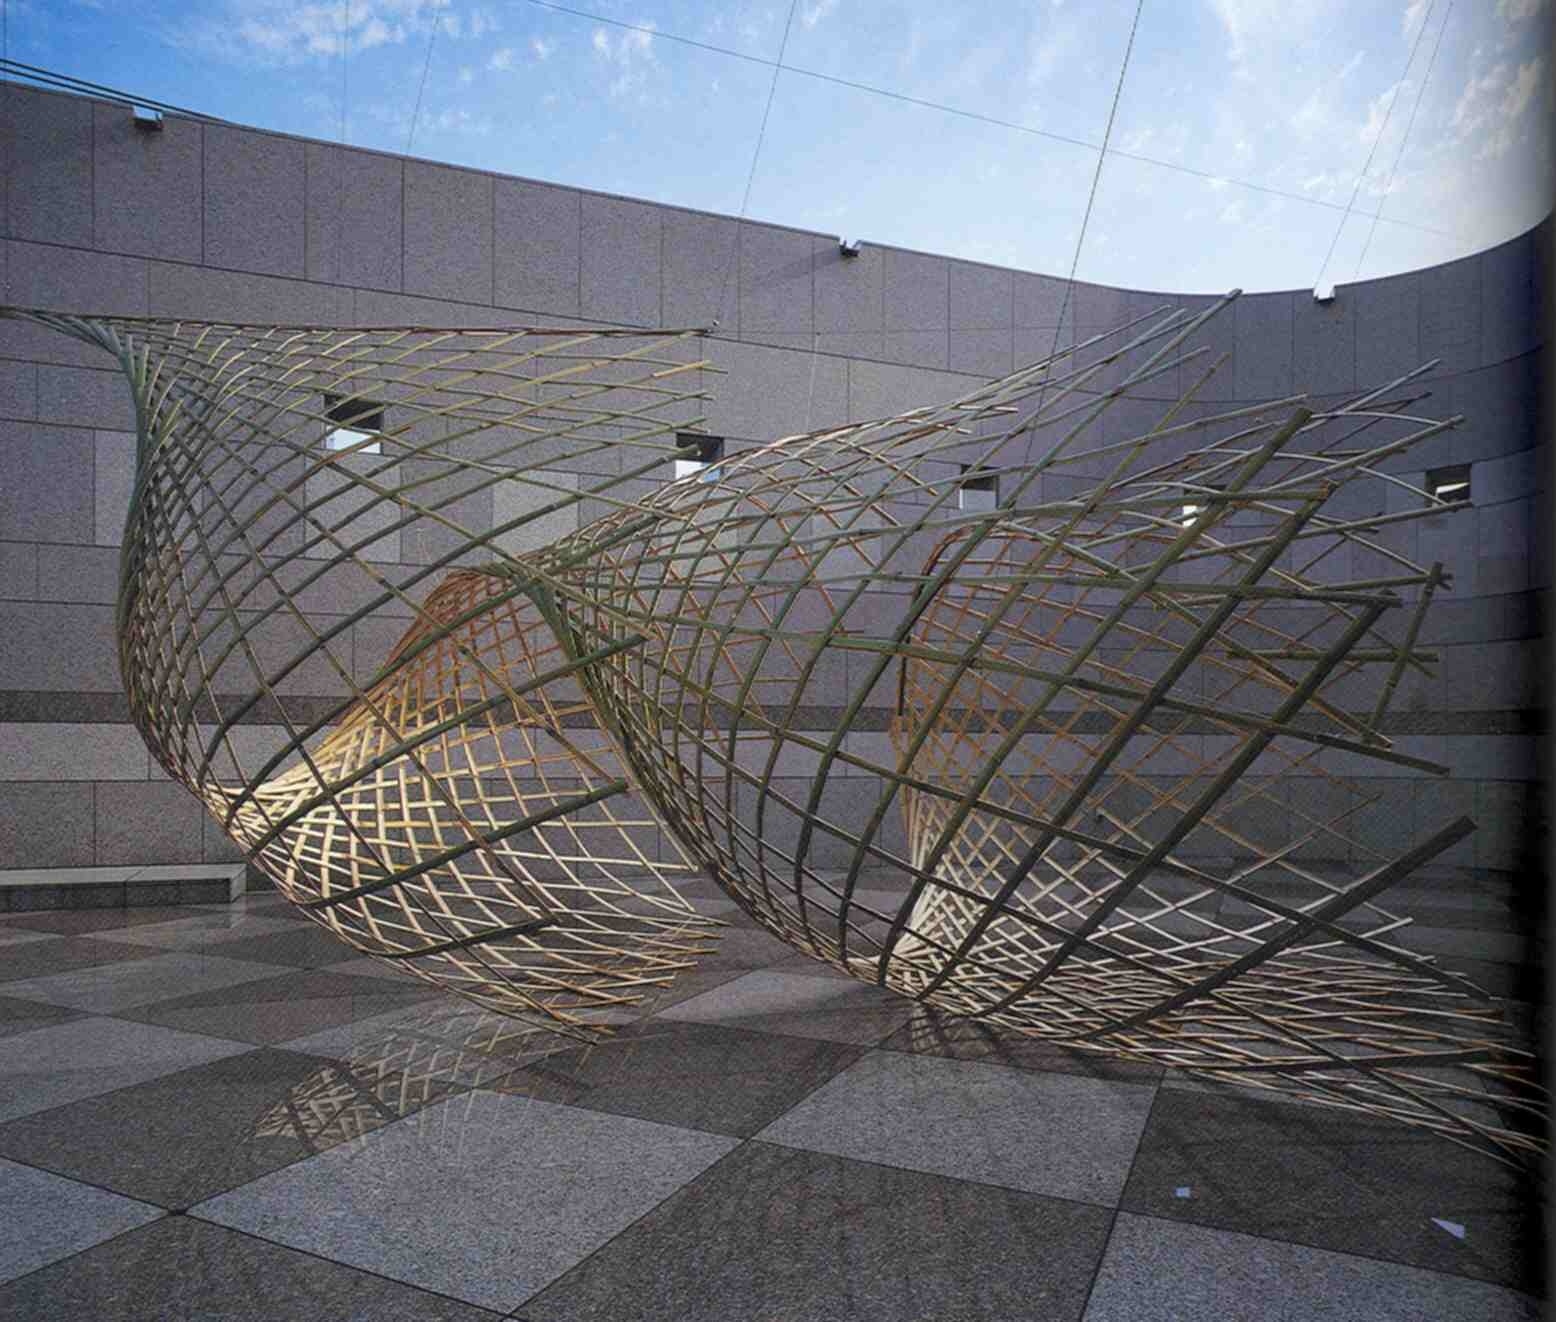
and 3D structures
Cut the Woven Circle 1996 – Plaited Bamboo – Ueno Masao
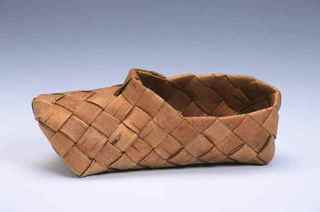
ranging in scale from tiny shoes
Birch Bark shoe
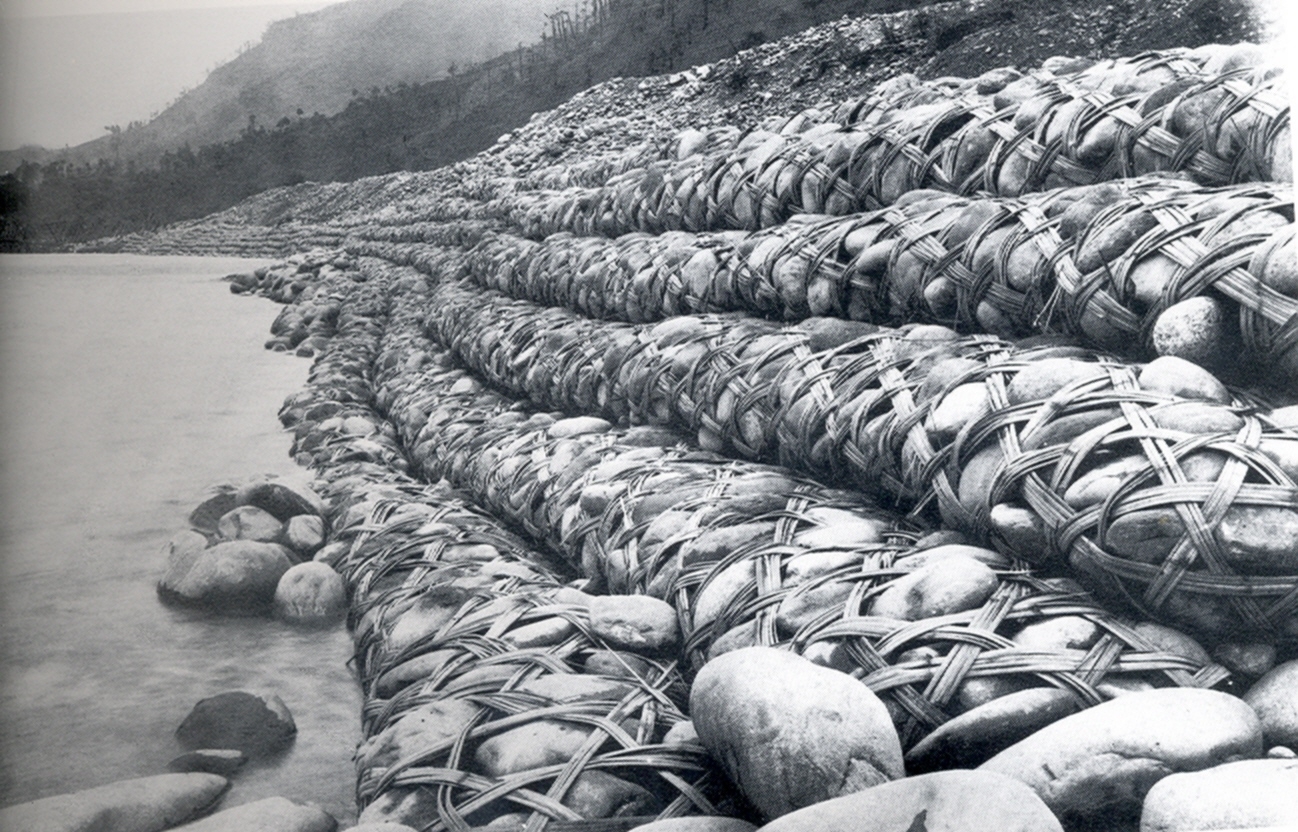
to huge dams…..
Bamboo dam in China
as well as baskets designed to fulfill a variety of functions.
cane linen basket – Dail Behennah
The 2 day workshop will cover the basic techniques of bias and hexagonal plaiting and “corners may be turned wherever you wish. The aim is not to make a conventional basket but to push the technique as far as possible and see where it leads moving from 2 to 3 dimensions and back again…..
For dressmakers the process may be seen as similar to making your own fabric with integral darts. Each corner turned makes the material go off in a different direction, creating hollows and bumps.”
This idea has got me thinking about a plaited corset….imagine some of these cinched waist pieces in plaited ribbons or leathers….although Dail is using re-cycled papers as her main material it is expected that the participants will bring their own materials to experiment with as well.
The idea behind the Heart Space Studios Master Classes is for makers to expand their own practice by being introduced to a new technique or material by a tutor who is an acknowledged expert in their own practice – so sparking off new ideas and possibilities for other makers.
And to prove a point here is a 2D piece of work that has been inspired by this technique – 2 paper maps have been intersected by intricate stranded patterns for a water-coloured collage.
Hebrides/Manhattan(detail) – Woven Maps and Watercolour 1996 – Chris Drury.
“How do you find the time” ? I am often asked this when people question me about my stitched work. Depending on the frame of mind I’m in, I answer “would you ask a man that”? but most often I simply state “This is what I do, and not much else gets done”.
Lately I am having to really study other people’s ways of working as I have been requested to mentor 2 volunteers, “>Sue Pickering and Sarah Thorp, at Heart Space Studios, in return for 2 days work each a week, when they help with the day-to-day activities of the studios, organise the publicity and take part in the weekly planning meetings. I feel certain that if it wasn’t for our team of volunteers, headed by the first and foremost, Sophie Bristol, Heart Space would not be in business and still growing.
Sue Pickering – Art foundation work
The idea of personal mentoring for developing her own textile practice came from Sue, in return for sorting out my publicity and keeping the studio neat (did I say she is a neat- freak)? she asked if I would discuss her work with her and give her some special making classes. She had been to several of the Heart Space classes, and realised that she needed some different direction for developing her own ideas. But crucially, after recently completing an Art Foundation year and as mother to 2 school age children (with a previous career as a university lecturer with a doctorate in psychology) she knew she had neither the funds nor the time to continue academic studies.
Sarah Thorp: first knitted scarves
Likewise Sarah saw the same opportunity, she was willing to give her own time to “get the word out” about the Studios. Having been a knitter from her early years and completed the same Foundation year as Sue, she also has a young family to look after and is frustrated not to be able to develop her own designs to sell in the regular Bristol art trails in which she participates and helps organise. Sarah is now using Heart Space Studios as a base to develop her burgeoning PR practice – I have never met such an active advocate for the things she loves.
I first started working with Sarah, she wanted to develop new products to sell on her numerous stalls around the craft markets in the city. Design development is my home territory as I spent 25+ years as a design and drawing tutor for textiles in the Fashion and Textile BA degree course at UWE. Bristol. I feel confident I can help Sarah with her design ideas and technical control, the immediate problem was unearthing her goals – she was making and selling simple large knitted scarves and small stuffed toys …we soon ascertained that this was not what she hoped to be making in the future, she wanted to really develop the knitting and combine it with other materials.
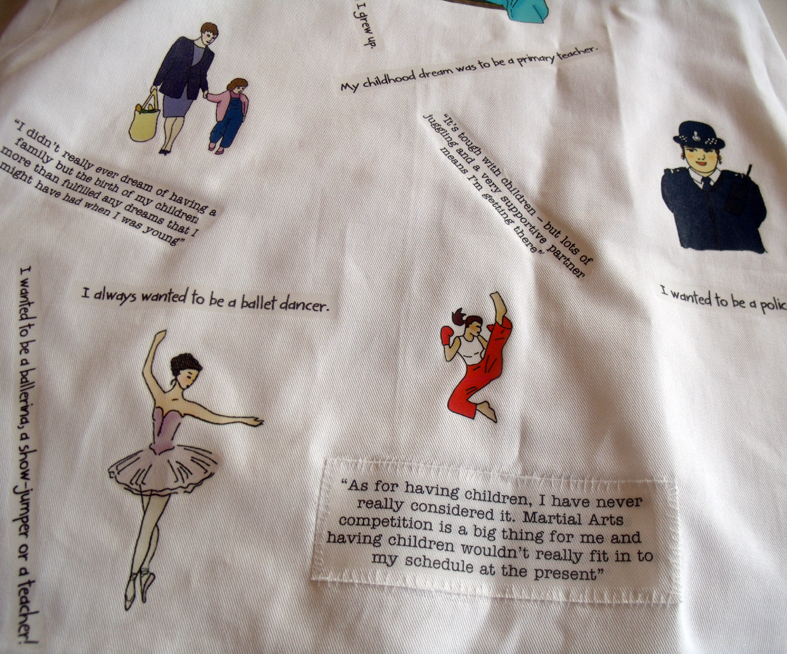
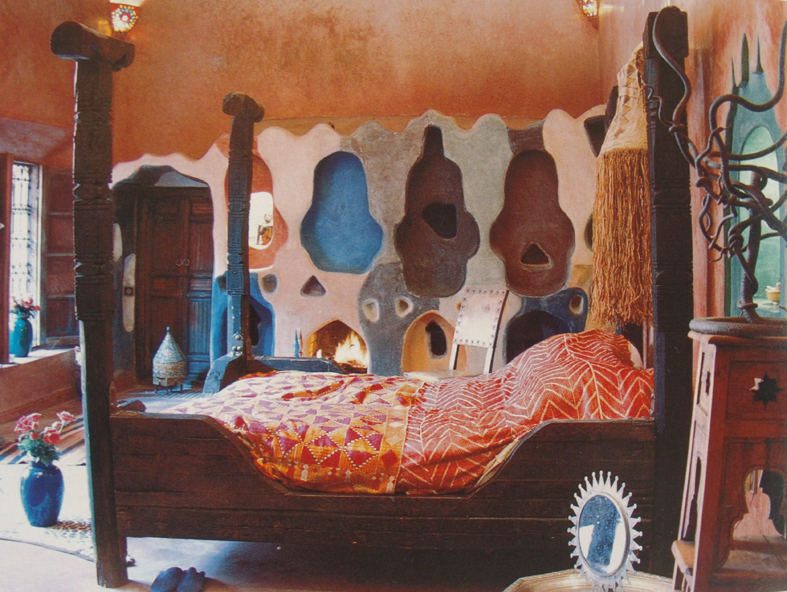
Sarah’s inspirational image
I asked her to bring in an inspirational object, image or idea – anything at all that visually excited her and she felt she could explore; to my delight she brought a book of exotic interior designs and turned immediately to the page above, telling me in the process that she had designed and built 2 houses on Tobago several years ago….. This then became our starting point.
We discussed what we both saw in the image, what atmosphere did it evoke and what did the actual background shapes remind us of – it is useful to develop other associated research areas when first embarking on new ideas. I asked her to work carefully from the photograph, selecting out the major colours and winding yarns and fabrics to develop a colour palette and to look at several artists who I had been prompted to recall by the shapes in the background, Picasso and Braque had immediately come to mind. Other areas to research were African sculpture and musical instruments. I also asked for 6 small drawn ideas sheets combining both knitting and stitching – all in a week.
Sarah Thorp, 1st translation
Sarah Thorp 2nd translation
Sarah Thorp 3rd translation
It was obvious from what she brought the next week that Sarah was struggling to find the time ( and head space) to do the work – not surprisingly she had underestimated how long this form of research takes – even so she brought in enough varied, if muddled, work to develop into some really exciting colour exercises.
Up till now Sarah has worked tonally, blues with greens and turquoise, reds with pinks, using yarn straight from the packets of Collinette yarns with no extras…she needed extras to make this knitting start to reflect her vibrant and eclectic interior decoration ideas.
Meanwhile Sue took a different tack, she wanted to talk to me, at length, to explain her situation which is reflected in the work she had achieved at Art Foundation level….
Sue Pickering: printed dress from Art Foundation course
So her theme is a massive modern concern, for want of a better way of putting it, ‘what it is to be a woman with a demanding young family, who needs her own time to develop/rediscover her own sense of self”. Sue tries to achieve this by working in “stolen moments” between the daily necessities of family life. She also stated that ” there is no good reason at present for my textile practice, it is self indulgent……..I have to invent reasons for doing my own things, and going to textile workshops, sort of sanctions this activity” I was learning a lot about why people are actually drawn to doing our workshops.
Sue Pickering; work book for dress project
What Sue has is a really big subject to work with but as yet a narrow visual language with which to do it – she has relied on her academic background and use of data collection of written and spoken language to make herself understood, she has an efficient strategy for recording her research – a bit too strict in my opinion….but my task is really to find a textile language for her to work with, because she responds emotionally to textiles. When asked about the textile discipline she feels most drawn to Sue answered – Felt – how weird is that? Felt is one of the least amenable of all the textile media to express precise imagery and writing….this was looking promising.
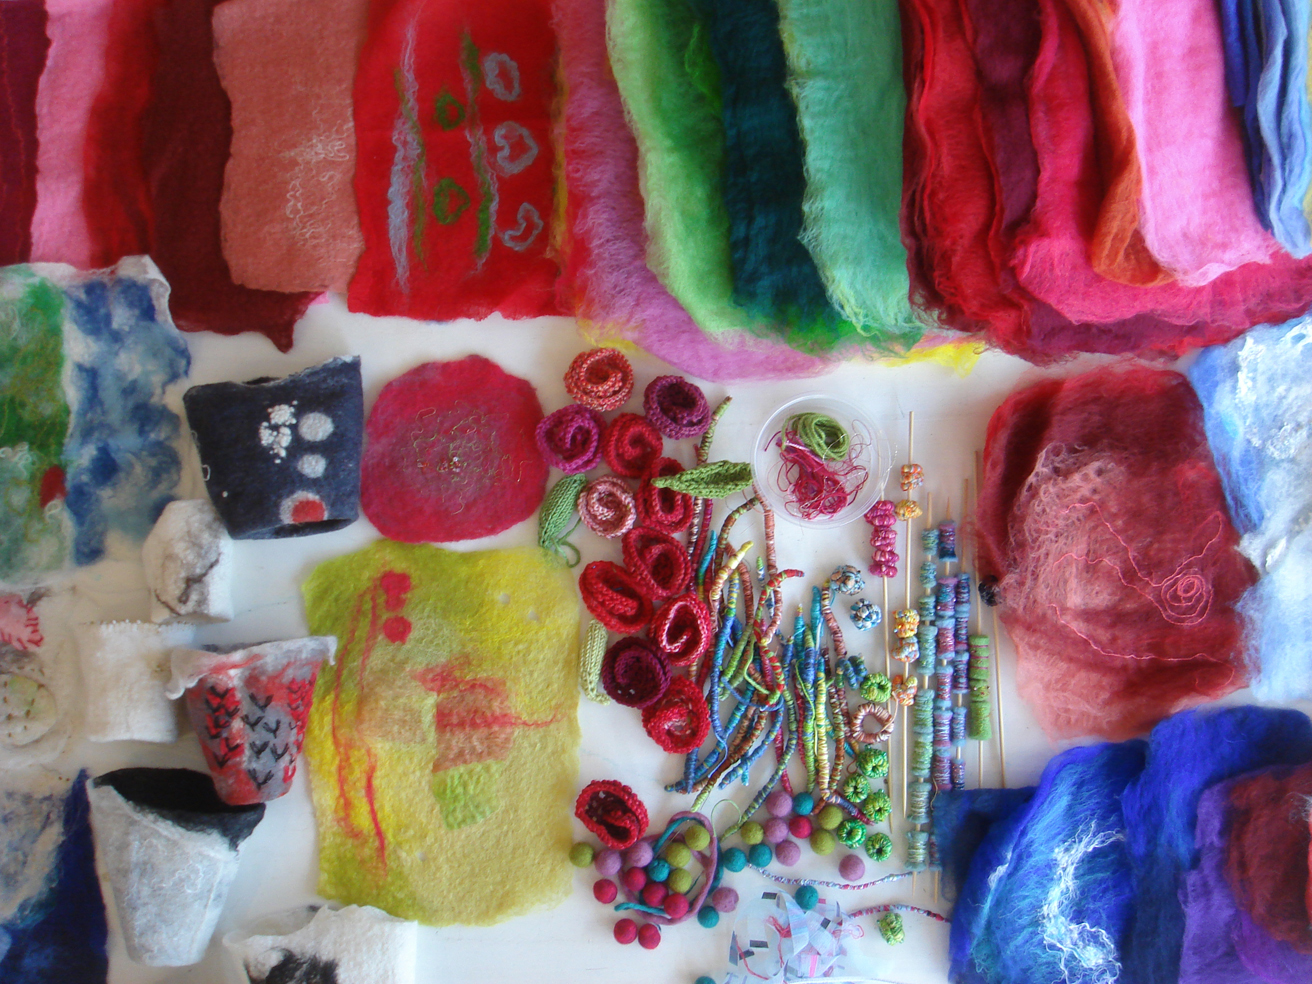
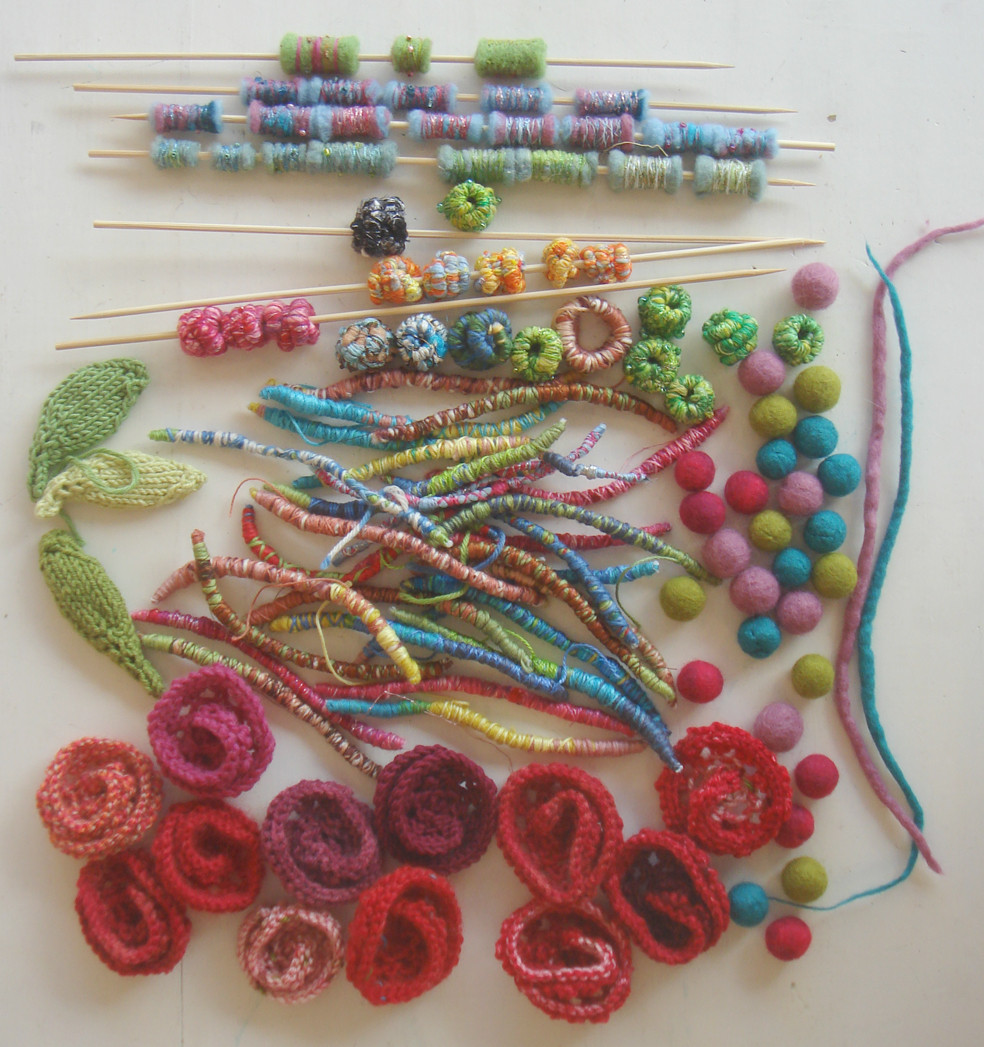
So I asked her how she manages to find time to make work at home, and she answered that when she was really frustrated or really too tired to do any work in the home, she promises herself an hour at the end of the day when she goes into her workroom and makes or prepares a felt bead (which she had learned at a class at Heart Space) or a small flower, meaning to do something with them all later – she is stealing time to make a store of things for later.
But I just thought of wearing those beads made out of so much frustration – they would surely itch and scratch you – I asked her to bring these things in for me to see.
Sue Pickering: collection of frustration felt
They look so benign and cheerful don’t they? But really think of the determination that it takes to make each bead, and when you look at the collection above, take away the color and they do look like chrysalis …I thought maybe to make a collection of them as frustration made palpable – maybe a cabinet of curiosities?
So there are my 2 completely different mentees…each in search of their own personal goals and each with different strengths and weaknesses to bring to express them selves…I will continue to show the development of their work.
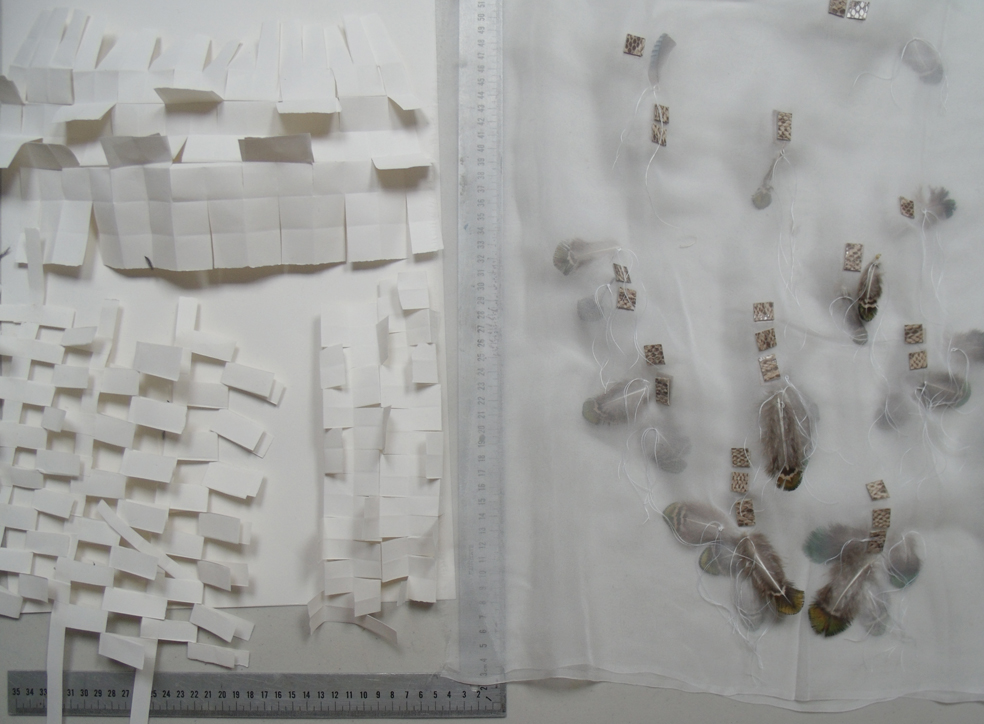
Kari Furre, tiny sculpture of fish scales, vellum and feathers
The strange tiny sculpture, shown above combines all 3 elements of the Surf Turf & Sky master class recently run by Basil Kardasis for Heart Space Studios in Bristol. In fact looking through all my 120+ images taken throughout the 2 days, this is the only piece of work that uses the 3 materials together. The participants came from several disciplines, but whether, professional or amateur makers, all were highly skilled makers in their chosen craft. They were tasked with creating 3 samples using any of the materials on offer, in order to develop them further to enable them to be exhibited at a later date.
Kari Furre’s black chiffon and feather fabric.
On her web site, Kari Furre describes herself as a sculptor and metal-smith, but took to making textiles readily; the results of her research in the workshop look decidedly sculptural and incorporate 3 dimensions even in her initial fabric based work
I know from my own, hard won, experience that when faced with strange and challenging materials the mature maker will often instinctively return to the core of their own experience and utilise familiar techniques to explore the new materials…resulting in imaginative samples and ideas. This is the main reason why I wanted to develop master classes for Heart Space Studios, to introduce new ways of thinking to mature makers through unfamiliar materials ( rather than the more usual workshops that teach new techniques). And Kari certainly made completely different fabrics and samples for the group to wonder at.
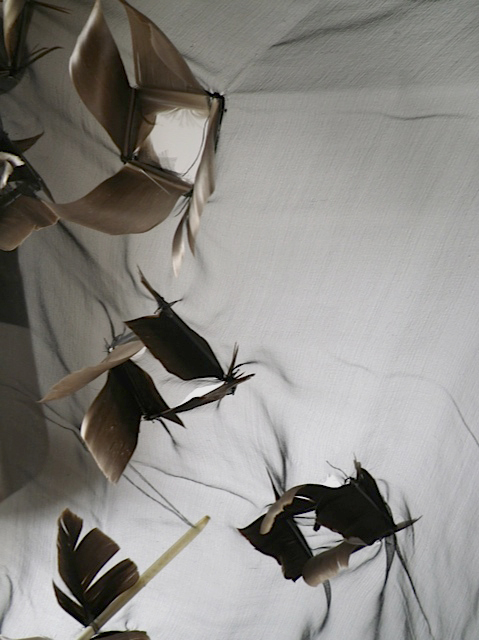
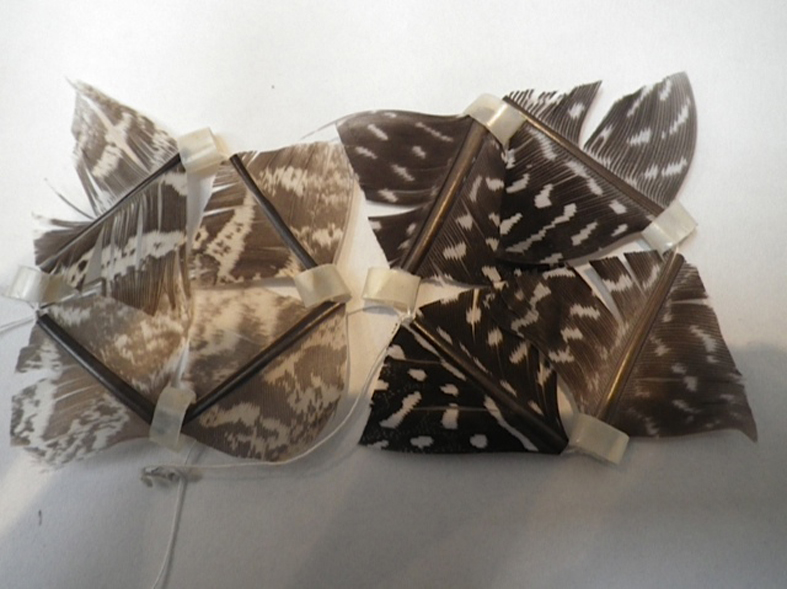
Kari Furre – cut and jointed feather pieces
The same behaviour can be seen in Ann Rippin’s embroidered collage of silk, beads and, as far as I can see, anything but leather, fish and feathers for her first day’s efforts. To see and read a more insightful record of her experience, click here Ann Rippin’s blog. But even though Ann didn’t use much of the unusual material provided by the workshop she certainly became inspired to develop wonderful work from things she had stashed away not knowing how to develop them.
Ann Rippin – scrunched, pleated linen silk and beaded sampler
On the second morning Ann came in with a half made sample which she had unearthed with ideas for its development very late the night before….
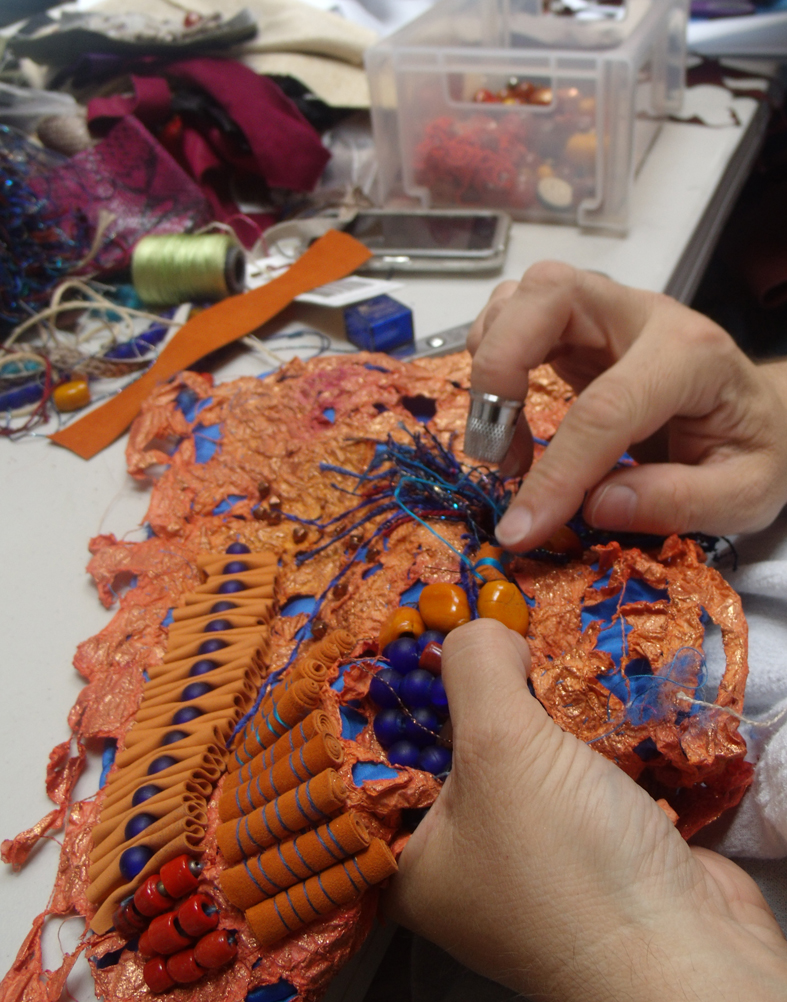
Ann Rippin – making and stitching beads to resurrect an old piece of work
She became fascinated by making leather and thread beads after seeing one of the research books I had brought in for everyone to delve into. What is interesting is Ann is primarily a quilter , or patch-worker, but here she has made and applied 3D objects to her work, perhaps a new way to develop? She spoke of her work being “excessive” and a good exampler of how to escape the atmosphere of parsimony engendered in the present economic situation – a wonderful reason for making any work.
inventive rolled leather beads to augment the ethnic ceramics for a new piece of work
Another stitcher, Sally Sparks, found a way back to hand stitching after experiencing several years working with other materials and techniques, and said her first day was “a disaster”; she has recently been developing much of her textile work from her own inspirational photographs of rust…. but now her work was pale and subtle in its colouring as she rediscovered some of her old materials. She was very nervous of using the fish skin, like everyone else she found that the very preciousness of the material was a barrier to experimenting with it. Realising this in advance Basil and I offered card and other fine leathers for people to work with.
Sally Sparks – leather and chenille applique sample on her own hand made paper.
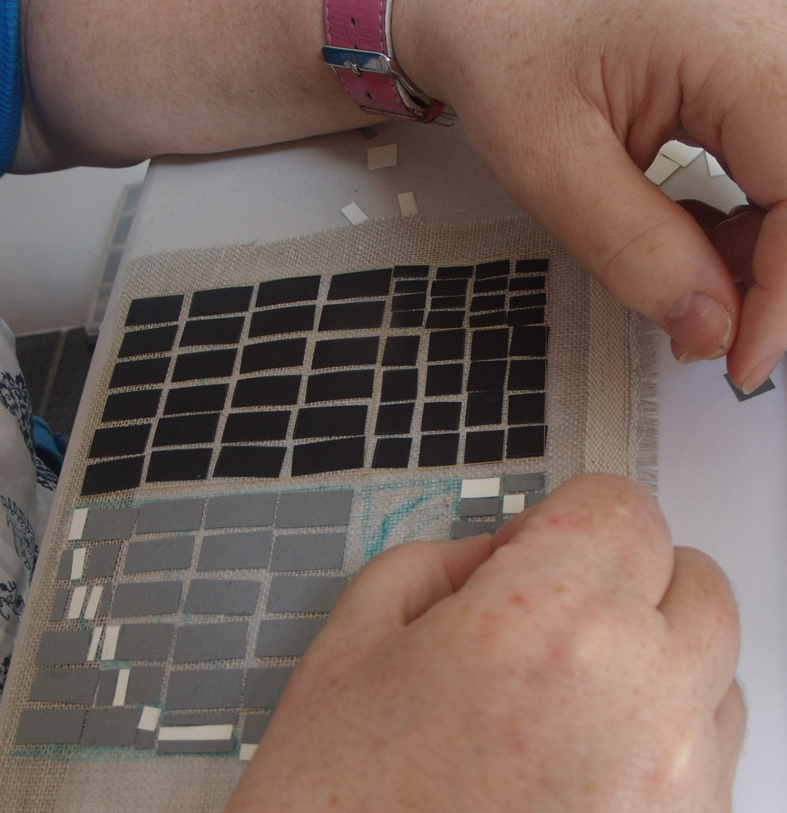
Another textile maker Debbie Bird , felt “out of her comfort zone” because of the preciousness of the materials – she she decided to try sampling all the materials systematically on a small scale as she didn’t want to waste anything – but one of my my making mottoes is “you have to break eggs to make cakes” ……
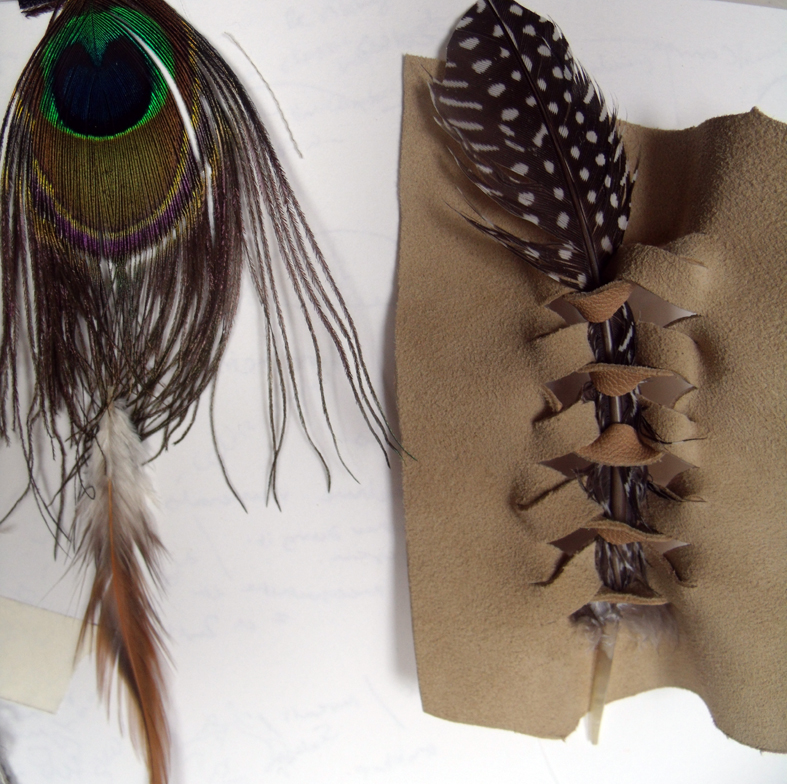
Debbie Bird makes tiny leather mosaics pieces with a reverse of feathers
nevertheless Debbie made several interesting samples that she can develop further when she has had time to assimilate all the ideas offered by the experience.
more small scale samples of feathers and leather
Several people became immersed in weaving and folding card to develop leather and skin fabrics, Sue James, a technical lecturer at Glamorgan university began a fascinating small scale interwoven series of samples using card, as did her colleague, Tom Clulee, the Award Leader in Fashion at Glamorgan, who made a good start with developing an interlocking star shape in cardboard like Islamic patterns…unfortunately he was called way from the class after the first day so Basil and I sent a “care package’ to him to help develop his ideas in his own time, we can catch up with him on a later post.
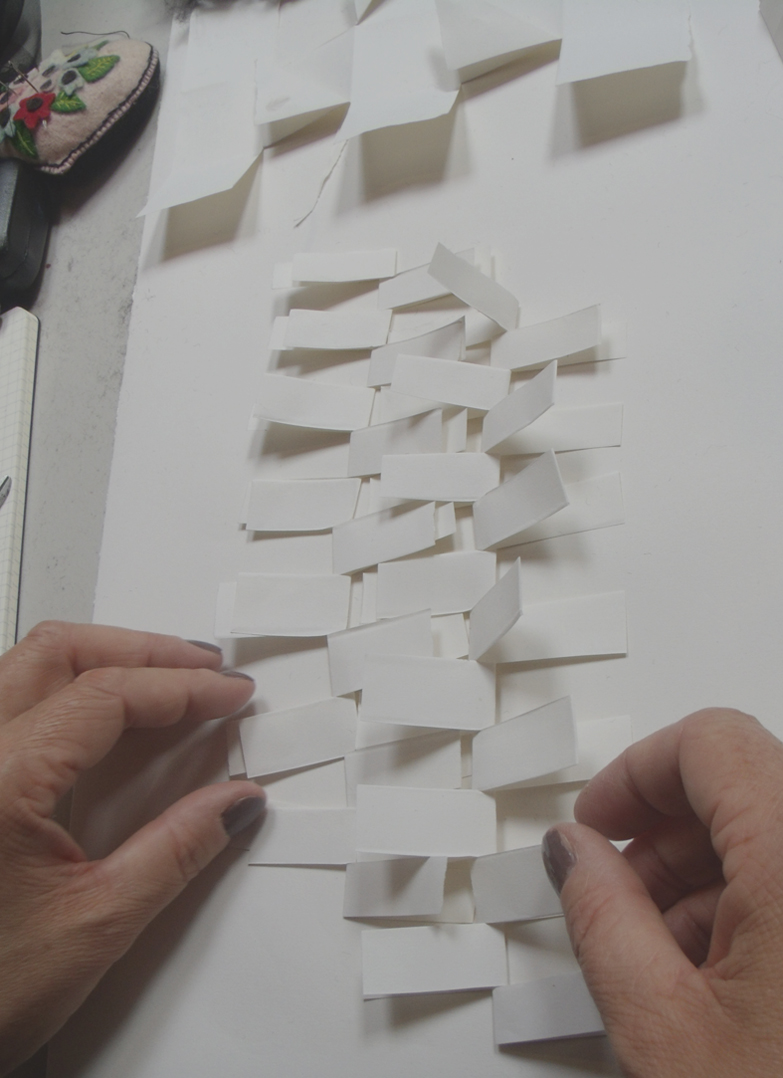
Susan James woven paper samples
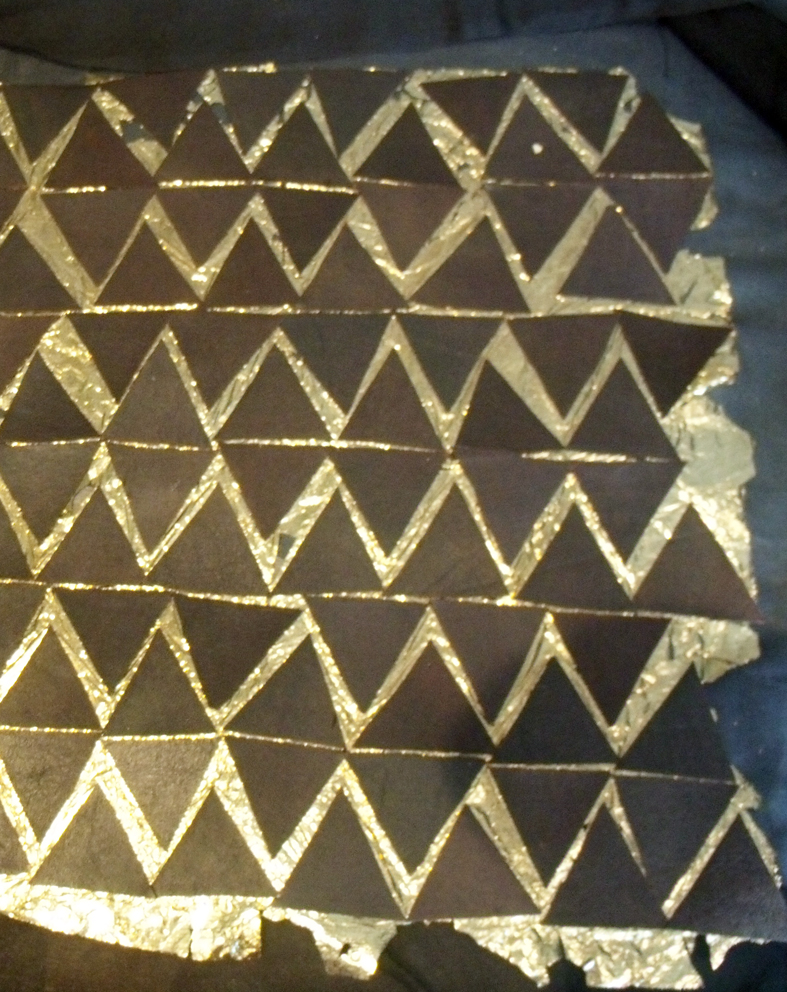
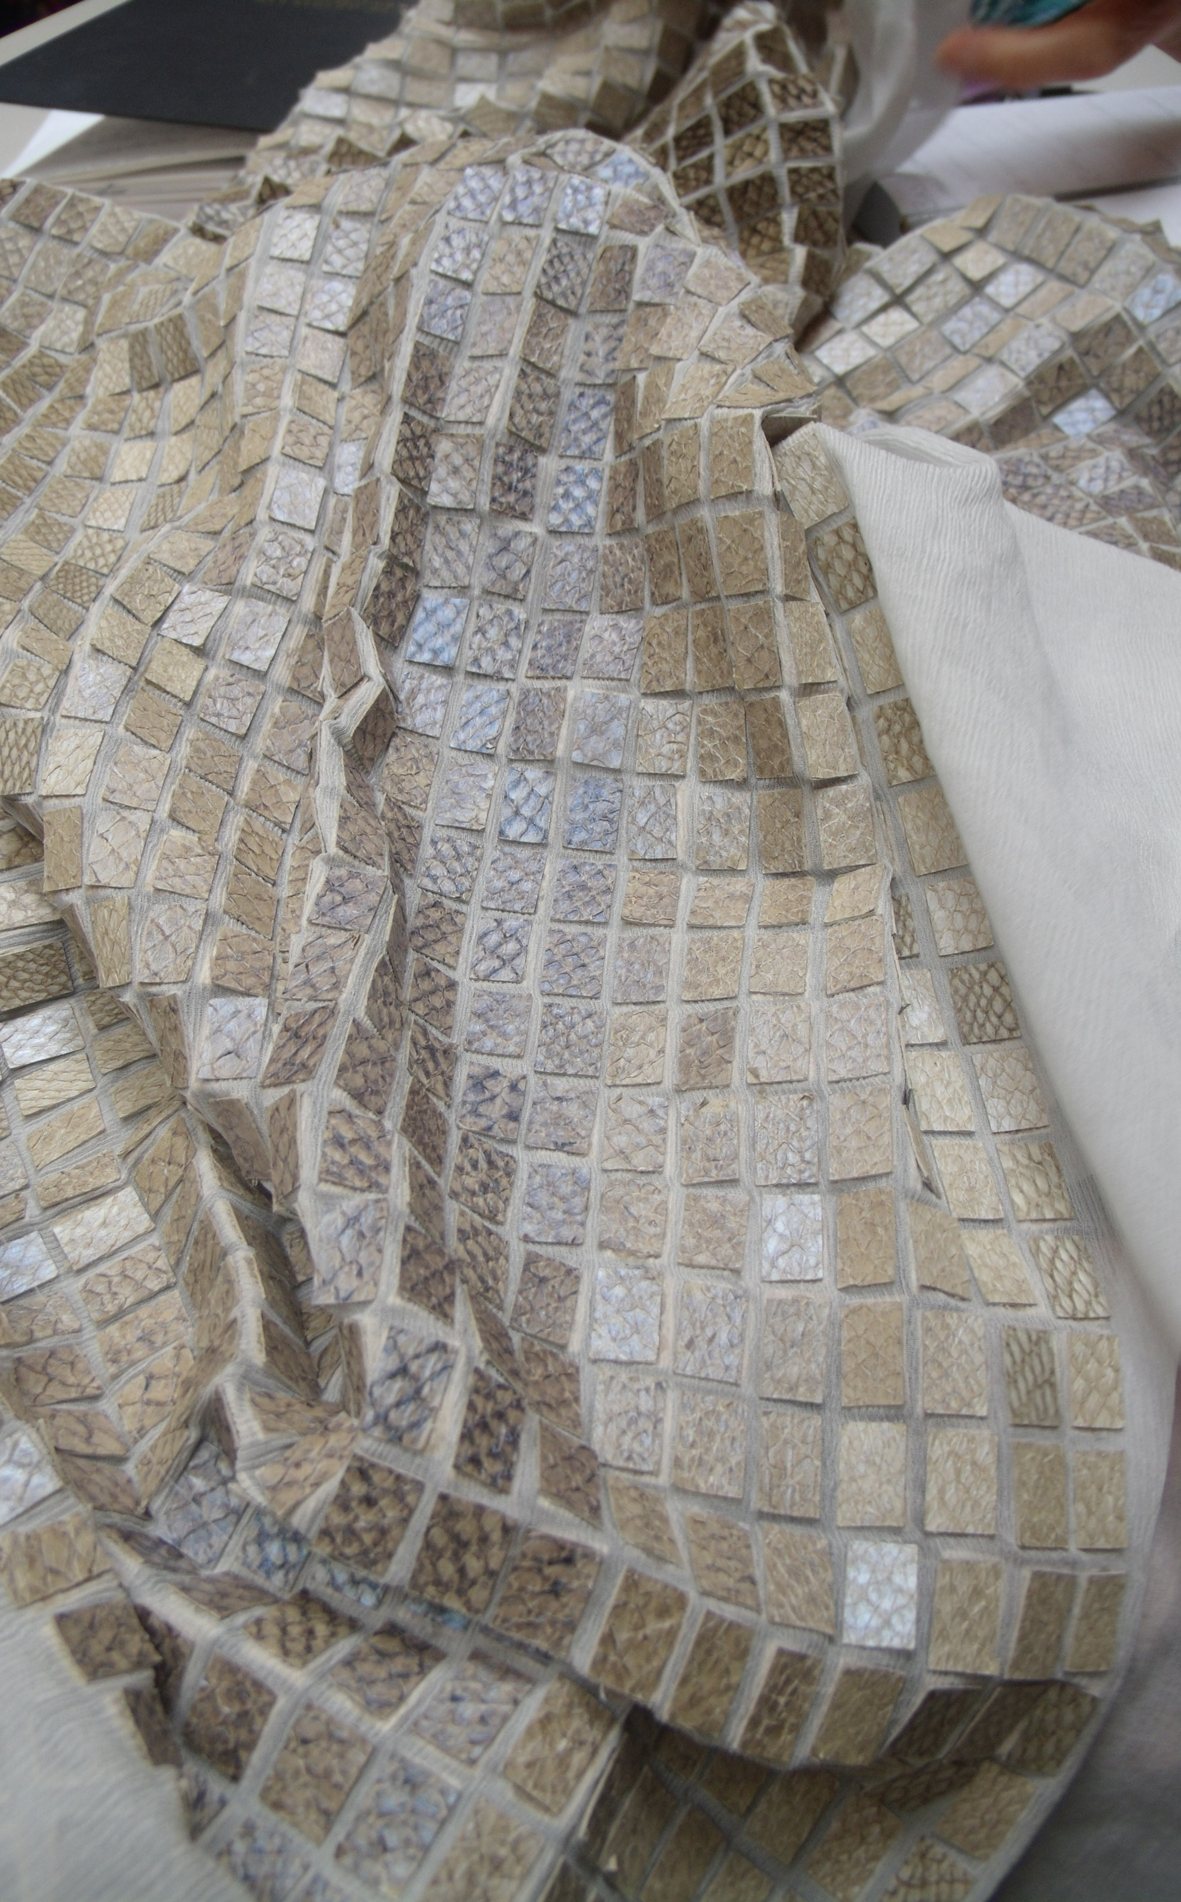
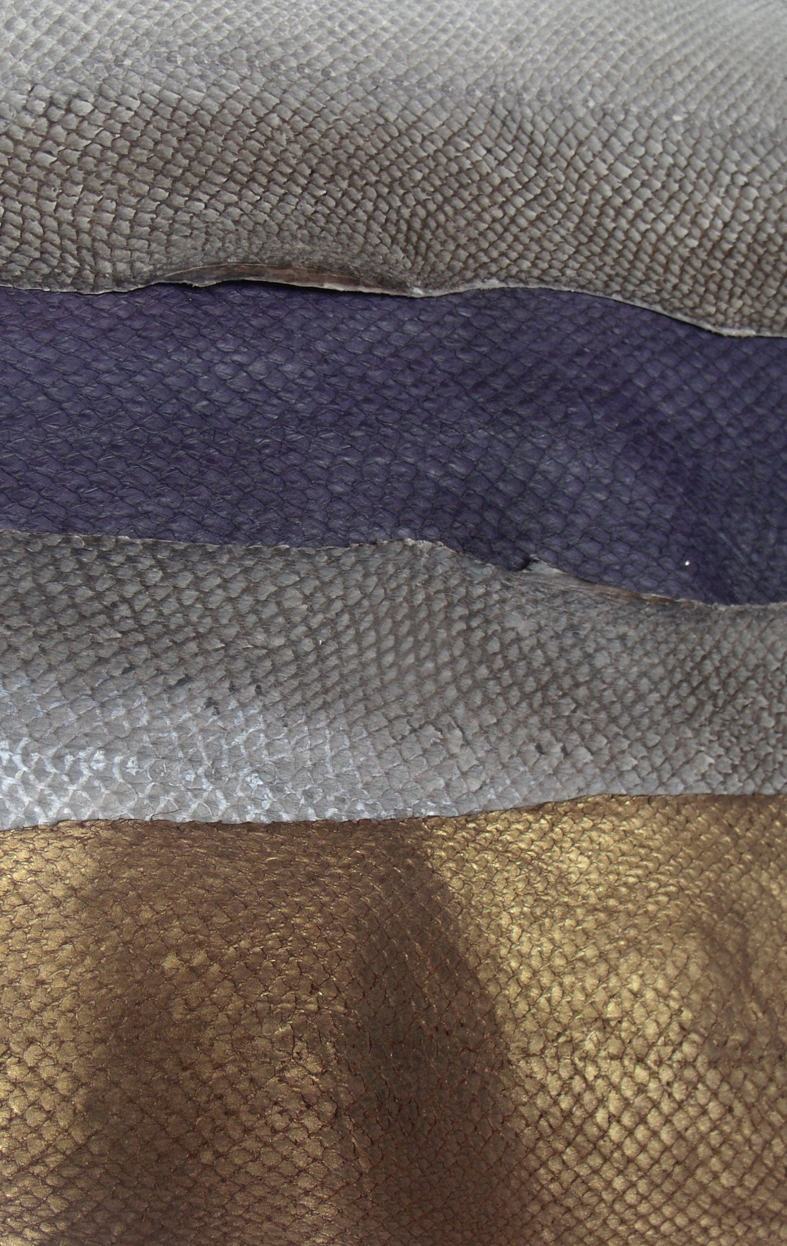
But Sue persevered in finding ways to make sheets of viable leather ‘fabric’, the beauty of which lies is the fact that each side has a different pattern, especially when gilded..
Susan James snakeskin and leather samples showing the same pattern on the reverse of a fish skin with gilding.
Her main aim now is to make a fabric that will be molded to ‘sit’ on the body as a garment without it being cut and stitched in the usual manner – so her technical expertise has come to aid her development for these unusual materials.
Dawn Mason makes a complicated folded and woven piece
Dawn Mason, who is the Award Leader of the Drawing and Applied Art programme at UWE, Bristol is a textile maker currently working with hand stitched papers who also decided to weave card to develop new ideas. She worked by referencing traditional fur cutting techniques that Basil had shown in his introduction; several samples of cut and woven leather were shown at the end of the session and she is now intrigued by the articulation achieved – she also stated that she had made a determined effort to change the way she usually waoked and to just experiment with “something that feels alien” .
Dawn Mason showing her samples and experiments at the end of the workshop.
Sitting next to Dawn and dealing with alien ways of working was Jules Tenebrae of Lux Tenebrae and if you go to her fascinating website you will see how far she travelled from her daily working life ..
side by side: Dawn Mason’s woven paper and Jules Tenebrae’s feathered chiffon
Well maybe not, we are still in the realm of fantasy and femininity.
Jules, a corsetier, made the most diaphanous fabrics, weaving and stitching soft feathers and leathers together, and she also gifted the class with extra snake-skins, leathers and seudes from her own workrooms for the second day. She said that she felt liberated as we were not “allowed to produce a product” and this was initially very difficult( I agree, once a designer always a designer). She worked from the idea of ‘Treasures on the Beach’ and started a long wavy piece of work that flowed and undulated when she hung it up, in fact all her fabric samples where very floaty and at the same time organic, at complete variance to the usual rigid corseted and structured leather clothes she sells. And now I look at her final sample I see that she also has incorporated the 3 materials, she has strips of snake and fish skins, fur, leather strips stitched with feathers onto silk chiffon.
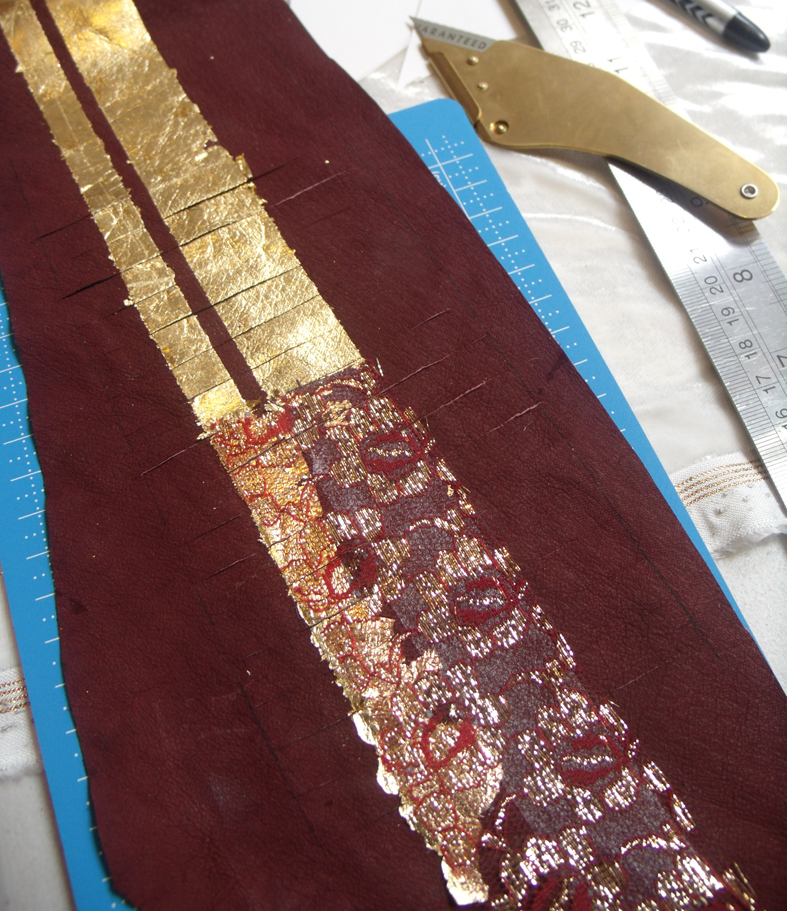
And next to Jules was another corsetier, Lisa Keating – a Heart Space tutor with her own designer business Bespoke Bridal Lisa immediately designed 5 fabric samples and embarked on trying to make them – a tall order but she really was inspired by the gilded leather…
Lisa Keating prepares leather with metal leaf and lace.
split and turned gilded leather
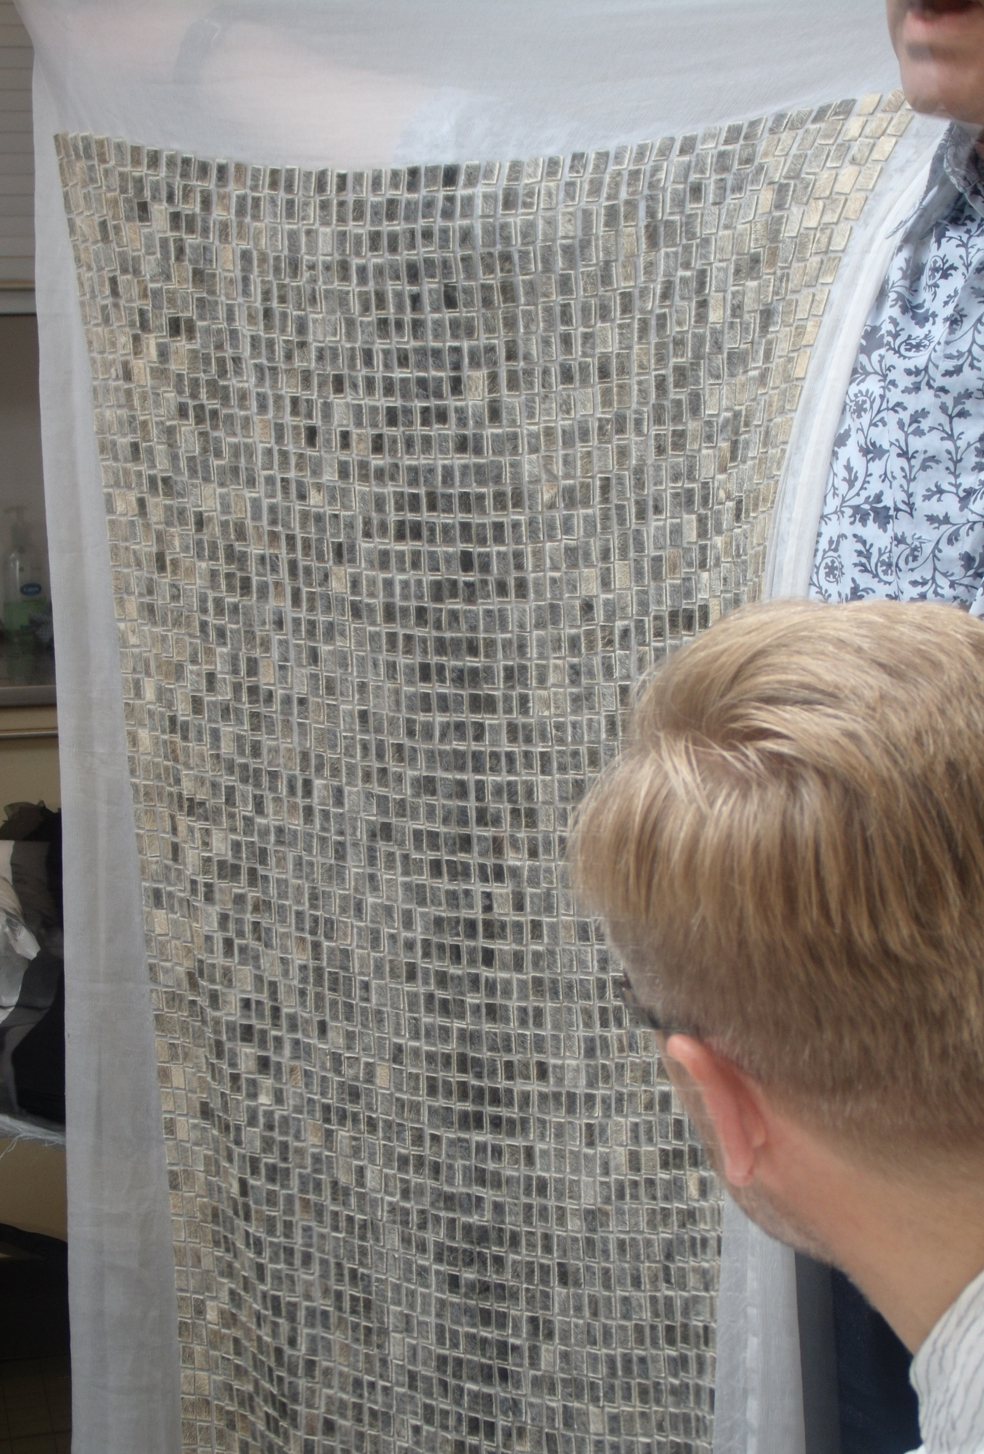
and the small chiffon fish skin piece from Swedish students, which really was inspirational for many of the other people in the group. Lisa made a simple and delicate spotted fabric using the iridescent fish skins like sequins.
Lisa Keating -appliqued discs of fish skins to silk chiffon
It is a seemingly simple technique but requires a great deal of precision and patience. The cutting and sticking of the fish-skins to the front and back of the material is really labour intensive. Libby Butler, a textile maker who makes truly for the love of it – became interested in working with the Fibonacci spiral and came on the second day with a storyboard from which to work a series of samples.
Libby Butler – storyboard of the Fibonacci spiral
she set to work knowing that she is in for a long time consuming period of developing this intricate idea into a viable fabric.
Libby Butler making her first card on linen sample collage for the spiral pieces
Meanwhile, textile maker Anne Harrington tried to simplify the making process by gilding the back of the leather using adhesive that could be permeate through the chiffon.
Anne Harrington …gilding the back of the leather mosaic at the same time as adhering it to the silk chiffon ground
with really interesting results that beg to be developed further…..
showing the successful finished gilded sample back
These experiments are the first samples in an ongoing process to an exhibition in London later in the year; we aim to help the makers develop new works inspired by and exploiting the qualities of these unusual materials….for Basil Kardasis’ next class he is working with Vellum .
Fish skin, reindeer leather and feathers are the weird and wonderful materials that went into the making of first Master Class at Heart Space Studios -hence ‘Surf Turf and Sky’. This was a 2 day workshop conducted by Basil Kardasis, an international designer and lecturer who specialises in using ethically produced and sustainable leather and fur and who reiterated again and again in this workshop how careful we had to be not to waste these precious materials which, for this workshop are the waste materials from farmed foods.
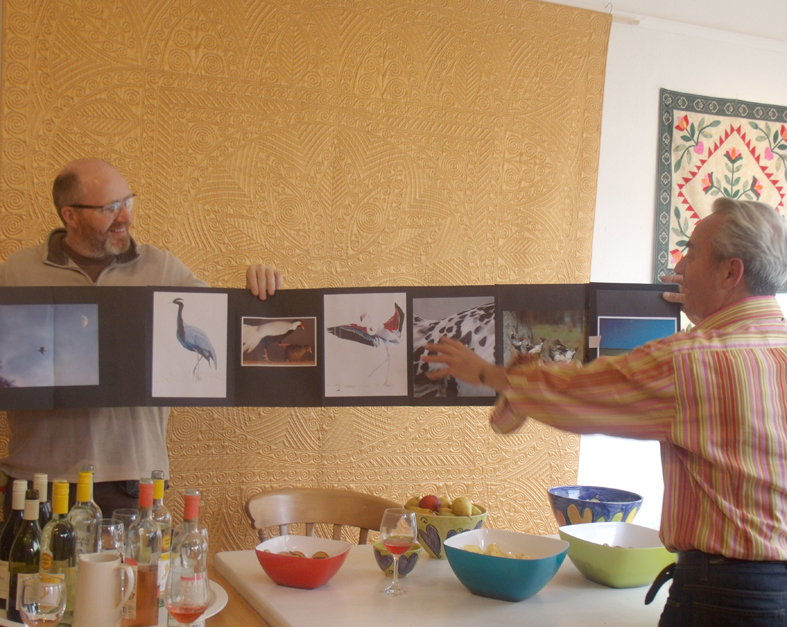
showing the start of the panorama research document in Heart Space
We had a ‘Meet and Greet’ session the evening before the workshop where everyone could informally get to know one another and see the ideas he had for the days ahead, a wonderful portfolio of images was shown which gave a panorama stretching 10 metres….all through the studios, the dining room and out of the door.
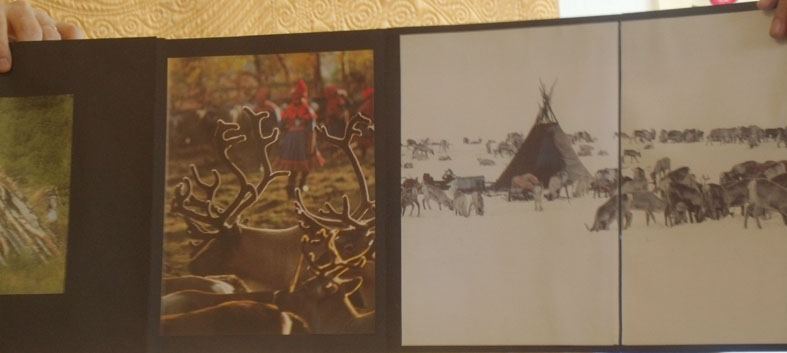
Turf section of the panorama
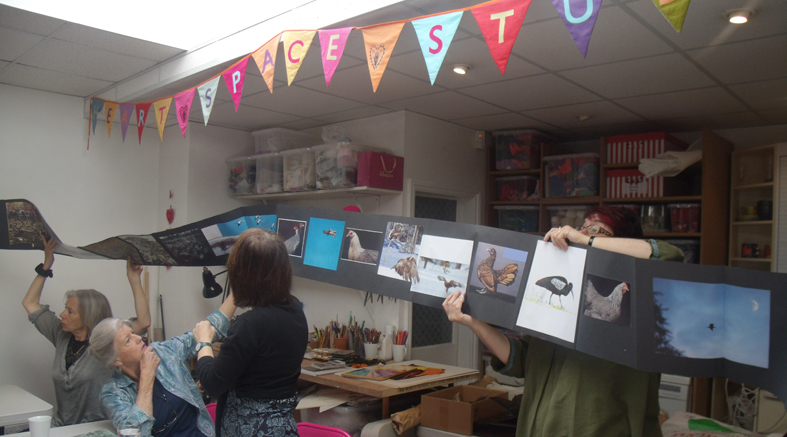
the next morning we unfurled it again to start the workshop with a myriad of inspirational images of animals, seas and skies.
start of the 2 day workshop in the studio
The people taking part were from many different backgrounds; we had 2 corsetiers/ dress designers; several university lecturers; an ‘academic quilter’, textile designers, embroiderers and a sculptor who worked in various materials from fish skins to precious metals. All were lured to the class by these unusual materials, but Basil told everyone they were not to think of their own practice – they had to react to the stimulus of what he and Heart Space provided. But first he showed ‘something he had caused to be made earlier’ a piece of sheer silk with appliqued squares of fish skin and fur. This beautiful but essentially simple fabric had been made at the University of Gothenburg in Sweden where he regularly teaches. This piece of work has tiny rectangles of salmon skin on one side and sheared Gotland sheep on the other (I thought I would be very specific in the spirit of research). This sheet of stretch chiffon fabric proved to be inspirational for several people.
leather and fur side of the appliqued fabric
salmon skin side of the fabric
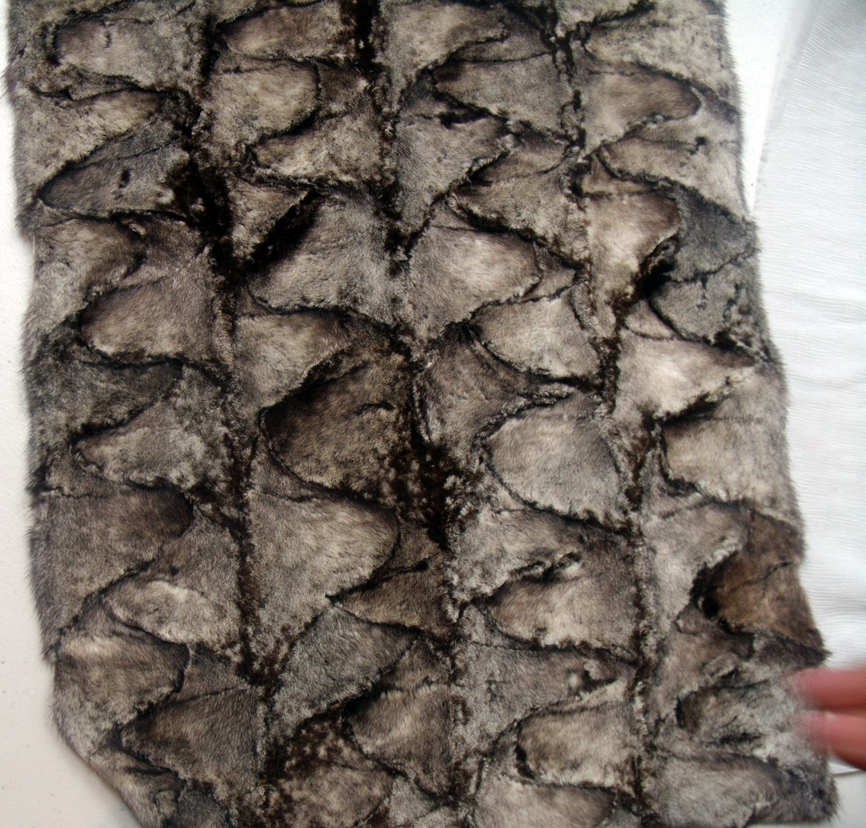
He showed several more ravishing dressed skins, not just to whet our appetites, but to explain how design can develop useable fabrics from usually discarded pieces of skin, like ” mink armpits”. The message is that we must sustain, make safe, and waste nothing at all when we use animals for our own appetites, whether food, protection or delight.
reverse of the fur to show construction
‘armpits’ of mink made into interlocking sheet of fabric
Then he introduced us, or should I say seduced us by showing the materials that he and his Swedish colleague, Eva Alfredson, had spent several months procuring from Scandinavia. The whole room was transfixed by the treasures he unwrapped…..
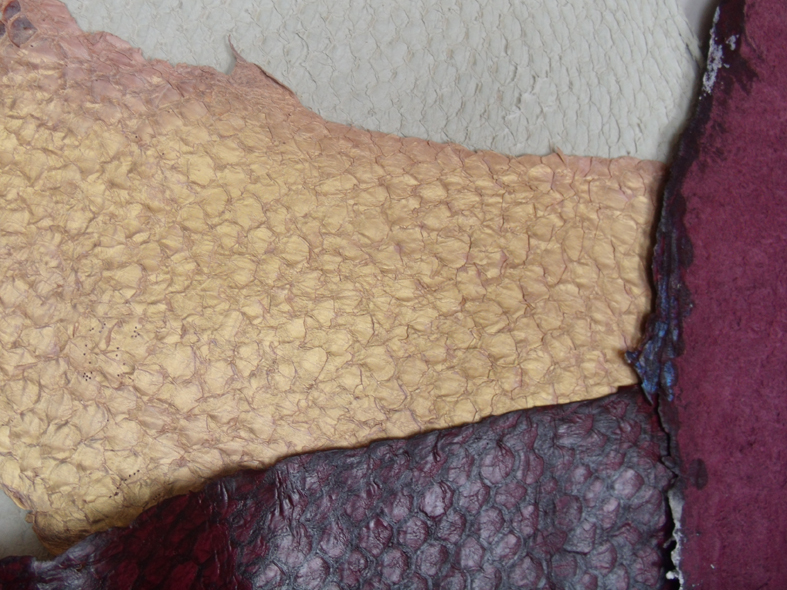
dyed and gilded salmon and Nile perch skins from the Scandinavian company Kust Skinn, kindly supplied by Karin Mattsson
Nile Perch dyed and gilded.
gilded and dyed salmon skins
shimmering salmon skins
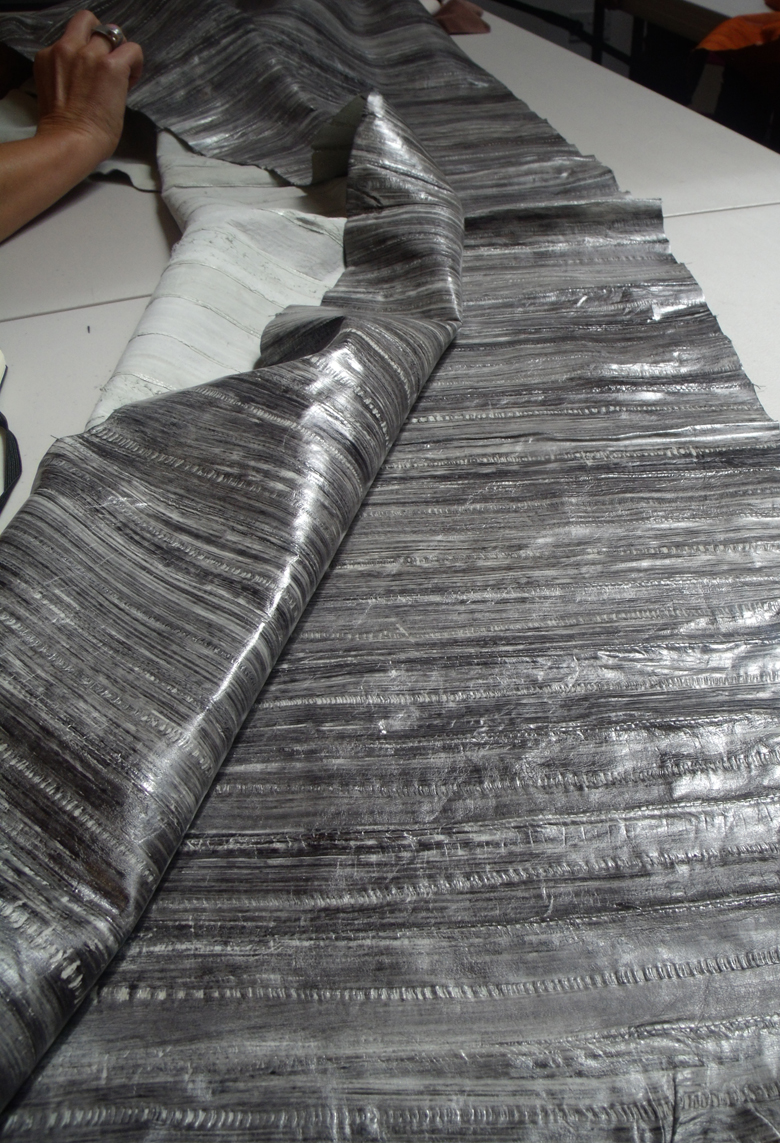
wonderful sheets of pieced and dyed eel skins provided by Saeed Khalique, who owns the London-based company Alma Leathers.
sheets of pieced and printed eel skins from Alma Leathers
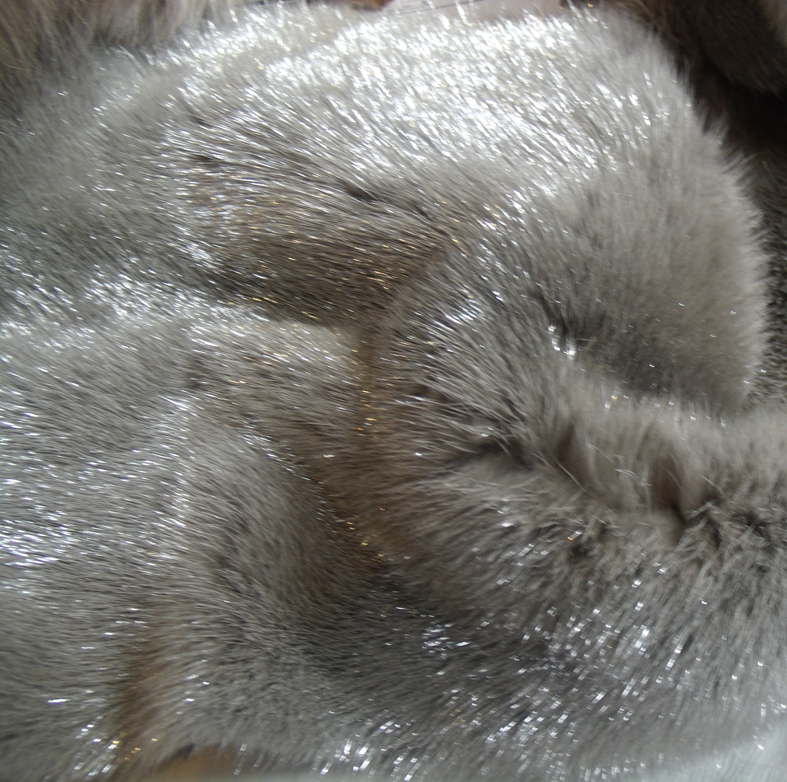
stunning silvered and gilded fox furs sent by Roberto Tadini from Italy, just for us to marvel.
silvered fox furs from Italy
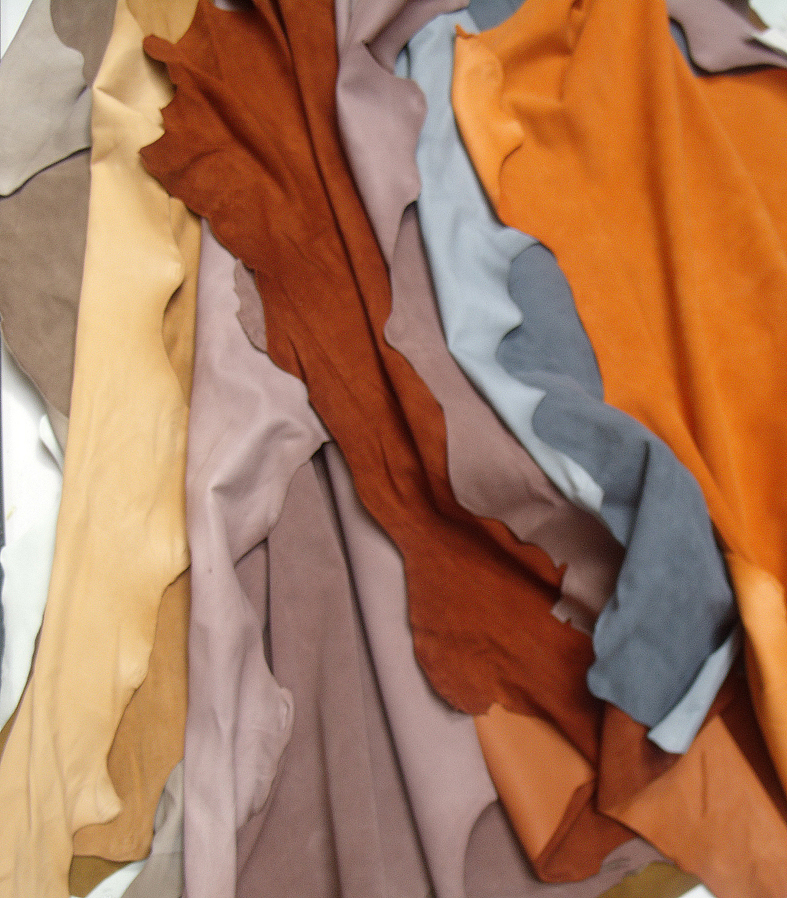
then the softest reindeer leathers in glowing colours from Finland, courtesy of Carita Pontio of Ahlskog Leathers
reindeer leathers from Finland
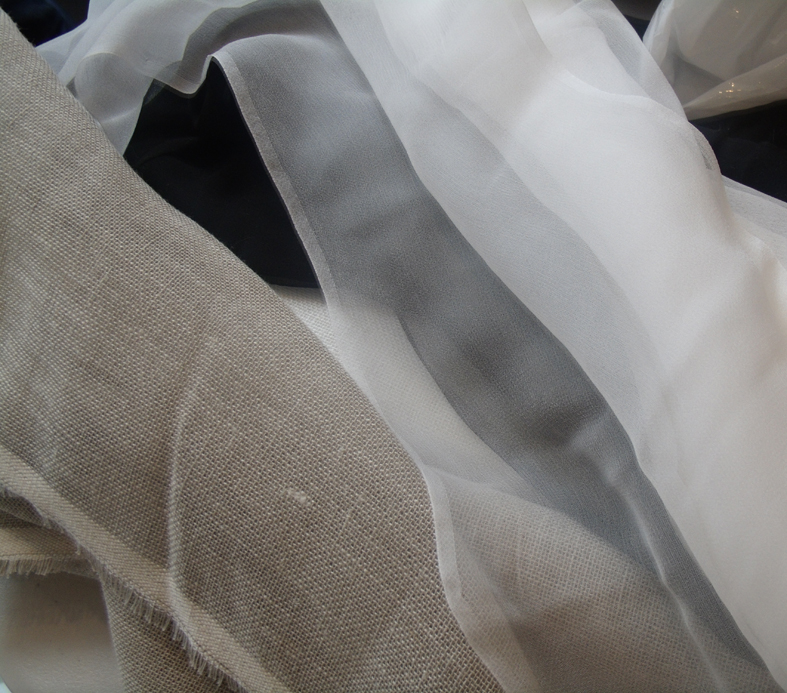
I teamed all these materials with sheer silks and linens from Whaleys of Bradford….
silk chiffon and linen scrim from Bradford
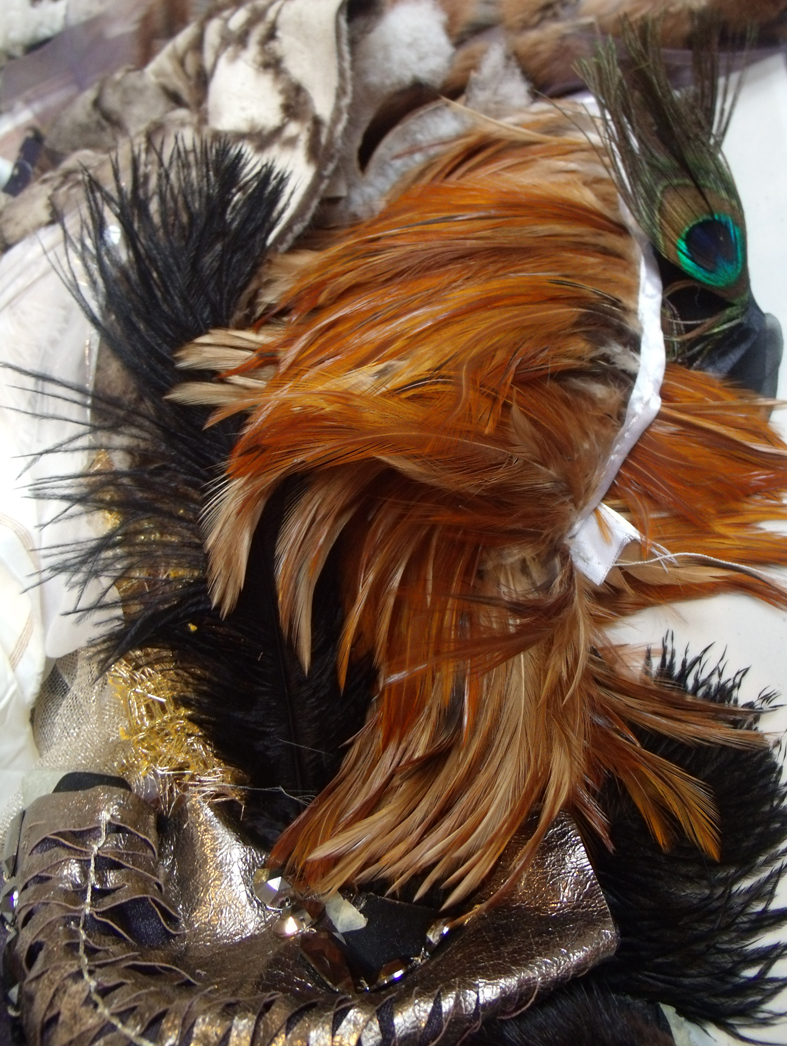
and also a small but beautiful selection of feathers from Buy Feathers, England.
feathers from England
After all this wonderful introduction we had to break for lunch to gain energy to face an afternoon of trying to start to do justice to these materials; everyone was nervous but raring to get going…..and I will show the results on the next post.