
Stitching 3 dimensional flowers is a strange mix of observational drawing, refined stitching and alchemy; the transition of the flat stitched petals freed from their background and applied to form a flower is slightly surreal. I developed this particular skill while making the Flora Embroideries, using the pansy to metamorphose into different forms to develop faces.

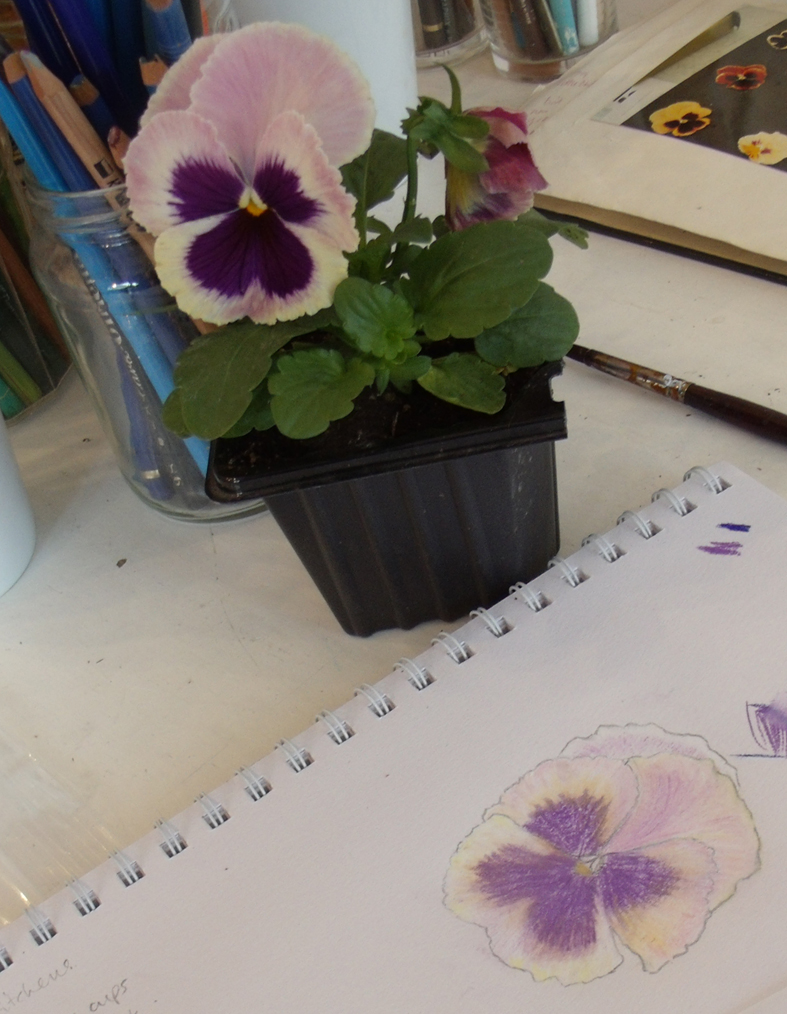
I had been asked by a regular Heart Space Studio student and volunteer, Libby Butler, to teach her to stitch a 3 dimensional pansy – her favourite flower, and knowing that she was a skilled embroiderer I agreed. What I did not know was if she could draw the flowers from life; this is the first essential stage as learning to select the colours and study the growth lines of the petals is most important to develop natural petal patterns – and looking really carefully to draw each petal really concentrates the mind for the stitching that follows.
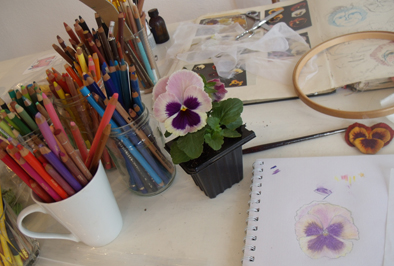
Libby looked a little nervous when I handed her the jars of crayons after selecting her pansy – however after a nervous start she achieved a simple working drawing from which we could establish petal shapes and colourings, now to move to the fabrics….
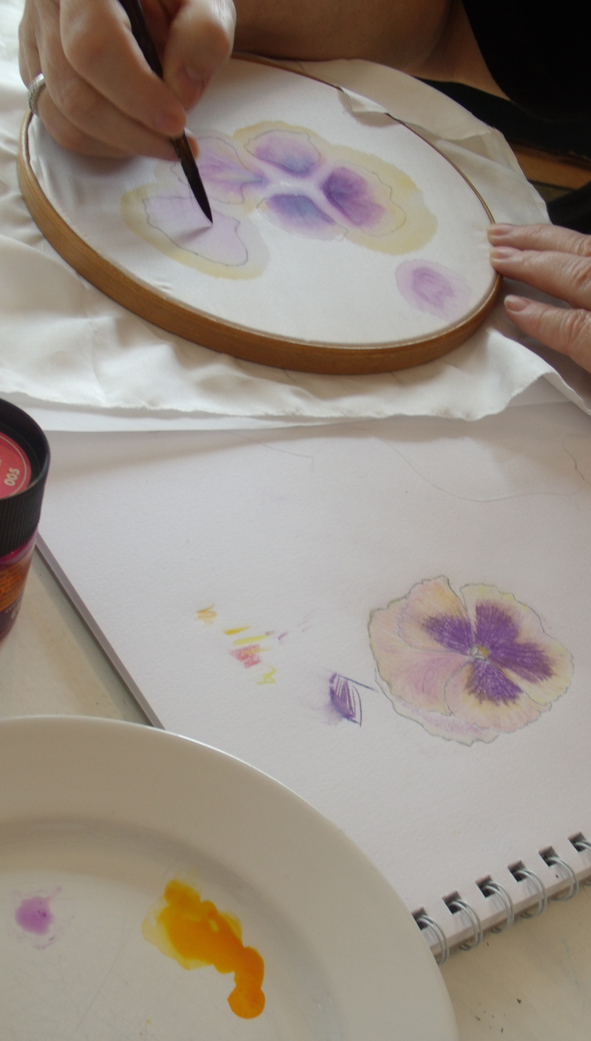
Now to the fabrics – first a thin silk fabric was selected and the individual petals from the drawing were traced onto it in pencil, a light dye was then applied with a paintbrush to give a background colour.
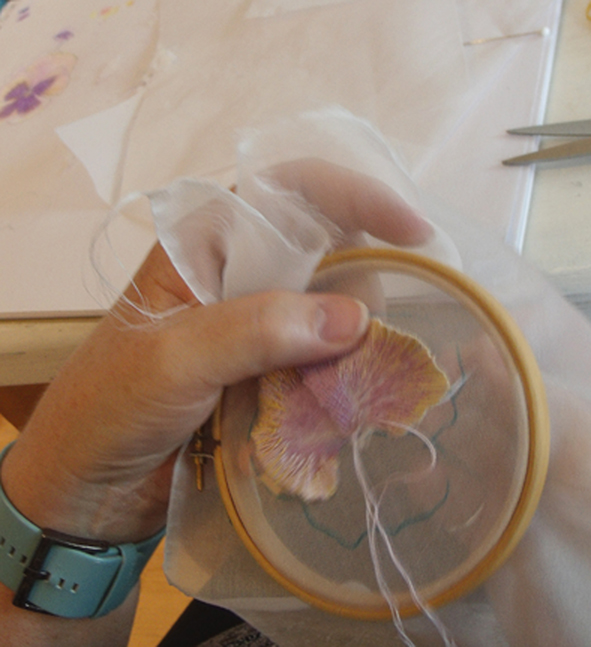
When the dye was dry, a heat transfer fabric adhesive was ironed onto the back of the fabric and each petal was cut out and ironed onto a very fine silk gauze and placed in a small embroidery hoops ready for embroidery – the edge of the silk petal means that the stitches have very strong definition which will be needed later for cuttung out. The silks were matched to the drawing colours and using one strand only, the embroidery was started…
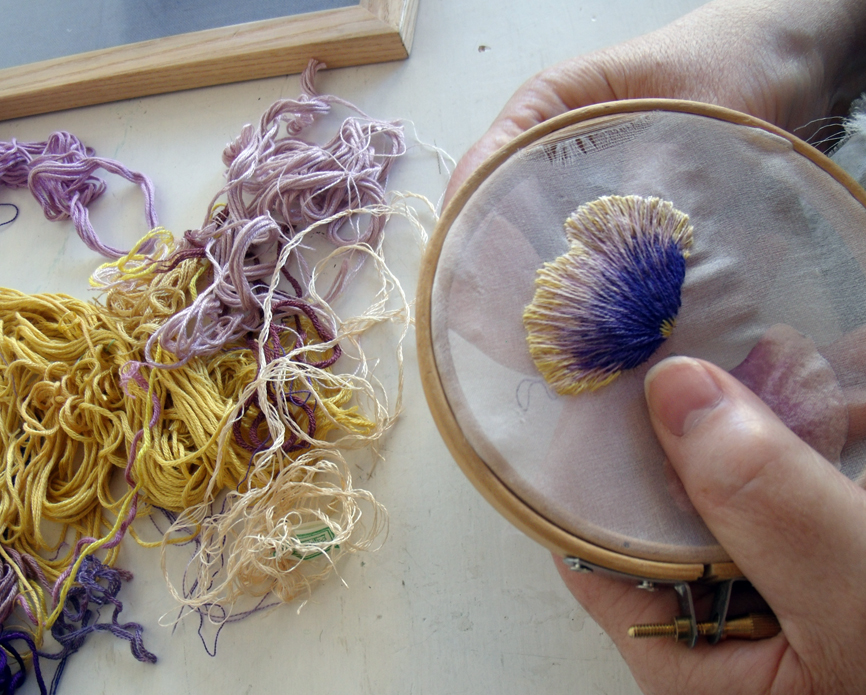
Libby worked one whole petal (see above) by the end of the first day of the 2 day workshop, she then had 1 week to complete the rest of the petals…..she took the drawing home to work from – the drawing is what she is following not the real flower – this is why the drawing needs to be really carefully observed
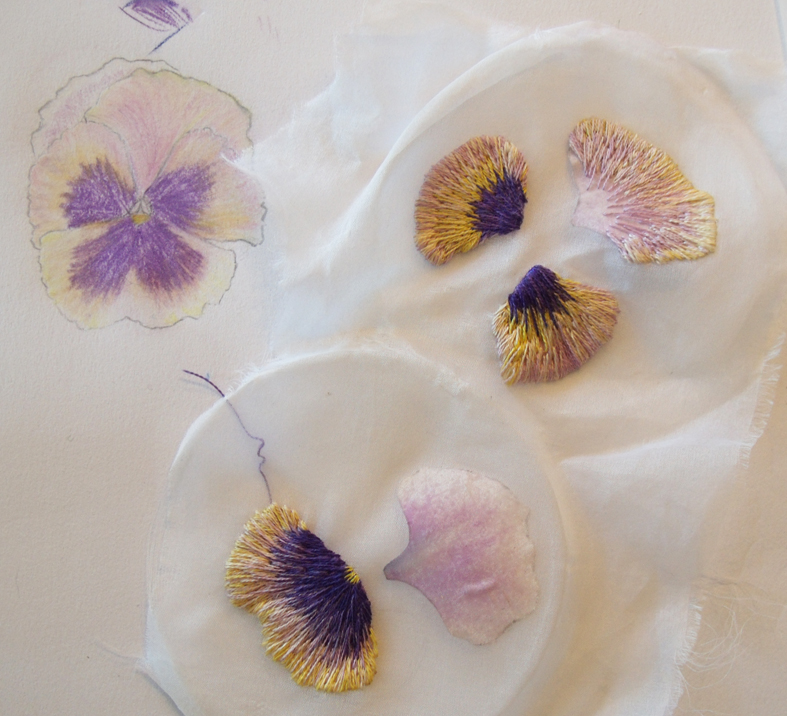
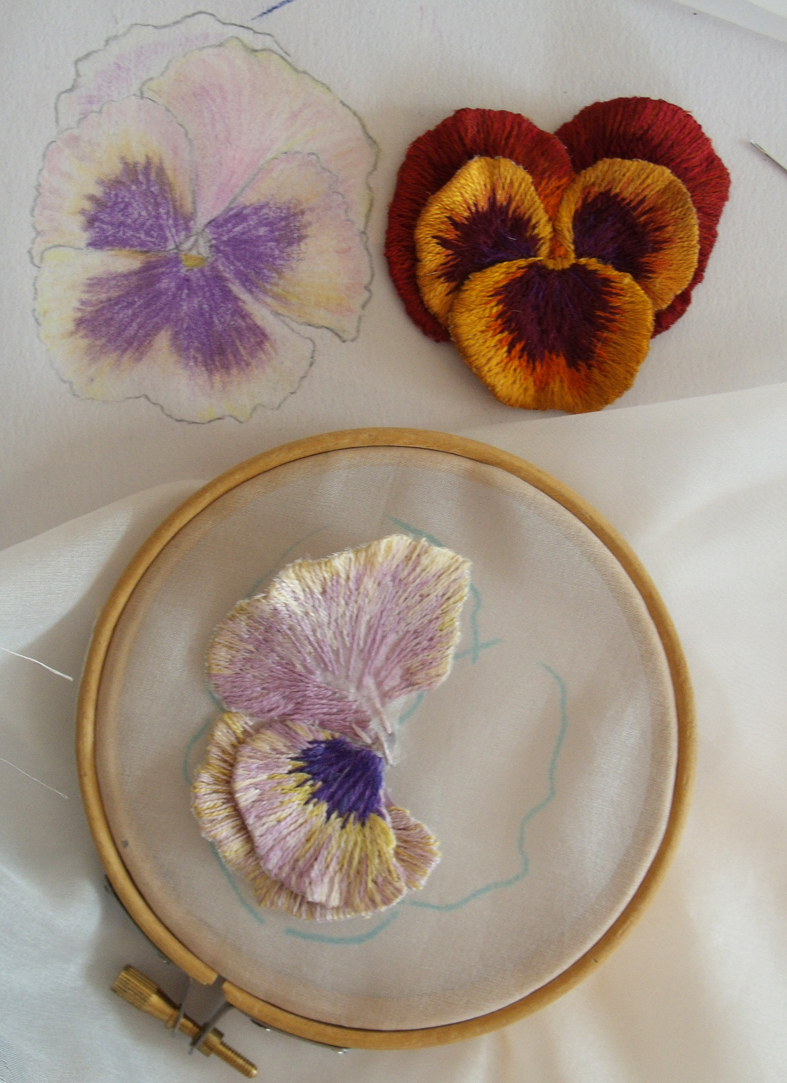
On her return I found that she needed to work a fine blending thread over the transition between the dark purple and light yellow of the pansy to make it look natural but this was quickly achieved – attention needs to be given for the direction of all the stitches so that they follow the lines of growth of the petal – but it is easy to see in bi-coloured pansies.
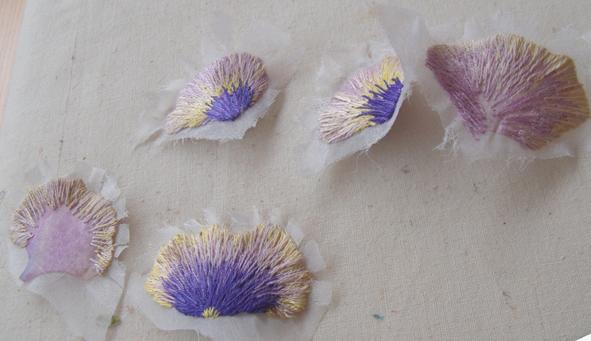
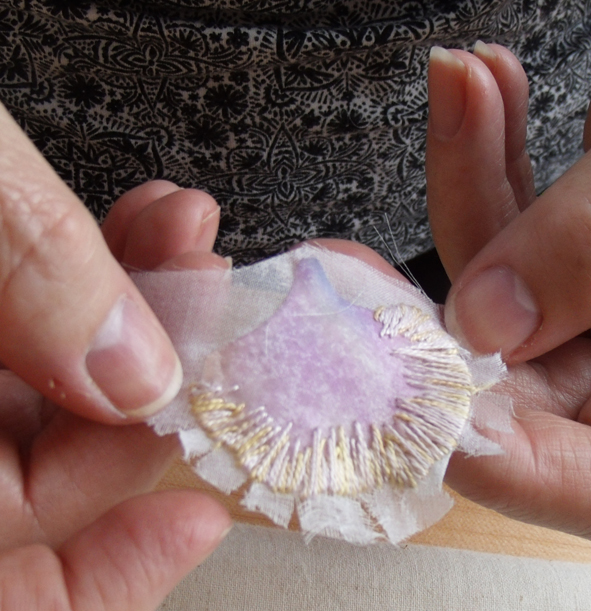
Once the embroidery was complete, the back of the fabrics was once again bonded with heat transfer adhesive and each petal cut out leaving a small area of surrounding silk. Each petal was then pressed from the back while being stretched around the its edge, this sets the stitches and gives a very life – like undulation to the petal edge – but the stitching needs to be very dense to allow this to happen…..then taking courage in both hands the extra fabric is VERY carefully cut away – the bonding keeps the threads in place.
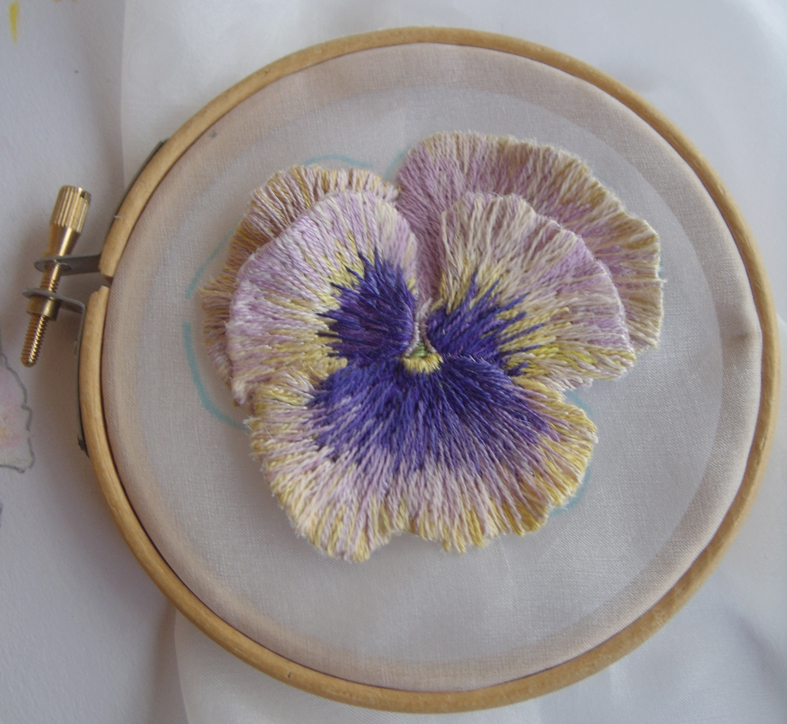
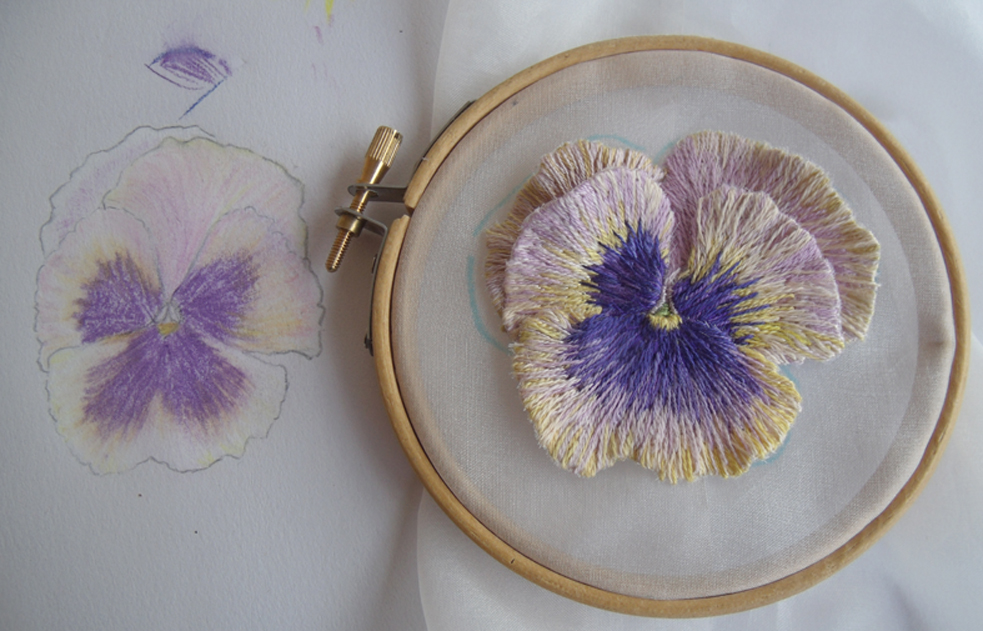
Now the flower formation can begin. On a fresh and final background fabric the original drawing was traced using a water-soluble pen, then each petal is embroidered into position starting from the back, only the middle area needs to be attached – the petals must be left free from the ground
The actual assembly does not take very long but it must be carefully structured so that each petal overlaps the one below it, the original drawing is again of vital importance to this process.
Eventually each petal is placed and the inside edges of the of the petals are is built up and over-sewn and a single central stitch finishes it – Da Da!
Discover more from JANET HAIGH: HER WORK
Subscribe to get the latest posts sent to your email.

Thank you so much for giving this degree of detail about how this embroidery was composed. It is truly magical to see this created in stitch.
LikeLike
Wow, Janet this is so lovely. I’m going to put it on my blog right now :)
LikeLike
Hi Janet!
So wonderful! You have caught flower’s natural expression.
I see that you worked hard with very interesting projects.
I’m still working with hearts and flowers, my favorite now is roses.
If you meet Basil or Dail, give them a big hug from me!
Miss you all
Big hug Tobias W (Sweden)
LikeLike
Hi Tobias,
how good to hear from you again – I still have your bronze? “heart of gold” hanging over my cooker…I am so glad that you are still working with hearts and flowers, as am I – I really loved your flaming flowers.
I have seen Basil recently in London – he is working with me still – we have an exhibition on at present, with lots of other people from my research group, it is at the Bristol Museum – see the post “Making a Mending Exhibition” and Eva Alfredson is coming to see the exhibition next month with him – so I will pass on your hugs then; and today I am seeing Dail who is giving a workshop at the museum for the exhibition….so she too will get a hug from you.
please keep in touch , janet
LikeLike
Hi Janet
sorry for the late reply, I forgot where on your site I wrote.
I’ve even had a flower show here in Sweden which was much appreciated.
Heart I’ve done for you is probably made of iron, bronze color may be due to an annealing method I used.
Janet, what’s your favorite color?
Best regards
Tobias
LikeLike
Hi Tobias,
well this is a very later reply to you but I seem to have got lost in work lately – very very busy and suddenly it is a month since I posted anything and I need to get a grip! i have to now catch up on all the things that I have been up to – a commission and also having a video made of me for another business that I work for – and talking of flowers teaching children to make simple ones at Heart Space…and as to my favourite colour this depends on the material and if I am wearing it, but safe to say either pure turquoise blue/green as seen in the mineral – I wear a lot of turquoise jewellry; or the sort of evening sky blue that is moving towards purple – mauve / blue – can’t really give it another name – sorry,myabe the colour of certain flowers, delphiniums….now you have got me thinking of names for colours…
keep in touch, Janet
LikeLike