Pastel drawing of dramatic cloud hanging over the Welsh coast seen at dawn one Sunday in February 2020…Something wicked this way comes?
I want to show how my stitched work progresses; here is a very heavily edited set of images taken over the last 2 months – from July through to the end of August 2022. Not shown is the unpicking, pulling apart already stitched fabrics and rearranging that leads to frustration and doubt but mixed with delight, calm contemplation and my eventual recognition that, having captured my original vision of this ominous sky, I can stop working on it. The drawing above took less than 1 hour, the piece shown below, more than 8 weeks…..
Week 1
The first stages were quite tricky to lay out using strips of silk georgette onto a pale cotton ground, that had to be kept scrupulously clear of stray threads while building the applique ground.
Week 2
By the end of the second week I had managed to cut the clouds and baste them all into position, then I checked them against my original drawing. The tiny sample of energetic Kantha quilting inspired the way I attempted to stitch the cloud.
Week 3
I started the running stitches in rows of single silk threads to create an undulating rippled surface. After a few unhappy days I stopped stitching, undid as little as i could get away with and inserted more pieces of rust coloured silk organza to give the cloud ‘depth’. The chalk drawing, above right, shows the paths I need to stitch along; I think stitching rhythms into cloth by using the Kantha technique is a bit like patting your head and rubbing your tummy at the same time – tricky!
Weeks 4 & 5
I was determined to use this piece of work to try to find a way of controlling the outer edges of the appliqued fabrics; usually when I make very large drifting Kantha Stitched Skies I leave them to be contained and wrapped out of sight when stretching the finished work. But here the view is much smaller as this black cloud did not extend the whole length of the estuary – it faded out just beyond my window frame. I looked at Georges Seurat (who is a great influence on the way I have developed the colour mixing within my stitched work) and adapted his painted canvas frames – his dots are my stitches ). And eventually the marsh starts to emerge, using large straight slanting stitches
Weeks 6 & 7
However as the stitching progresses the different tensions start to exert itself onto the fabric – where the stitches are close together the fabric width starts to shrink, which is to be encouraged as this gives the curious patterns that I feel are so like air currents…. So the side borders are unpicked and the the whole embroidery is squared up. When I had almost finished stitching I outlined the whole piece using a machine stitch to give me a better guide for the dozens of running stitched lines for the frame.
The finished work “The Dark Cloud” approx.18in ( 45cm) square
These rapid drawings below are early attempts to express one of my most vivid dreams lest I ever forget it…. But the dream was not ready to be forgotten, it has reoccured often in one form or another – evidently I have not learned its message; the loosening ladder rungs and the tiny impossible blue window never change
the earliest drawing above on the left has some written comments that I was interested in using for the embroidery also I seem to have both shoes on; the one on the right is scaled up for embroidering on a sheet! What was I thinking?
Here I am again some years later ( the shoes are getting looser) climbing out of the chaos of my scribbled darning designs for a book that eventually never got published!!!!! with a burning heart to the right and no way back down that ladder. Circa 1998.
So I recently decided to embroider it as a pillow for my ongoing project Make it Through the Night . It is a simple idea and my friends who saw the drawing were highly amused by me in my nightdress losing my shoes…but I started this piece just before the lockdown and now I see it in a very different light.
The most recent drawing I made using a photograph of me in my nightshirt climbing on a chair.
drawing now traced straight onto the pillowcase in water soluble pen – all the drawings alongside
The interpretations of dream referring to ladders are many and varied depending if you are climbing up or down, and a broken rung (just the one) means “you will never achieve your greatest ambitions” while “to lose a shoe is indicative that you have forgotten something important ” or “finding your direction in life difficult” – and as to the lack of underclothes whilst climbing a very high wall in your nightshirt……
I found stitching the ladder the most challenging piece of work, a vintage pillow has only a limited space for inserting embroidery hoops and working straight onto fine linen needs stretching. I preferred to use some natural linen yarns and whip them into position making a more fluid line – finding knots and drawing them became a fascination.
above are the various ways I managed to stitch the ladder into position, with and without a stretcher.
Now to the window: in some dreams it is impossibly teeny tiny, in others I get to go through it – only to find a steep and shaky descent on the other side into more blueness, the one thing always in common is that it is always a brilliant and shining deep blue
the background of the sky is painted with cotton dye, then embroidered in silk threads, it is high up in the farthest corner of the pillow case
and here it is finished – washed, starched and pressed as a proper piece of Household Linen
I feel now that it makes its own statement without the added words; and why should it balance? I mean, what am I describing?
AND it is only after finishing this that I see this is a perfect portrait of how I feel right now – just coming out of the strictest lockdown period….uncanny!
However, we were well into the current lockdown before I had found the impetus to finish this work. And while stitching I realised that I just wanted to stop this whole project that excavates very personal ideas, dreams, mottoes, and observations….I did have more ideas that I planned to stitch, but now I no longer want to make them. It has taken me over 10 years, off and on, to get here.
Affirmative sayings seem to be the philosophy of our times, the be-in-the-here-and-now mindfulness movement. But I have been collecting and pasting all sorts of sayings and mottoes in my work books and on my studio walls for years. Quotations, overheard remarks or messages and even poems from friends sometimes develop into pieces of work, but most often they just serve to enable me to grin and bear with it – see above!
A current favourite was heard when I was mid-way through making the ‘Butterfly Dream Pillow’ – “I am proud of it and I am ashamed of it” immediately struck me as the perfect expression for how I feel about the work I do. I wrote it down on my work-top with the first thing that came to hand – an indelible pink marker! I have read it out to other artists and makers, and they smile and nod in recognition.
A quote from an interview heard on Radio 4 by a musician having just heard his own work played, my heart goes out to him.
It almost made it onto my own Security Blanket, which is part of my ongoing work project, Make it Through the Night..and I did write it out along with the ones that have stood the test of time. I wrote all of them onto large scale graph paper so that my own handwriting could be resized, with the idea of stitching them easily. I have had this ‘affirmative sayings’ idea for several years, and for several different media, even as a vitreous enamel patchwork, but never had the time or energy to face making it. In between some commercial projects, late last year I started to make it – piece-meal.
the first attempt at designing the blanket as a strippy quilt with inspiration from an American quilt
Above show the first attempts to design the ‘blanket’ idea as a quilt; the inspirational Strippy Quilt above right is an American design, I love the wobbly lively stripes, like a flying flag. Initially I had considered stitching a vintage woollen blanket, then I realised that heaving around such a large piece of fabric would not be easy for a lot of hand embroidery. I remembered a Strippy Quilt in Unconventional & Unexpected: American Quilts Below the Radar” by Roderick Kiracoffe, it inspired me to change tack, this way I could stitch the sayings piece-meal and patch them all together at the end; it also meant I didn’t have to decide the order of the quotations immediately.
I started by using some scraps of vintage striped deckchair fabrics, but they were too hard to hand stitch into. I turned to my stash of scrap fabrics, Kaffe Fassett Studio’s lovely subtle shot cottons and woven stripes left over from various quilts that my team have made for his Patchwork and Quilting books were perfect. Very colourful and here very RED, and “the purest and most noble minds are those that love colour”. But not having enough of any one fabric for the background I cut my stripes into strips and joined the clashing shot cotton colours together as a background.
I have a saying that lives with me – a mantra that I recite during my sleepless hours of most nights; it has subtly changed over the years I have used it to still my thoughts, and I can chart my state of mind by what I have decided.
My subtly changed mantra is stitched onto the same set of fabrics, ready to be cut up and placed in the telling positions….
slowly the ‘blanket’ collects more words and becomes unnervingly personal for me; The Reverend Sydney Smith’s sublime epithet for not judging a book by its cover is really barbed, and oooh how many times have I wanted to say this out loud!!!!!
The finalised order pinned together on the quilt wall, tells a story about my working life over the last decade and more……hard to display – but here I am.
Eventually I got them all into order, some sayings were dropped or the blanket would be enormously long I would need to re-design, others were added as they described more succinctly what I wanted to express about how I feel about the work I do. The quotations are all by individuals who have used their life to express themselves, teachers and critics, a bon vivant, a dancer – and me. They are in order from the top, The Rev. Sydney Smith, John Ruskin, Richard Sennett and the last 2 (heavily edited) are by the American dancer Martha Graham. The succinct “Do what you can, with what you have, where you are”. sums up my husband’s philosophy for living…
Now to the ‘quilting’ or just a system of large straight stitches ‘in the ditch’ of the seams, to hold the the layers together. The finished piece is a tad wobbly, due to my inexpert ‘quilting’. Hey Ho, you can’t do it all!
Each quotation has its owner’s name and dates stitched onto the back of the quilt to be in line with the quotation
The finished piece pinned to my studio wall, waiting to be blocked and pressed;
And ” I am proud of it and I am ashamed of it” – go figure!
It is almost 20 years since I had this disturbingly beautiful dream but I have NEVER forgotten it. Re-visiting my sketch books archive, I found the original drawing that was hastily scribbled down when I thankfully I woke up.
Now, I have decided to complete my long standing/stitching on-going work project “Make it Through the Night“, after not working on it for more than 5 years. I have determined to complete the project to a degree where I can hopefully resolve it but so as not have it in my brain as frustrating “unfinished business”. I just can’t ignore it any more…. too much of me resides in it; and as the composer Gustav Holtz puts it ” Compose nothing unless the not composing of it becomes a positive nuisance”
The initial drawing , above left, is dated 28th July 03; the second drawing is another later version when I was trying to make a composition for a stand-alone embroidery….. now I have decided to add it to the ‘dream pillows‘ and I need a different composition. Recently looking very carefully at the 2 drawings I realised I had completely forgotten that the butterfly had a face – YIKES!
In the actual dream it was a giant butterfly several yards/metres wide, dying and lying on some grass underneath a tree, the remnants of wings scattered round it. People were picking up the large technicoloured pieces of shattered wing and I really wanted some as well – but I thought I would get it something to drink first, then decided to pick it up and take it to a nearby puddle, the result was my butterfly covered hands…I abruptly woke up.
I started to research the ways on which I could have held the massive butterfly. I looked at many different British butterflies and chose the Peacock mainly because it was so colourful but it has eyes as well – one of the major symbols I use in my work. Every year we get smaller butterflies over-wintering in the house but these beauties are rare here.
I had my own hand prints on silk, from an earlier area of research and I liked the way the lines of the palm were voided. I now transferred the palm lines to the outlines of my hands so that they would interrupt the wing pattern.
moving around with the photocopied cut out hand shapes to find interesting enlarged wing patterns to embroider.
I enlarged the first peacock butterfly image and cut out my hand shapes…next I had to add the patterns to enable me to stitch the whole hands……the original working drawings below with a a technical sample that I would use for the very complicated patterned hands. I decided to paint dye onto the ground first to give me guidance for the colour blending and to assess the amount of work I would have to manage.
the separate hand drawings with a very crude but vital painted dye and stitching sample.
Next I had to imagine the shattered butterfly – I tried many variations; the shape had to show a degree of violence and some direct connection in the shapes left after my hands had devastated it, because it shows the terrible result for the insect…
3 of many versions of the lay-outs for the pillow, the hand writing is in water soluble pen
I drew the hand outlines and running stitched them, then drew my palmistry lines on each hand and painted dye within the lines and fixed it securely – all of this before I could start stitching, which I was itching to do …..
2 images above show the first and last day’s stitching of the hands. I started this project in early August and now it was late September – I needed to move onto the butterfly now…
working from my research drawings, I drew and embroidered the main area of the butterfly and then placed paper shapes to act as the shattered wings to make some connection to my hands.
research materials and dyed butterfly with the embroidered version with paper shapes in place for the broken wings.
It was at this point that something strange started to happen….I found a trapped Peacock butterfly in the window of my studio, I was delighted, I had never seen one of these in the house; the weather was still warm, so I let him go….
But then more and more Peacocks came into the studio, and in different areas of the house… in all we had 11 different Peacocks visit us. SPOOKY WOOKY……
the 3 photographs are of just some of the 11 different butterflies that came into the house over the last 3 months while finishing the embroidery. The image of the butterfly lying in my palm was taken on 25th December – amazingly it died with it’s wings folded back to show the eyes, I take this as a rare and wonderful Christmas present.
Sadly some of them died indoors and I keep them in m studio – they are all in different conditions; some very tattered wings and faded colour but others still beautiful.
my small collection of some of the autumn visitors I think there is another embroidery here……
so I eventually finished the pillow, completed the writing in running stitch and it is ready to join the Make it Through the Night project.
The Curzon Cinema in Clevedon, North Somerset, https://www.curzon.org.uk is my favourite (actually our only) local cinema; it looks and feels like the picture houses of my childhood in the 1950’s. (photograph above courtesy of Go Bath Bristol) Saved by the community from total dereliction some years ago, it now has a major problem, the roof is leaking and needs major money for repairs. So there was a call – out for local artists to help – decorate an old roof-tile in any way whatsoever ………and they are being auctioned on line next month from 1st December 2019.
the roof tile when it appeared was a bit of a shock, very curvaceous, I applied a layer of organza and turned it on it’s side….a felt a sea scape emerging. the headland of the Kilkenny Bay seen from our house and garden, on late sunny evenings…utterly magical.
The central curve reminded me of the the headland at the end of the bay where I live, Battery Point, on the Severn estuary, fanciful I know but I have many drawings of this view and have made many different types of work from the studies.
I tried many variations of colour scapes from my earlier drawings. I liked the glistening nylon shot fabric for the water, trouble is that the water of this estuary is never a deep true blue, air-force blue is as good as it gets. For some reason I started with the lump on the left…so the view was of the other end of the bay where the sun sets and all the colour emerges from…but it wasn’t working for me – then one morning I just changed it around so it looked like the Battery Point headland…I was suddenly on home ground..or should I say water?
I added the salt marsh fabric, a piece of green and orange shot cotton is the perfect colour of the marsh when the late afternoon sun lights it up in the autumn – the rest of the sky and sea seem purple in comparison.
The task now was to organise the layout of the fabrics so that they would lie in straight lines when they were eventually placed onto the undulating tile …this took some calculations as the tile is wedge shaped but the sea level and the salt- marsh horizons are straight….
I start to running stitch the sky …..but I have decided against the brilliant blue sea I hid it under a translucent layer of silk!
I used the simple running stitches of Kantha technique for this appliqué, I have to get the fabrics to stay together in a soft and malleable form so that I can easily manipulate the fabric over the lumpy tile.
I continue to stitch down the length of the tile – it takes several days but as always fascinating to handle the colour changes. The stitching is quite large and almost crude using a heavy gauge silk thread but very satisfying to do; usually when working this technique I use one single thread of silk and it takes ages and ages to cover the ground
As I continued to stitch the colours became muted and now the once brilliant orange sky was being challenged by the bright green of the salt- marsh; reluctantly I changed the fabric after several different variations of shot cottons had been tried, but there is enough going on in this small space as it is – hey ho!
eventually the finished piece is ready to be mounted onto the tile covered in wadding.
I then covered the tile in a layer of very thin wadding, sticking it down with thins lines of fabric glue so that I could continue to embroider the silk piece to it. I have evolved this technique for covering 3D shaped objects over many years of trial and error but this was a real challenge.
Having aligned the top of the stitching to the top of the tile I tacked it into position, then pinned it all along the undulations…it’s really tricky work trying to keep the horizon lines straight…all those years of pattern cutting came into play! The top and bottom were secured by over stitching onto the back of the tile wadding, pulling and stretching as I proceeded eventually it was securely stitched and bedded into position.
the back and front of the tile side by side – now photographed the tile just looks flat and with wobbly sides…but it feels lovely to hold.
I am really liking the feel of the tile now it is so softly padded and am thinking of possibly making some more stitched covers for other objects – one day. Meanwhile my husband Stephen Jacobson, has painted another view of the estuary using the imprint of the tile manufacturer as a flag with a view of the band stand at Clevedon. And artist Alfred Stockham has painted eyes to create a curious face and called it ” The Man in the IronMask “
hand hem stitched sample of Broderie Perse as sewn on the original quilt
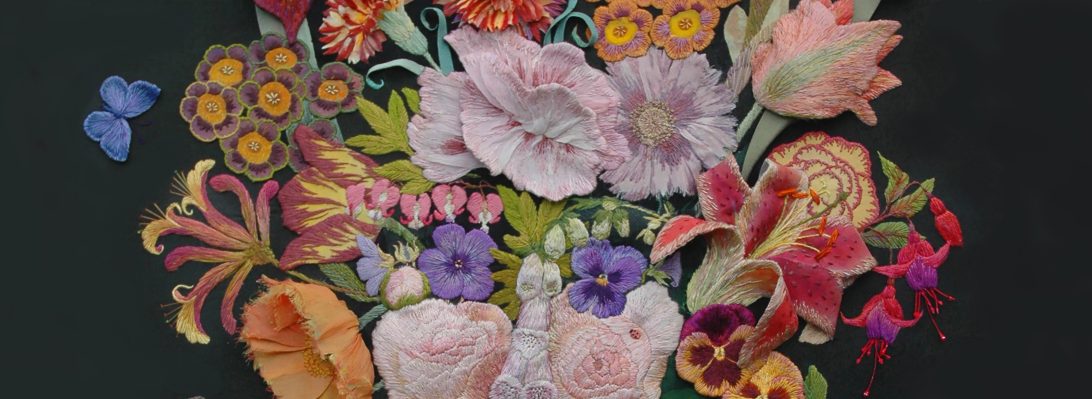
As part of the activities developed for the current Kaffe Fassett exhibition at the American Museum in Britain I am giving 2 separate day workshops to make a small panel of hand appliqué flowers. I am supplying the same fabrics used for the large scale appliquéd quilt that I made for Kaffe to celebrate his 80th birthday.
Kaffe visits his present in the quilt room at the American Museum
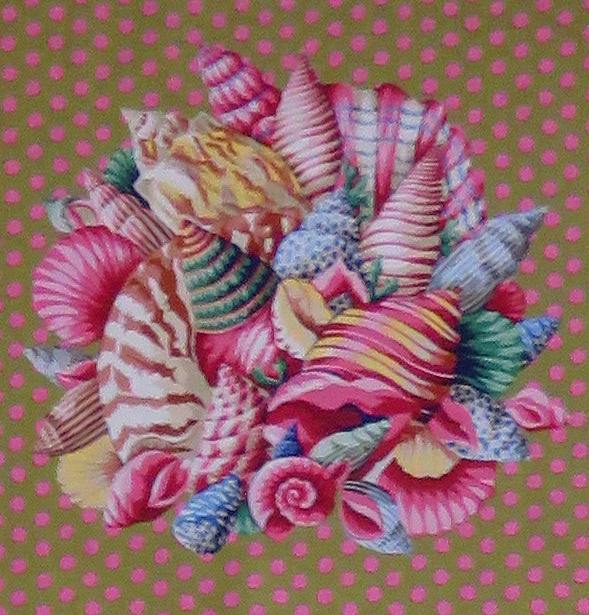
I started the day by taking all the participants to the museum’s Quilt Room to see the original quilt and explained some of the techniques we would cover. I explained my technique of hand stitching over the raw edges of the bonded motifs, which is easier than the original way of turning a small hem and stitching onto the panel. They were asked to design their own version of the appliquéd flower and shell panels – but not the central Kaffe portrait.
Kaffe Fassett Collective fabrics bonded with heat transfer papers
I had prepared a whole sheaf of flowered fabric by pressing heat transfer paper onto the backs of them so they were ready to cut out. I also took the remaining motifs I had cut, but not used, from my quilt. Plus a selection of different coloured squares of Shot Cotton for the backgrounds, these I backed with a woven cotton interlining to strengthen them for appliqué to be sewn without a stretcher or hoop.
Everyone had to choose their own back ground fabric first, this makes finding colours for the individual flowers easier; I know how daunting it is to have so much choice. But they soon got going on the cutting and placing….
The first thing I noticed was that most people put far too many flowers onto the fabric squares with odd gaps between. I had to keep reminding them that this was to be a hand- stitched appliqué and to think about the work involved to finish the stitching later at home….. but even so most people favoured lots and lots of flowers, below shows some work in progress.
After the basic shapes were developed extra flowers could be found in the spare fabrics I had brought, and people could bond and press motifs individually to balance or fill up their basic design. Several people worked as I do and changed their designs a great deal during the design process until they were about satisfied.
Other people had very organised workspaces (very unlike me) and I enjoyed seeing their beautifully laid out tables with all necessary equipment to hand. They seemed to progress steadily and surely, with only a small tweak or suggestion of a different fabric from me
a work table set out with cut motifs and a camera ready to record a successful design
eventually all the designs were organised; some really interesting designs were arrived at by chopping and changing until the last minute…
but eventually everyone had to commit to trimming,
very very carefully trimmed stalks and petals ready to be bonded
then tracing around places with a water soluble pen, before pressing the whole design into position.
and then after a quick demonstration from me – start to stitch it.
a range of embroidery cottons chosen to tone in with the fabric colours are ready to appliqué
They all were very skilled at this very precise stitching, a relief as poor work at this point can ruin all the meticulous care taken after this really intense design stage.
At the end of the afternoon session there was a lovely and varied set of designs and some were already being stitched – with promises from the rest that they would definitely finish them.
the whole ten class participants with their own ready-to stitch appliqué designs.
And for anyone who is interested in joining the next workshop – it is on Saturday September 21st 2019.
My final stitches on the back of quilt appropriately backed with fabric designed by Brandon Mably
This major project started life in 2017 through sheer frustration. For Kaffe Fassett’s 2018 quilt book, based on traditional quilts housed in the American Museum in Britain he had asked that, as a hand embroiderer, I make his revised version of an ‘Broderie Perse’ in their collection. I was delighted.
I immediately started to sample some simple ways to make such a large hand stitched quilt nowadays, plus information notes for others to follow the instructions. However, due to lack of time due to publishing deadlines this quilt was dropped….Rats!
behind the scenes of the American Museum
Later in the year I organised with the museum’s curator, Kate Hebert, to visit the archives with the UK making and publishing team. I asked to see ‘the one that got away’ and on hearing the story, Kate said that if I ever re-considered making the quilt she would show it in the quilt gallery alongside the original. Well of course I jumped at the chance to show work at this museum, and I did want to make the quilt.
I decided that I would make it as a present for Kaffe, it was his 80th birthday in December and I had enjoyed the last 3 years working with him on his books and my contract was at an end. I reasoned I would soon have plenty of time on my hands to complete the project in time for his birthday.
Kaffe Fassett studies new work on the quilt wall in my studio
As I now had ‘carte blanche’ to interpret the design as I liked I decided to make his portrait as one of the panels. Using a recent photograph from his last visit to the studios I set about drawing and scaling the head.
the original drawings scaled up from the photograph
I made carefully measured sketches, and then 2 masks – one to the size of the hexagonal block and the other of the head. My initial idea was to garland the head with flowers – well why not?
first attempt to design the head using some of my favourite fabrics
This looked miserable, and the garland didn’t fit into the hexagon very well – and then I would have to embroider the features; I remembered my ‘Flora’ embroideries influenced by Archimboldo – the artist who made faces from flowers. I tried various flowery fabrics from the Kaffe Fassett Collective.
This selection took several days and I was still not convinced I could make it work well enough, then into my studio stepped an old university colleague from my teaching and researching days, Dr Dawn Mason, with the perfect bunch of flowers to match the work – I believe that chance happenings are not always random
serendipitous flowers – I am on the right track
I persevered. Eventually I chose the fabric placement, cut it out with a tiny seam allowance and hand slip stitched it to a spotty fabric, adjusting the chin to become a tad larger proved successful. Very carefully I placed a blue bud for the eye. Suddenly Kaffe appeared in front to me.
chosen fabric on drawing
perfecting the chin
Now for the hair: I found the white petals of Japanese Chrysanthemum by Phillip Jacobs perfect for my purpose, and so it appears does everyone else; the hair is the thing that gets the attention. In fact most of the fabrics that I used Summer Bouquet and Shell Bouquet and Tulip Extravaganza are designed Phillip Jacobs, his fabrics are so elegantly drawn and painted and the perfect replacement of the original chintzes.
The next stage was to decide the rest of the portrait. For the shirt I had a smidgeon of an old version of Kaffe’s Roman Glass in blue, I had bought years ago – and after many trials chose the fresh Spot fabric in the colour ‘Pond’ for the background.
the finished head
Now for the rest of the patchwork, So far this has taken me about 3 weeks of drawing and stitching – but it is still only June.
the original samples for the American Museum book
I dug out the abandoned samples I had made for the book – I needed to make more other panels to add to the portrait.
To make the bouquets, the fabric has to be backed with a bonding paper, carefully cut out, placed into position by re-arranging the various elements to fit harmoniously, pressed, then hand stitched around each raw edge, the stitching is quicker than the arranging and my idea of blissful work.
The quilt slowly started to grow; but trying to control the overall colour was the most difficult thing – colours that work on their own or in a sketch suddenly look drab or take on another shade when placed next to one another – obviously. But the colours of the flowers changed the balance every time I added a new panel. It was my major ongoing and fascinating struggle to get these balances to work.
my textile studio September 2017
By September I had eventually made my fabric decisions, I had to make multiple versions of some of the panels – all in different colour-ways, but this gave cohesion to the busy design. I also added 4 shell corners, this was possibly the easiest panel to apply as the size was perfect and the shape fitted – just a few additions to balance colour.
making larger Brassica panels
Above shows the development of the Brassica panels, they needed to be made larger by adding extra rows of leaves before hand sewing them onto the grounds.
The next stage was to add the diamond shaped patches at the intersections of the squares.
the added diamonds start to assert themselves
And this is when the panic started – suddenly this massive work, that had grown over months took off in another direction, these diamonds dominated the entire design – already busy, this was manic
The only thing was to keep going – too late to stop now – the samples below looked fine
hand stitched applique
sample of pinned Phased Stripe by Renaissance Ribbons
I started to applique the tiny cut squares from Kaffe’s fabrics, Sunburst onto Shot Cotton dozens of them, all hand stitched in 2 colours and I slowly added them to the quilt on the wall ….and the result below doesn’t have all the dividing ribbon strips yet!
without the addition of all the ribbons – hells’teeth!
This was beginning to look overloaded, so I called in my 2 trusted quilt makers, Julie Harvey and Ilaria Padovani – they have very sound taste in all things quilt, and I knew they would tell me the truth. They just laughed and said “well it is for Kaffe and ‘more is more’ with him – why are you worried’?
It was the addition of the ribbons, kindly donated to me by both Edith Minne, owner of Renaissance Ribbons and Brandon Mably (who was in on the secret) that tipped the balance of the work and I suddenly understood that the work had ceased to be mine – it was now Kaffe’s. This happens when you are commissioned to design and make stuff for people – you need to work with their ideas/tastes/preferences – otherwise they don’t pay you! But this wasn’t a commission this was a present, and it was all my own work – I realised now just how much I have been influenced by working alongside him.
the quilt starts to look like it belongs to Kaffe
So I machined in place all the ribbons – a mammoth task for a hand embroider! they were very tricky to manipulate especially as I had to split many yards of a wider ribbon to get the correct proportion, both Edith and Brandon were out of stock of the narrow version. Hey ho! Thankfully Julie machine stitched it all into position first and then I started to hand quilt all around my stitched applique – another mammoth task, but so rewarding, the quilt looks suitable wonky – in a good way – it looks very hand made
March 2018, finally finished – I thought!
It was completed in March 2018 but I had not time to deliver it; then Kaffe was awarded an MBE and I know I have to include this – so back again to the finished quilt
I made a sample first and then the real thing and appliqued it to the ‘finished’ portrait
portrait complete with medal
In Bath, where Kaffe and Candace Behouth, have an exhibition together based on Flowers , I delivered another set of 5 quilts for the next book and my “surprise”
And Kaffe’s reaction when he was shown it?
Worth every moment.. I made the sample into a badge for Brandon – this says it all!
My recent meeting with Lillian Delavoryas is, in her words “serendipitous” and in mine “bizarre”. During October 2017 I was visiting various friends who were taking part in the annual West Bristol Arts Trail . The artist, Anna Christy, recommended that I visit the studio of another friend of hers who, “used to design textiles”; she was sure that we had a lot in common. I recognised the name immediately, but it was late in the day and the studios were all closing, so with 10 minutes to spare I rushed into the signed doorway, and felt that my working life had come full circle.
Paintings hung on the bookshelves – all for sale
I walked into a sitting room full of people and hung with small jewel-like paintings of people, landscapes and flowers. lovely work but this wasn’t what I was expecting!
wool tambour work wall hanging
but in an adjoining room I saw a large blue and mauve flowered embroidery, this looked more familiar. then delving further into the exhibition I found a piece of work I recognised, Nicotianas.
Nicotianas – Lilian Delavoryas
I had just a little time before she closed, and although I had never met her, I realised who she was, sitting on a settee amidst cushions that I also knew were her designs. Thanking her for the opportunity of seeing the exhibition, I introduced myself and explained that I often worked with Kaffe Fassett, organising the production of his patchwork quilts for publication and exhibition. Also that I had worked on the original “Good Housekeeping Encyclopaedia of Needlecraft, first published in 1979 by Ebury Press and was now delighted to see some of her original work.
2 days later, she emailed me asking that I visit her with the idea of helping to find a home for her collection of textile based books and various pieces of her old work , some half-finished canvases, needle work samples and painted design drawings. She thought it could all go to a school as an aid to design education!
Lillian Delavoryas and Kaffe Fassett and were leading textile designers in the late 1970’s, when I first left college and became a freelance designer and illustrator in the Fashion industry. Influenced, no doubt, by their work I taught myself to hand embroider onto canvas as a way of the easing the frustration of my hectic working life. But my early works were tiny, so when I saw the scale of these pieces I was deeply impressed. Kaffe and Lillian knew one another when they both lived in America and he is responsible for bringing her to the UK, in order for her work to be recognised here.
page of Kaffe Fassett’s and Lillian Delavorayas’ work Good Housekeeping encyclopedia of Needle Work
Good Housekeeping pages with my tiny work blown out of proportion next to Lillian’s
For the past 3 years I have been working directly with Kaffe Fassett, organising the making of his patchwork quilt designs as well as other stitching projects. I was recommended to him by Susan Berry, the publishing consultant of his major series of patchwork books. Susan was the first person to commission me in publishing, and I have worked with her on many projects over the intervening years. So now you see the complete circle!
needlepoint hanging – vase of flowers, the corner of which can be seen on the page above
When I visited, Lillian had organised a whole lot of different books, copies of articles featuring her past textiles and the promised samples.
various cushion cover designs
sample stitched bid on large drawn canvas
Also, and this I did not expect, samples and books of fabric and wall paper designs from Designers Guild circa 1980’s , all looking very familiar to me. Lillian assured me that she had ceramics to match somewhere in her flat, and a lot more besides – if I was interested….
2 wrapping papers
Designers Guild fabric samples
beautiful water-colour and pencil design drawing
Assessing what I was looking at – a part-archive of an innovative and influential designer of 20th century textiles, I suggested that she collect as much of her work as she could locate and that we try to tell her textile design ‘story’. I thought that it would eventually become of interest either for a museum to keep as an archive and a work-in-progress exhibit, or to students undertaking higher degrees, to research and catalogue it all, enabling her to be set within the context of 20th century design.
Lillian Delavoryas October 2017
This is an ongoing story. My next contact was Hugh Ehrman of “Ehrman Tapestry” for whom Lillian, Kaffe and I have worked. Explaining to him of my serendipitous meeting he at once visited me, bringing a folder of painted paper designs that his company had held on her behalf…but that will be covered in the next post on this saga.
although I was not aware of it at the time I wrote this blog this is the very last post for Heart Space Studios…we conducted many more parties, clubs and classes , we have now ceased trading as a class based studio – however I continue to make my work and explain many different ways of constructing and thinking about the making of ‘Her Work‘ in my ongoing blog http://www.janethaighherwork.com.
Susi Bancroft stitching her suspended large Kantha piece in Heart Space Studios
Autumn is here and the new term started for Kantha Club – run by Susi Bancroft for Heart Space Studios. We all wanted to swap summer experiences and stories and show what we had been up to – or not!
Kay at the back of the Kantha sheet – the light shining though the colour was lovely, showing up the rows of stitches.
Susi had embarked on a very large piece ( I meanwhile had put my first attempt at a large piece aside). She had dyed the fabric in Turmeric and Tea to get this very subtle yellow. She finds it easier to hold the needle at the eye end to keep the cloth steady – so each stitch requires 2 hands on the needle, standing to work on such a large-scale fabric she says ” I am surrounded by beautiful colour with the light behind you, like being cocooned in colour “
closed hand with thumb kept into palm = the narrow band
wide open hand = the wide band of stitches
Explaining how she made decisions for spacing the stitching bands by using simple hand measurements she said “I used the fact that I couldn’t see the whole cloth working so close up so the hand spans were the measurement I adopted”
hand spans for the gaps between stitching lines
to enable her to keep stitching rhythmically while standing up, she threaded several needles at a time in different colours, using each as she felt that she wanted them – relying on her instinct for the colour striations, she enjoyed the feeling of the fabric being “just being out of my reach’ whilst she worked.
Kay Swancutt showed us some dying samples that she had stitched , she had exhibited these recently at Nature in Art and used many natural materials to make the different patterns and colours
samples of natural dyed fabrics by Kay Swancutt
more of Kay’s experimental samples
Steph Wooster brought several examples of her earlier drawn textile work that she has now worked with a kantha stitched ground…these were also exhibited at Nature in Art and I feel that they could lead to even more intricate background stitched patterns – I am thinking animal skin patterns, leaves, grass..
Steph Wooster’s Biro drawing of animals from the Bristol Museum, augmented with ripples of stitching
I particularly like the combination of the stark elegant drawings and the tone on tone rippled grounds.
Biro drawing of animals and kantha stitched ground – Steph Wooster
she also brought a new piece fabric that she wanted some feedback from us – it was a parachute silk sheet, very old and damaged,
choosing coloured threads to mend the fragile silk sheet
she wanted to mend it – we suggested she start with the weakest area.
carefully searching for the weakest points ot start to mend using Kantha as a technique
Meanwhile Naomi Clarke has been having fun just using Kantha technique to stitch the patterned cloth and also appliqueing it to the tie- dyed ground – as a technique this could really be developed to make lively fabrics
Naomi Clarke’s Kantha applique
I had started another project in the break – a quilt based on a painting by Alfred Stockham, an old friend and ex colleague, it is a small painting that had always called to me to be made as a patchwork…
oil painting by Alfred Stockham
starting in the top right hand corner I ripped some pieces of shot cottons into squares and strips and stitched them down onto a red cotton ground…the coours of the threads made for the nuance of his dragged brush marks
starting the squares of painting patchwork
completed square of kantha stitched patchwork
during the last few hectic weeks of launching my book it has been a relief to get back to simply stitching these square transitions from paint to cloth
I am interested to see how each square is in itself a small complete composition
I am fascinated by this work but it may take some time to get finished
the start of the first row of patches for the painting quilt.