Surf, Turf and Sky : The Works

Kari Furre, tiny sculpture of fish scales, vellum and feathers

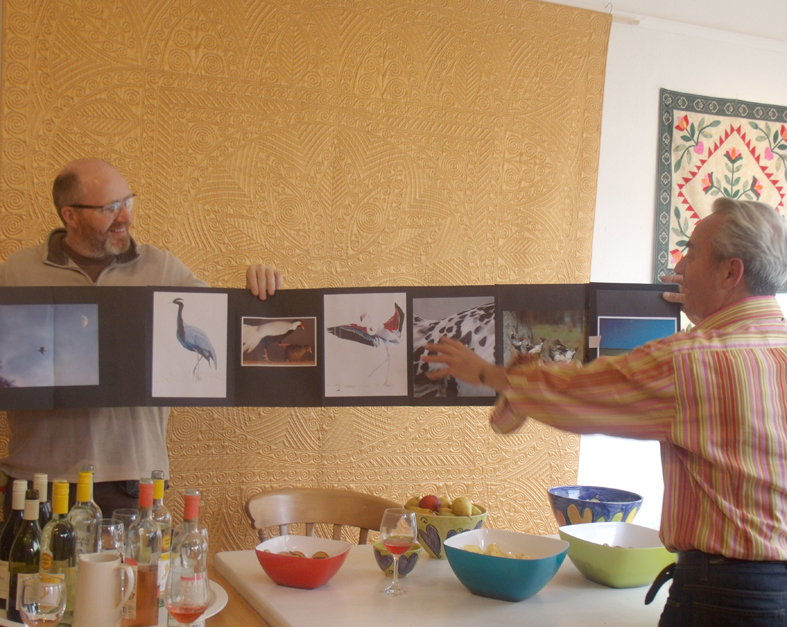
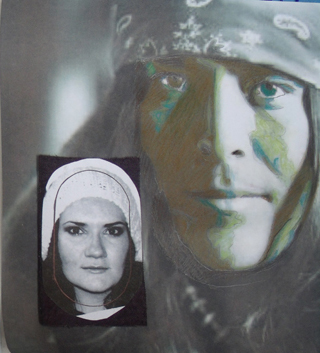
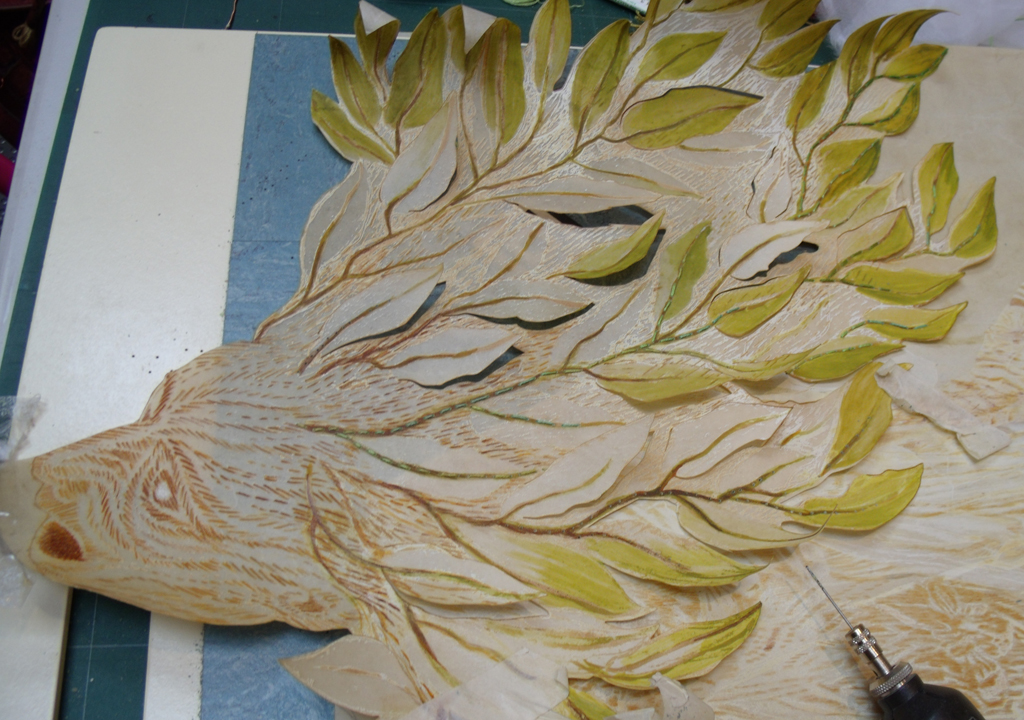
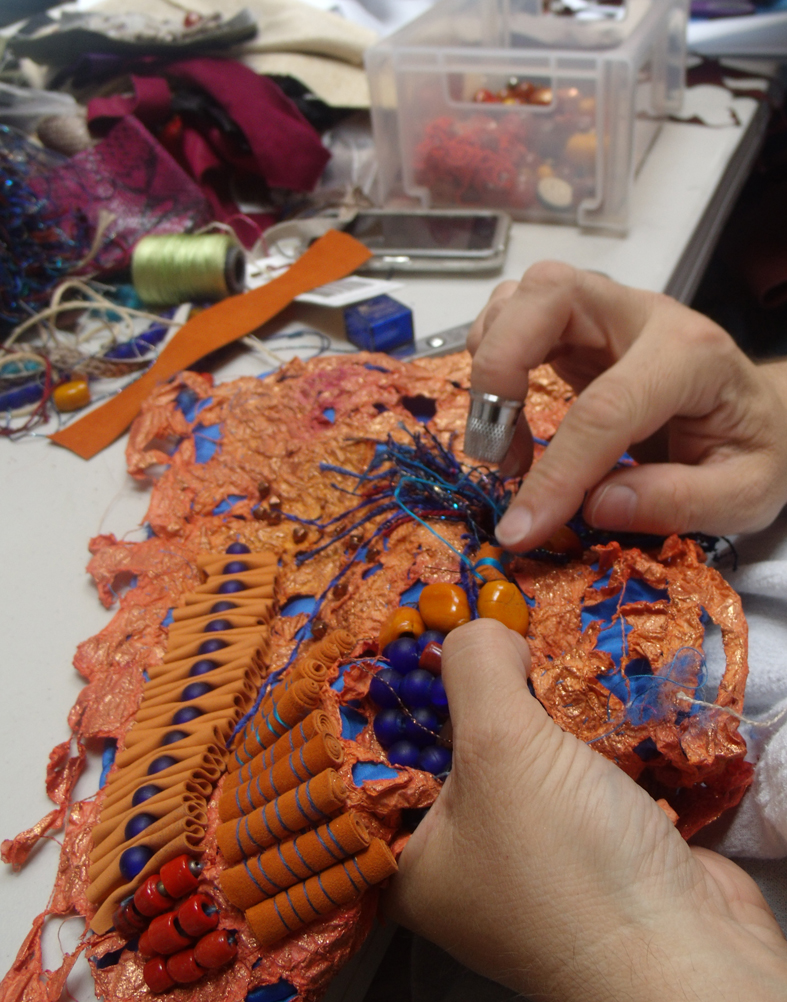
The strange tiny sculpture, shown above combines all 3 elements of the Surf Turf & Sky master class recently run by Basil Kardasis for Heart Space Studios in Bristol. In fact looking through all my 120+ images  taken throughout the 2 days, this is the only piece of work that uses the 3 materials together. The participants came from several disciplines, but whether, professional or amateur makers, all were highly skilled makers in their chosen craft. They were tasked with creating 3 samples using any of the materials on offer, in order to develop them further to enable them to be exhibited at a later date.

Kari Furre’s black chiffon and feather fabric.

On her web site, Kari Furre describes herself as a sculptor and metal-smith, but took to making textiles readily; the results of her research in the workshop look decidedly sculptural and incorporate 3 dimensions even in her initial fabric based work

I know from my own, hard won, experience that when faced with strange and challenging materials the mature maker will often instinctively return to the core of their own experience and utilise familiar techniques to explore the new materials…resulting in imaginative samples and ideas. This is the main reason why I wanted to develop master classes for Heart Space Studios, to introduce new ways of thinking to mature makers through unfamiliar materials ( rather than the more usual workshops that teach new techniques). And Kari certainly made completely different fabrics and samples for the group to wonder at.

Kari Furre – cut and jointed feather pieces

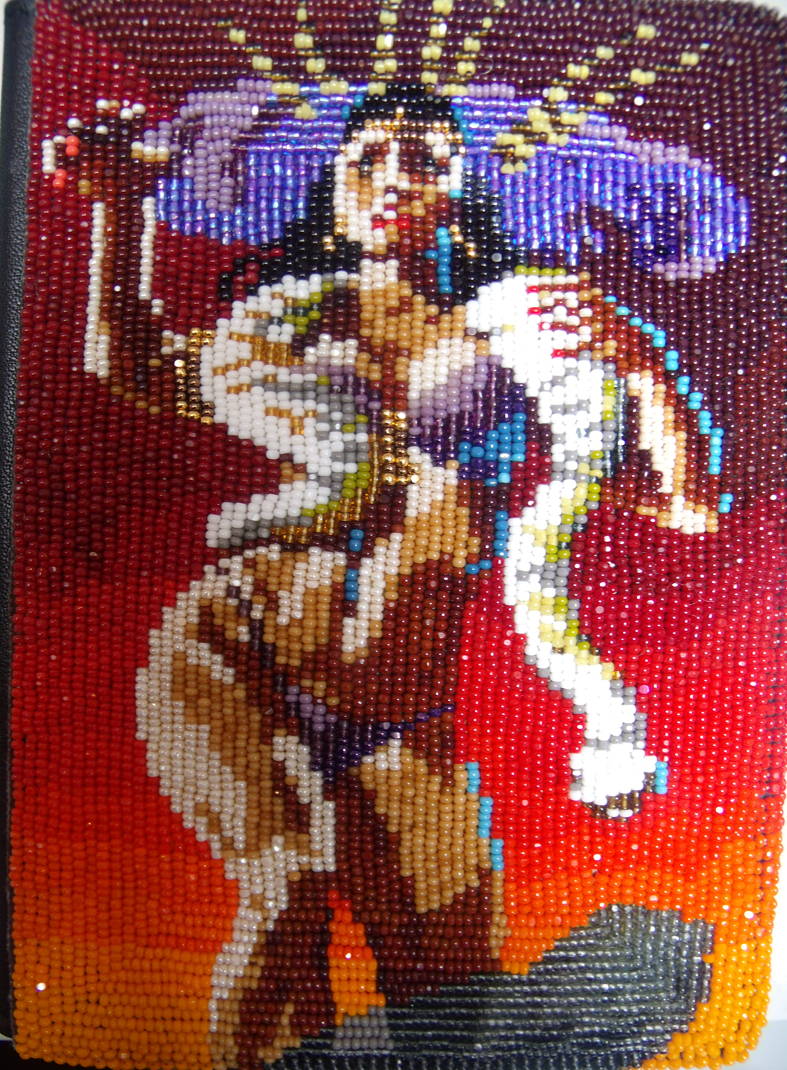
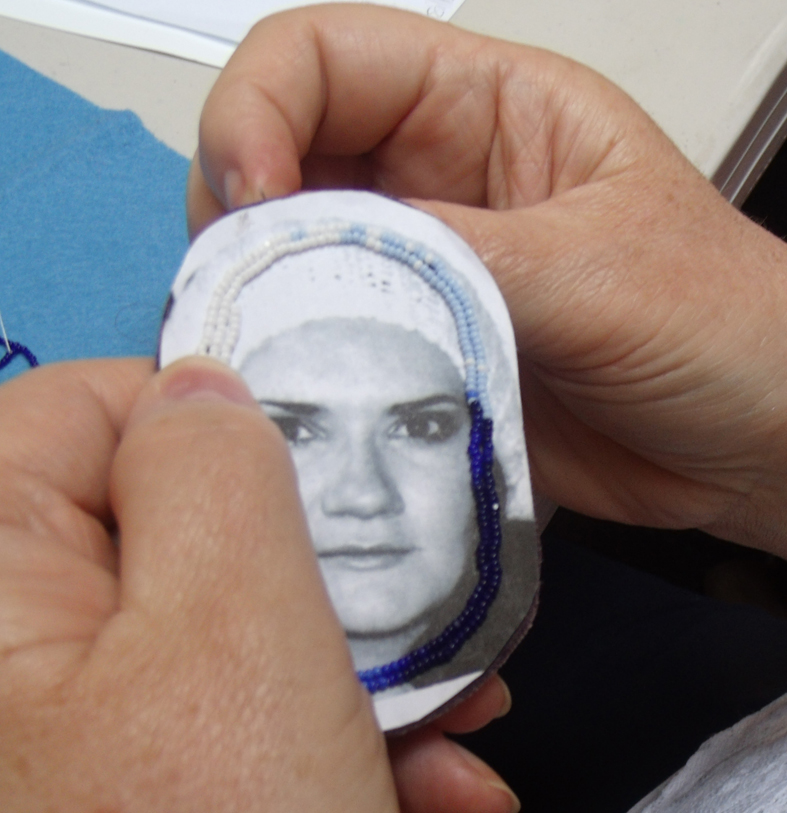
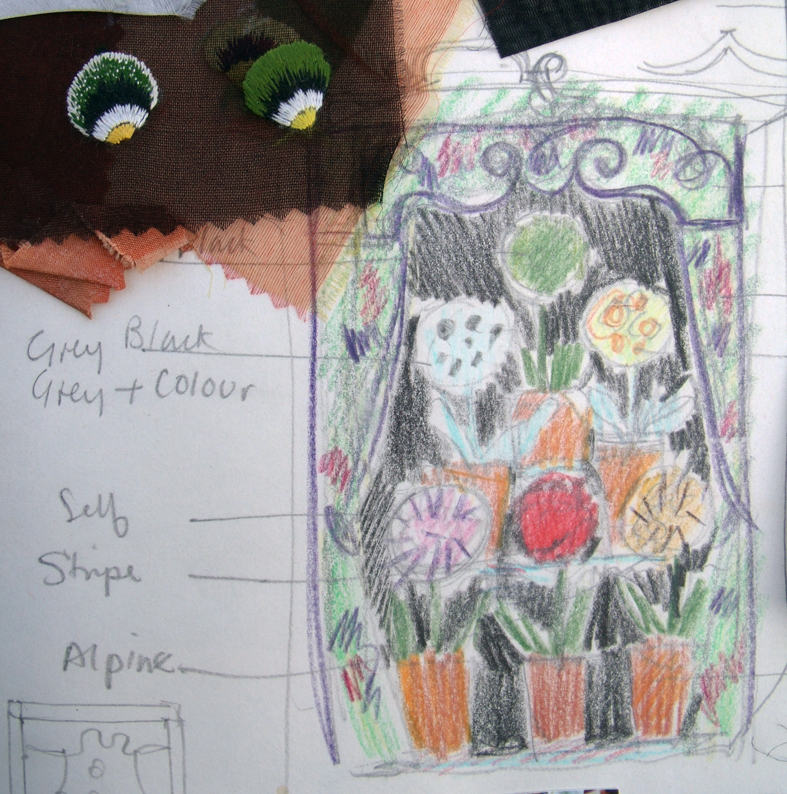
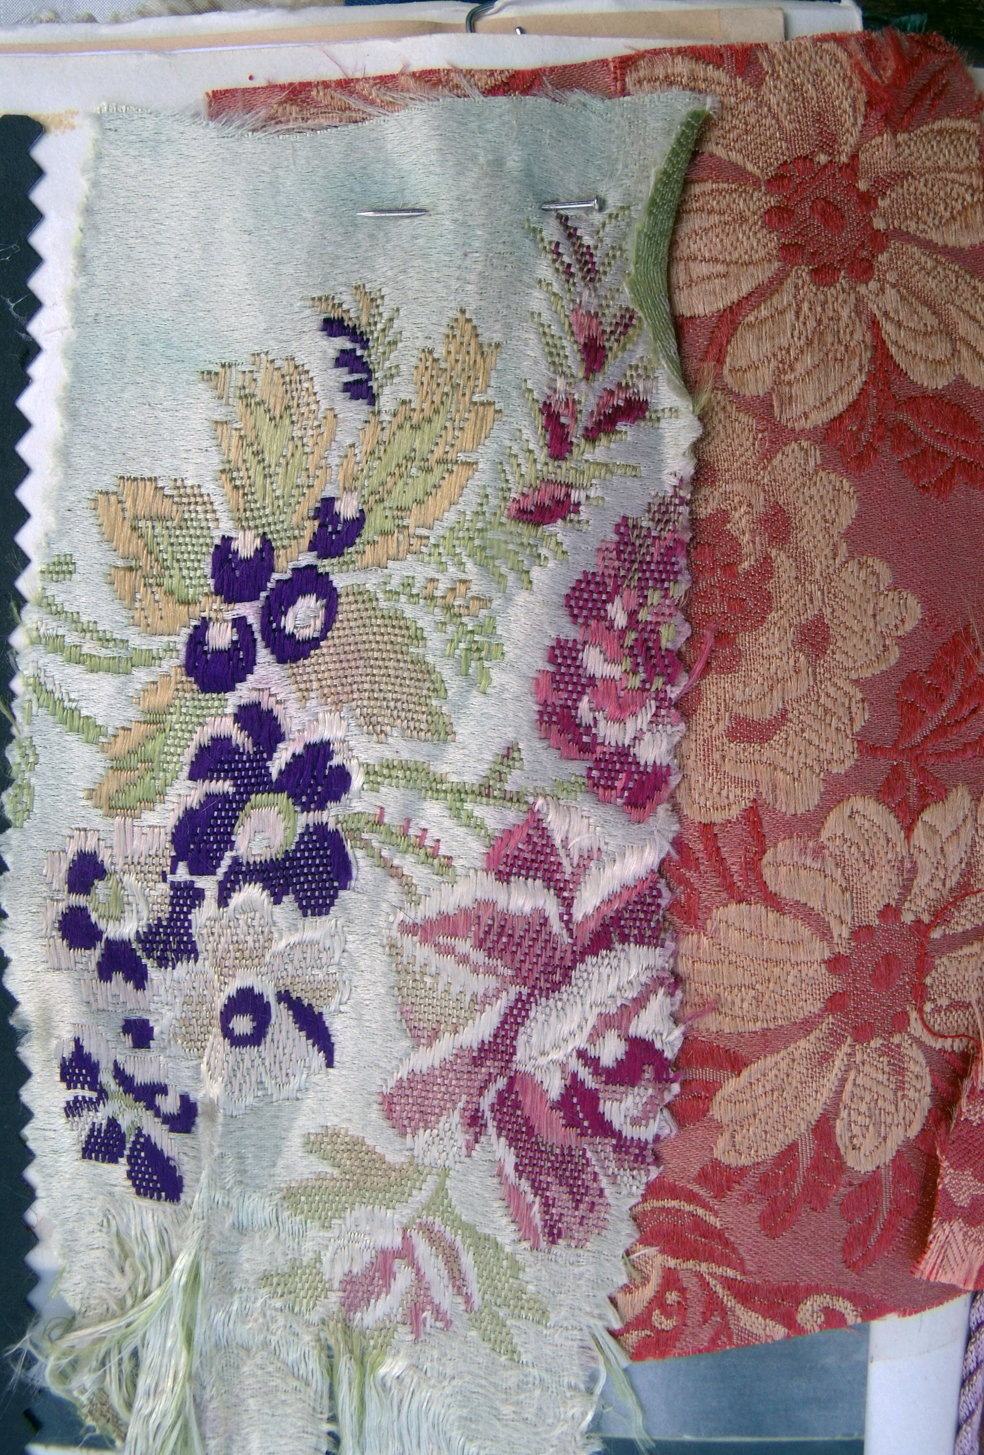
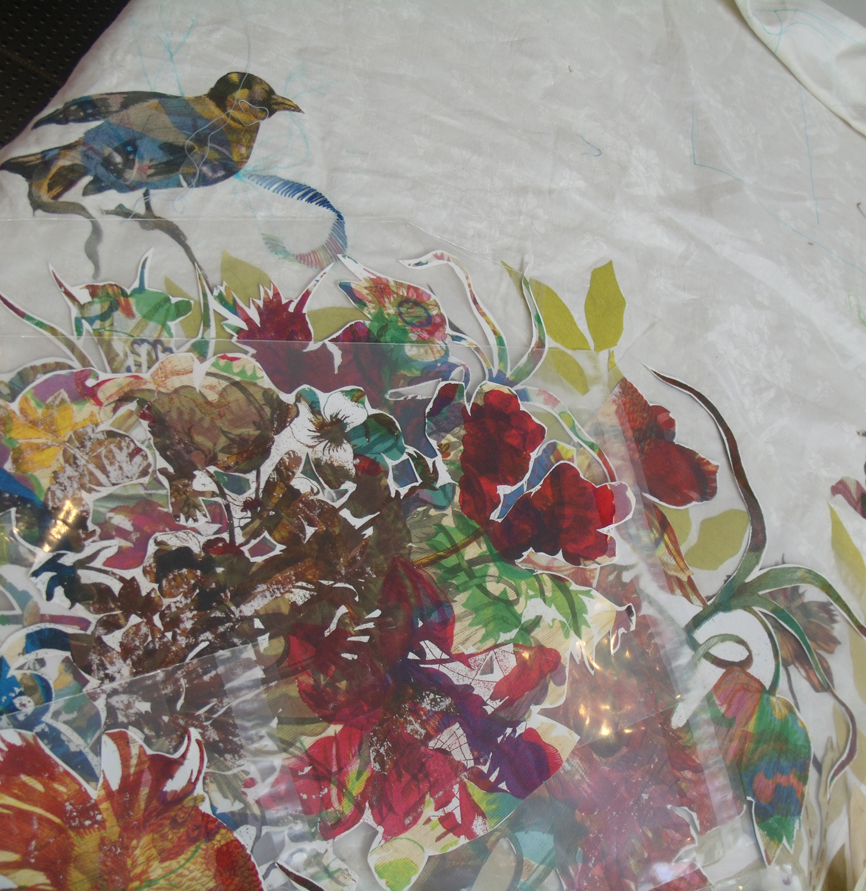
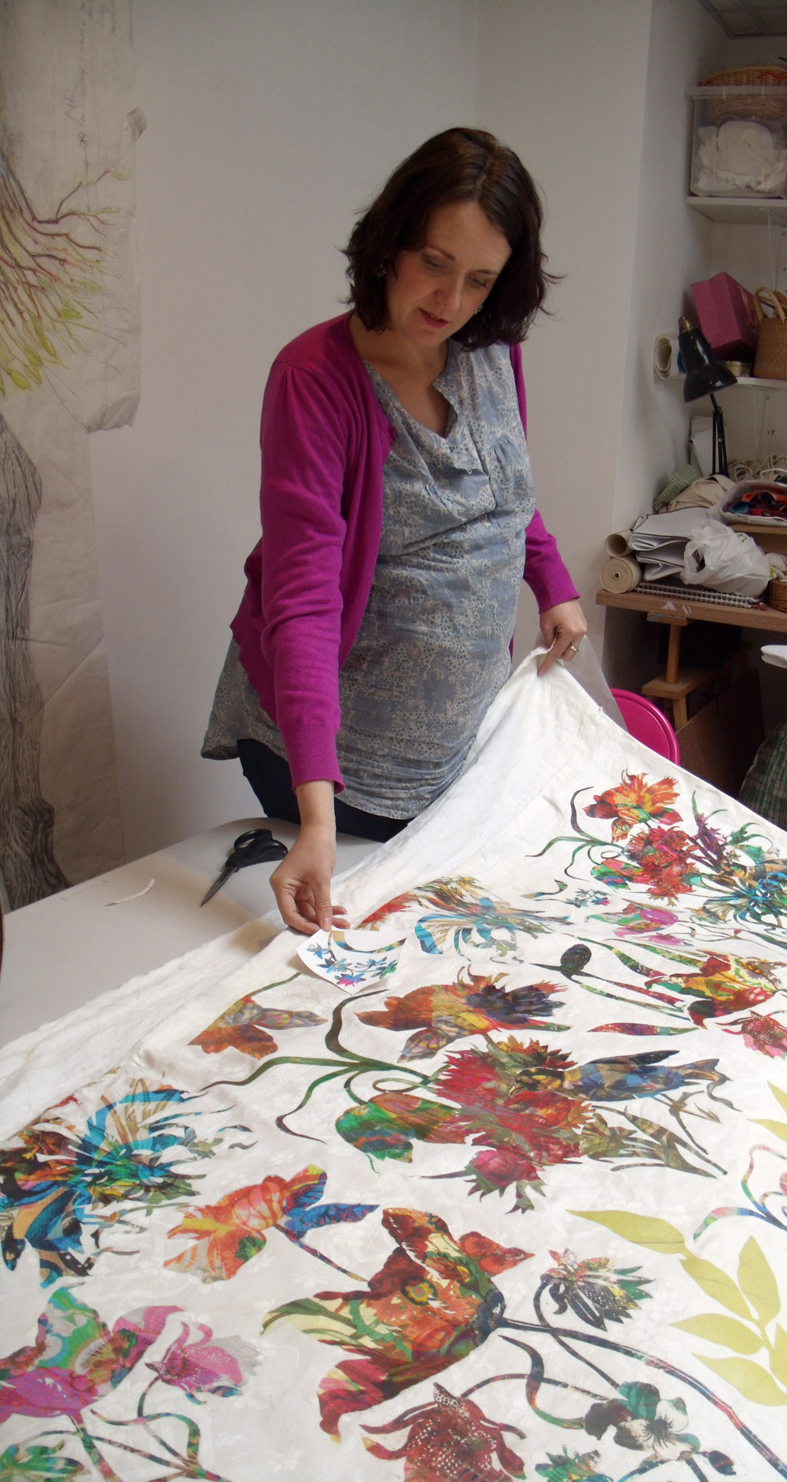
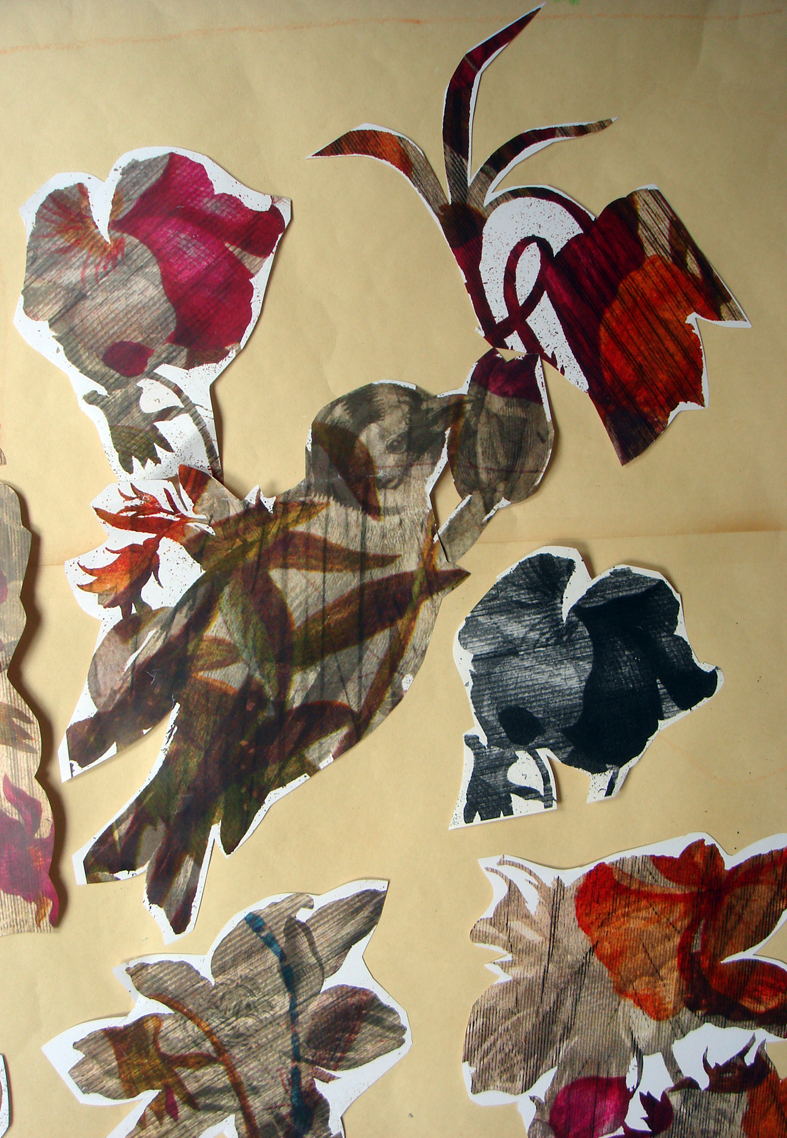
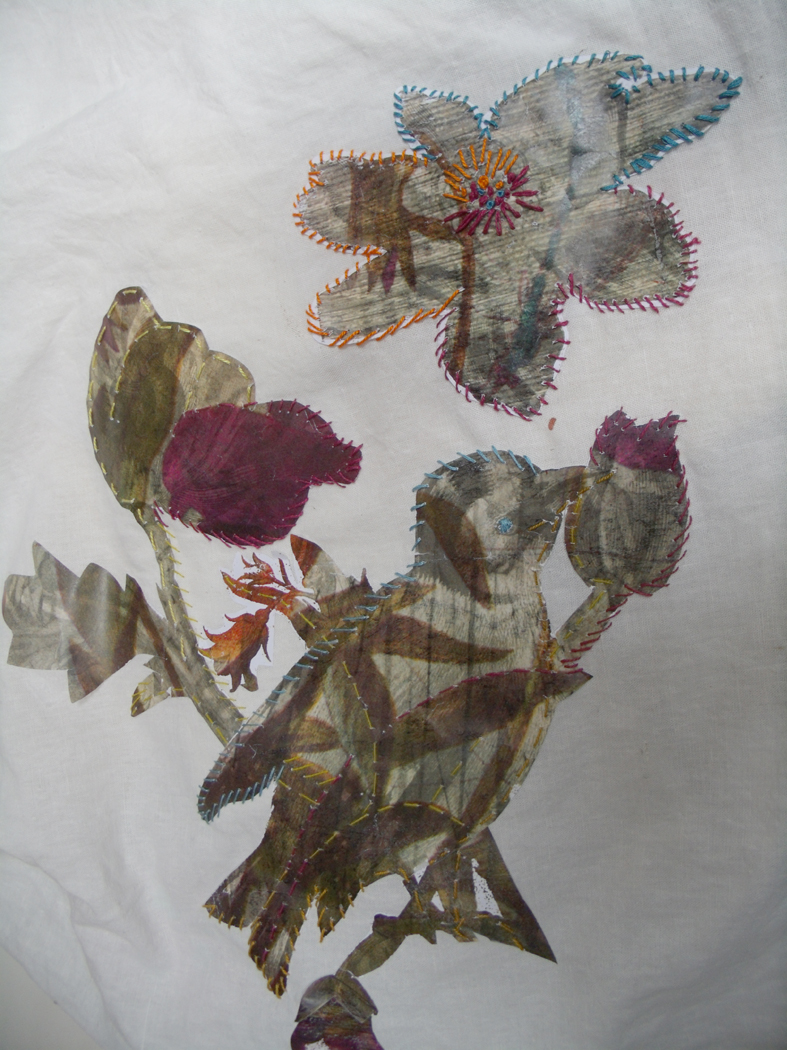
The same behaviour can be seen in Ann Rippin’s embroidered collage of silk, beads and, as far as I can see, anything but leather, fish and feathers for her first day’s efforts. To see and read a more insightful record of her experience, click here Ann Rippin’s blog. But even though Ann didn’t use much of the unusual material provided by the workshop she certainly became inspired to develop wonderful work from things she had stashed away not knowing how to develop them.

Ann Rippin – scrunched, pleated linen silk and beaded sampler

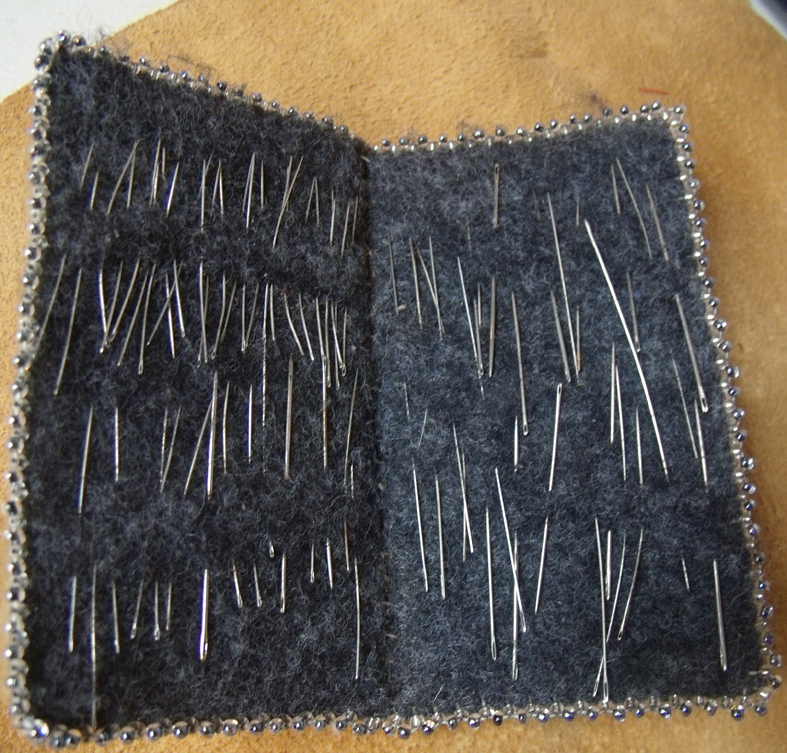
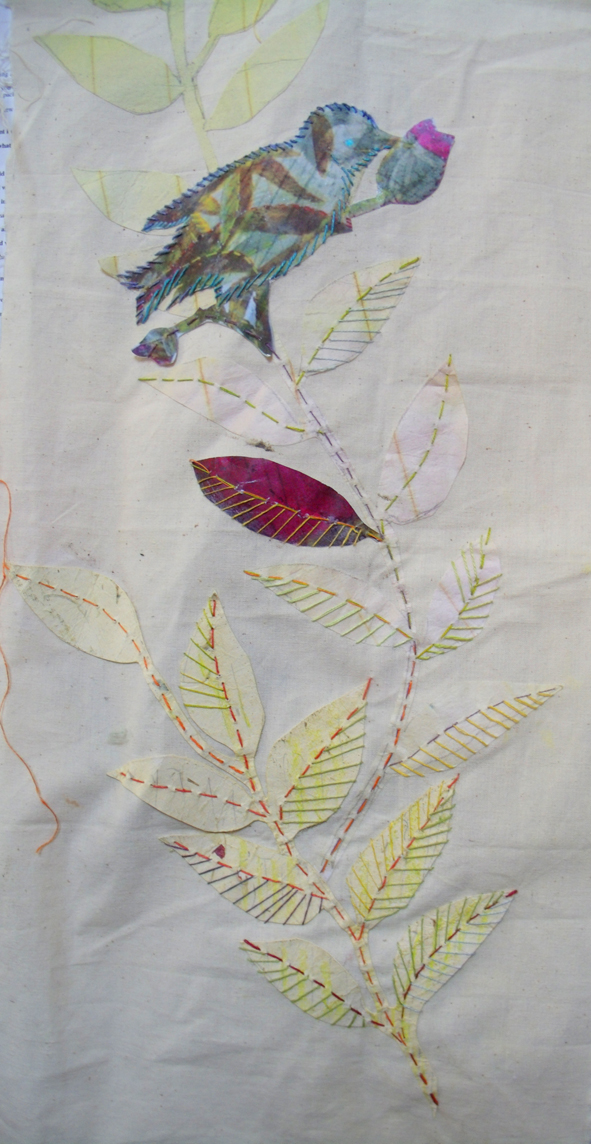
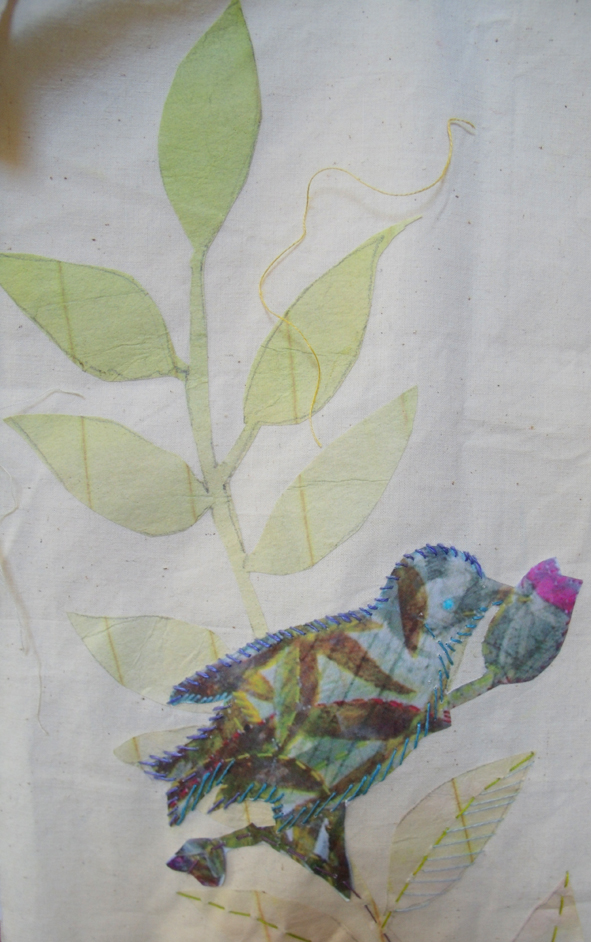
On the second morning Ann came in with a half made sample which she had unearthed with ideas for its development very late the night before….

Ann Rippin – making and stitching beads to resurrect an old piece of work

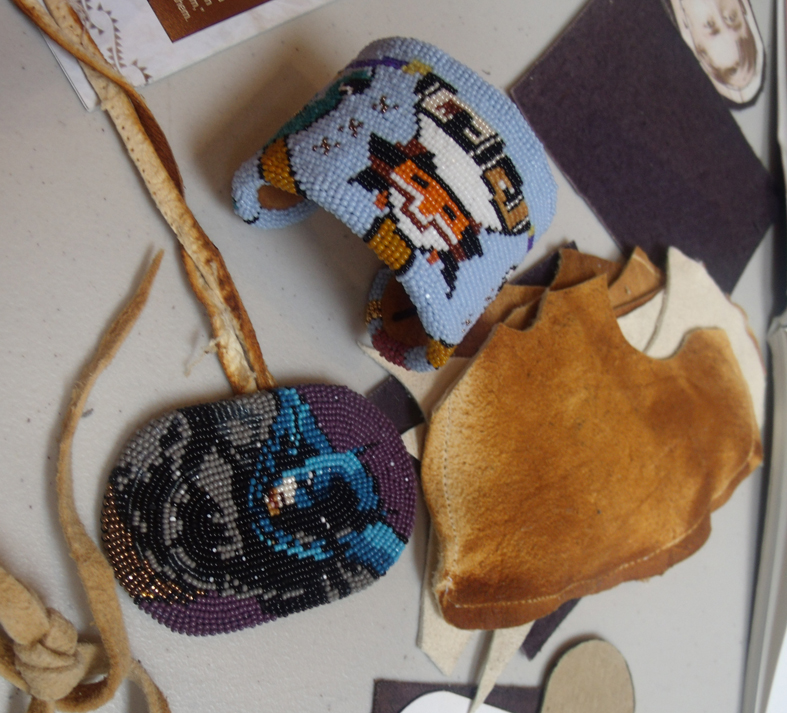
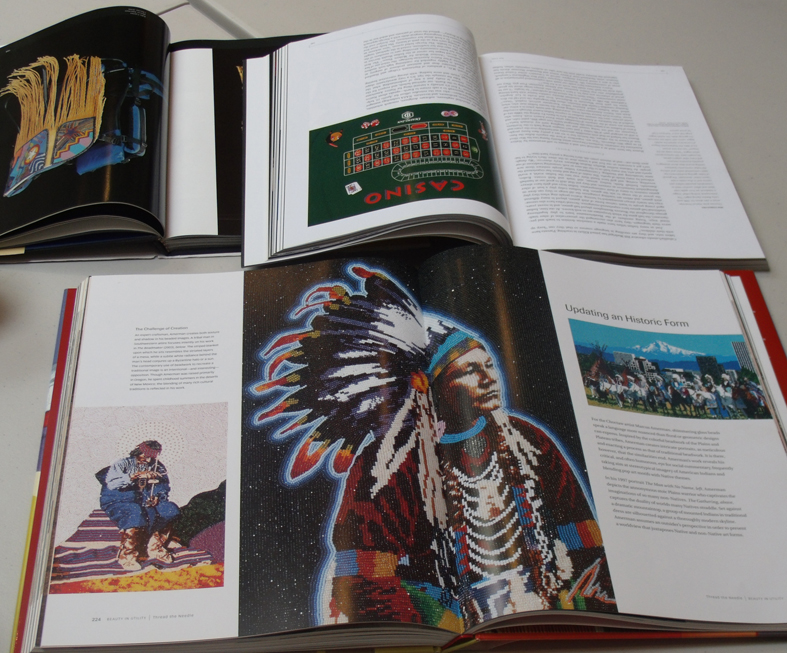
She became fascinated by making leather and thread beads after seeing one of the research books I had brought in for everyone to delve into. What is interesting is Ann is primarily a quilter , or patch-worker, but here she has made and applied 3D objects to her work, perhaps a new way to develop? She spoke of her work being “excessive” and a good exampler of how to escape the atmosphere of parsimony engendered in the present economic situation – a wonderful reason for making any work.

inventive rolled leather beads to augment the ethnic ceramics for a new piece of work

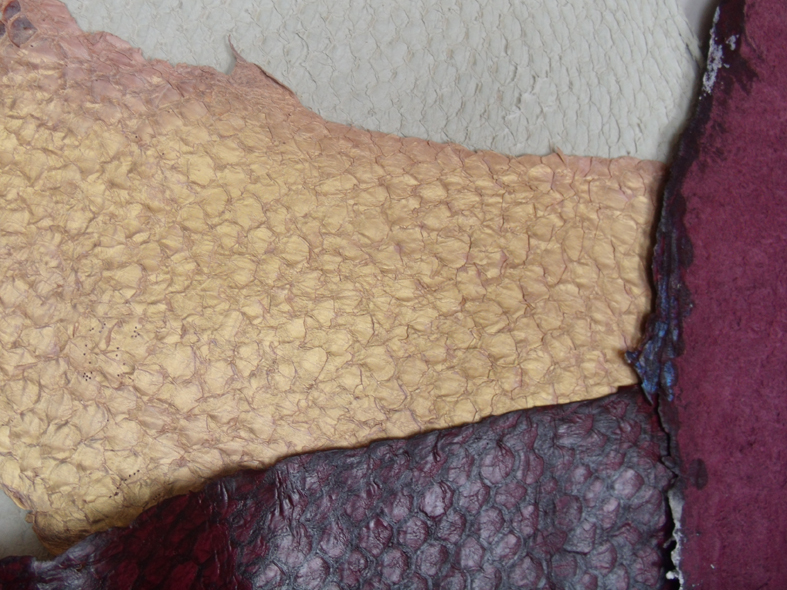
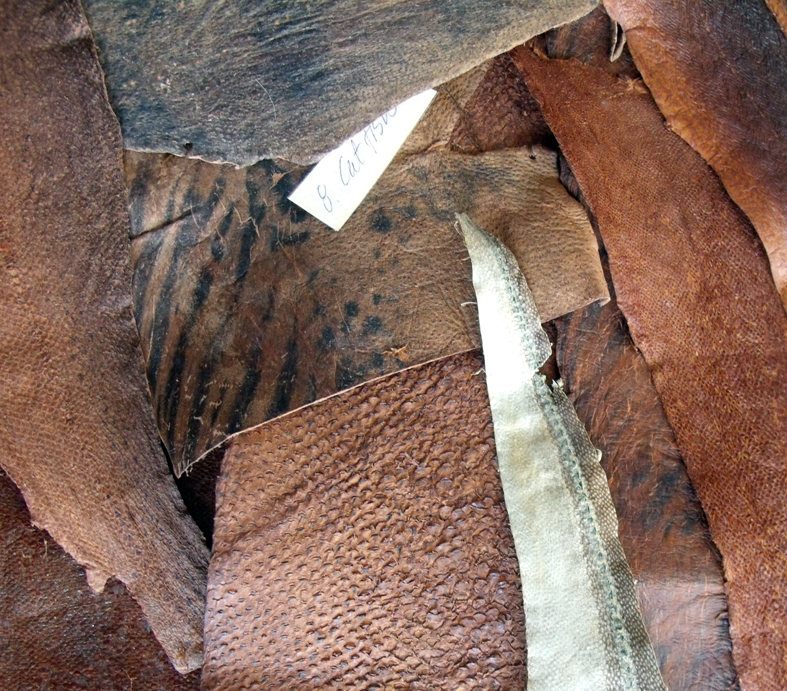
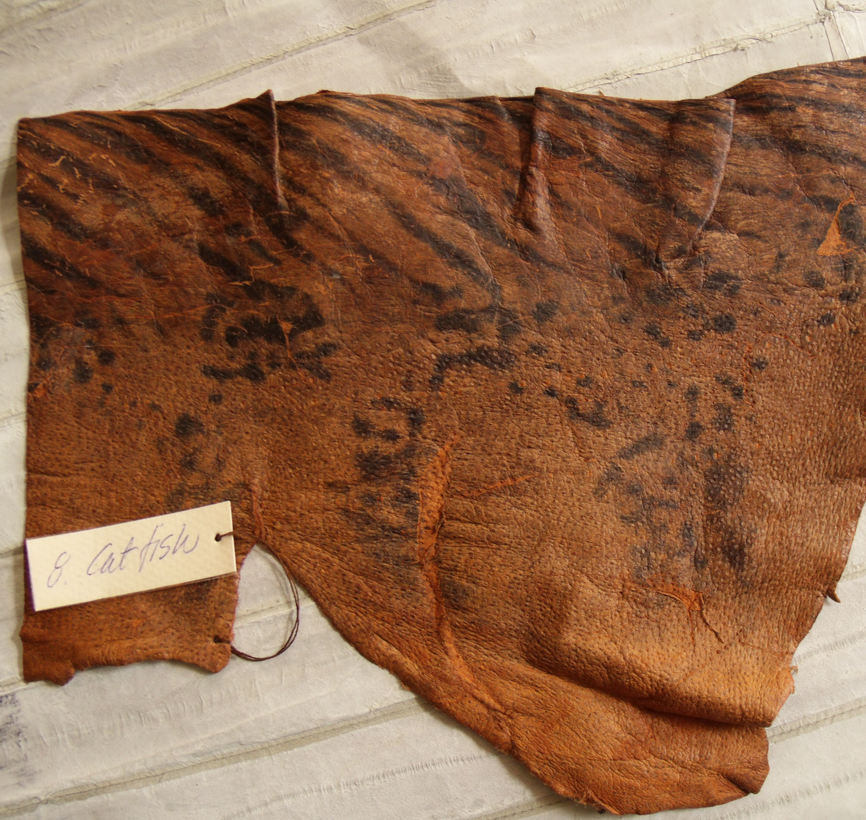
Another stitcher, Sally Sparks, found a way back to hand stitching after experiencing several years working with other materials and techniques, and said her first day was “a disaster”; she has recently been developing much of her textile work from her own inspirational photographs of rust…. but now her work was pale and subtle in its colouring as she rediscovered some of her old materials. She was very nervous of using the fish skin, like everyone else she found that the very preciousness of the material was a barrier to experimenting with it.  Realising this in advance Basil and I offered card and other fine leathers for people to work with.

Sally Sparks – leather and chenille applique sample on her own hand made paper.

Another textile maker Debbie Bird , felt  “out of her comfort zone” because of the preciousness of the materials  – she she decided to try sampling all the materials systematically on a small scale as she didn’t want to waste anything – but one of my my making mottoes is “you have to  break eggs to make cakes” ……

Debbie Bird makes tiny leather mosaics pieces with a reverse of feathers

nevertheless Debbie made several interesting samples that she can develop further when she has had time to assimilate all the ideas offered by the experience.

more small scale samples of feathers and leather

Several people became immersed in weaving and folding card to develop leather and skin fabrics, Sue  James, a technical lecturer at Glamorgan university began a fascinating small scale interwoven series of samples using card, as did her colleague, Tom Clulee, the Award Leader in Fashion at Glamorgan, who made a good start with developing an interlocking star shape in cardboard like Islamic patterns…unfortunately he was called way from the class after the first day so Basil and I sent a “care package’ to him to help develop his ideas in his own time, we can catch up with him on a later post.

Susan James woven paper samples

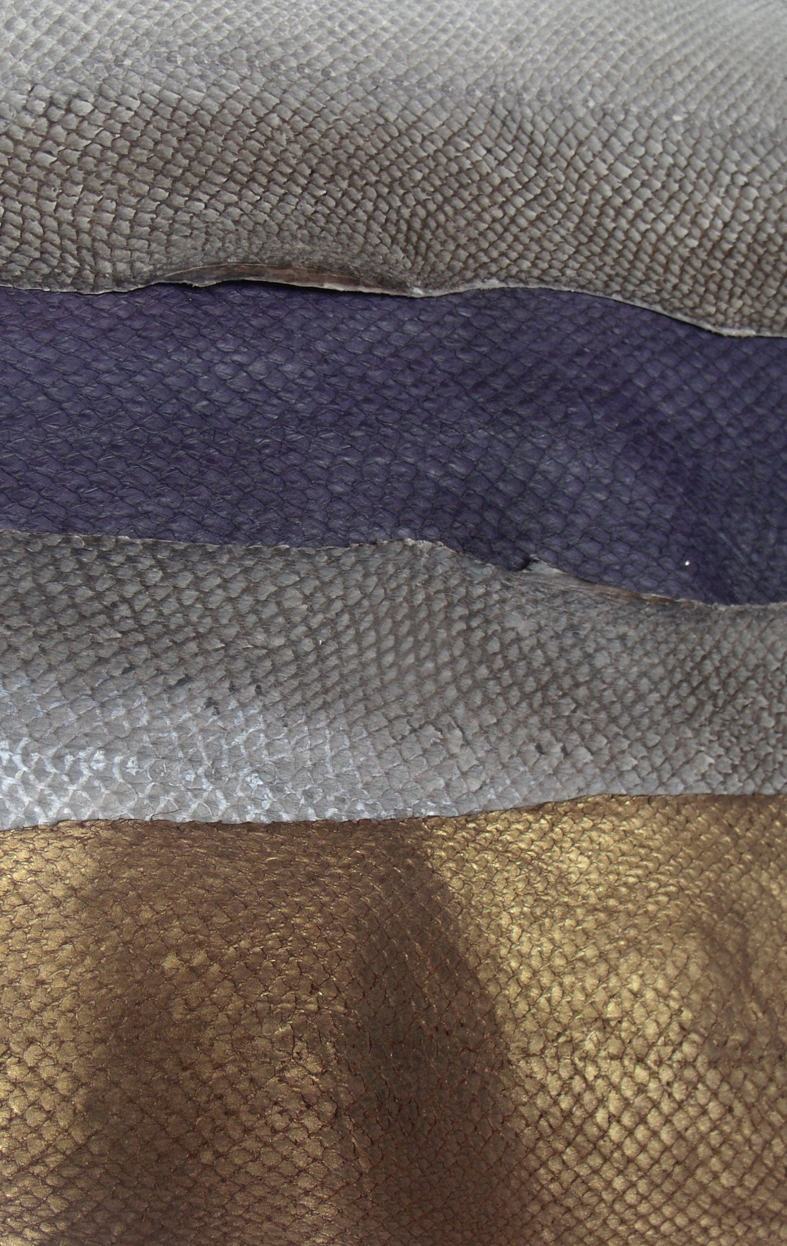
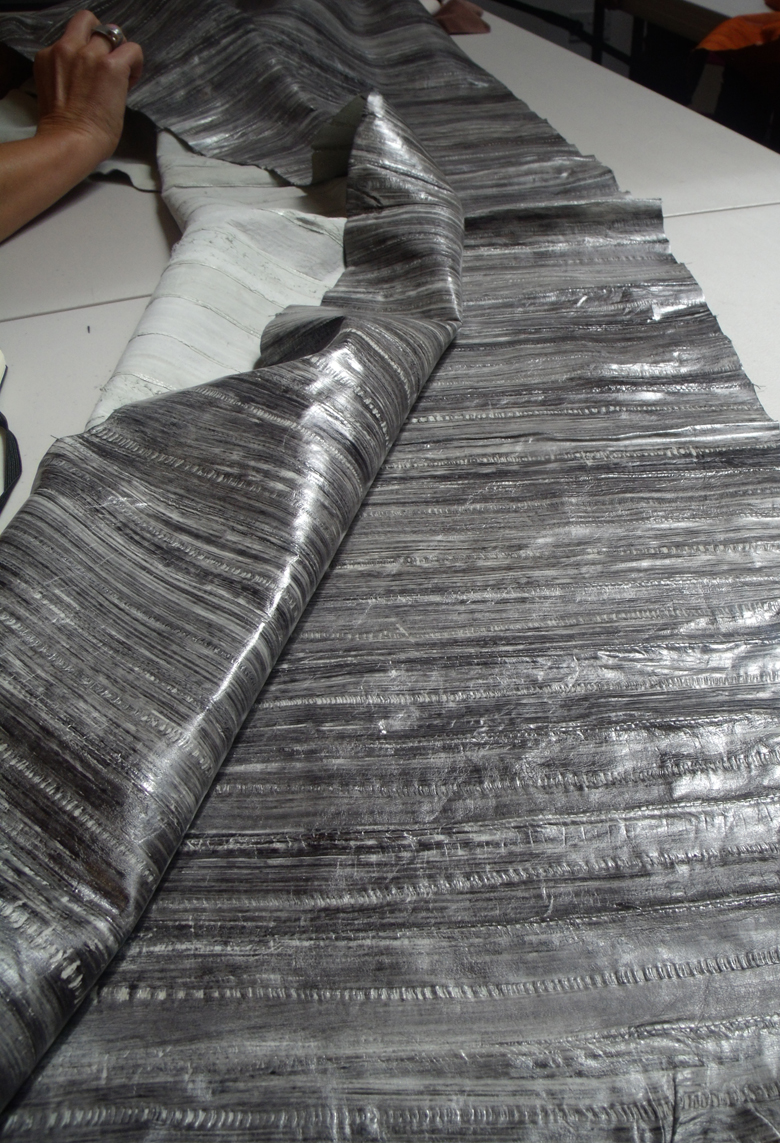
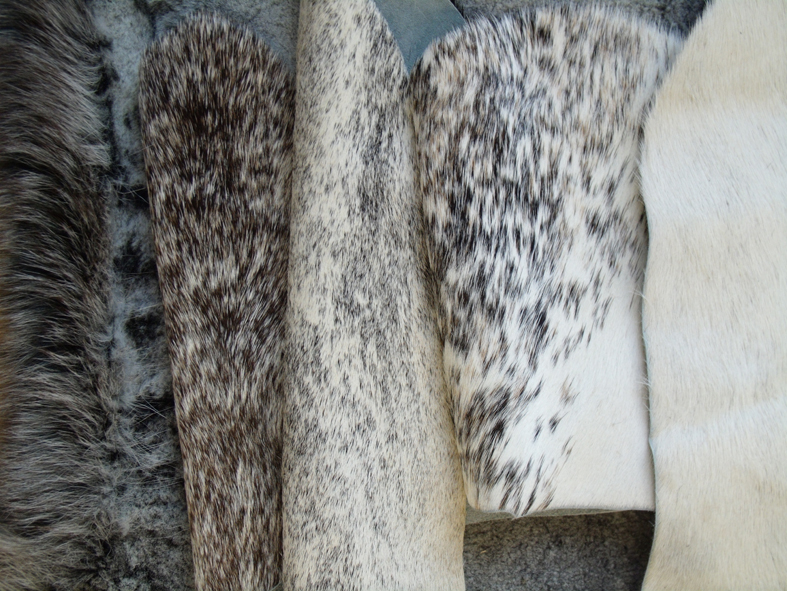
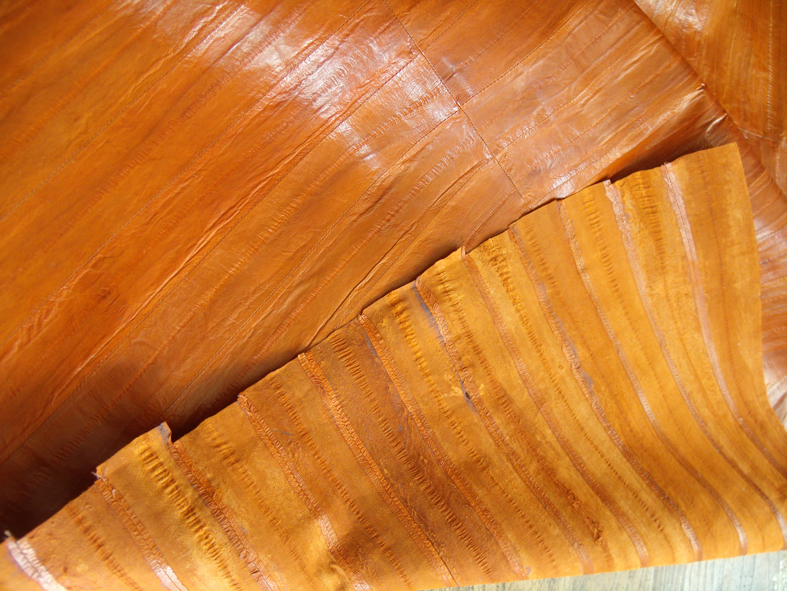
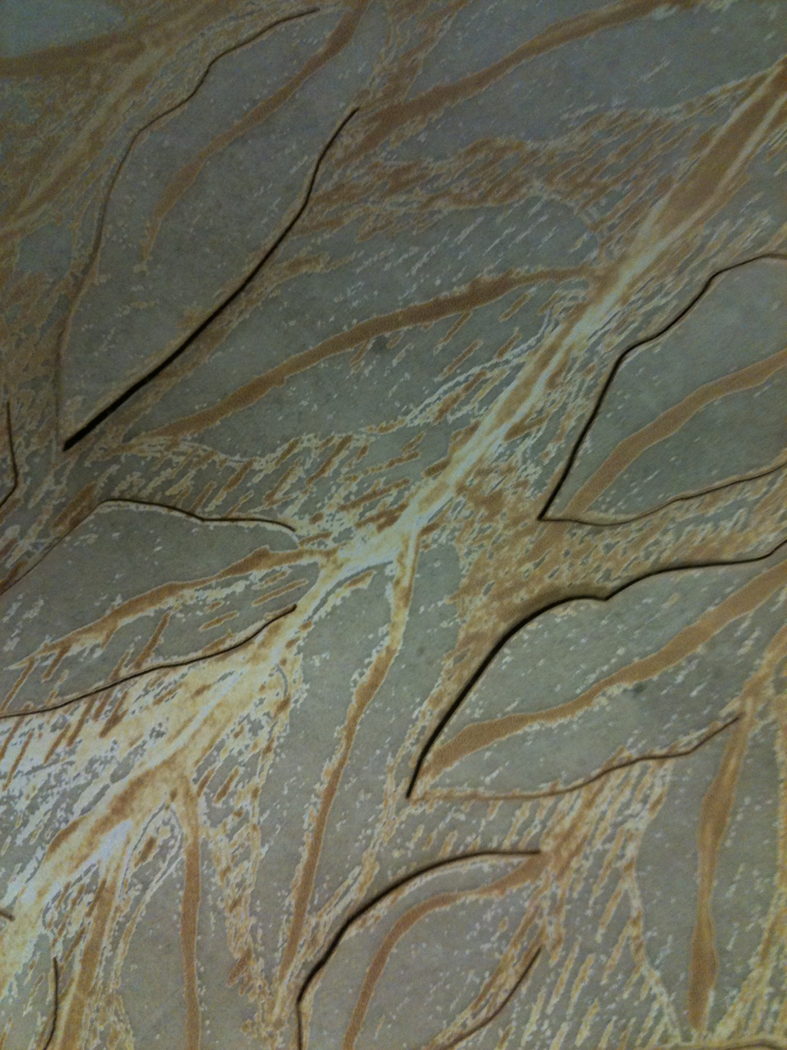
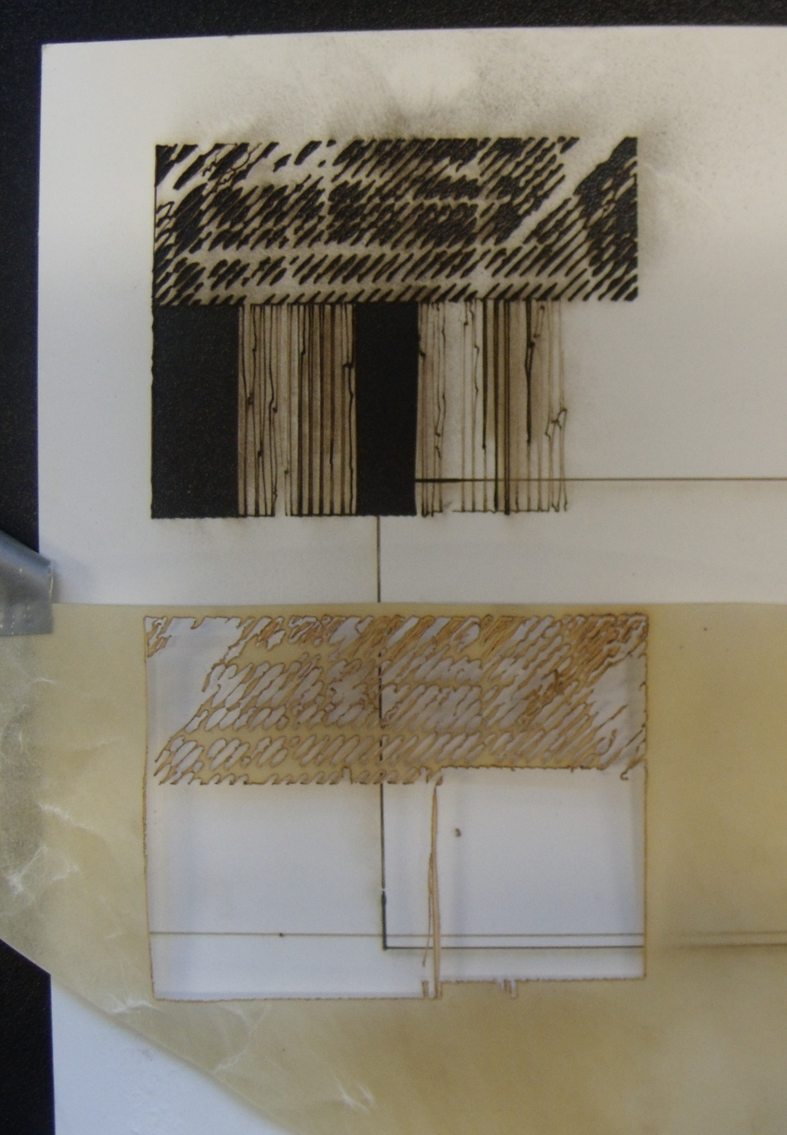
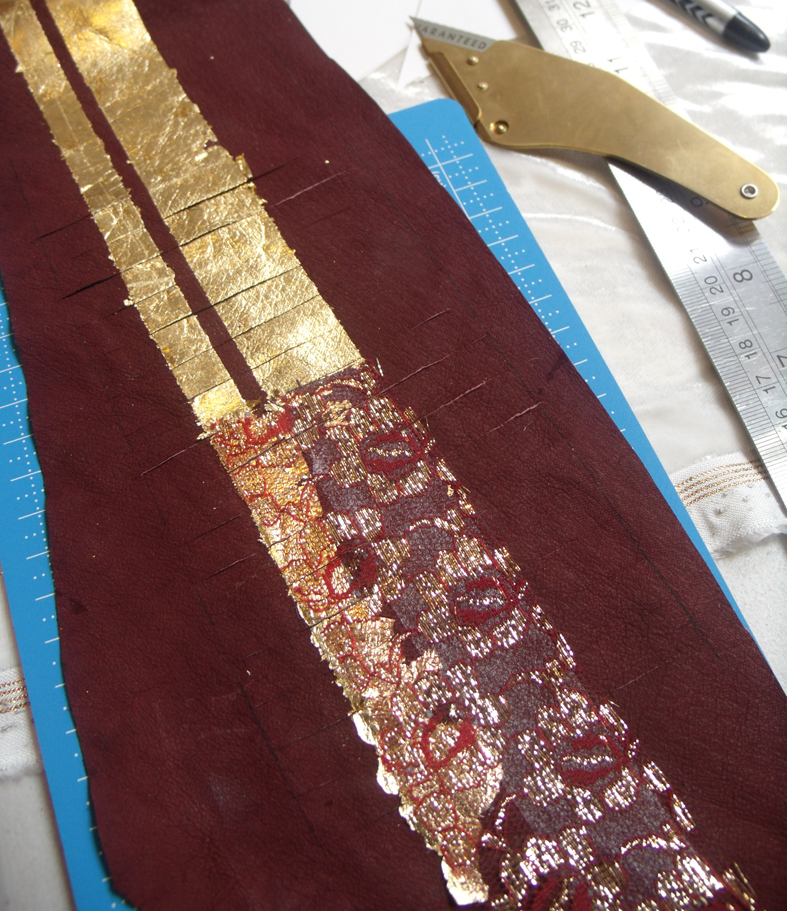
But Sue persevered in finding ways to make sheets of viable leather ‘fabric’,  the beauty of which lies is the fact that each side has a different pattern, especially when gilded..

Susan James snakeskin and leather samples showing the same pattern on the reverse of a fish skin with gilding.

Her main aim now is to make a fabric that will be molded to ‘sit’ on the body as a garment without it being cut and stitched in the usual manner – so her technical expertise has come to aid her development for these unusual materials.

Dawn Mason makes a complicated folded and woven piece

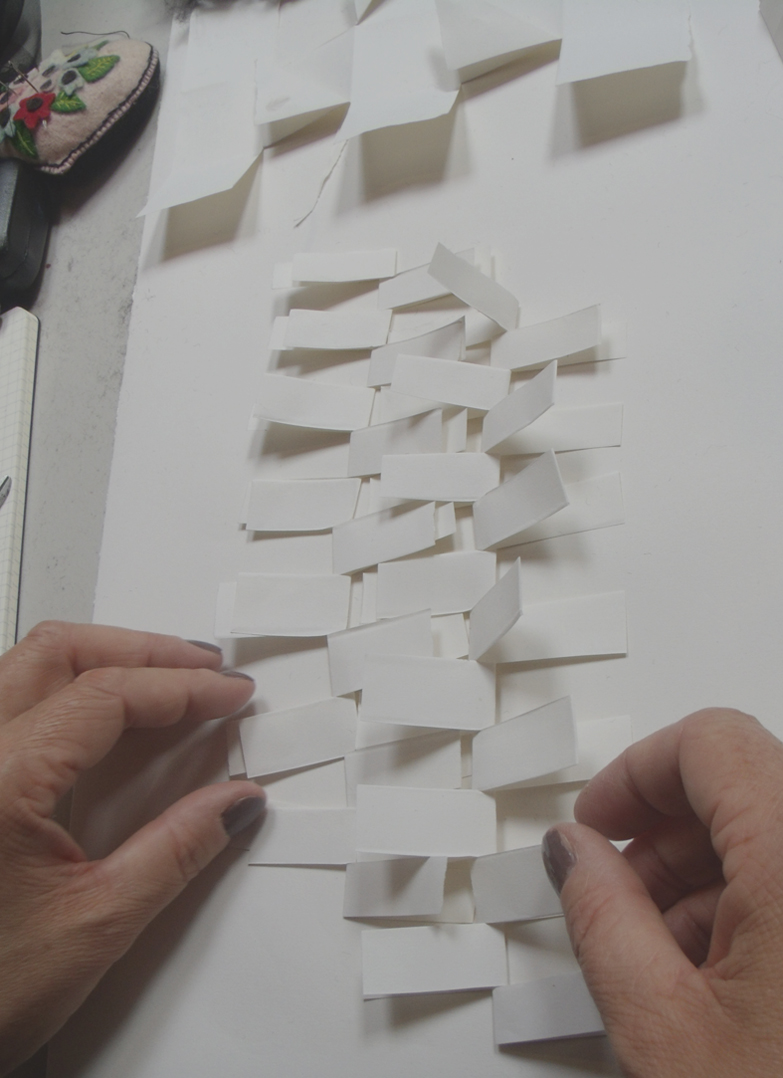
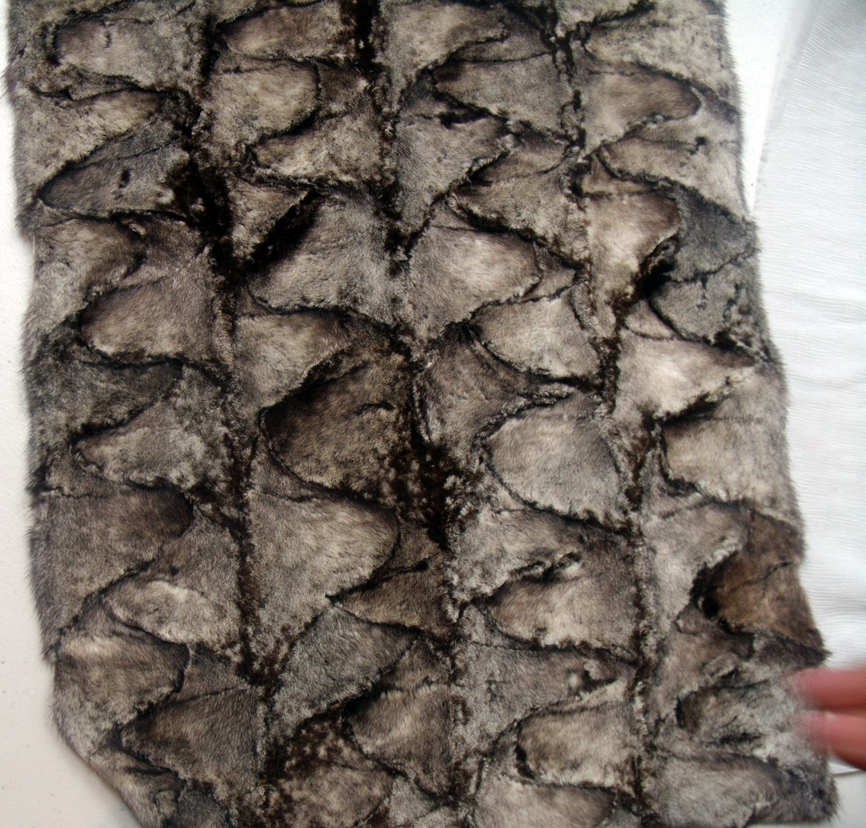
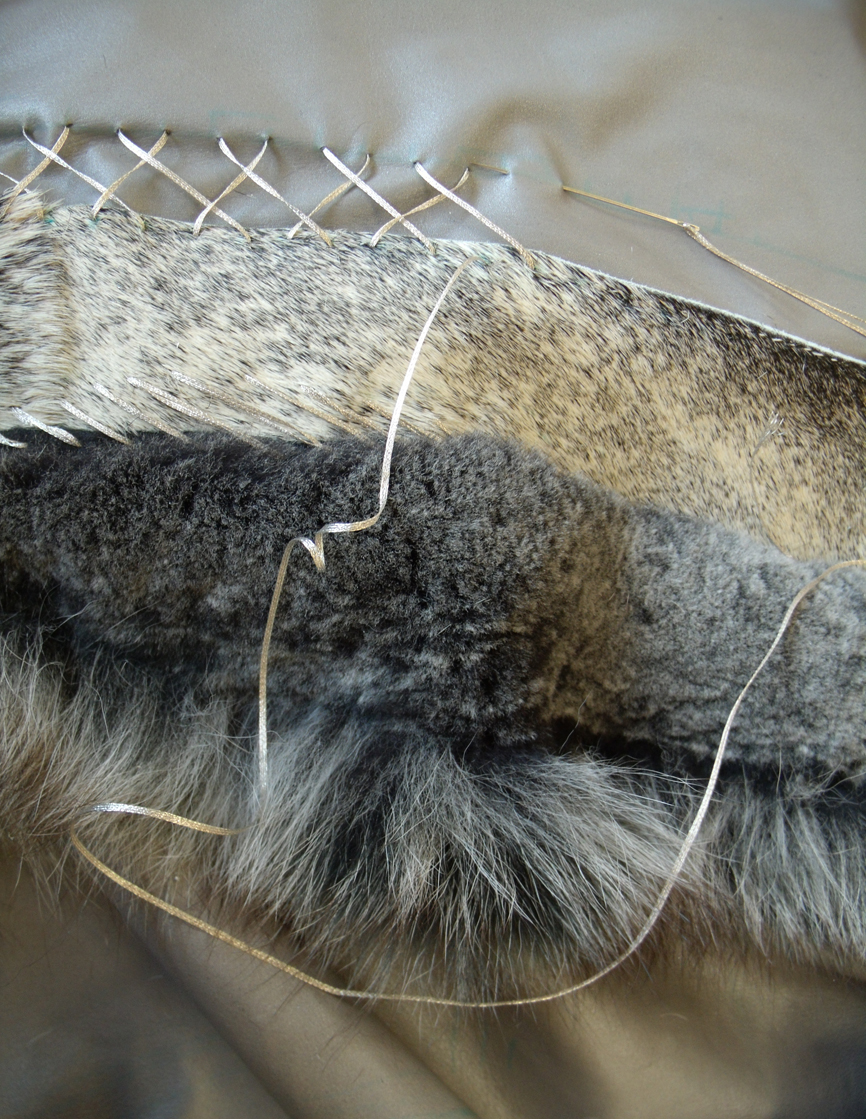
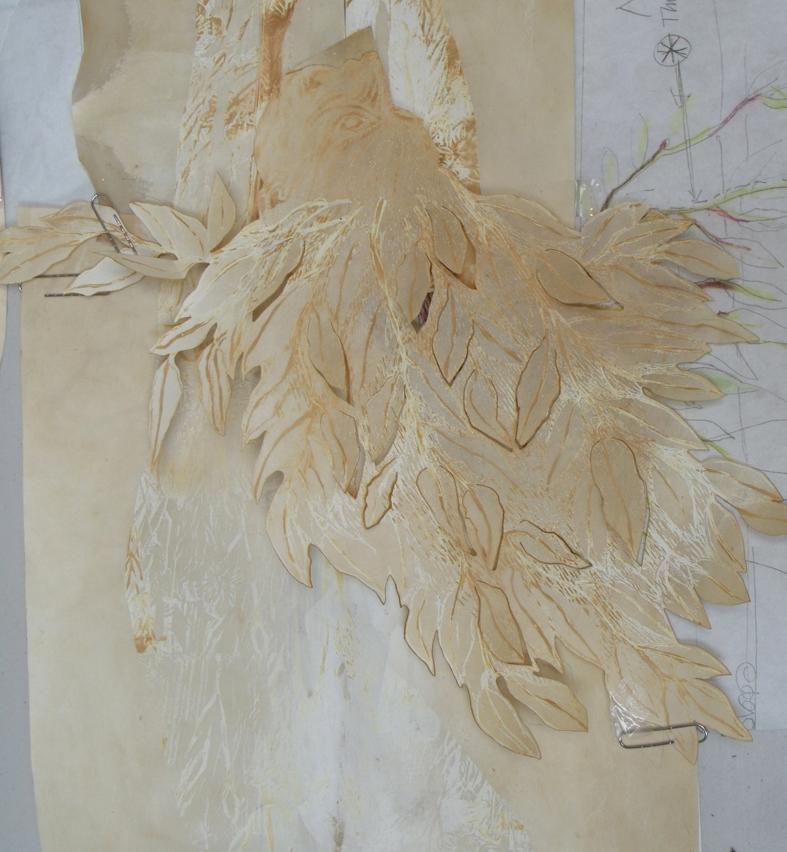
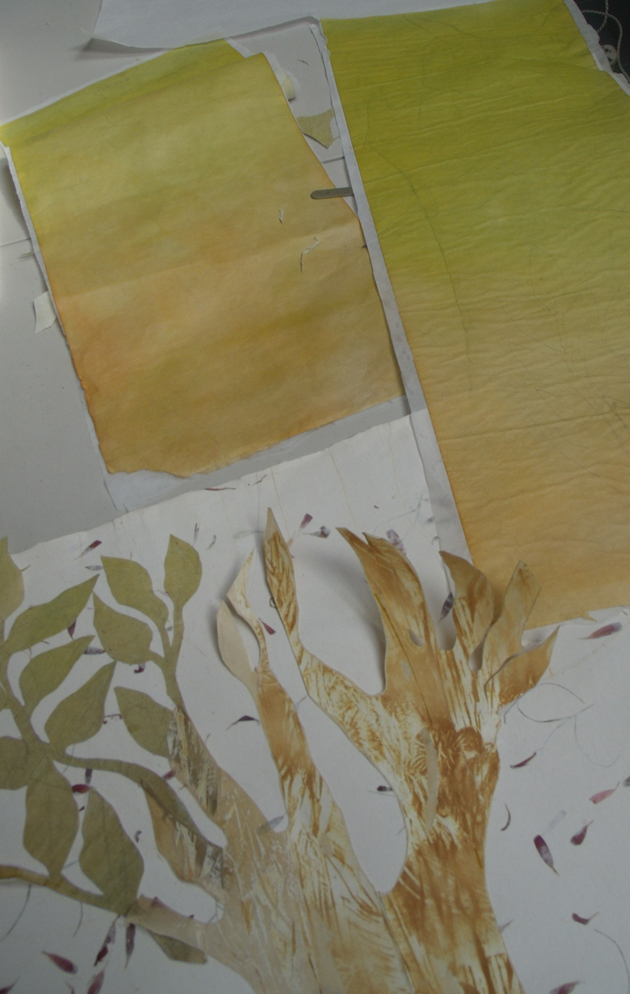
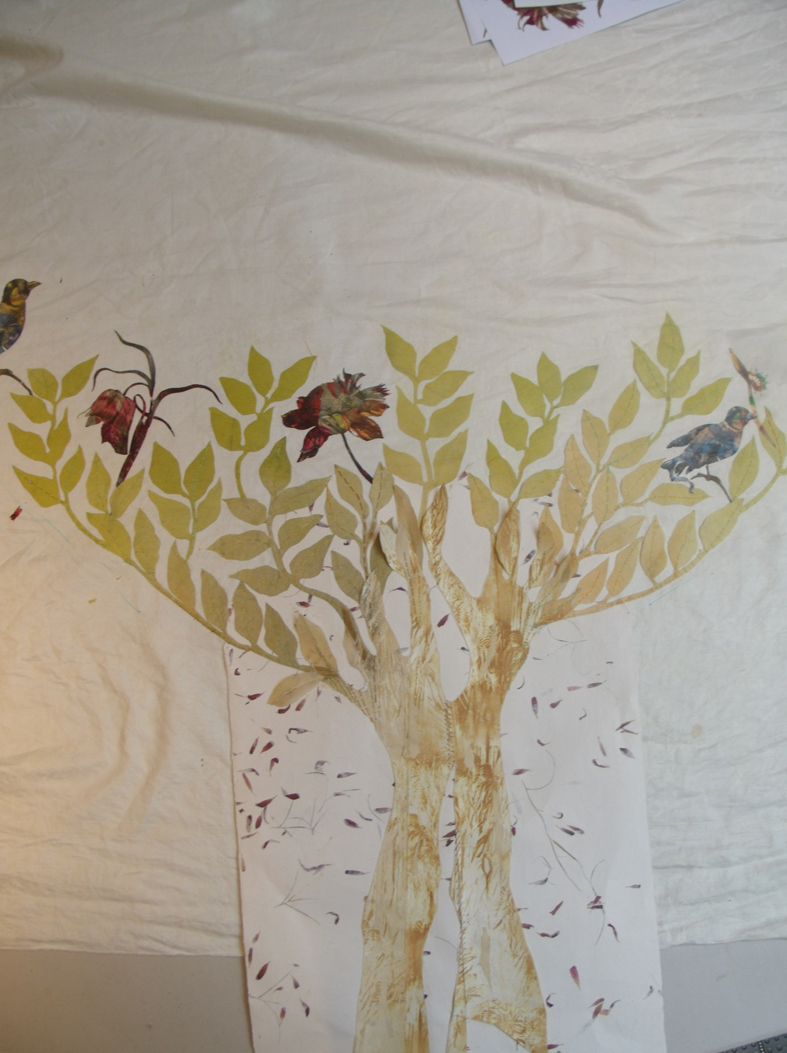
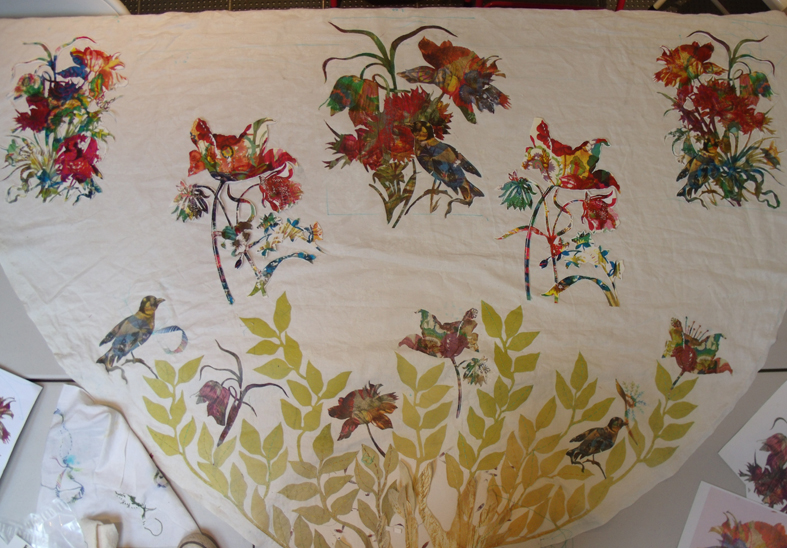
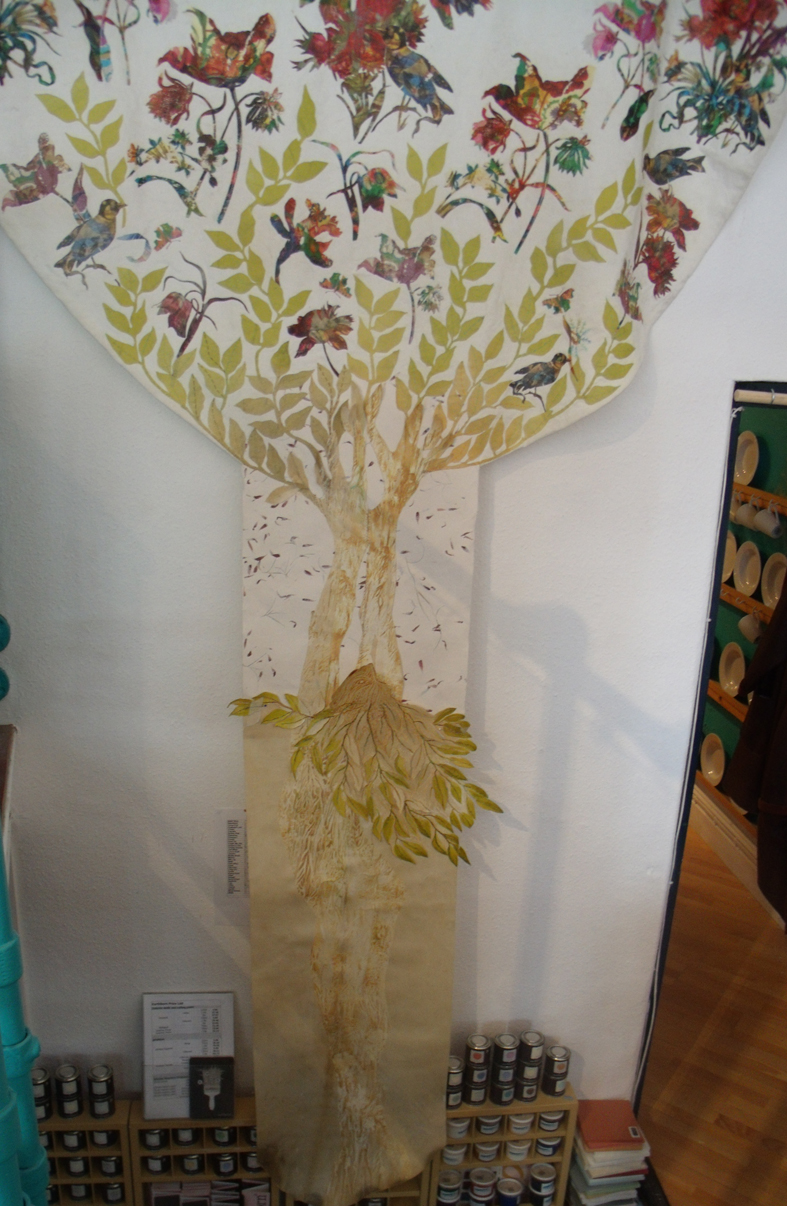
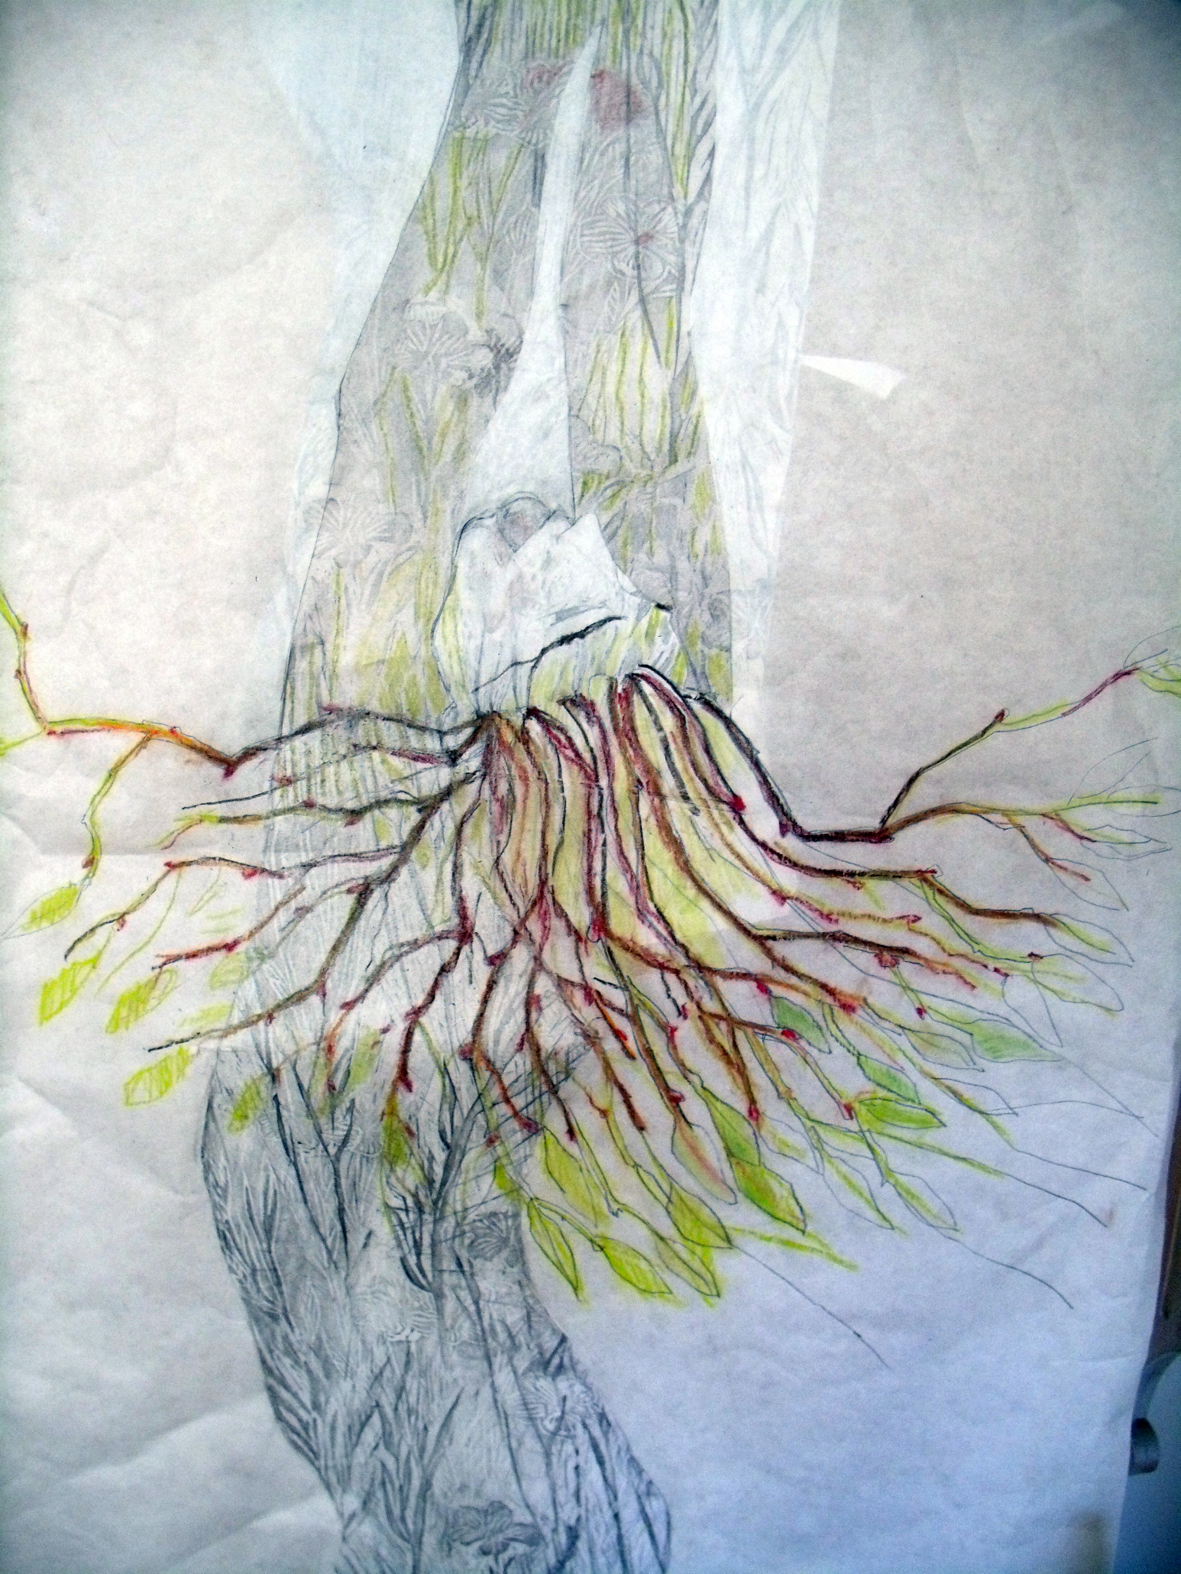
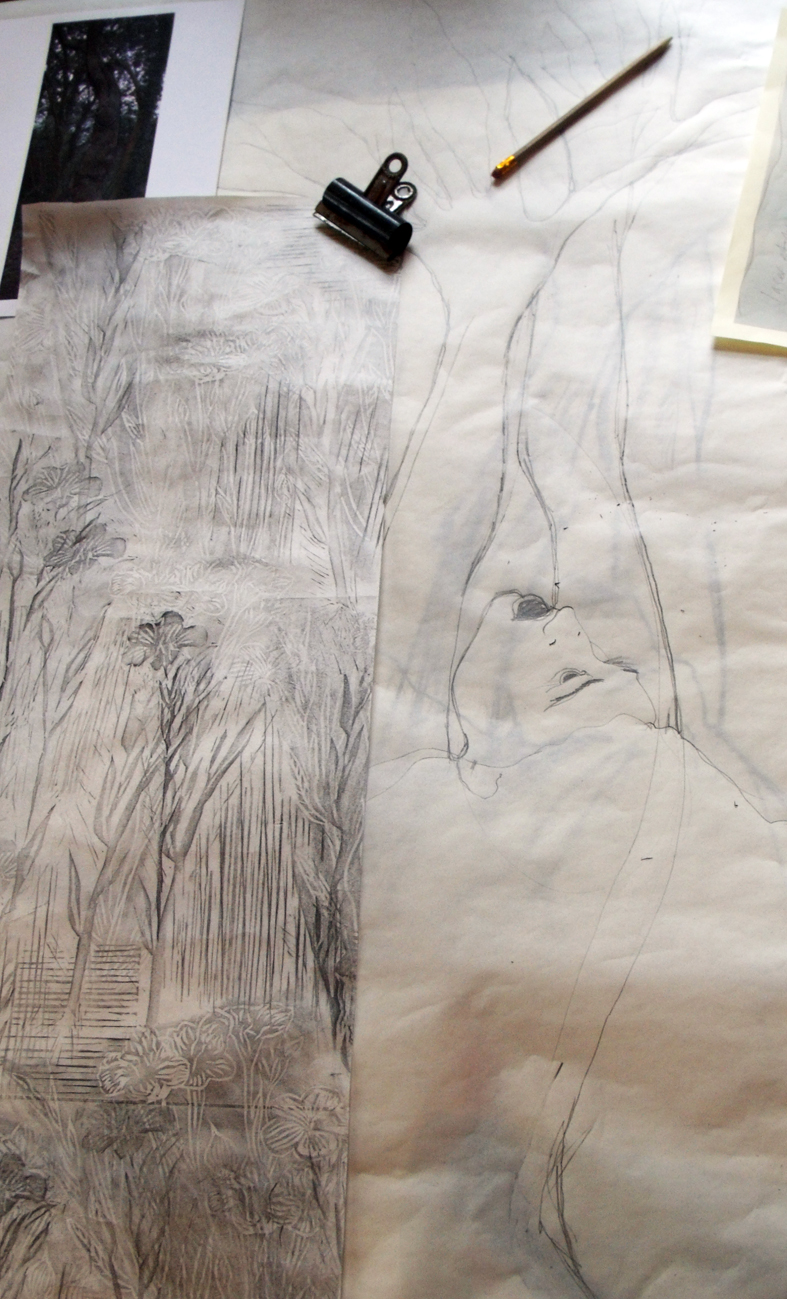
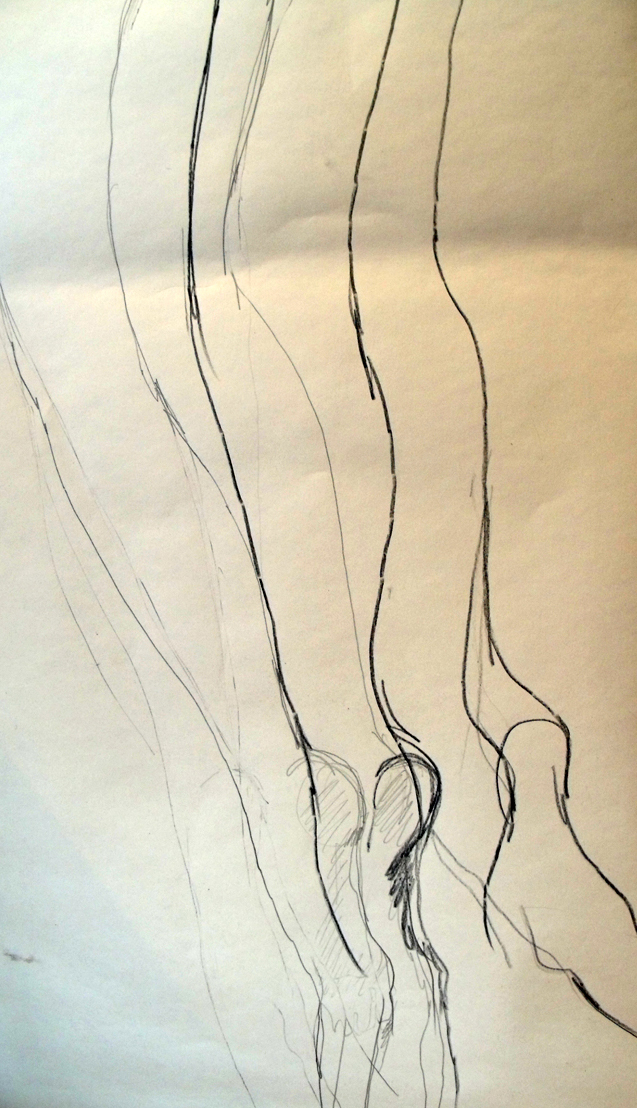
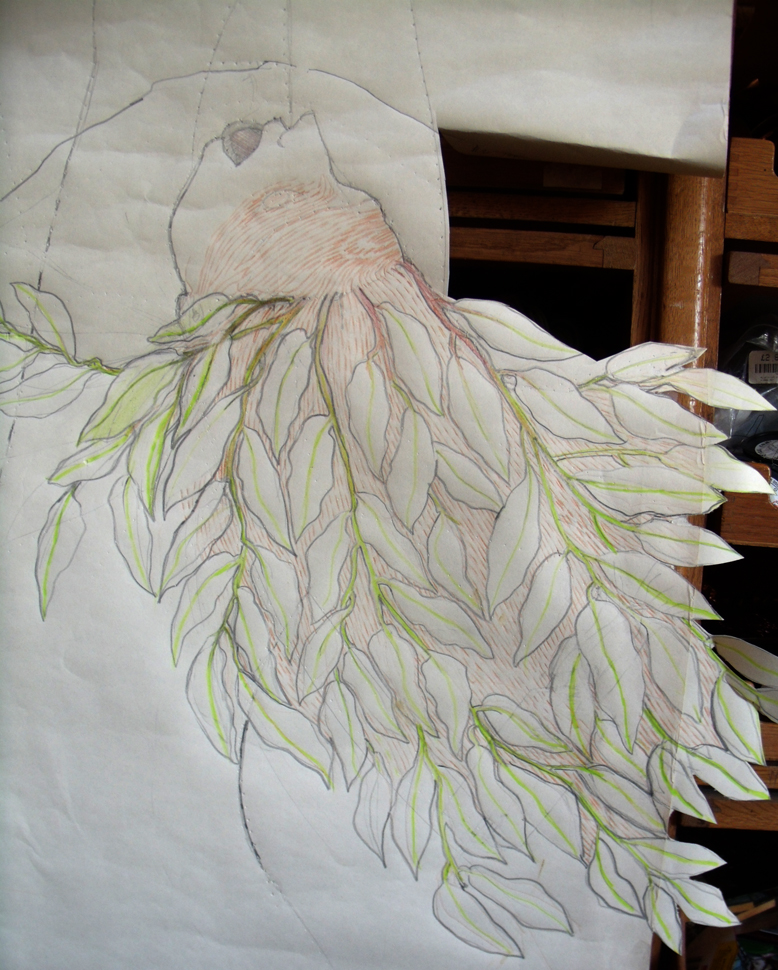
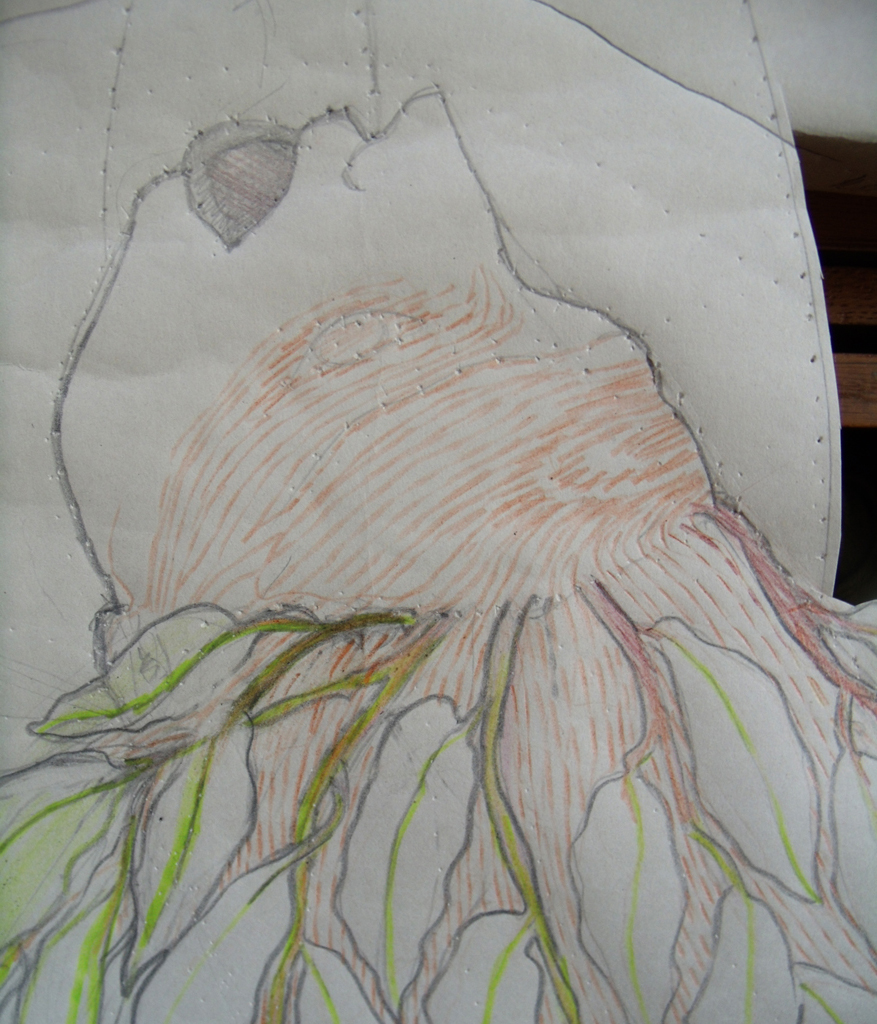
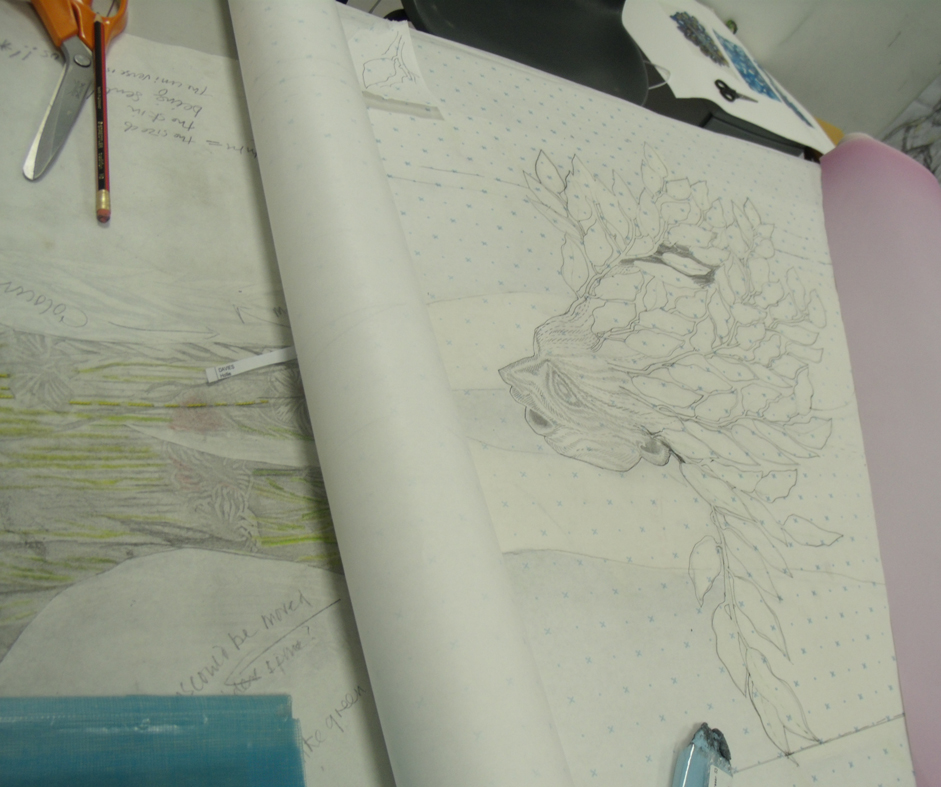
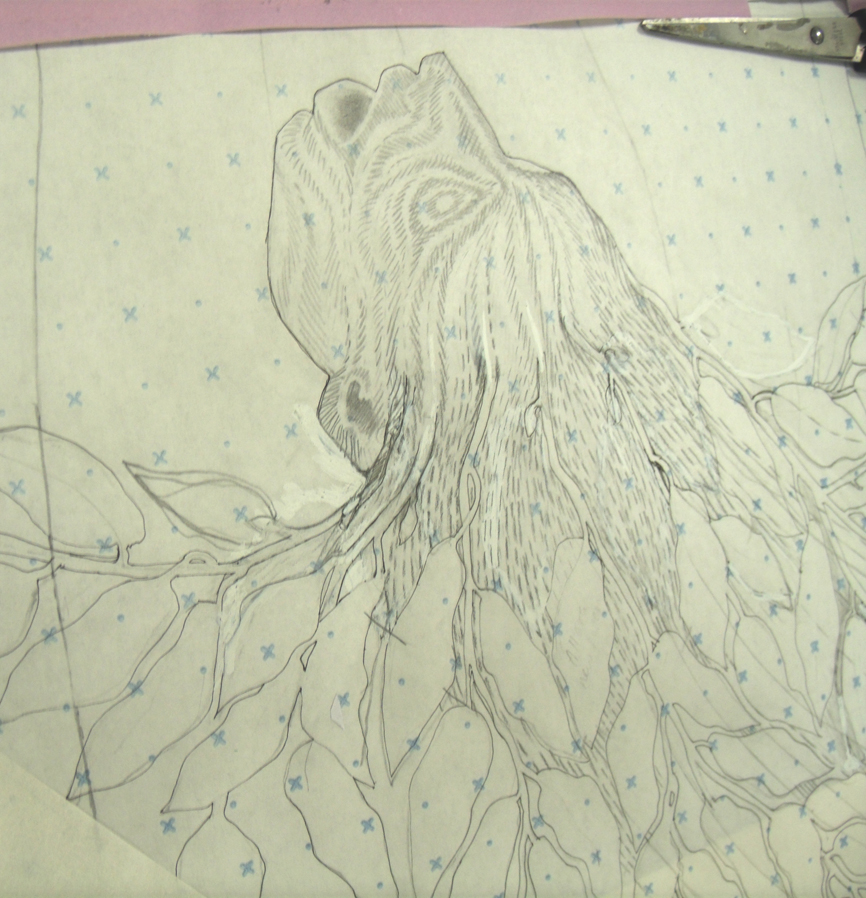
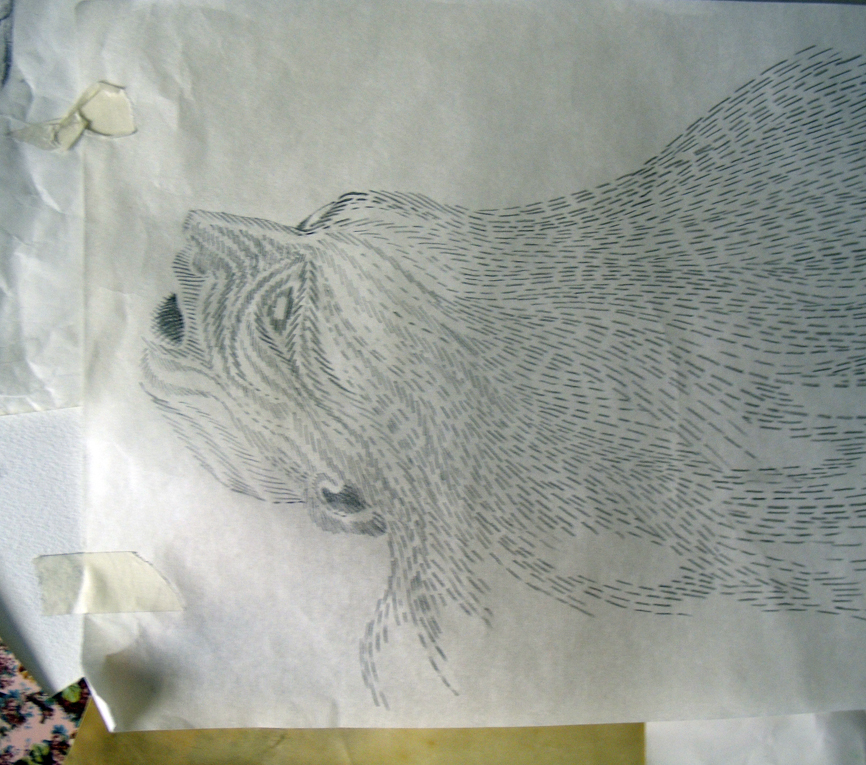
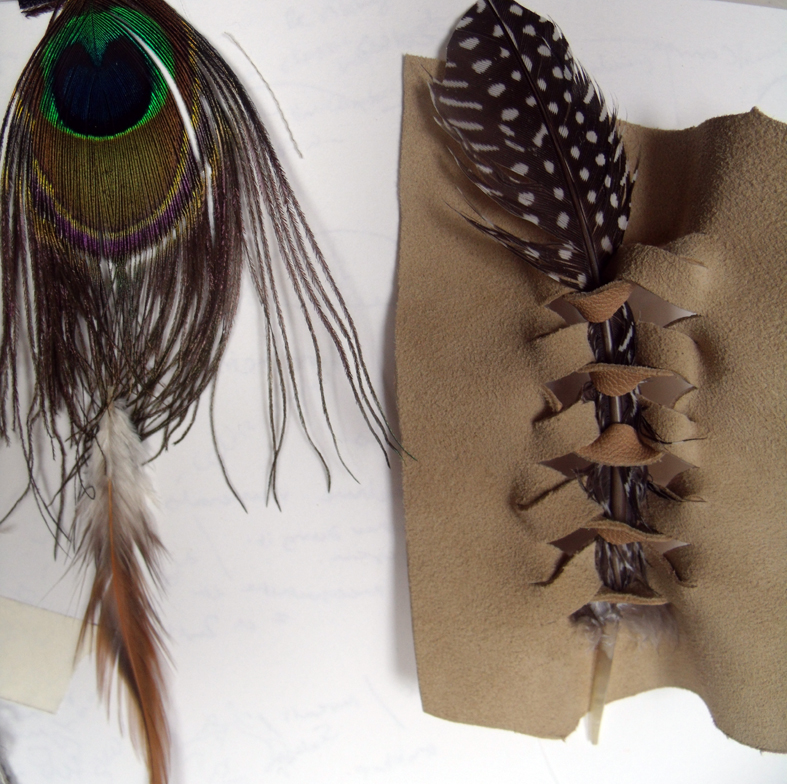
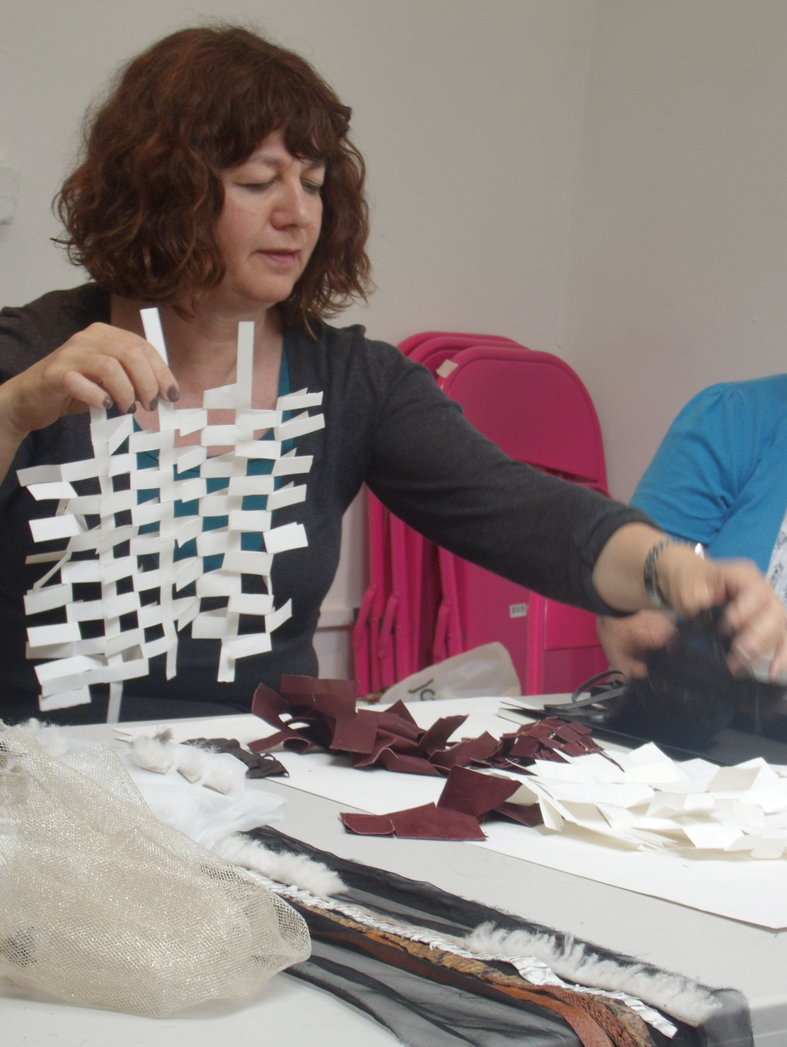
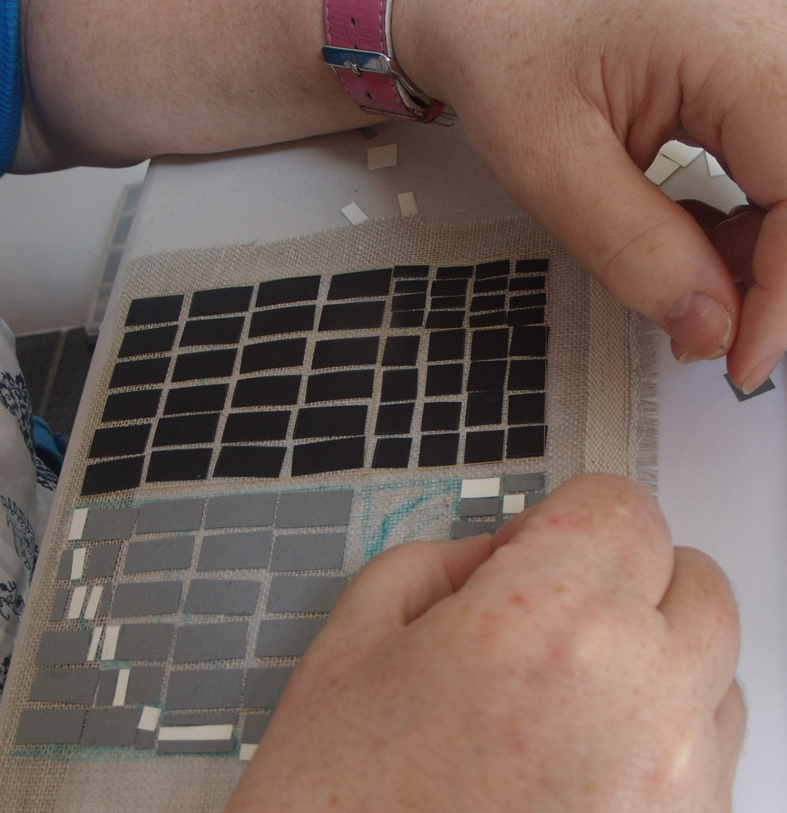
Dawn Mason, who is the Award Leader of the Drawing and Applied Art programme at UWE, Bristol is a textile maker currently working with hand stitched papers who also decided to weave card to develop new ideas. She worked by referencing traditional fur cutting techniques that Basil had shown in his introduction;  several samples of cut and woven leather were shown at the end of the session and she is now intrigued by the articulation achieved – she also stated that she had made a determined effort to change the way she usually waoked and to just experiment with “something that feels alien” .

Dawn Mason showing her samples and experiments at the end of the workshop.

Sitting next to Dawn and dealing with alien ways of working was Jules Tenebrae of Lux Tenebrae and if you go to her fascinating website you will see how far she travelled from her daily working life ..

side by side: Dawn Mason’s woven paper and Jules Tenebrae’s feathered chiffon

Well maybe not, we are still in the realm of fantasy and femininity.

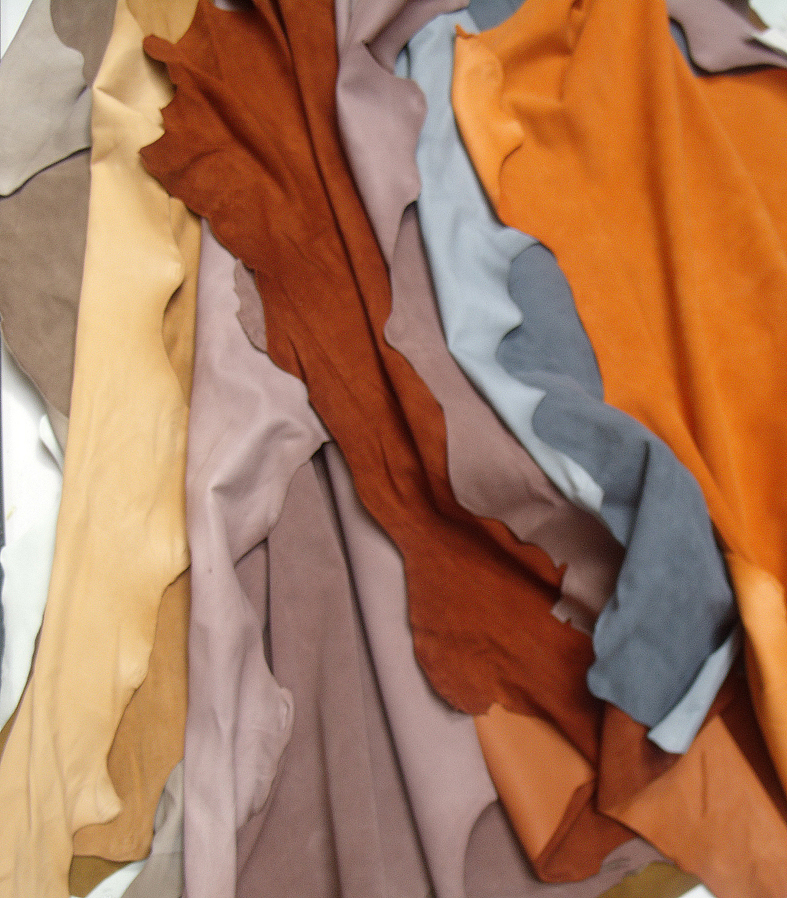
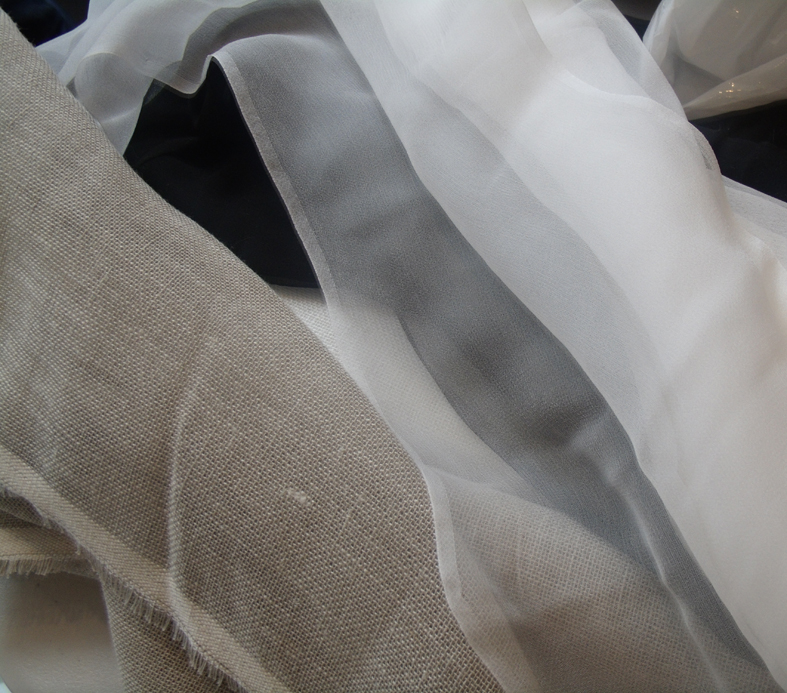
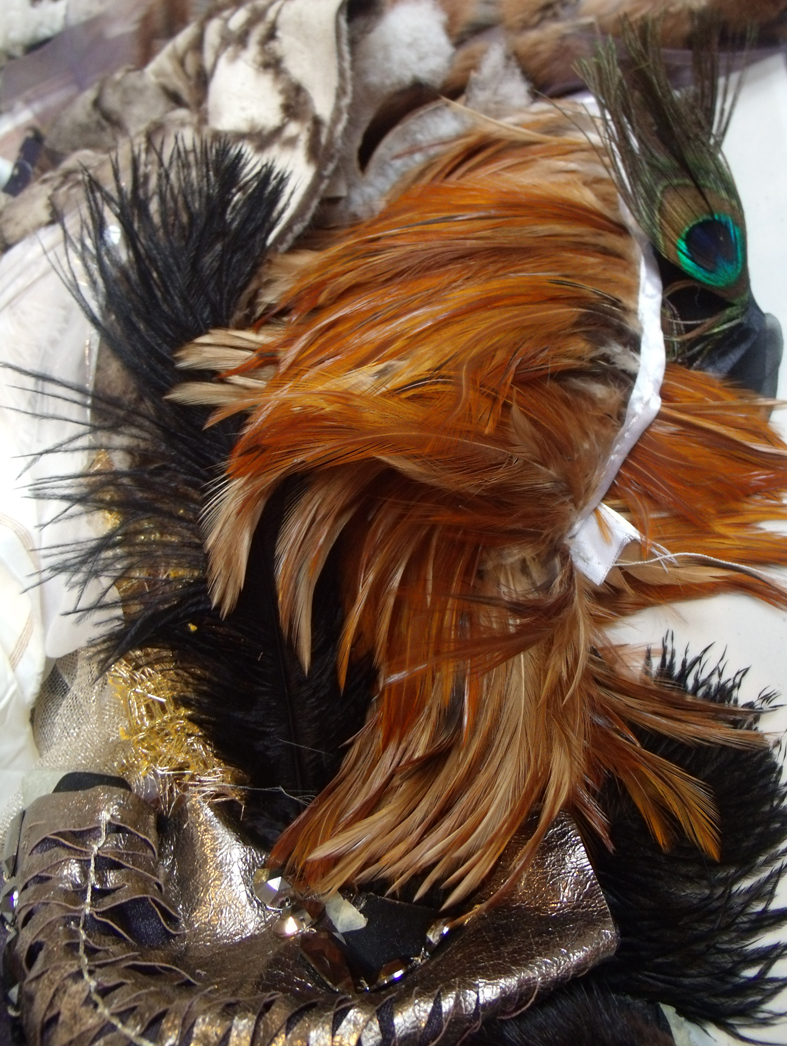
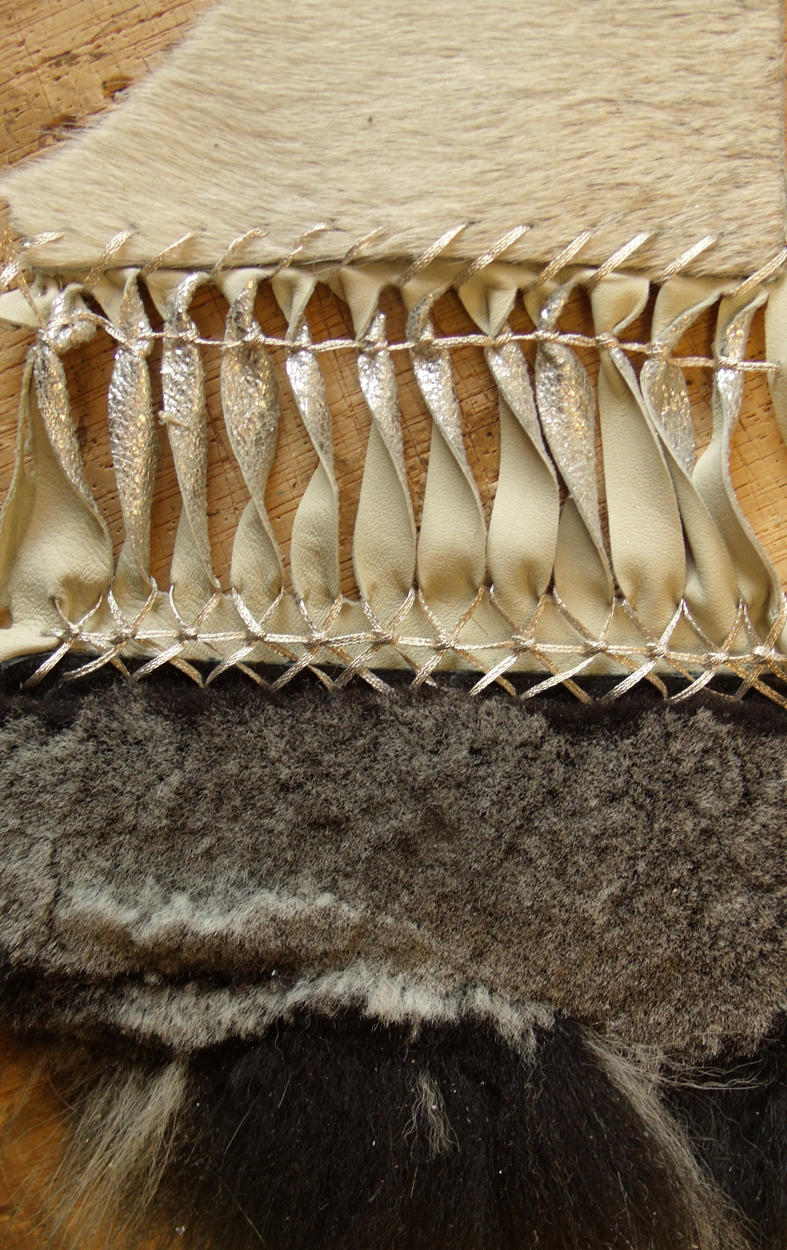
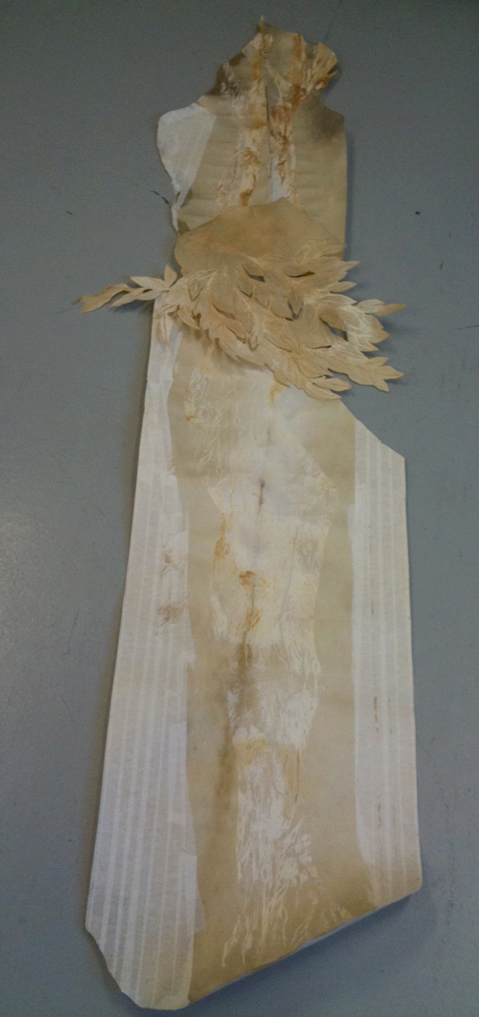
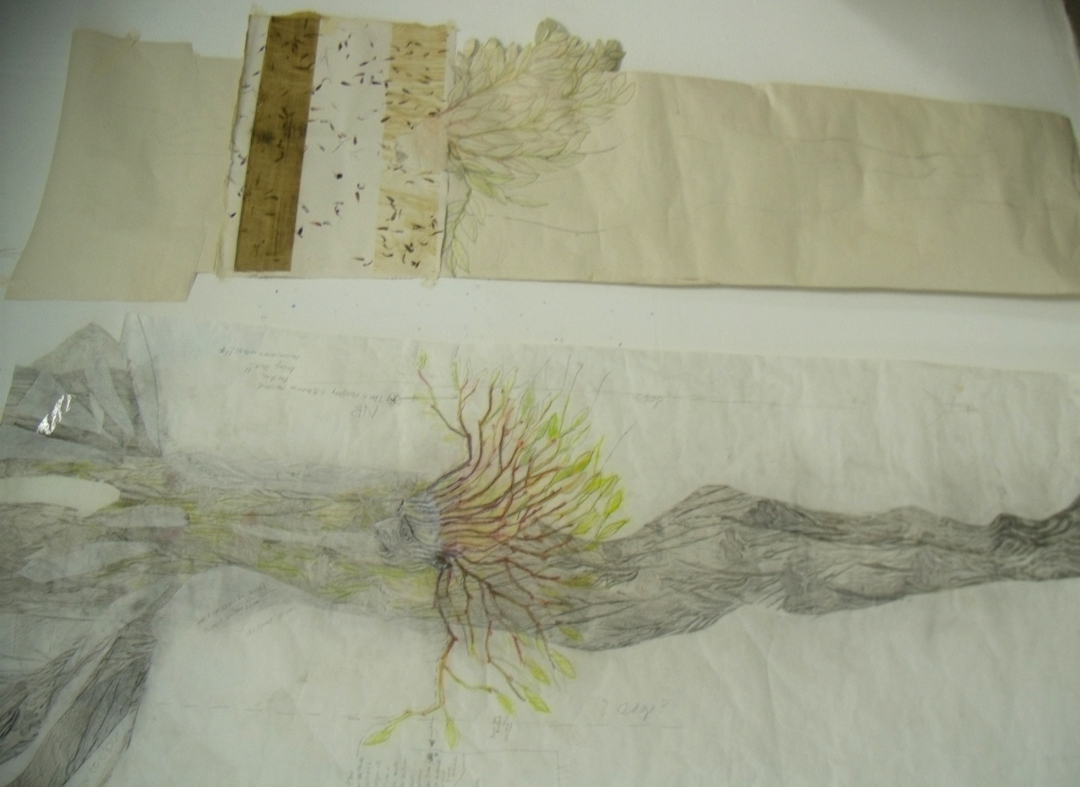
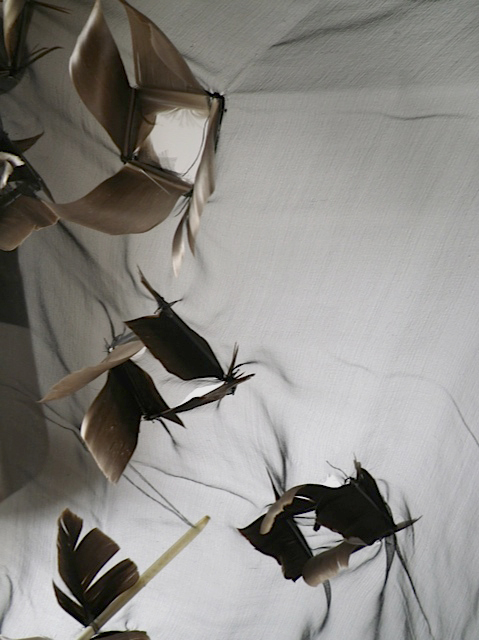
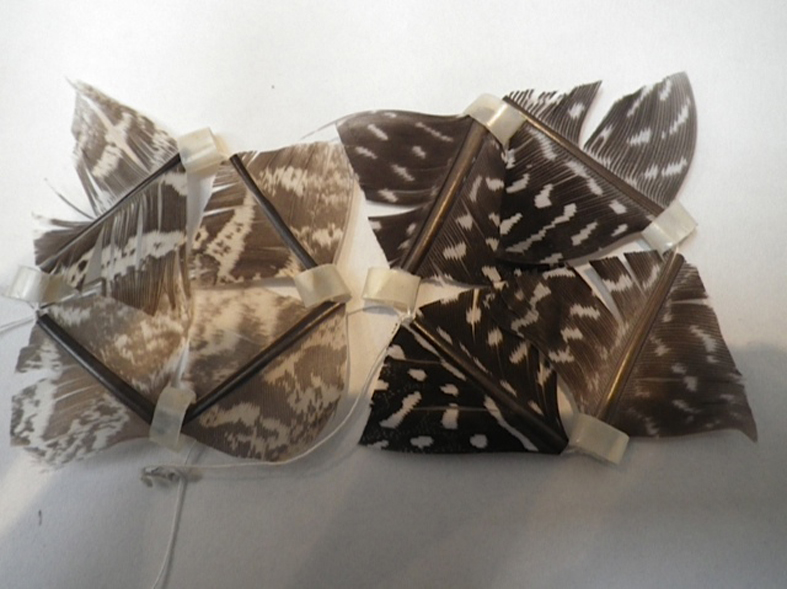
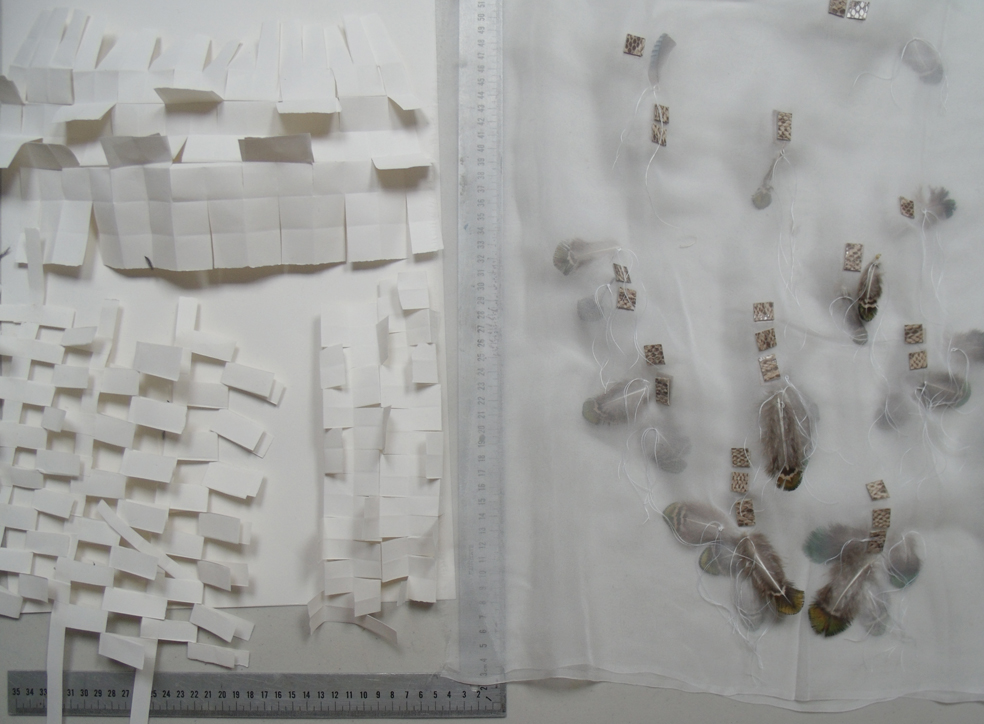
  Jules, a corsetier, made the most diaphanous fabrics, weaving and stitching soft feathers and leathers together, and she also gifted the class with extra snake-skins, leathers and seudes from her own workrooms for the second day. She said that she felt liberated as we were not “allowed to produce a product” and this was initially very difficult( I agree, once a designer always a designer). She worked from the idea of ‘Treasures on the Beach’ and started a long wavy piece of work that flowed and undulated when she hung it up, in fact all her fabric samples where very floaty and at the same time organic, at complete variance to the usual rigid corseted and structured leather clothes she sells. And now I look at her final sample I see that she also has incorporated the 3 materials, she has strips of snake and fish skins, fur, leather strips stitched with feathers onto silk chiffon.

And next to Jules was another corsetier, Lisa Keating – a Heart Space tutor with her own designer business Bespoke Bridal Lisa immediately    designed 5 fabric samples and embarked on trying to make them – a tall order but she really was inspired by the gilded leather…

Lisa Keating prepares leather with metal leaf and lace.
split and turned gilded leather

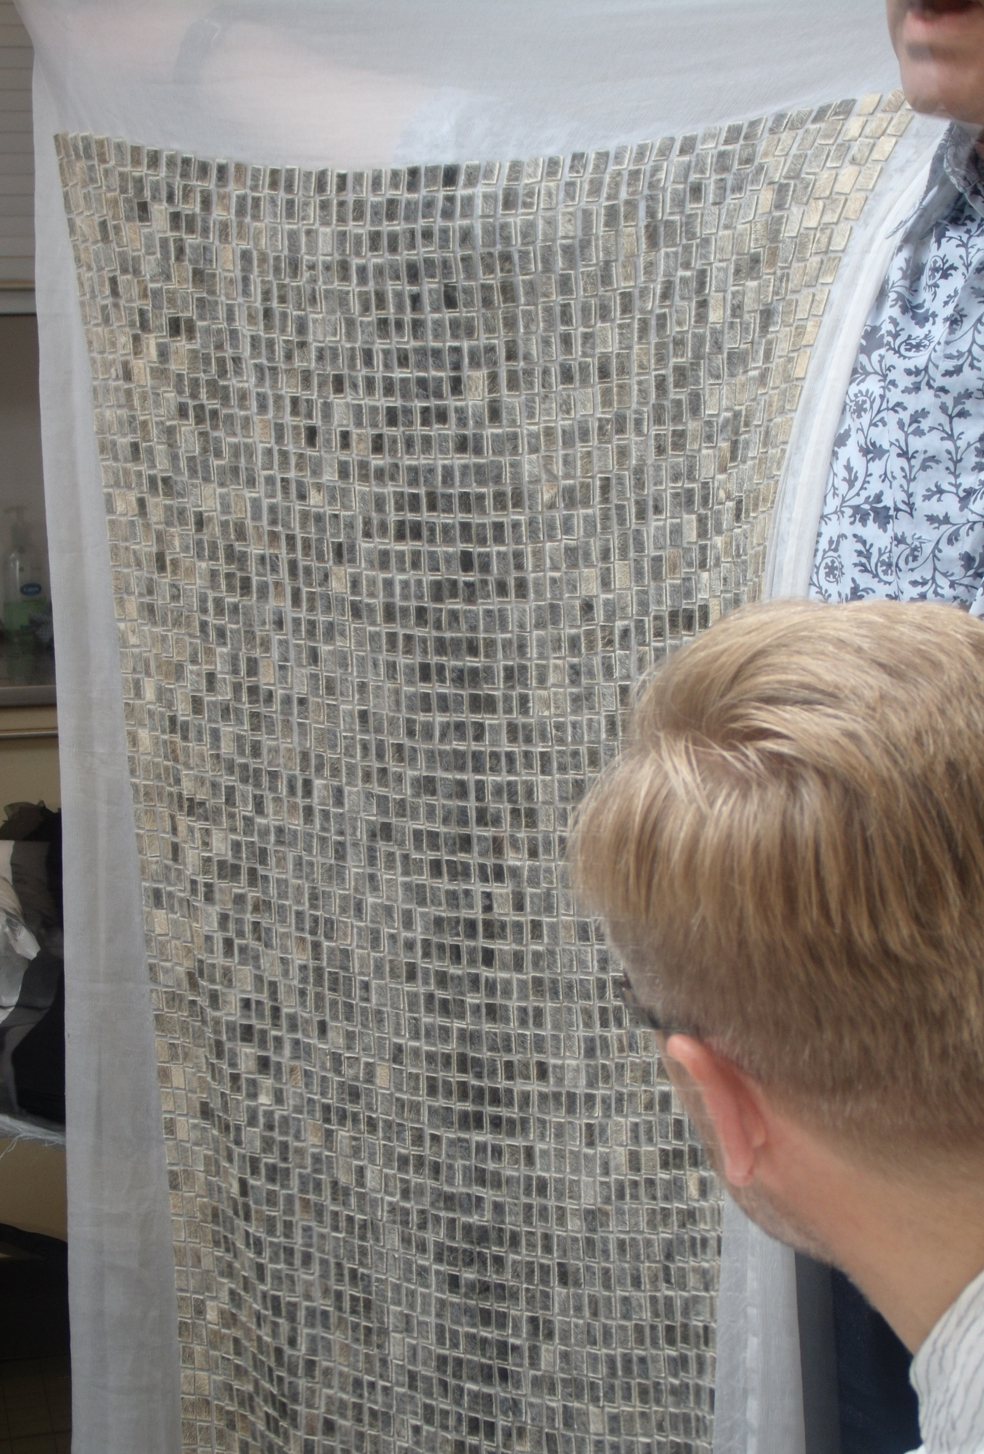
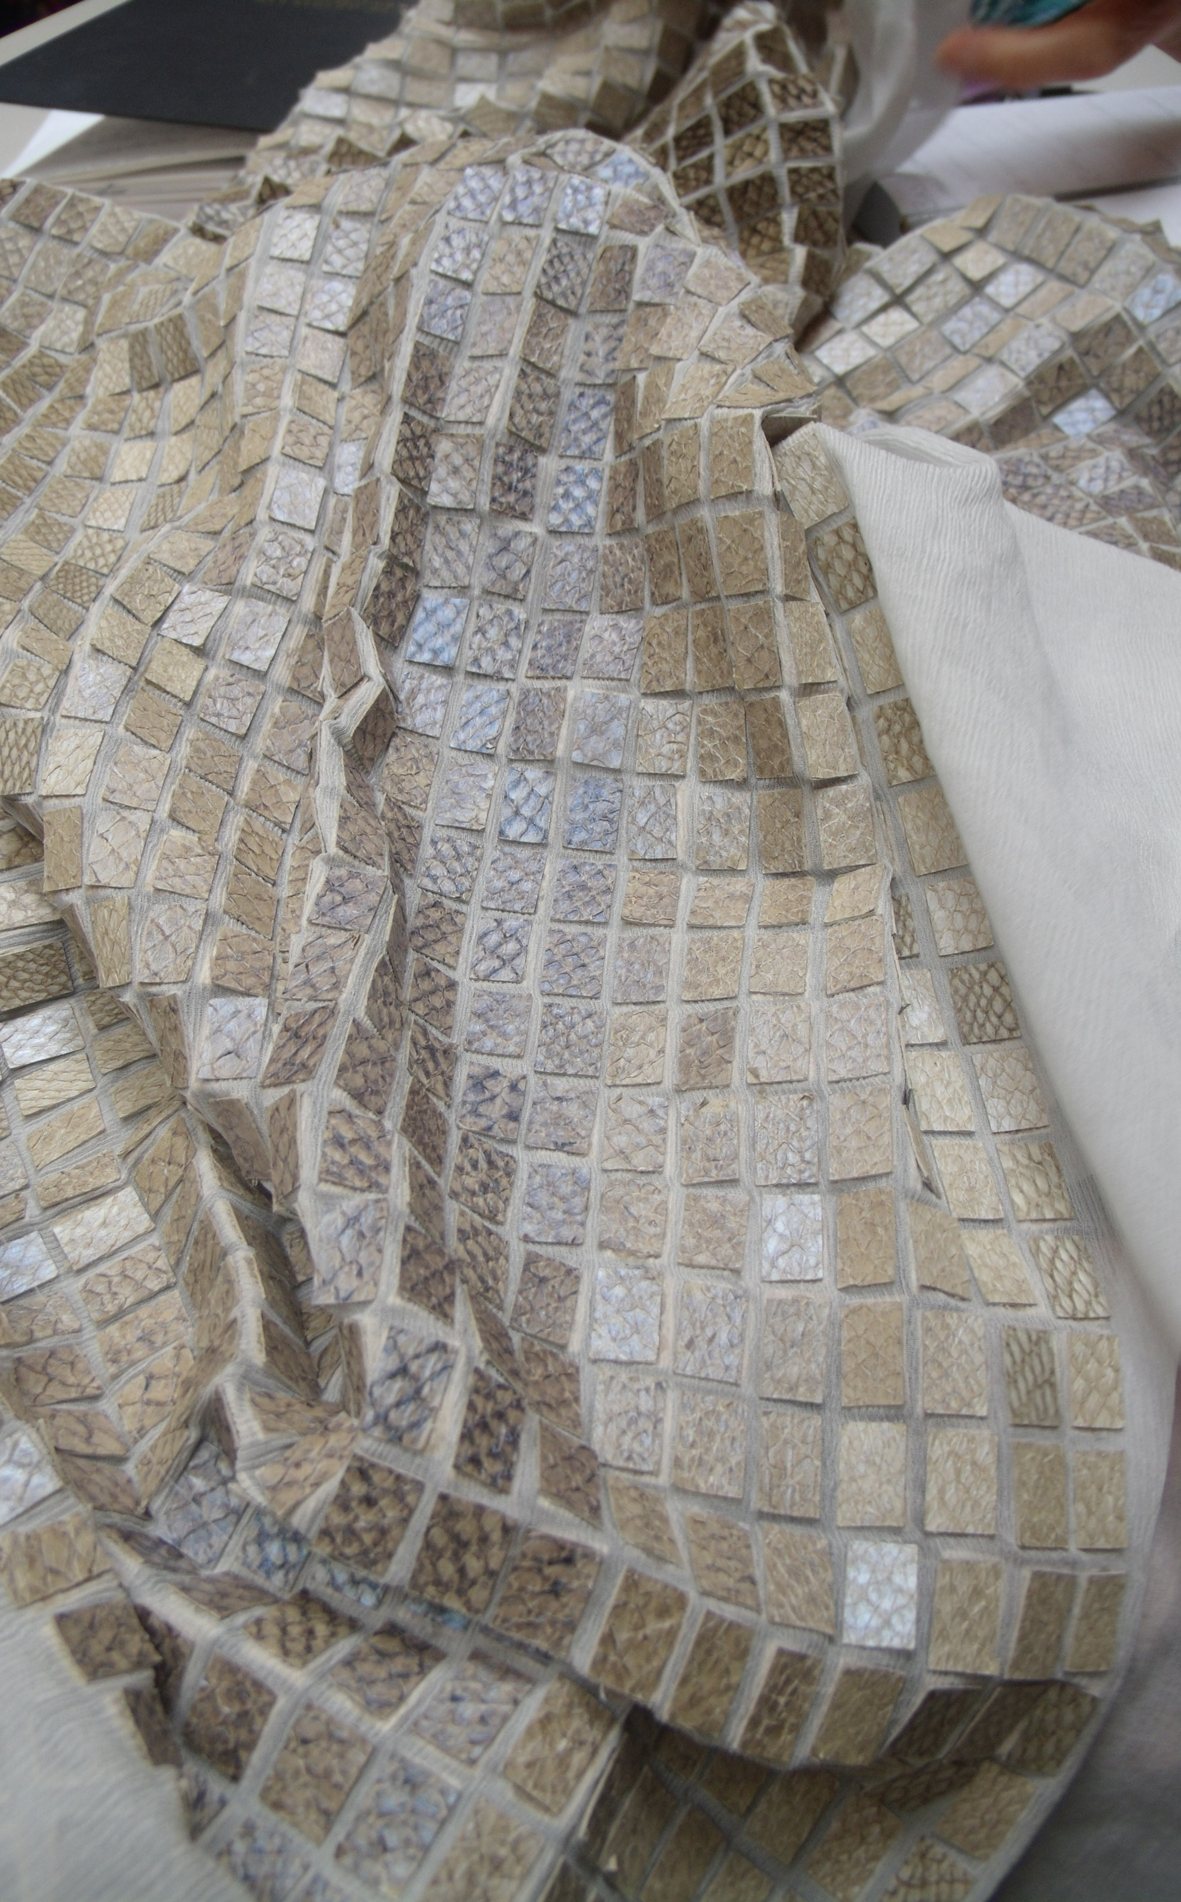
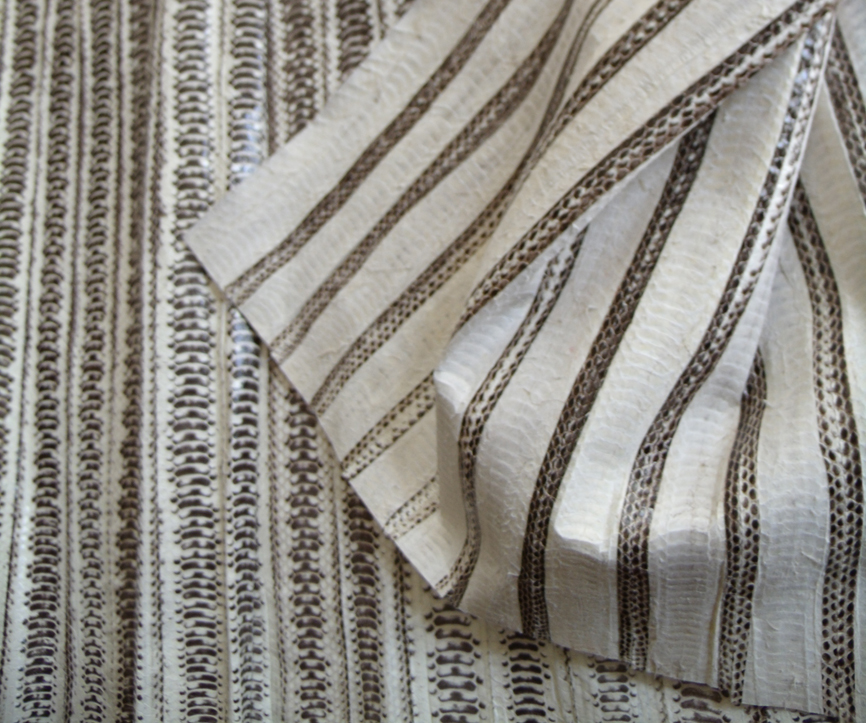
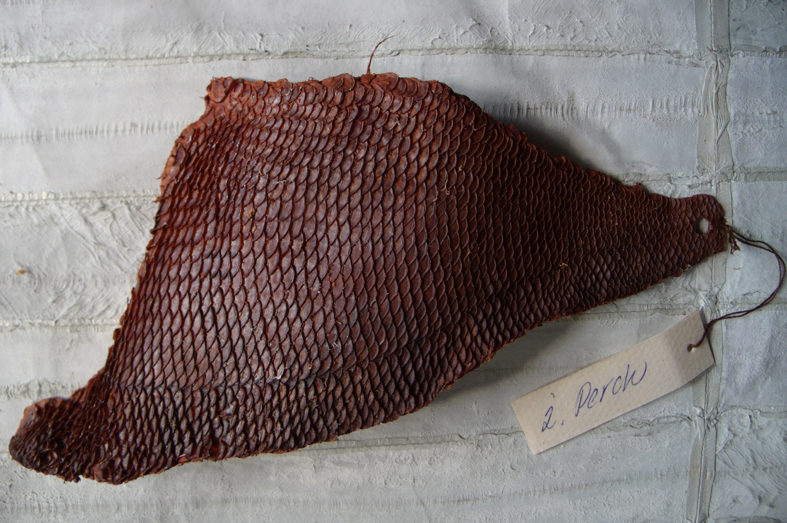
and the small chiffon fish skin piece from Swedish students, which really was inspirational for many of the other people in the group. Lisa made a simple and delicate spotted fabric using the iridescent fish skins like sequins.

Lisa Keating -appliqued discs of fish skins to silk chiffon

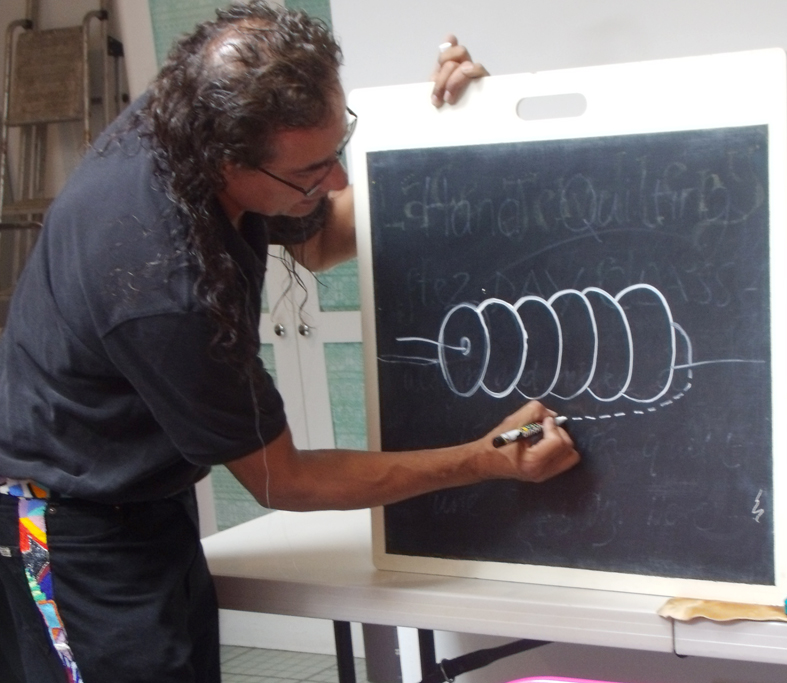
It is a seemingly simple technique but requires a great deal of precision and patience. The cutting and sticking of the fish-skins to the front and back of the material is really labour intensive. Libby Butler, a textile maker who  makes truly for the love of it –  became interested in working with the Fibonacci spiral and came on the second day with a storyboard from which to work a series of samples.

Libby Butler – storyboard of the Fibonacci spiral

she set to work knowing that she is in for a long time consuming period of developing this intricate idea into a viable fabric.

Libby Butler making her first card on linen sample collage for the spiral pieces

Meanwhile, textile maker Anne Harrington tried to simplify the making process by gilding the back of the leather using  adhesive that could be permeate through the chiffon.

Anne Harrington …gilding the back of the leather mosaic at the same time as adhering it to the silk chiffon ground

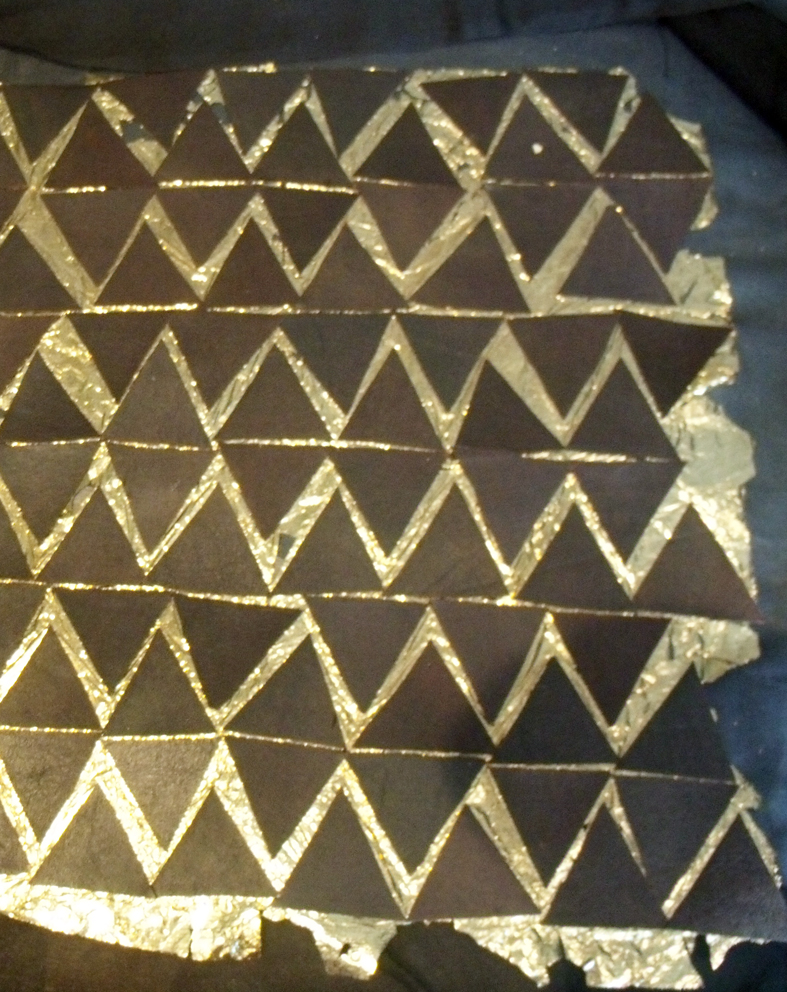
with really interesting results that beg to be developed further…..

showing the successful finished gilded sample back

These experiments are the first samples in an ongoing process to an exhibition in London later in the year; we aim to help the makers develop new works inspired by and exploiting the qualities of these unusual materials….for Basil Kardasis’ next class he is working with Vellum .

Surf,Turf and Sky: Master class materials

Fish skin, reindeer leather and feathers are the weird and wonderful materials that went into the making of first Master Class at Heart Space Studios -hence ‘Surf Turf and Sky’. This was  a 2 day workshop conducted by Basil Kardasis, an international designer and lecturer who specialises in using ethically produced and sustainable leather and fur and who reiterated again and again in this workshop how careful we had to be not to waste these precious materials which, for this workshop are the waste materials from farmed foods.

showing the start of the panorama research document in Heart Space

We had a ‘Meet and Greet’ session the evening before the workshop where everyone could informally get to know one another and see the ideas he had for the days ahead, a wonderful portfolio of images was shown which gave a panorama stretching 10 metres….all through the studios, the dining room and out of the door.

Turf section of the panorama

the next morning we unfurled it again to start the workshop with a myriad of inspirational images of animals, seas and skies.

start of the 2 day workshop in the studio

The people taking part were from many different backgrounds; we had 2 corsetiers/ dress designers; several university lecturers; an ‘academic quilter’, textile designers, embroiderers and a sculptor who worked in various materials from fish skins to precious metals. All were lured to the class by these unusual materials, but Basil told everyone they were not to think of their own practice – they had to react to the stimulus of what he and Heart Space provided. But first he showed ‘something he had caused to be made earlier’ a piece of sheer silk with appliqued squares of fish skin and fur. This beautiful but essentially simple fabric had been made at the University of Gothenburg in Sweden where he regularly teaches. This piece of work has tiny rectangles of salmon skin on one side and sheared Gotland sheep on the other (I thought I would be very specific in the spirit of research). This sheet of stretch chiffon fabric proved to be inspirational for several people.

leather and fur  side of the appliqued fabric
salmon skin side of the fabric

He showed several more ravishing dressed skins, not just to whet our appetites, but to explain how design can develop useable fabrics from usually discarded pieces of skin, like ” mink armpits”. The message is that we must sustain, make safe, and waste nothing at all when we use animals for our own appetites, whether food, protection or delight.

reverse of the fur to show construction
‘armpits’ of mink made into interlocking sheet of fabric

Then he introduced us, or should I say seduced us by showing the materials that he and his Swedish colleague, Eva Alfredson, had spent several months procuring from Scandinavia. The whole room was transfixed by the treasures he unwrapped…..

dyed and gilded salmon and Nile perch skins from the Scandinavian company Kust Skinn, kindly supplied by Karin Mattsson

Nile Perch dyed and gilded.

gilded and dyed salmon skins

shimmering salmon skins

wonderful sheets of pieced and dyed eel skins provided by  Saeed Khalique, who owns the London-based company Alma Leathers.

sheets of pieced and printed eel skins from Alma Leathers

stunning silvered and gilded fox furs sent by Roberto Tadini from Italy, just for us to marvel.

silvered fox furs from Italy

then the softest reindeer leathers in glowing colours from Finland, courtesy of Carita Pontio of Ahlskog Leathers

reindeer leathers from Finland

I teamed all these materials with sheer silks and linens from Whaleys of Bradford….

silk chiffon and linen scrim from Bradford

and also a small but beautiful selection of feathers from Buy Feathers, England.

feathers from England

After all this wonderful introduction we had to break for lunch to gain energy to face an afternoon of trying to start to do justice to these materials; everyone was nervous but raring to get going…..and I will show the results on the next post.

Beading a Face

Heart Space Studios has been host to a fascinating set of artists this week, Native Americans who are exhibiting their work at an exhibition called Messengers 2012 at Rainmaker, a Bristol gallery specialising in native art from south west America, mainly jewellry, but also prints, sculpture, paintings and textiles. Rain maker hired the studios for 2 events, a master class in bead-work “Making a Face” by Marcus Amerman, and also for a day of lectures given by several other artists in the exhibition, all of whom are renowned makers and scholars.

Marcus lecturing with an image of one of his beaded pieces, Indian Country

Marcus Amerman is an innovator in Photo-Realism in bead-work; he demonstrated how to develop a portrait in beads from a photograph, a technique that updates the bead-work tradition of Native Americans, where the beading is largely used for ceremonial costumes. He showed how the portraits can be used for personal adornment as brooches, pendants or bracelets.

selection of beaded pieces, including a bracelet and a money clip

He started the class by showing a selection of his work and several books to illustrate various aspects of the craft traditions he has used in his career as an artist. He was born in Phoenix Arizona to an Eastern European father and a Native American mother and is a member of the Choctaw nation. The bead-work tradition that he practices is, however,  a specialism of the Hopi nation and his brother- in- law is a Hopi man – so this is where and he feels he has been influenced to adopt this beading method.

American books showing contemporary arts and crafts

He talked at length about duality within his work, and how beading, for him,  embodies both masculine and feminine attributes; the beaded ceremonial pieces worn are by men to show strength and dominance, defying the world –  but are made by women who “embrace the world” by their skills.  He also spoke of when he teaches this class to women who stitch traditional bead-work on reservations, how they invariably make very personal portraits of their own children so they can wear them everyday.

Like all the Artists that Rainmaker exhibits Marcus mixes different cultures within his work; he uses imagery from  films, fashion, other crafts all bound together in a figurative manner that can make varied visions from popular culture to subtle political statements.

Salma Hayek in Dusk Till Dawn beaded onto a passport holder.

 He also makes clothes and costumes for his performance art and first started embroidering and beading his denim jackets when he was a young man – he still wears beads today, and practices several different crafts including enamel and kiln fired glass. I really admire the way that whatever Marcus makes, be it a passport holder, note clip or a subversive art work, he is at ease with himself and his chosen media and message.

Marcus’ beaded belt and trousers

What I did find surprising about his work, having only seen it in books before, was its small scale  –  it looks monumental when illustrated, but it is full of detail, pattern and colour – you can hold it in your hands and it is a glinting, brilliant, faceted  fabric…. truly remarkable.

Now to the workshop – Marcus started everyone beading by first introducing them to the tiny beads he had brought with him and the smallest needles I have ever seen. They were stored in an animal hide needle case outlined in beads, the needle were sized from 11 – 13 and were very fine and very short for a beading needle.

hide needle case adorned with beads.
tiny needles in a hand made case

He brought 7 shades of blue beads to use for the faces and a length of each colour was given to everyone. Next they had to learn how to map out the facial contours for each shade, staring with the darkest tone. He gave everyone the same photograph to work with, stating with the darkest tone of blue they had to draw in all 7 tones.

seven shades of blue beads for tones of face

The image that was given to the students was a photographic  portrait of another of Rainmaker’s artists, Shonto Beday, a Navaho painter and print-maker, who has work in the current exhibition as well. Each person had to draw around or shade in each isolated contour of the face – the results are so entirely different and you can see at once how everyone has their own way of seeing and perceiving.

picture of a student’s daughter with the coloured drawing contour guide

I really like these drawings, they make such an impact and clearly show that even when working from the same photograph everyone has a different perception and interpretation entirely of their own.

Now the students had to start stitching their own images, with only the contour map for a tonal guide – BUT not before they were shown the technique for stitching the beads straight onto the photographs in a spiral pattern. The photographs had been prepared for this by bonding them onto a specially reinforced paper backing made by brushing a thin card with several coats of a bonding solution.

Marcus draws the stitch diagram for the spiral beading.

The method of attaching the beads ensures an even and straight line of beads that can be manipulated around shallow and eventually tight bends – if you get the tension right.

Beading the photograph starts from outside the face

The maker than has to use their own judgement when to change the tones in the row of 6 beads – so that they cover the face exactly. Not so easy as it first appears. And now it becomes obvious why the beads have to be so tiny. And just one bead needs to be stitched to show the bright reflective point in the eye – this gives the face life…and Marcus says that every beader he has ever taught uses a different colour  or type of bead to represent this point.

I am hoping to show some of the finished pieces at a later date….meanwhile I am trying hard to stop myself from going into my studios and trying my own version of this technique – I will wait till I have an idea that suits the system as it has a lots of potential for enriching my fabric enamel work

Put Out More Flags

red white and blue

The weekend of the Queen’s diamond jubilee here in England has  brought out the bunting and as this is a textile blog – let’s celebrate….

strings of the union flag bunting along the main road to work

On the way to Bristol to work at Heart Space Studios, I kept stopping the car to take pictures of the patriotic red white and blue bunting strung out in front gardens,  – the local neighbourhood streets  had tastefully dressed windows

window dressing in Bristol

Families had decorated their homes for this one weekend….

vintage style bunting

even scaffolding got the a dressing of flags

decorated scaffolding in Westbury Park

and while waiting for the wisteria to bloom,  bring out the bunting …

wisteria vine with bunting

The shops really got into the spirit

a charity shop window in Clifton
reflected awning with bunting galore in a local cafe and craft shop
knitted bunting in a vintage clothes shop

But for really proper patriotism go for the Union Flag – this vintage flag is in the window of my favourite vintage clothes shop Clifton Vintage Boutique.

vintage union flag

and my favourite red white and blue bunting was in the window of a clothes shop in Clifton village it is authentic stitched and appliqued cotton i am very jealous that I didn’t think to make up some like this for Heart Space.

union flag bunting in cotton patchwork – the real thing

All very tasteful… but back in the  Somerset town of Portishead, where I live, the bunting is full – on and fabulous – all ready for a street party

Portishead garden with bunting

Almost every house and garden in the centre of the town is dressed for the celebrations

Portishead town garden..

and one more just to show you how colour co-ordinated we are here, the perfectly matching red roses of England

red roses & bunting line

and how’s this for real patriotism? bunting with toning red white and blue washing.

ebunting and mix & match washing line

Auricula Theatre

Flora Exhibition catalogue cover – Holburne Museum. Bath 2000

In an effort to be topical with the spring here at last, I am posting another of my Flora Embroideries, the Auricula Theatre. A strange idea to display flowers in such an artificial setting, I just had to embroider it – but needed quite a bit of help. In fact after the initial sampling I left the embroidery of all the dozens of tiny petals to my then assistant, Debbie Cripps, and a beautiful job she made of them. All I had to do was design and assemble the whole edifice.

Auricula Theatre illustration by John Farleigh

The theatres actually did exist and originally for a purpose other than display, the curious colours of some of the flowers is due to a farina or flour like substance that coats the leaves and petals giving  them a white or silvery appearance and it can be washed away by rain – so the earliest flowers were often placed under protective coverings. I became intrigued by the auriculas having seen them at spring flower shows – not in theatres but in simple plant pots; even in local church halls they really attract attention – they just don’t look real, they look like someone has painted them in strange colours with stripes and edgings of greens and white and yellows, they look like a child’s drawing of a flower.

black and white auricula at a local flower show

And when they are displayed in modern theatres their various markings can be truly appreciated

modern Auricula theatre

So I set about making one for myself, to become a permanent display. I arranged several of my photographs form the various shows I attended into a staged setting, then set about trying to embroider them.

.

show photographs arranged as theatre display

first I needed to draw them before I could start to stitch them.

first pastel drawings of flower heads

at first I tried to paint in the backgrounds, really to make things easier and quicker….

painted dye on linen ground with embroidered edgings

They looked OK but didn’t really have the intensity that the real things had, show auriculas look like imploded flowers so intense is their colouring  and perfectly symmetrical their form. I realised that I had to make similar intense embroideries. I started by embroidering individual petals..

my hand stitched samples of individual petals

I decided to try coloured grounds to make life a little easier.

different ground fabric samples

I used gauzes and fine silk grounds so that the made up flowers would not be too heavy but it was a bit of an awesome task even with help with the stitching.

after giving the fabrics and my working samples to my assistant I set to work to develop the theatre.

initial drawing for the embroidered theatre

I know that this drawing is really simple and childlike but it was enough to get me started – I soon realised I had to make a 3D embroidery, so the curtains were  lined and draped and the canopy was held above and projected out beyond the flowers, it was ribbon worked exactly as 17th century embroidered bed hangings.  The earliest auricuals were grown by Flemish silk weavers and eventually shown in special competitions were prizes were awarded, usually a silver cup or spoon. The Flemish silk weavers introduced them into England as early as the 17th century  – so I decided to have curtains made from woven silk brocade that features auriculas ( you can’t say I am not thorough in my research)!

pure silk brocade featuring auricula flowers

The finished embroidery is very 3 dimensional and is densely stitched and draped, it is the one piece of work that everyone wants to buy, probably because it featured on the poster for the exhibition at the Holburne museum in Bath where the whole set of Flora embroideries were first shown in this country. This was in 2000 so this is really old work now – but making this piece made me decide that I needed to start to develop new types of work using different media or techniques or both, this heavy stitched surface is too time-consuming and therefore too costly to sell except to a committed collector or dare I say it – museum? and I have decided not to separate the pieces because they tell a story of how, through trying to perfect nature we can go horribly wrong. I had stitched myself into a corner but I still had quite a few more pieces to complete The Flora set of work.

completed Auricula Theatre

Skin

Fingers and arms lasered for translucent vellum

I have become fascinated by skin as a material to work with. This has come about, no doubt, by my recent project to develop a piece of work for Pairings II for the Stroud International Textile exhibition. I used a huge skin that had been prepared as vellum – or parchment –  a hide, possibly reindeer in this case, treated in such a way as to make a smooth, hard, fine grained surface after removing the pelt, either  fur or  hair – don’t let’s forget that all animal leather and suede is simply skin with the fur or hair shaved off.

coloured drawing, dyed, stitched and lasered onto vellum

What is really exciting me about working with vellum is that I can draw onto it as well as stitch into it. There are other things to do with it as well but drawing and stitching really are the backbone of my textile practice, and here is a new material redolent with all sorts of symbolism that I can start to mine. So maybe this will lead to more drawn imagery with stitch to enhance the drawing – not sure yet – but hand stitching this material needs long and slow preparation.

drilling the vellum to stitch it together

Recently I have been working with all types of other skins, mostly calf skins, some with the hair still on…

shaded mottled calf skins

I have done quite a lot of work with fine leather and suede, most recently at a workshop in Finland at the University of Ostrobothnia, at the faculty of Applied Sciences, where I first experienced the large scale sheets of vellum as an option to work with. However I chose metallic leathers, cow hides and farmed fur to create an embroidered seascape, embellished with silver leaf. But I had remembered the large vellum skin and how beautiful it was and so used it for the Daphne Tree metamorphosis piece.

hand stitching fine metallic skins to hide
sample of stitched leather and calf skin

The company who farmed and manufactured the vellum, were generous in sending me a whole skin to work with; it has caused much interest in the exhibition, most people seem to think that vellum is just some esoteric writing-paper and keep asking me where is the animal?

But what is really exciting is that the leader of the Finnish workshop, Basil Kardasis, is conducting another workshop at Heart Space Studios, but  this time using one of the most unusual and beautiful of skins –  fish.

He is introducing this material for a master class for experienced makers, called Surf, Turf and Sky, using fish skins, leathers and feathers – all of which are by-products of the food industry, so think eel….

dyed and stitched eel skins

water snake (they eat these in Scandinavia)……

un-dyed stitched water snake skins

and smaller whole dyed fish skins….like salmon, trout, pike….

dyed salmon and trout skins

and also some specially hand – tanned skins from Sweden, perch, cat fish, and plaice.

a variety of tanned fish skins

the individual skins are small but call out to be combined with other materials to enable us to make fabrics out of them..

tanned catfish
tanned perch

but my favourite fish sample is a tiny single side of Knot, it already appears to be embroidered.

beautiful preserved Knot skin – about the size of a sardine

Plan B for the Daphne Tree.

I have been too busy to blog – or rather too tired after working a succession of 12 hour days to get to the deadline, today, for putting this work on the wall of  the Pairings exhibition. I have been making the Daphne Tree  with Rachel Kelly, designer of Interactive Wallpaper,  and Daphne is a truly metamorphic development. She morphs from a laser etched drawing in animal skin – (I suspect reindeer as this is a gift from the manufacturers in Finland,who produce and sell these large sheets of vellum or parchment for  making into drum skins) through paper hand made petal infused and shoji screen papers which are vegetable eventually becoming cotton damask with a man made surface skin of printed decals…..But to start we have burnt a drawing of a figure using modern technology onto of the oldest drawing materials known to mankind – and the result is very very beautiful.

The quality of the skin changes over the surface of the animal, thin and white on the sides nearest to the spine – which is dark; then translucent on the edges where it has been stretched and where, I presume, the skin is thinner. The results of the lasered marks are startlingly different, in places hardly discernible in others a beautiful burnt golden brown.

The appearance of the drawing fluctuated over the entire surface of the body – sadly it needed to be drawn into to make it look stronger and bring out the intricate patterning of Rachel’s original leafy drawing. and the hair had to be coloured as well as it turns to leaves

So far – so good, all going to plan…then we hit a series of snags, first the fabric chosen for  printing the flowers of the canopy was not is stock and then Easter holidays meant that the staff in charge of the printing machine were away and suddenly everything looked to be very tight for getting it organised in time….

Plan B. I decided to ask Rachel to send me her designs on print transfer papers that can be ironed into position – I had seen this done before at Heart Space Studios by Teresa Searle and I knew it was a possibility to get things printed fast …so I bought some T shirt printing transfer papers from the local high street, and taking my courage on both hands started sampling.

Meanwhile I stared to dye the shoji screen papers for the leaves which transitions the animal to the vegetable.

Then I started to cut and apply the leaves onto the paper and the fabric..a beautiful vintage damask I had dyed in tea to blend in with the petal paper…

By this stage the transfer designs had arrived from Rachel – and they were really something else -brighter colours on new flowers…daffodils, tulips and big bouquets in brilliant colours – I loved them BUT they didn’t go with my first row of lovingly pressed transfers….I had to think on my feet – but hey I am a designer and this is what designers’ do…isn’t it? I definitely needed more leaves and many more flower transfers..the space looked massive that I had to fill up – about 1 x 1 1/2 metres wide….but eventually Rachel and I got there.

OK I hear the more attentive of you say, ” you missed a bit – the body is now attached to the head which is attached to the arms…HOW did that happen”?  Well it was all stitched together.

To be more precise it was drilled and stitched together, the vellum and petal papers being too tough for me to get a decent spaced stitched line – here I am hard at work

But eventually Rachel arrived yesterday to complete the flowery appliques..

All we have to do now is starch and press it, get it fixed to a cardboard tube as if it is a roll of fabric and take it to the exhibition…..you can get the latest update and the other side of the process by visiting our Pairings blog, which is by way of a conversation between us Rachel and myself.

Panic Early – Design and Sample

“Panic Early ” has been my making motto for many years and the advice I always handed to students at the beginning of any project with a set deadline….now it is my turn to heed my own advice. As a hand embroiderer the idea of stitching in a hurry is a total nightmare.  So I tend to give myself a few days ‘wriggle room’ on any given deadline, I hate last minute making. So as my partner Rachel Kelly and I have about 3 more weeks to the deadline for a piece of work, I have decided to step up my input and get to grips with the rest of the tree design and sampling (with a plan B as well – watch this space) so that as soon as the Easter vacation is over we can just roll into the manufacture of the fabrics. The actual piece of work has been in the making for about 2 months now (see the last 2 posts) and the idea to make the Daphne Tree is at least 15 years old and I am about to see it come to fruition in the next 2 weeks, when it is due to be exhibited at a group exhibition called ‘Pairings’ the Museum in the Park in Sroud

The design drawing above, although sketchy, is looking fairly comprehensive, although to anyone who hasn’t seen the full scale pattern on the tables at Heart Space Studios will have their doubts about my progress.

As a hand embroiderer I am used to developing my original design ideas as I make them. Working from a fairly comprehensive design drawing with stitched/dyed/fabricated samples, hand stitching then affords time to contemplate the work in progress, so subtle shifts of colour or even whole areas can be re-assessed –  sometimes a piece of work can take several months of steady work to complete. The initial research is a  fairly rapid process compared to the execution of the finished piece. Now I have to plot the whole piece in advance of starting the work so that I can calculate just how much stitching time will allow…we have hit on the idea of working with paper computer print-outs that Rachel send to me as she designs them -so that I can develop the design and get the scale sorted out, while we wait for the fabric to arrive to be printed and the departments to open up after Easter

 My pairing partner, Rachel, works in a completely different  way – she is a digital printer, so everything she makes has to be mapped out first on a computer and programmed so that she can manipulate everything she needs at the final printing stage. She gives herself a range of options to choose from – making her work spontaneous in a totally different way than mine…..in fact my way of working isn’t spontaneous at all, it could be said to be organic or even vegetative in its development. She takes a long time to prepare; I take a long time to make; she can print metres of  piece of cloth in a day; I can take months to cover half a metre.

And as we are playing a game of consequences to make this work, in that we each react to the others new idea or  image, I have to play by the rules and just make  new ways to to do my stitched work within the time span. But what wonderful choices I am given, beautiful bouquets of exquisite flowers, some with hidden birds that I can cut out and embellish, but at the moment just working with paper makes the stitched results rather crude, but gives me ample opportunity to play with the colour and composition.

Eventually we will have the cloth to print on and cut out and sew beautifully – and the vellum will be laser etched hopefully later this week ready for me to start sewing it all together. Meanwhile I have to carry on sampling all the ways I can make a piece of vellum transform into a sheet of paper which then becomes a printed chintz design on cotton. I have started to sample dyeing the shoji paper leaves to applique onto the cotton fabric – hand stitching is the answer   as all of this is too big to go under a sewing machine – did I mention that this work is 3 metres from the toes to the top?

Drawing Consequences

I have often said that drawing is my first language, English my second and Stitching my third, and I can’t now remember a time when I did not draw. So it is a real pleasure that my latest work (working title – the Daphne Tree)  that I am making for an exhibition Pairings, with my partner Rachel Kelly has involved all types of drawing, from scribbled notes on the scrap paper made on trains to laser etched vellum.

Rachel and I are making a single piece of work using the idea of the game of consequences; we are reacting to each others work, developing a figure turning into a tree. I drew the figure, Rachel drew the “bark on shoji paper, then I sent the collaged bark drawing back to her and so we go on…but before this second step I had to make several large drawings to establish the figure – she needs to look like she is being stretched and frightened and also looking sort of tree shaped….I had problems with the legs – getting the stretch in the calves was crucial – the first drawings were useless they looked like she was floating. I always use cheap rolls of lining paper used for decorating for any large scale rough drawings

I had to work on her feet, they were supposed to be burrowing into the ground taking root, the drawings look really nasty like she has been burned, but they are starting to look forceful and like they could penetrate the earth. in fact they look like they have been dug out of the earth….But it is the head that has to be looking as if it is in shock at the moment that it is turned into tree bark and the hair to leaves.

The final drawing for this transition or metamorphosis, has to be exact for it to be then transferred and later translated into other materials and different types of drawing – and this re-drawing with a tracing wheel is just as crucial as all the drawings that have gone before.

So eventually Rachel and I have met up to develop the drawings, I have taken my large sheet of vellum, that I have been kindly given to work this project with, by Kemin Nahkatarvike oy the Finnish Leather and Fur manufacturing company. We are now sampling all sorts of other material that we may use in the final piece – we need to sample all the stuff to see how we can laser these drawings onto the various surfaces…but first more drawings are  developed by Rachel – on a computer.

The results were not exactly what we wanted – well not for this project ….

The drawing into hand – made paper was more successful even though we lost some of the surface petals  – but we had to hand-draw and cut the stencil that acted as a shield for the burnt area of laser etching

laser drawing on hand made paper with embedded petals

But meanwhile Rachel and I were busy thinking and drawing out the next stage of the work – this is only the trunk of the tree – now we had to imagine the canopy. I had scribbled some ideas down on the train to Manchester, I don’t know what it is about trains but they always make me very imaginative, I get lots of ideas on train journeys.

I drew this in Biro – I really like Biro to draw with as it can make a very elegant mark; but actually it was all I could find in my handbag to work with. It shows how I envisaged the next stage of the work – the canopy. But when I got to Manchester we had to really start to consider the various stages for the design drawings, so we stretched out our combined drawing along side the samples we created with the laser

Then while Rachel dealt with the computer drawings – did I mention that she is a technological wonder woman? I dealt with the tracings of the original figure.

I had to make quite a few different typed of marks to translate into the separate systems that we needed to translate the original drawings into  computer aided drawings

When we met up between tasks or at lunch, we talked of the next stage – how will we develop the canopy? I thought we could applique some printed versions of old flower bird or leaf designs  from our separate practices,  as used in old American chintz patchworks and quilts. And chintz seems to be where we are going next…but the during her morning train journey into work Rachel drew this( below)  in her note book.

And now we are at last ready  to start to introduce the missing element for us both – colour, but that needs a new set of research drawings….