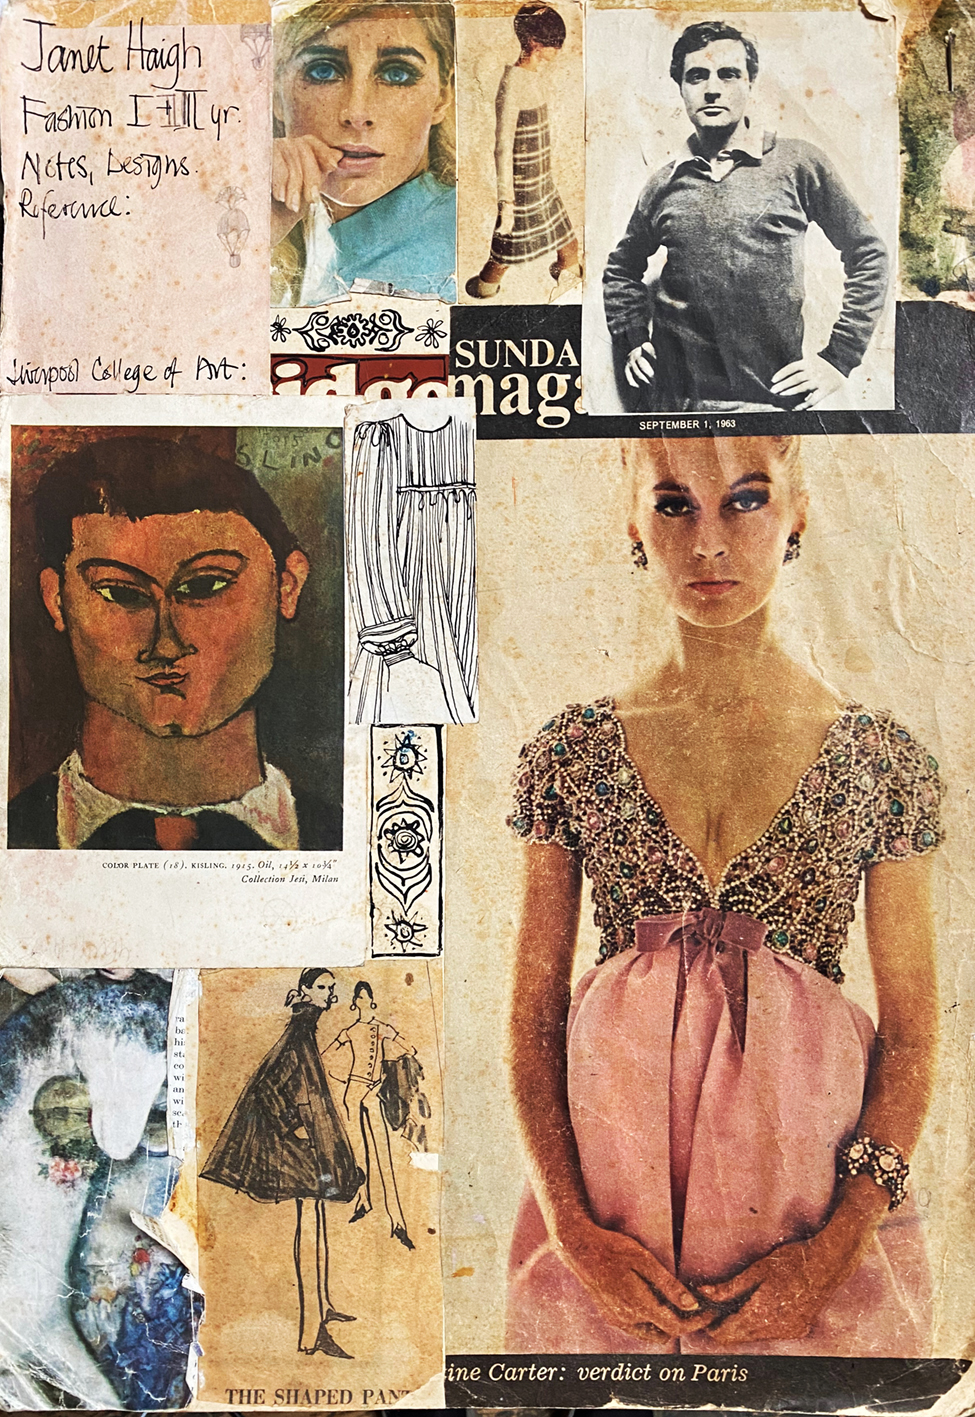
The cover of my late 1960’s sketch book – says it all!
Invited to conduct a week long course of drawing flowers and then to develop the drawings into a small sketch book at Court House Farm in early June, when the cutting garden flowers are blooming. I checked out my collection of sketch books/ visual research journals (whatever they are currently called) I have kept all my research books throughout my working life.
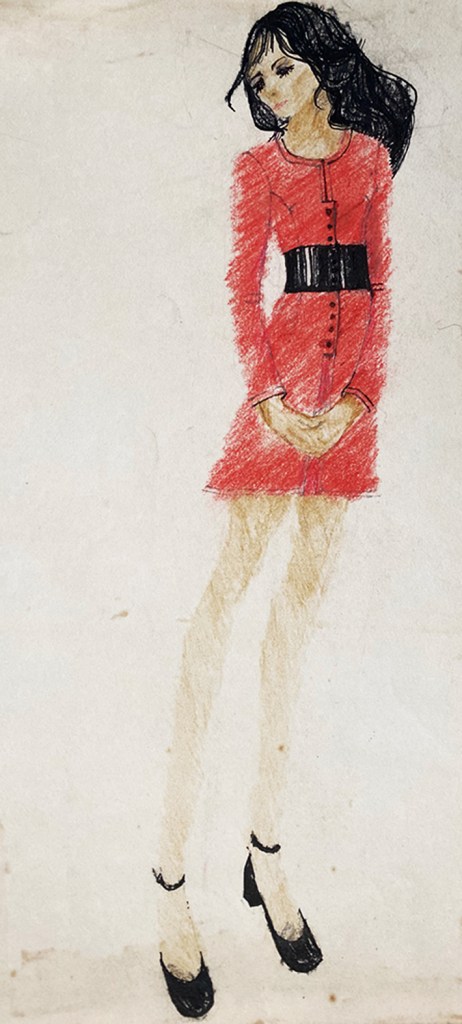
then I unearthed my first Liverpool College of Art sketch book circa 1968 – and this cover still looks like a protrait of my early loves and fashion influences …Modigliani, man and work, Chagall, dresses as worn a la Dusty Springfield; with the faces and poses of models that influenced my design illustrations. And inside???
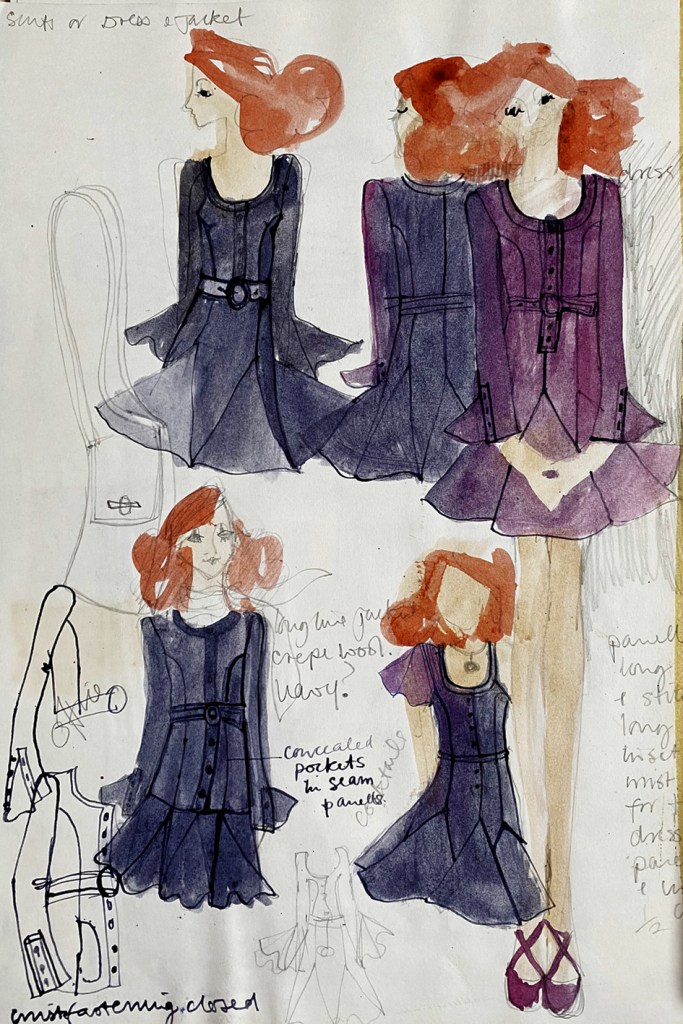
Above are a range of design drawings in pencil and coloured inks that were used to tint black and white photographs. I found that the colours were very subtle, I wonder what happened to them? These are layouts of my designs ready to be illustrated, I think for a competition for RSA (a brilliant organisation that enabled students to develop their practice with scholarships and grants). Everything looks in proportion until you see the legs, they go on forever. We were taught to make drawings that someone else could work the pattern cutting and making, a very good practice as I found out when I did become a fashion designer and illustrator in London in the 70’s. But what is really fascinating, the pages do not look so different to my own recent research books – just a change of subject matter- oh and embroidery!
These pages of flower are from my current research book started in 2023; I am still having a written conversation with myself. Back to the 60’s…….
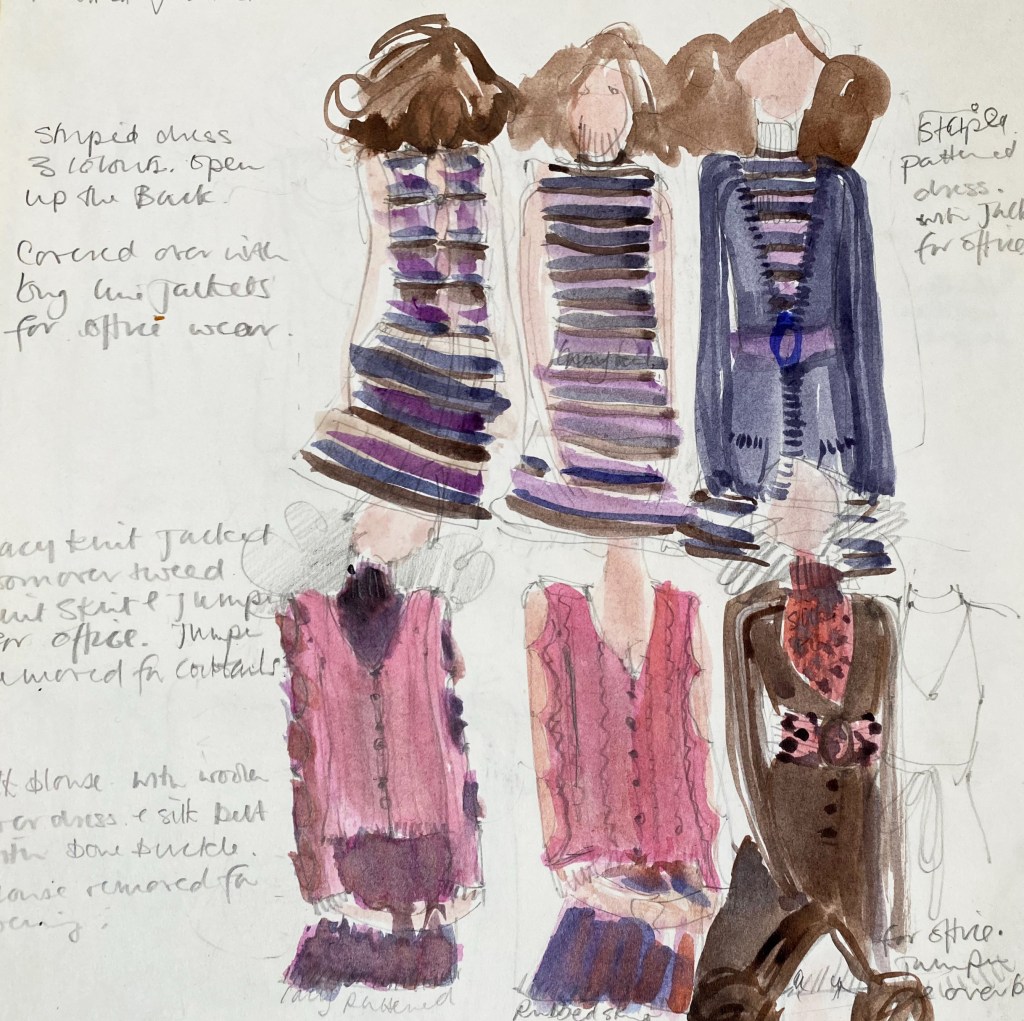
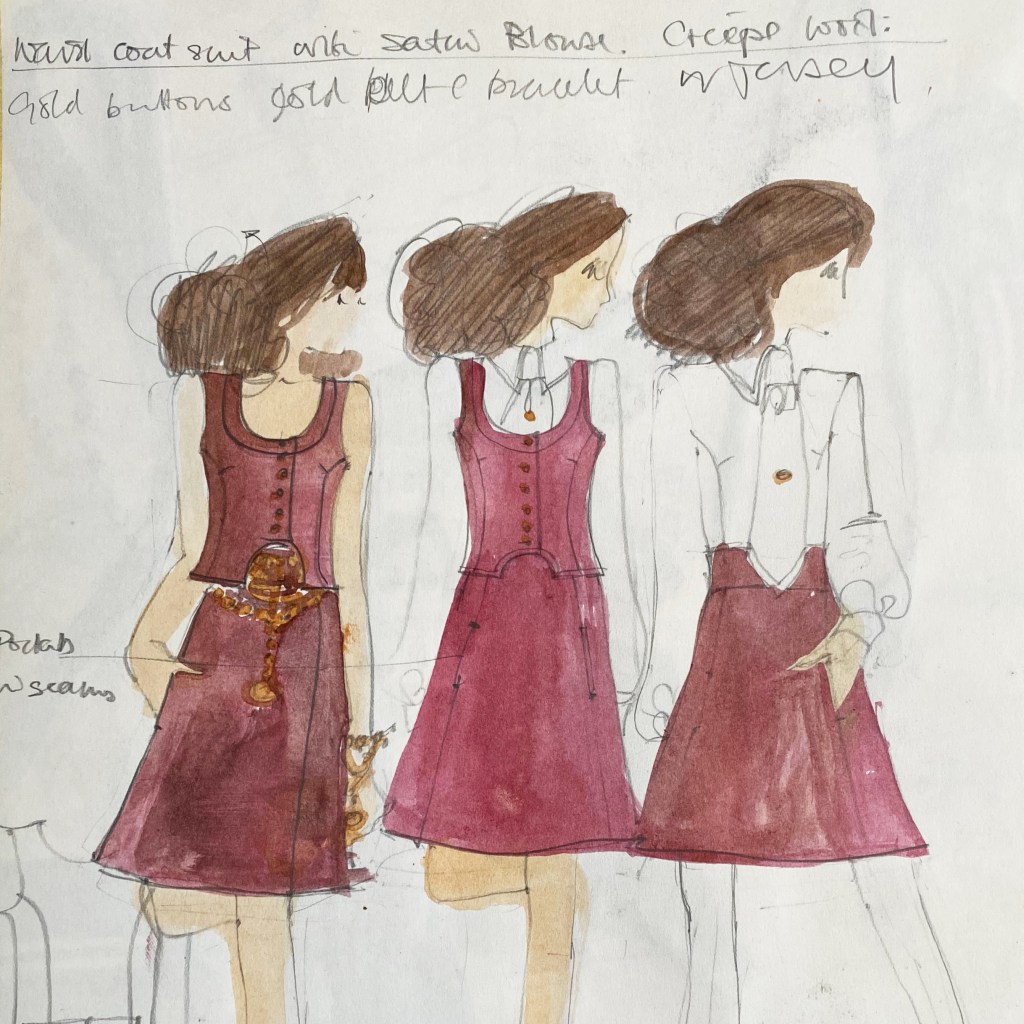
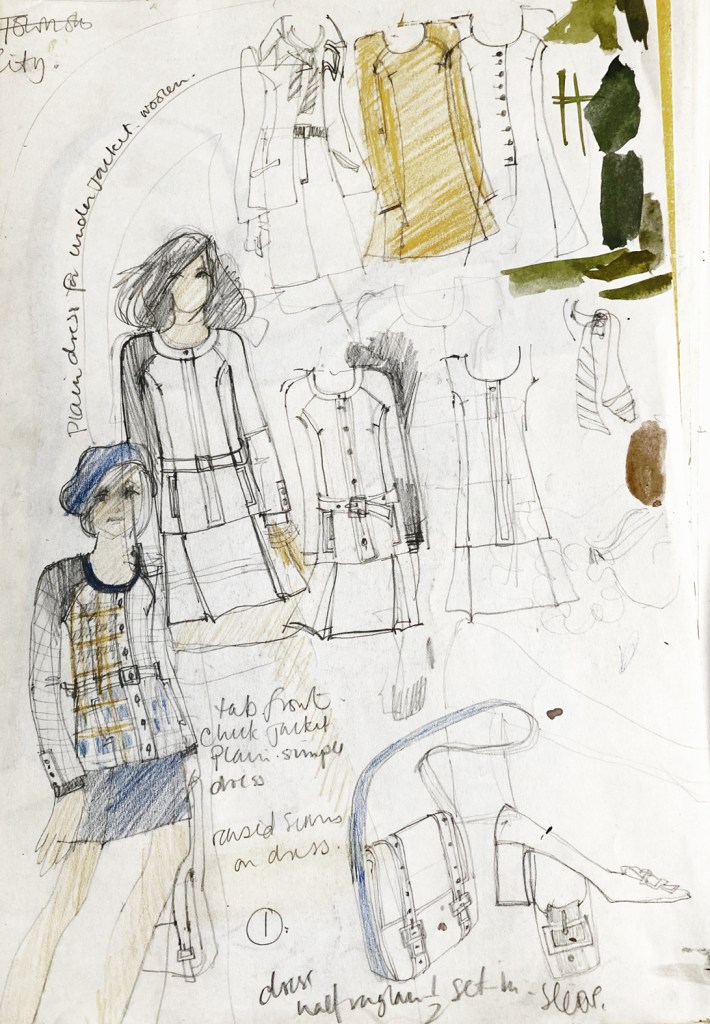
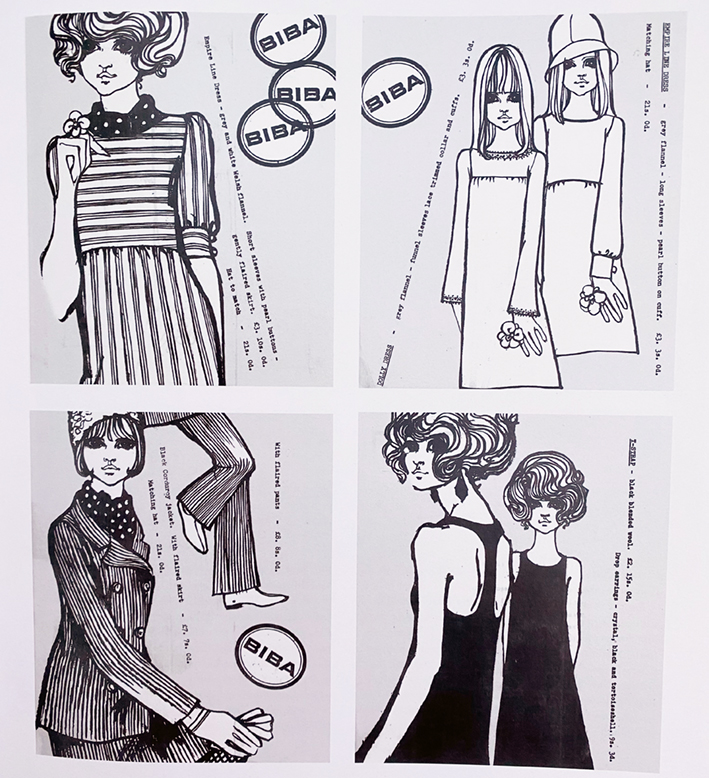
These very neat dresses were designed to be made in Double Jersey, a new innovation that made for easier pattern cutting (but little else as far as I was concernd). I always preffered my designs to be made in fine wool crepe. In the sketches below it appears I was also designing lots of accessories as well! the drawings above use my favourite media of the time – pastel with mapping pen and ink details.
Below are designs that use applique and embroidery – I remember embroidering woollen flowers onto a knitted dress for my final collection and I think this is where I really got the passion for embellishment and embroidery. My first freelance job was making and designing appliqued T shirts for the Mr Freedom in Kensington – the height of London boutique street fashion at the time.
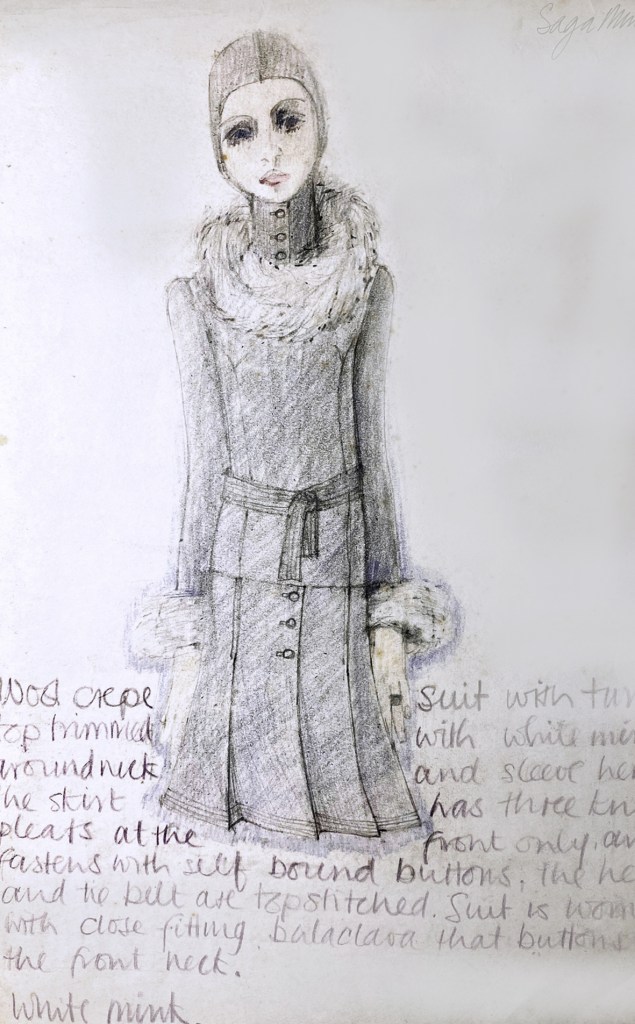
Another sign of the times the Saga Mink competition, ( I did not win – well just how much fur would these designs sell)? The anti fur lobbly was just starting up, but that’s another story. The drawings are in crayon and pencil.
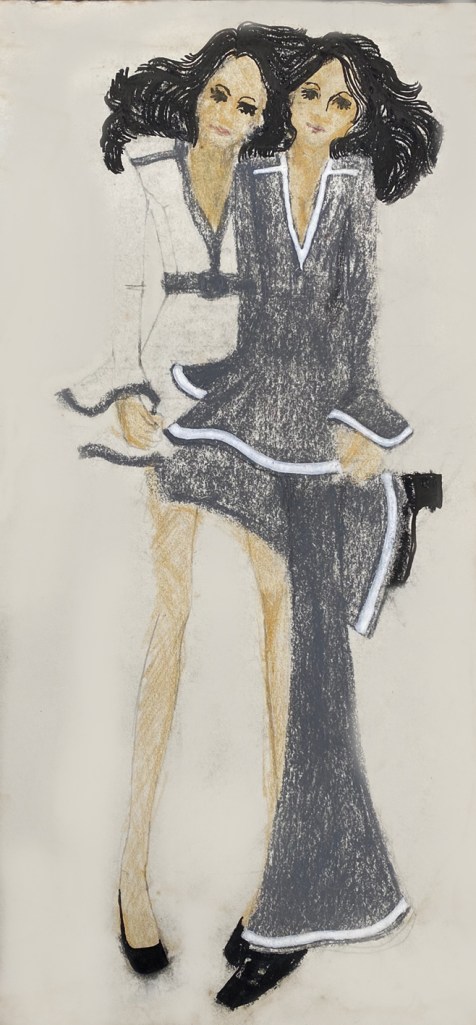
However here you can see the direct connection to the cover of my sketch book and the influence of my favourite fashion designer and illustrator – Barbara Hulanicki the design genius behind the most fashionable shop of the times – Biba .
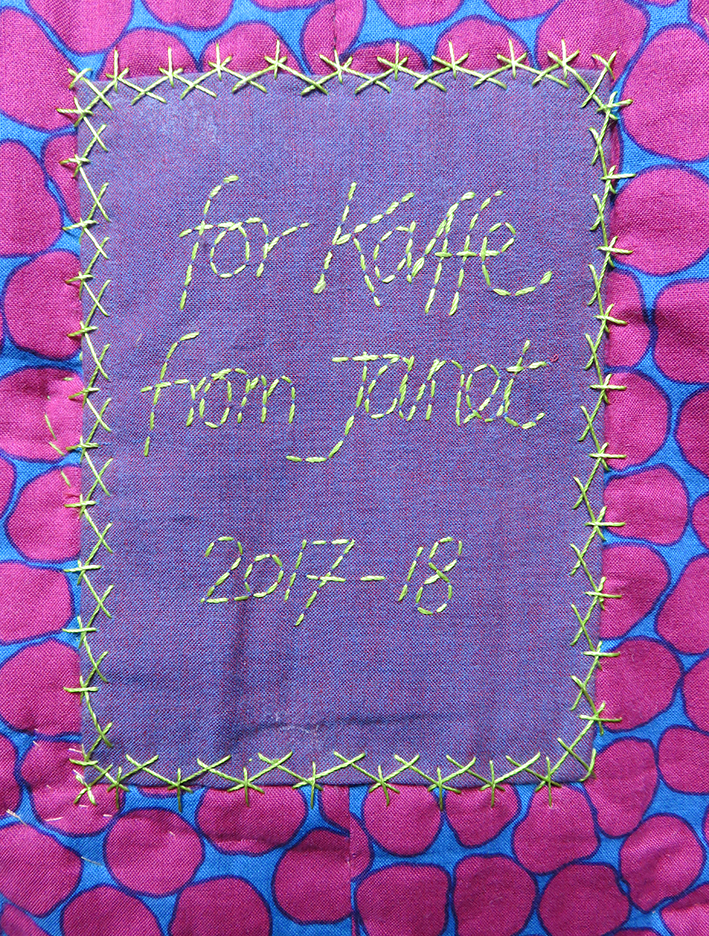
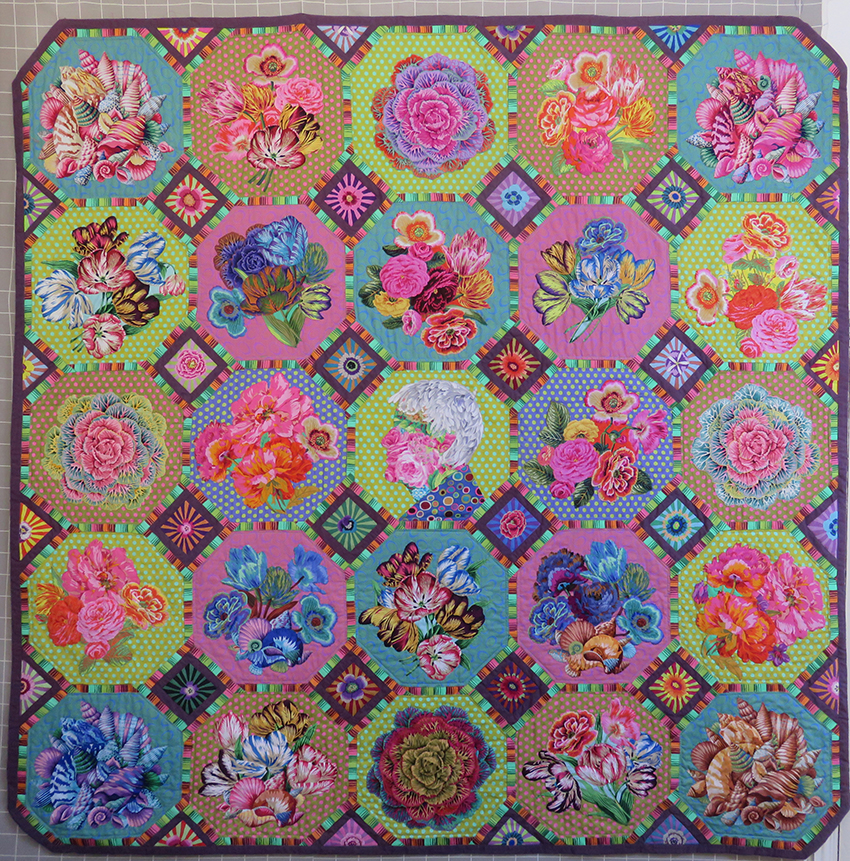
My final stitches on the back of quilt appropriately backed with fabric designed by Brandon Mably
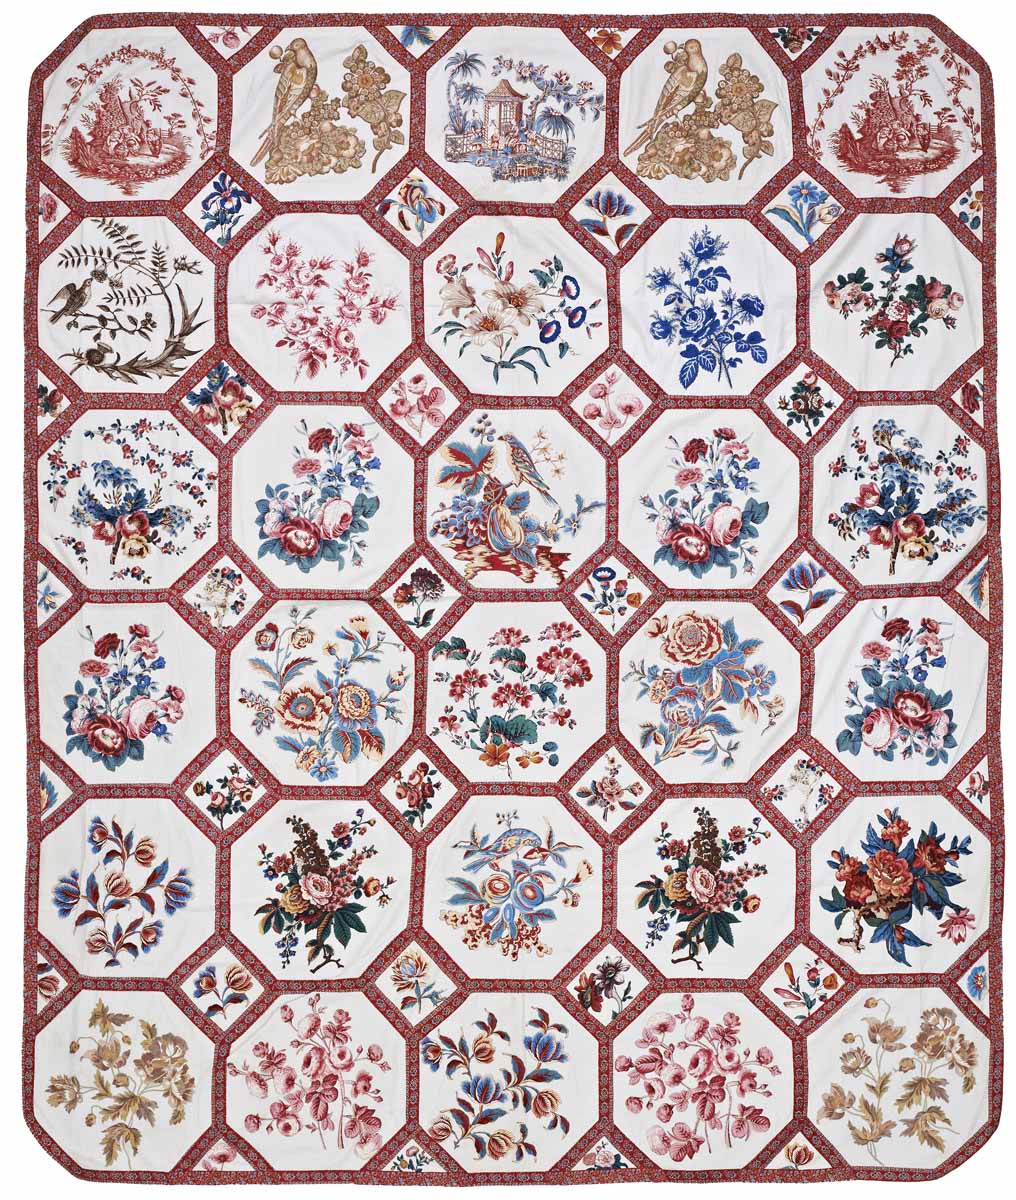
This major project started life in 2017 through sheer frustration. For Kaffe Fassett’s 2018 quilt book, based on traditional quilts housed in the American Museum in Britain he had asked that, as a hand embroiderer, I make his revised version of an ‘Broderie Perse’ in their collection. I was delighted.
I immediately started to sample some simple ways to make such a large hand stitched quilt nowadays, plus information notes for others to follow the instructions. However, due to lack of time due to publishing deadlines this quilt was dropped….Rats!
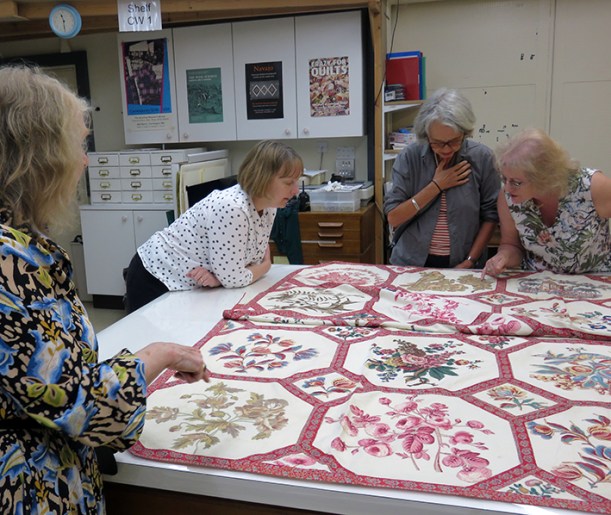
behind the scenes of the American Museum
Later in the year I organised with the museum’s curator, Kate Hebert, to visit the archives with the UK making and publishing team. I asked to see ‘the one that got away’ and on hearing the story, Kate said that if I ever re-considered making the quilt she would show it in the quilt gallery alongside the original. Well of course I jumped at the chance to show work at this museum, and I did want to make the quilt.
I decided that I would make it as a present for Kaffe, it was his 80th birthday in December and I had enjoyed the last 3 years working with him on his books and my contract was at an end. I reasoned I would soon have plenty of time on my hands to complete the project in time for his birthday.
Kaffe Fassett studies new work on the quilt wall in my studio
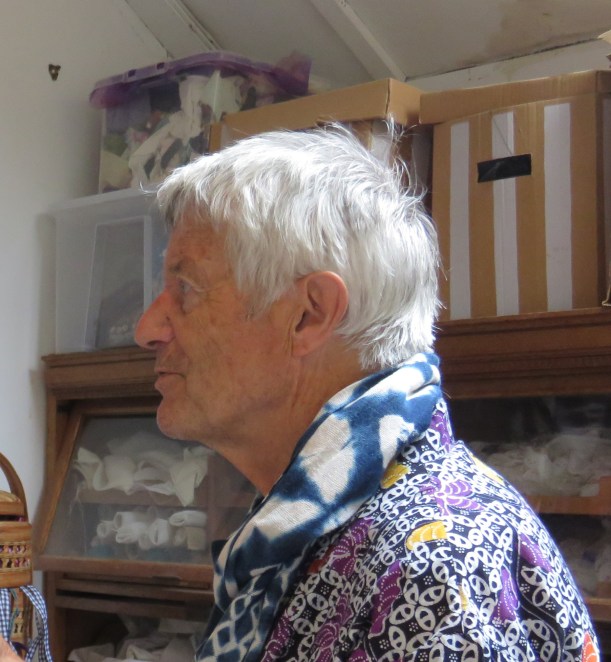
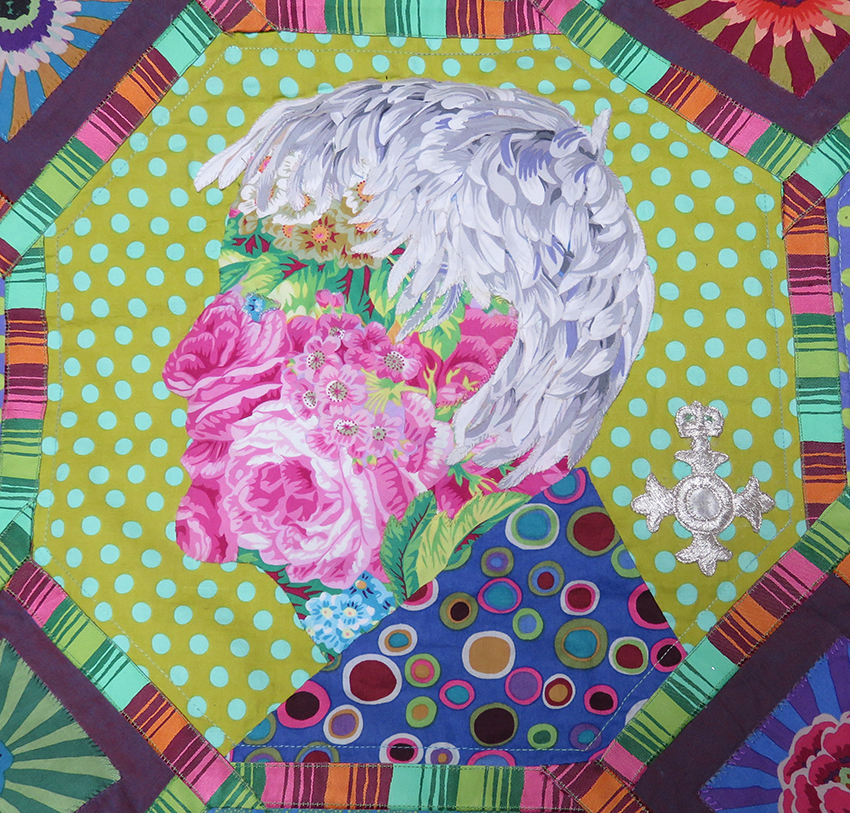
As I now had ‘carte blanche’ to interpret the design as I liked I decided to make his portrait as one of the panels. Using a recent photograph from his last visit to the studios I set about drawing and scaling the head.
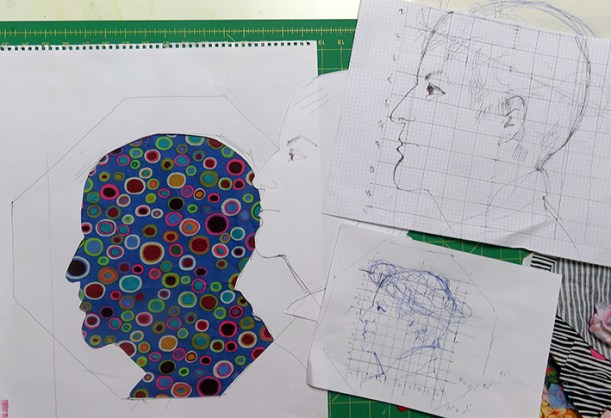
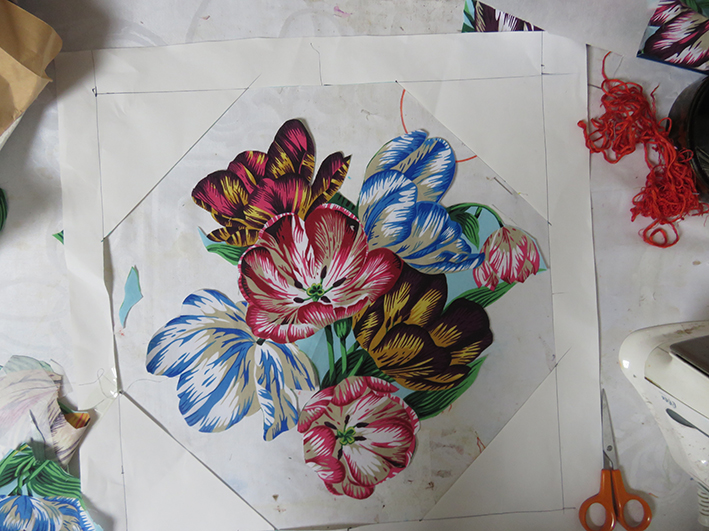
the original drawings scaled up from the photograph
I made carefully measured sketches, and then 2 masks – one to the size of the hexagonal block and the other of the head. My initial idea was to garland the head with flowers – well why not?
first attempt to design the head using some of my favourite fabrics
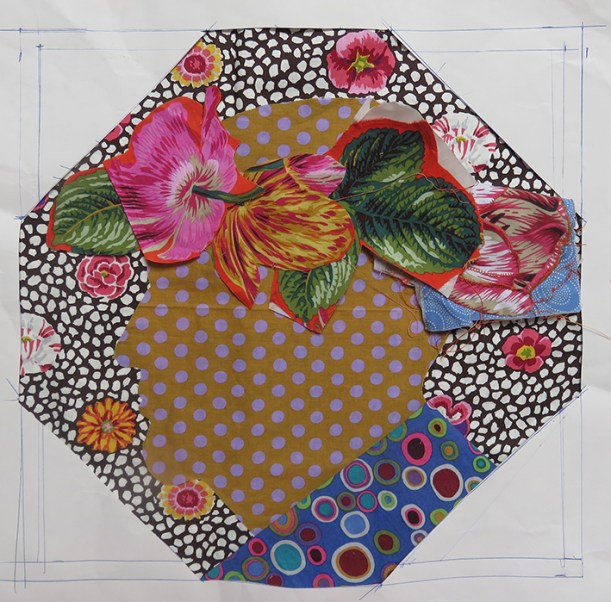
This looked miserable, and the garland didn’t fit into the hexagon very well – and then I would have to embroider the features; I remembered my ‘Flora’ embroideries influenced by Archimboldo – the artist who made faces from flowers. I tried various flowery fabrics from the Kaffe Fassett Collective.
This selection took several days and I was still not convinced I could make it work well enough, then into my studio stepped an old university colleague from my teaching and researching days, Dr Dawn Mason, with the perfect bunch of flowers to match the work – I believe that chance happenings are not always random
serendipitous flowers – I am on the right track
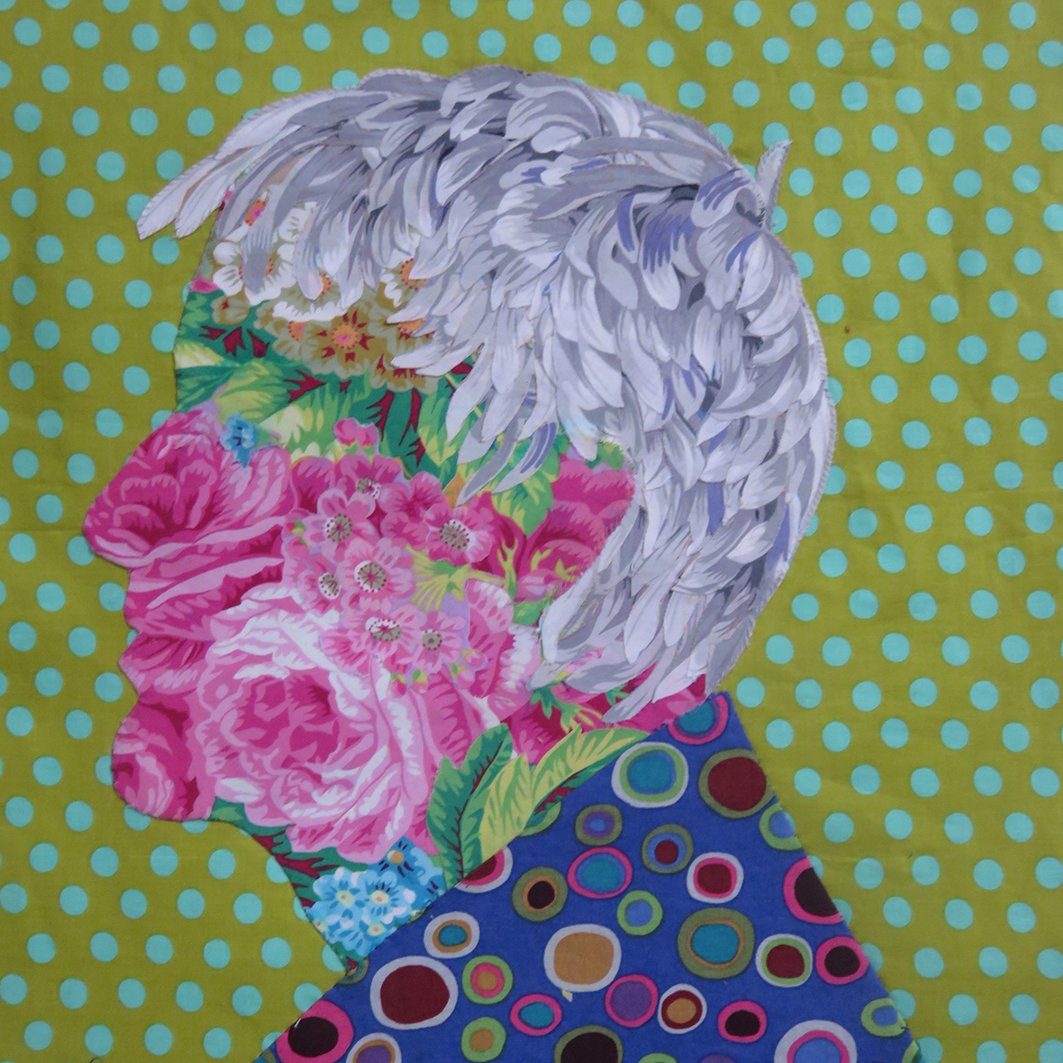
I persevered. Eventually I chose the fabric placement, cut it out with a tiny seam allowance and hand slip stitched it to a spotty fabric, adjusting the chin to become a tad larger proved successful. Very carefully I placed a blue bud for the eye. Suddenly Kaffe appeared in front to me.
chosen fabric on drawing
perfecting the chin
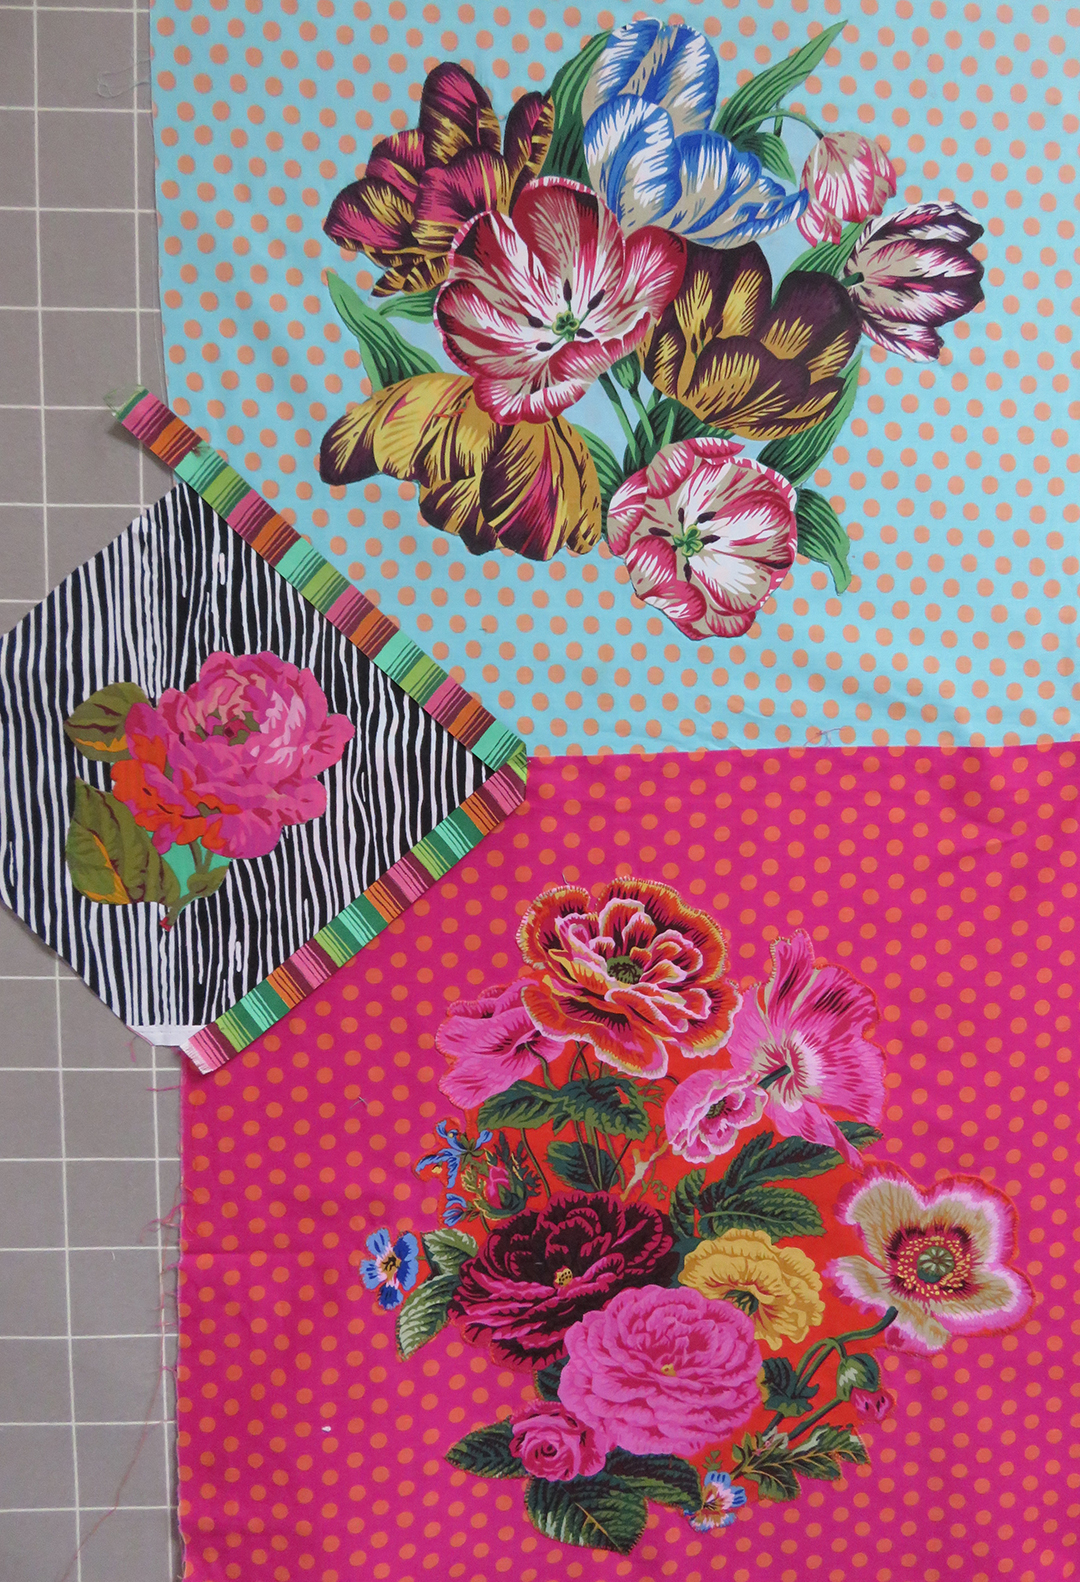
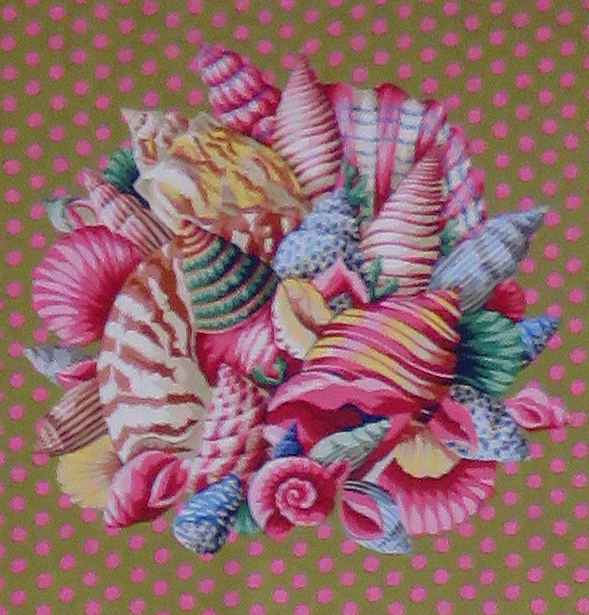
Now for the hair: I found the white petals of Japanese Chrysanthemum by Phillip Jacobs perfect for my purpose, and so it appears does everyone else; the hair is the thing that gets the attention. In fact most of the fabrics that I used Summer Bouquet and Shell Bouquet and Tulip Extravaganza are designed Phillip Jacobs, his fabrics are so elegantly drawn and painted and the perfect replacement of the original chintzes.
The next stage was to decide the rest of the portrait. For the shirt I had a smidgeon of an old version of Kaffe’s Roman Glass in blue, I had bought years ago – and after many trials chose the fresh Spot fabric in the colour ‘Pond’ for the background.
the finished head
Now for the rest of the patchwork, So far this has taken me about 3 weeks of drawing and stitching – but it is still only June.
the original samples for the American Museum book
I dug out the abandoned samples I had made for the book – I needed to make more other panels to add to the portrait.
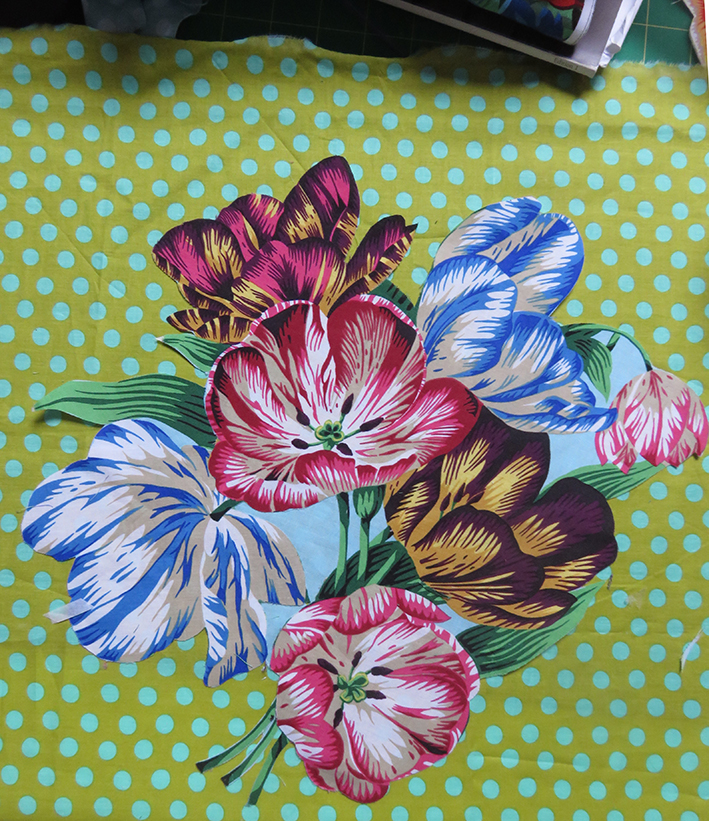
To make the bouquets, the fabric has to be backed with a bonding paper, carefully cut out, placed into position by re-arranging the various elements to fit harmoniously, pressed, then hand stitched around each raw edge, the stitching is quicker than the arranging and my idea of blissful work.
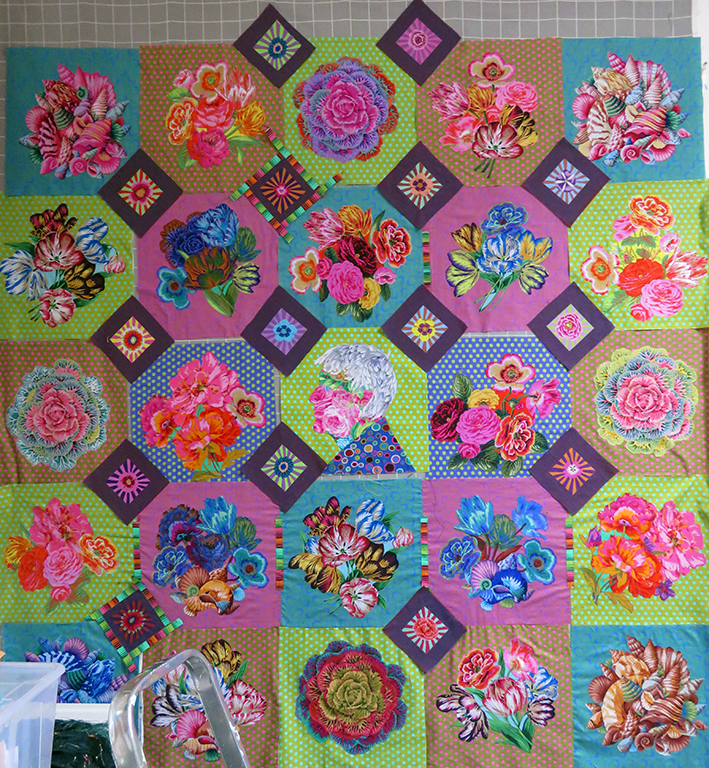
The quilt slowly started to grow; but trying to control the overall colour was the most difficult thing – colours that work on their own or in a sketch suddenly look drab or take on another shade when placed next to one another – obviously. But the colours of the flowers changed the balance every time I added a new panel. It was my major ongoing and fascinating struggle to get these balances to work.
my textile studio September 2017
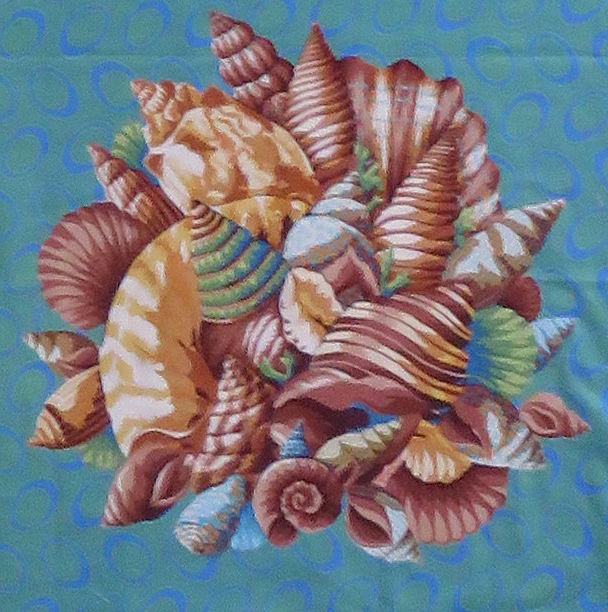
By September I had eventually made my fabric decisions, I had to make multiple versions of some of the panels – all in different colour-ways, but this gave cohesion to the busy design. I also added 4 shell corners, this was possibly the easiest panel to apply as the size was perfect and the shape fitted – just a few additions to balance colour.
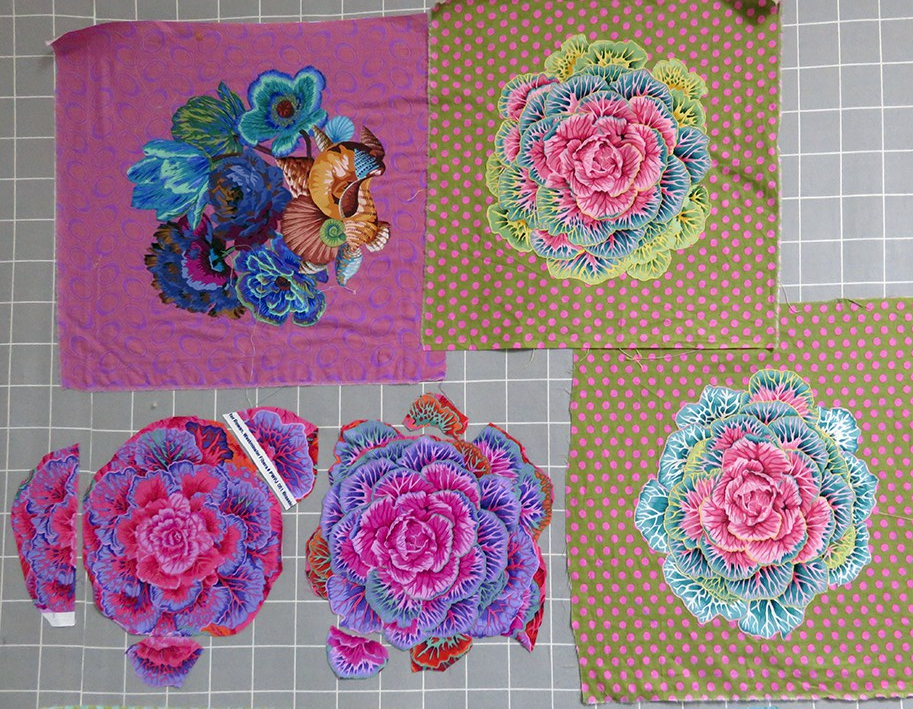
making larger Brassica panels
Above shows the development of the Brassica panels, they needed to be made larger by adding extra rows of leaves before hand sewing them onto the grounds.
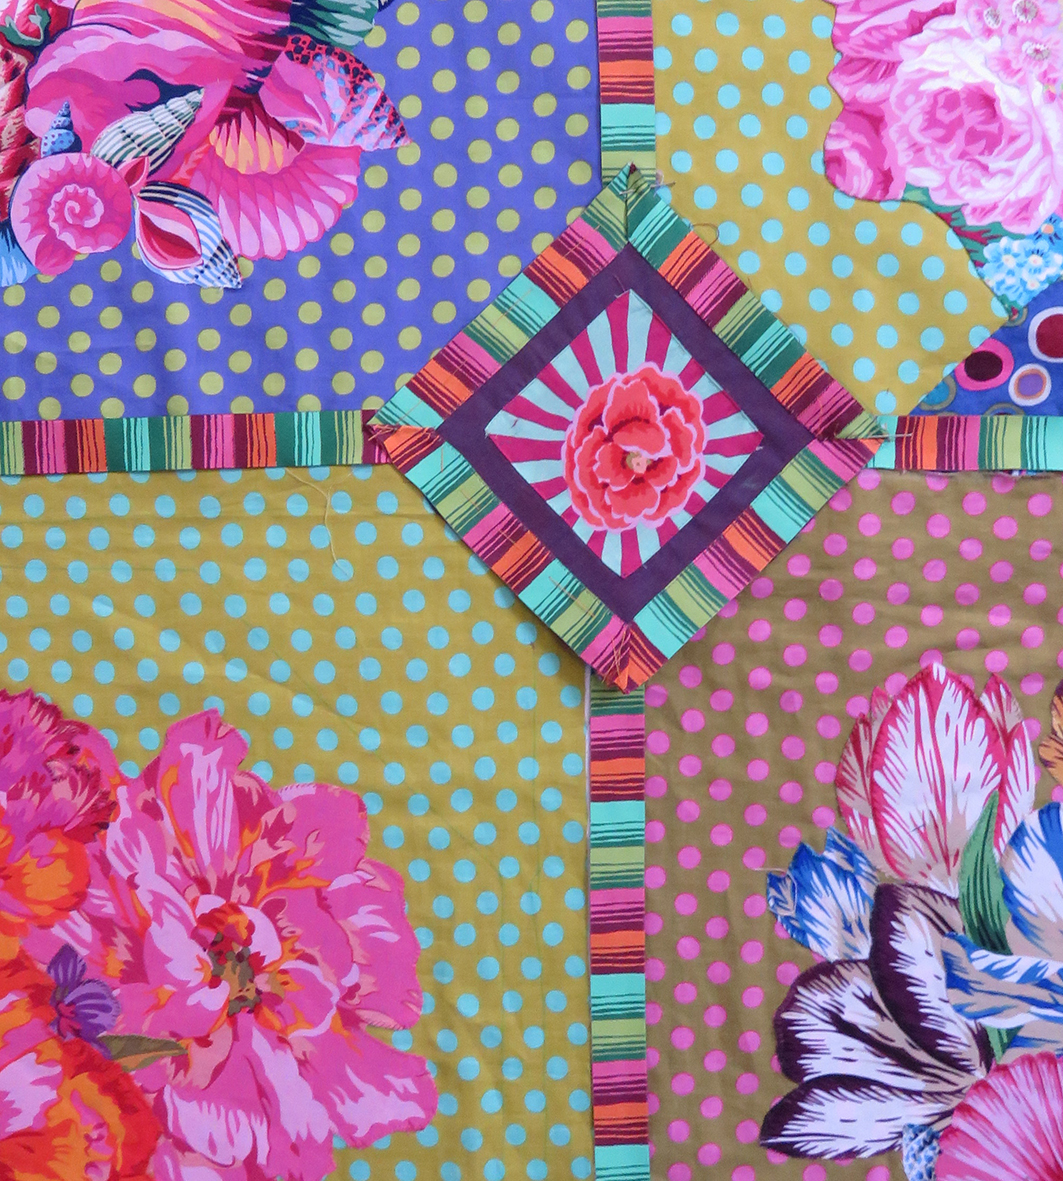
The next stage was to add the diamond shaped patches at the intersections of the squares.
the added diamonds start to assert themselves
And this is when the panic started – suddenly this massive work, that had grown over months took off in another direction, these diamonds dominated the entire design – already busy, this was manic
The only thing was to keep going – too late to stop now – the samples below looked fine
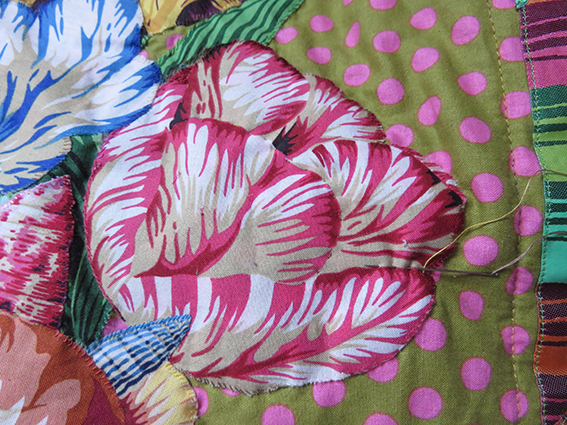
hand stitched applique
sample of pinned Phased Stripe by Renaissance Ribbons
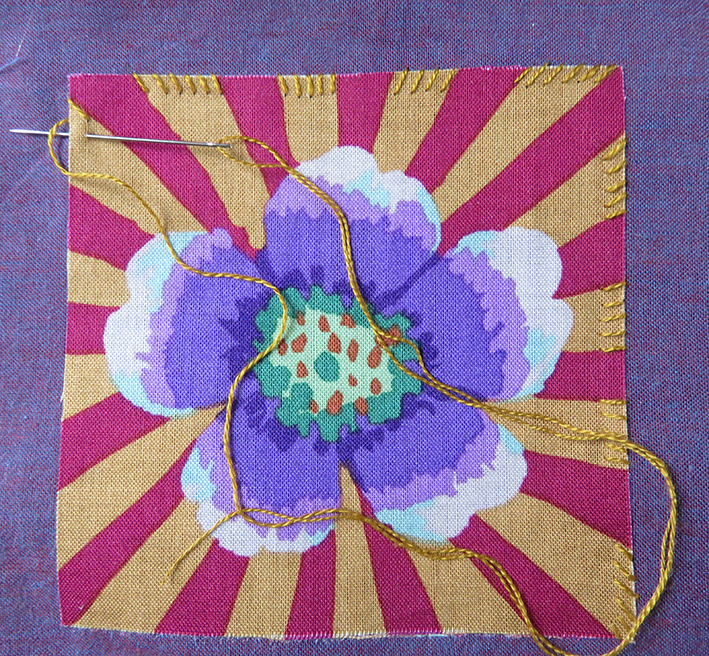
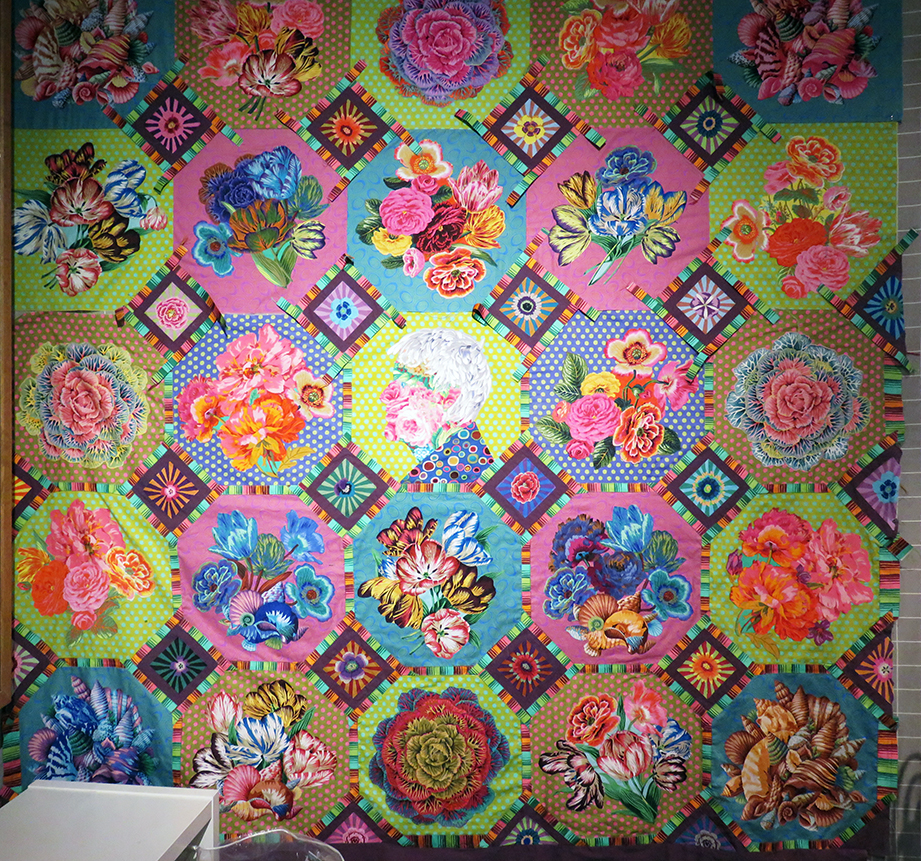
I started to applique the tiny cut squares from Kaffe’s fabrics, Sunburst onto Shot Cotton dozens of them, all hand stitched in 2 colours and I slowly added them to the quilt on the wall ….and the result below doesn’t have all the dividing ribbon strips yet!
without the addition of all the ribbons – hells’teeth!
This was beginning to look overloaded, so I called in my 2 trusted quilt makers, Julie Harvey and Ilaria Padovani – they have very sound taste in all things quilt, and I knew they would tell me the truth. They just laughed and said “well it is for Kaffe and ‘more is more’ with him – why are you worried’?
It was the addition of the ribbons, kindly donated to me by both Edith Minne, owner of Renaissance Ribbons and Brandon Mably (who was in on the secret) that tipped the balance of the work and I suddenly understood that the work had ceased to be mine – it was now Kaffe’s. This happens when you are commissioned to design and make stuff for people – you need to work with their ideas/tastes/preferences – otherwise they don’t pay you! But this wasn’t a commission this was a present, and it was all my own work – I realised now just how much I have been influenced by working alongside him.
the quilt starts to look like it belongs to Kaffe
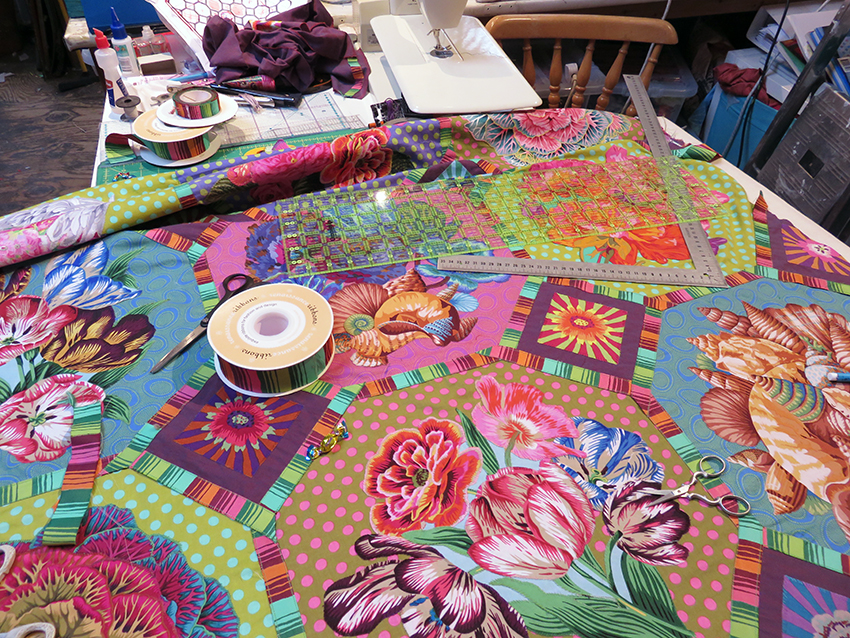
So I machined in place all the ribbons – a mammoth task for a hand embroider! they were very tricky to manipulate especially as I had to split many yards of a wider ribbon to get the correct proportion, both Edith and Brandon were out of stock of the narrow version. Hey ho! Thankfully Julie machine stitched it all into position first and then I started to hand quilt all around my stitched applique – another mammoth task, but so rewarding, the quilt looks suitable wonky – in a good way – it looks very hand made
March 2018, finally finished – I thought!
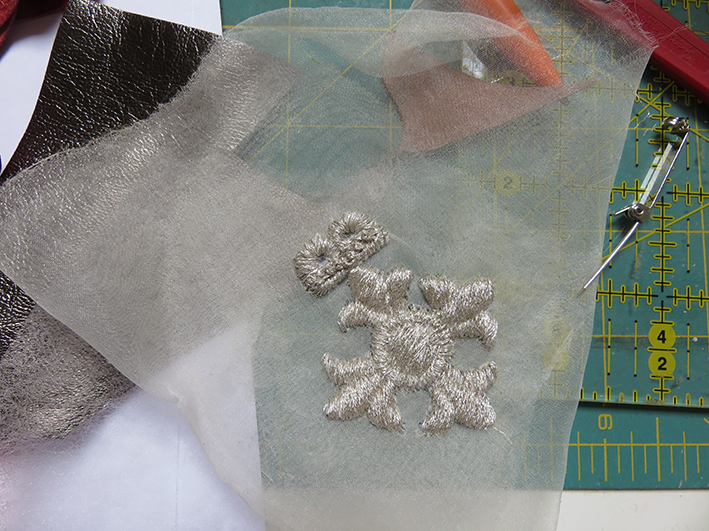
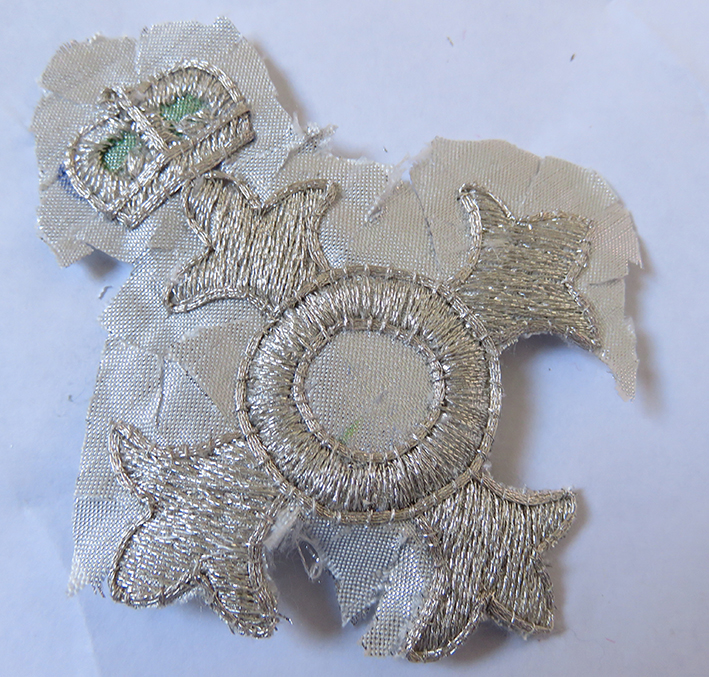
It was completed in March 2018 but I had not time to deliver it; then Kaffe was awarded an MBE and I know I have to include this – so back again to the finished quilt
I made a sample first and then the real thing and appliqued it to the ‘finished’ portrait
portrait complete with medal
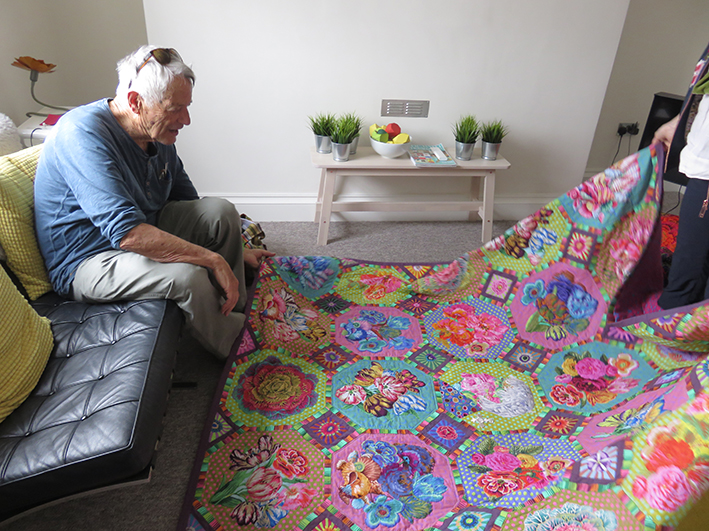
In Bath, where Kaffe and Candace Behouth, have an exhibition together based on Flowers , I delivered another set of 5 quilts for the next book and my “surprise”
And Kaffe’s reaction when he was shown it?
Worth every moment.. I made the sample into a badge for Brandon – this says it all!
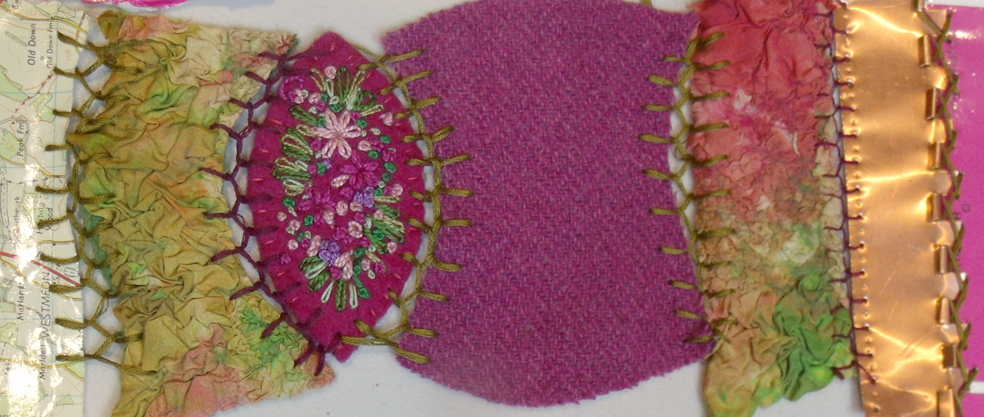
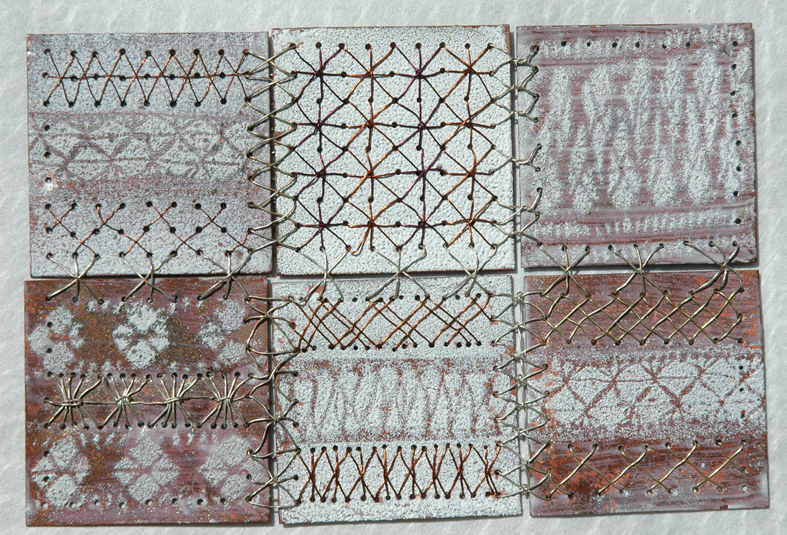
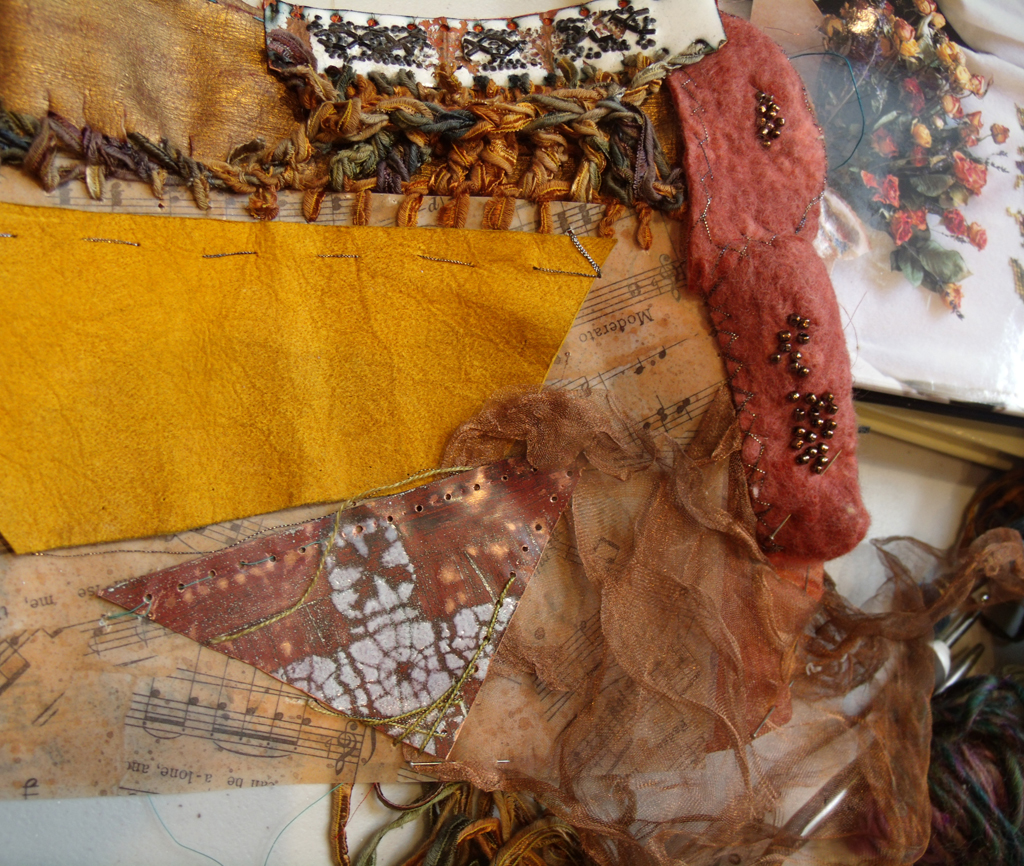
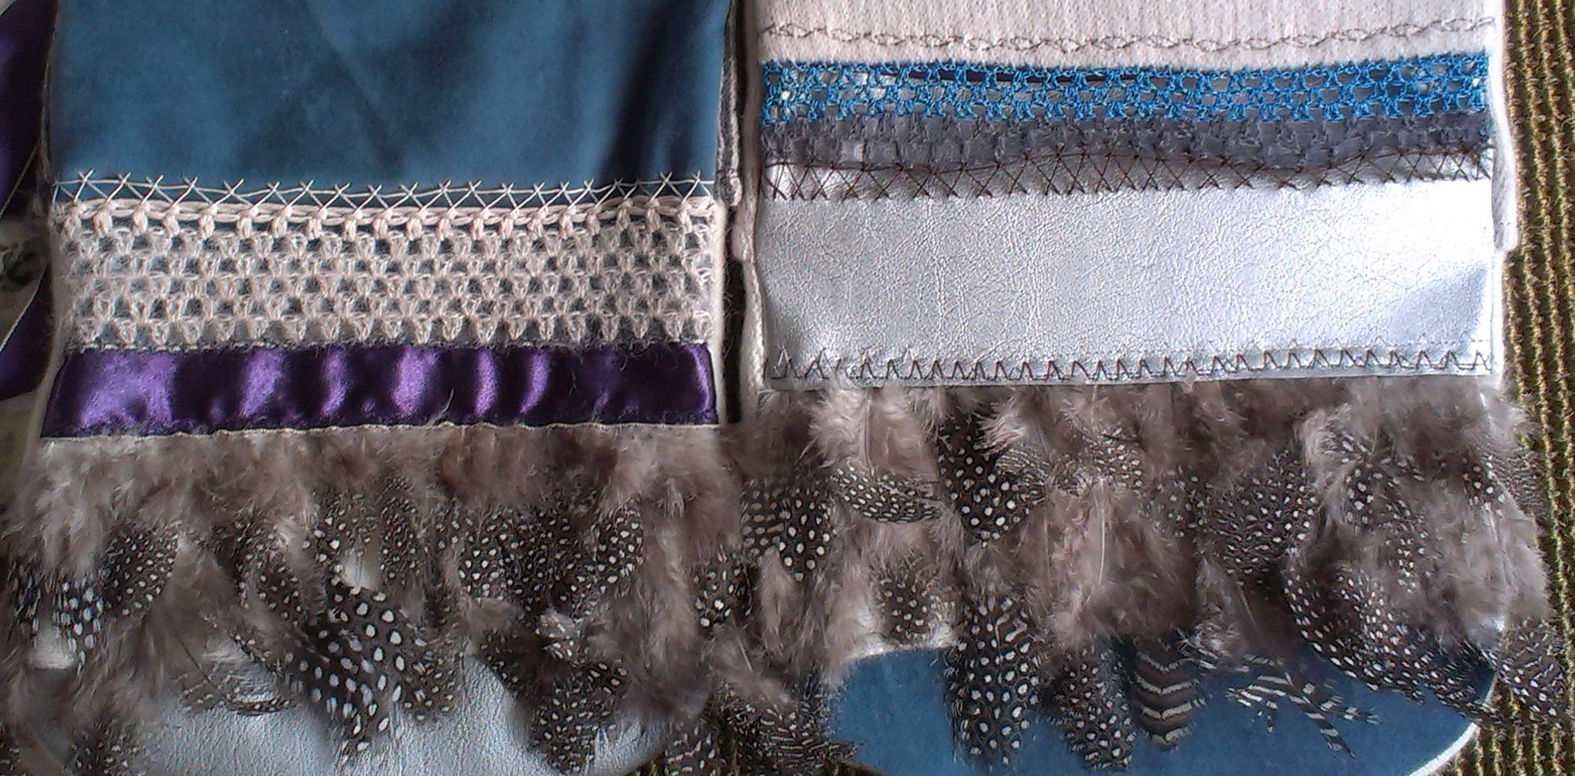
strip sampler of tweed, embroidery, nuno felt copper and paper- Kirsten Hill-Nixon
I am interested in developing a set of workshop using mixed media at Heart Space, think leathers, metals, ceramics, fabrics, glass and wood….. so I thought I could try the idea out on the people who work with us, all expert in their own field and up for a challenge.
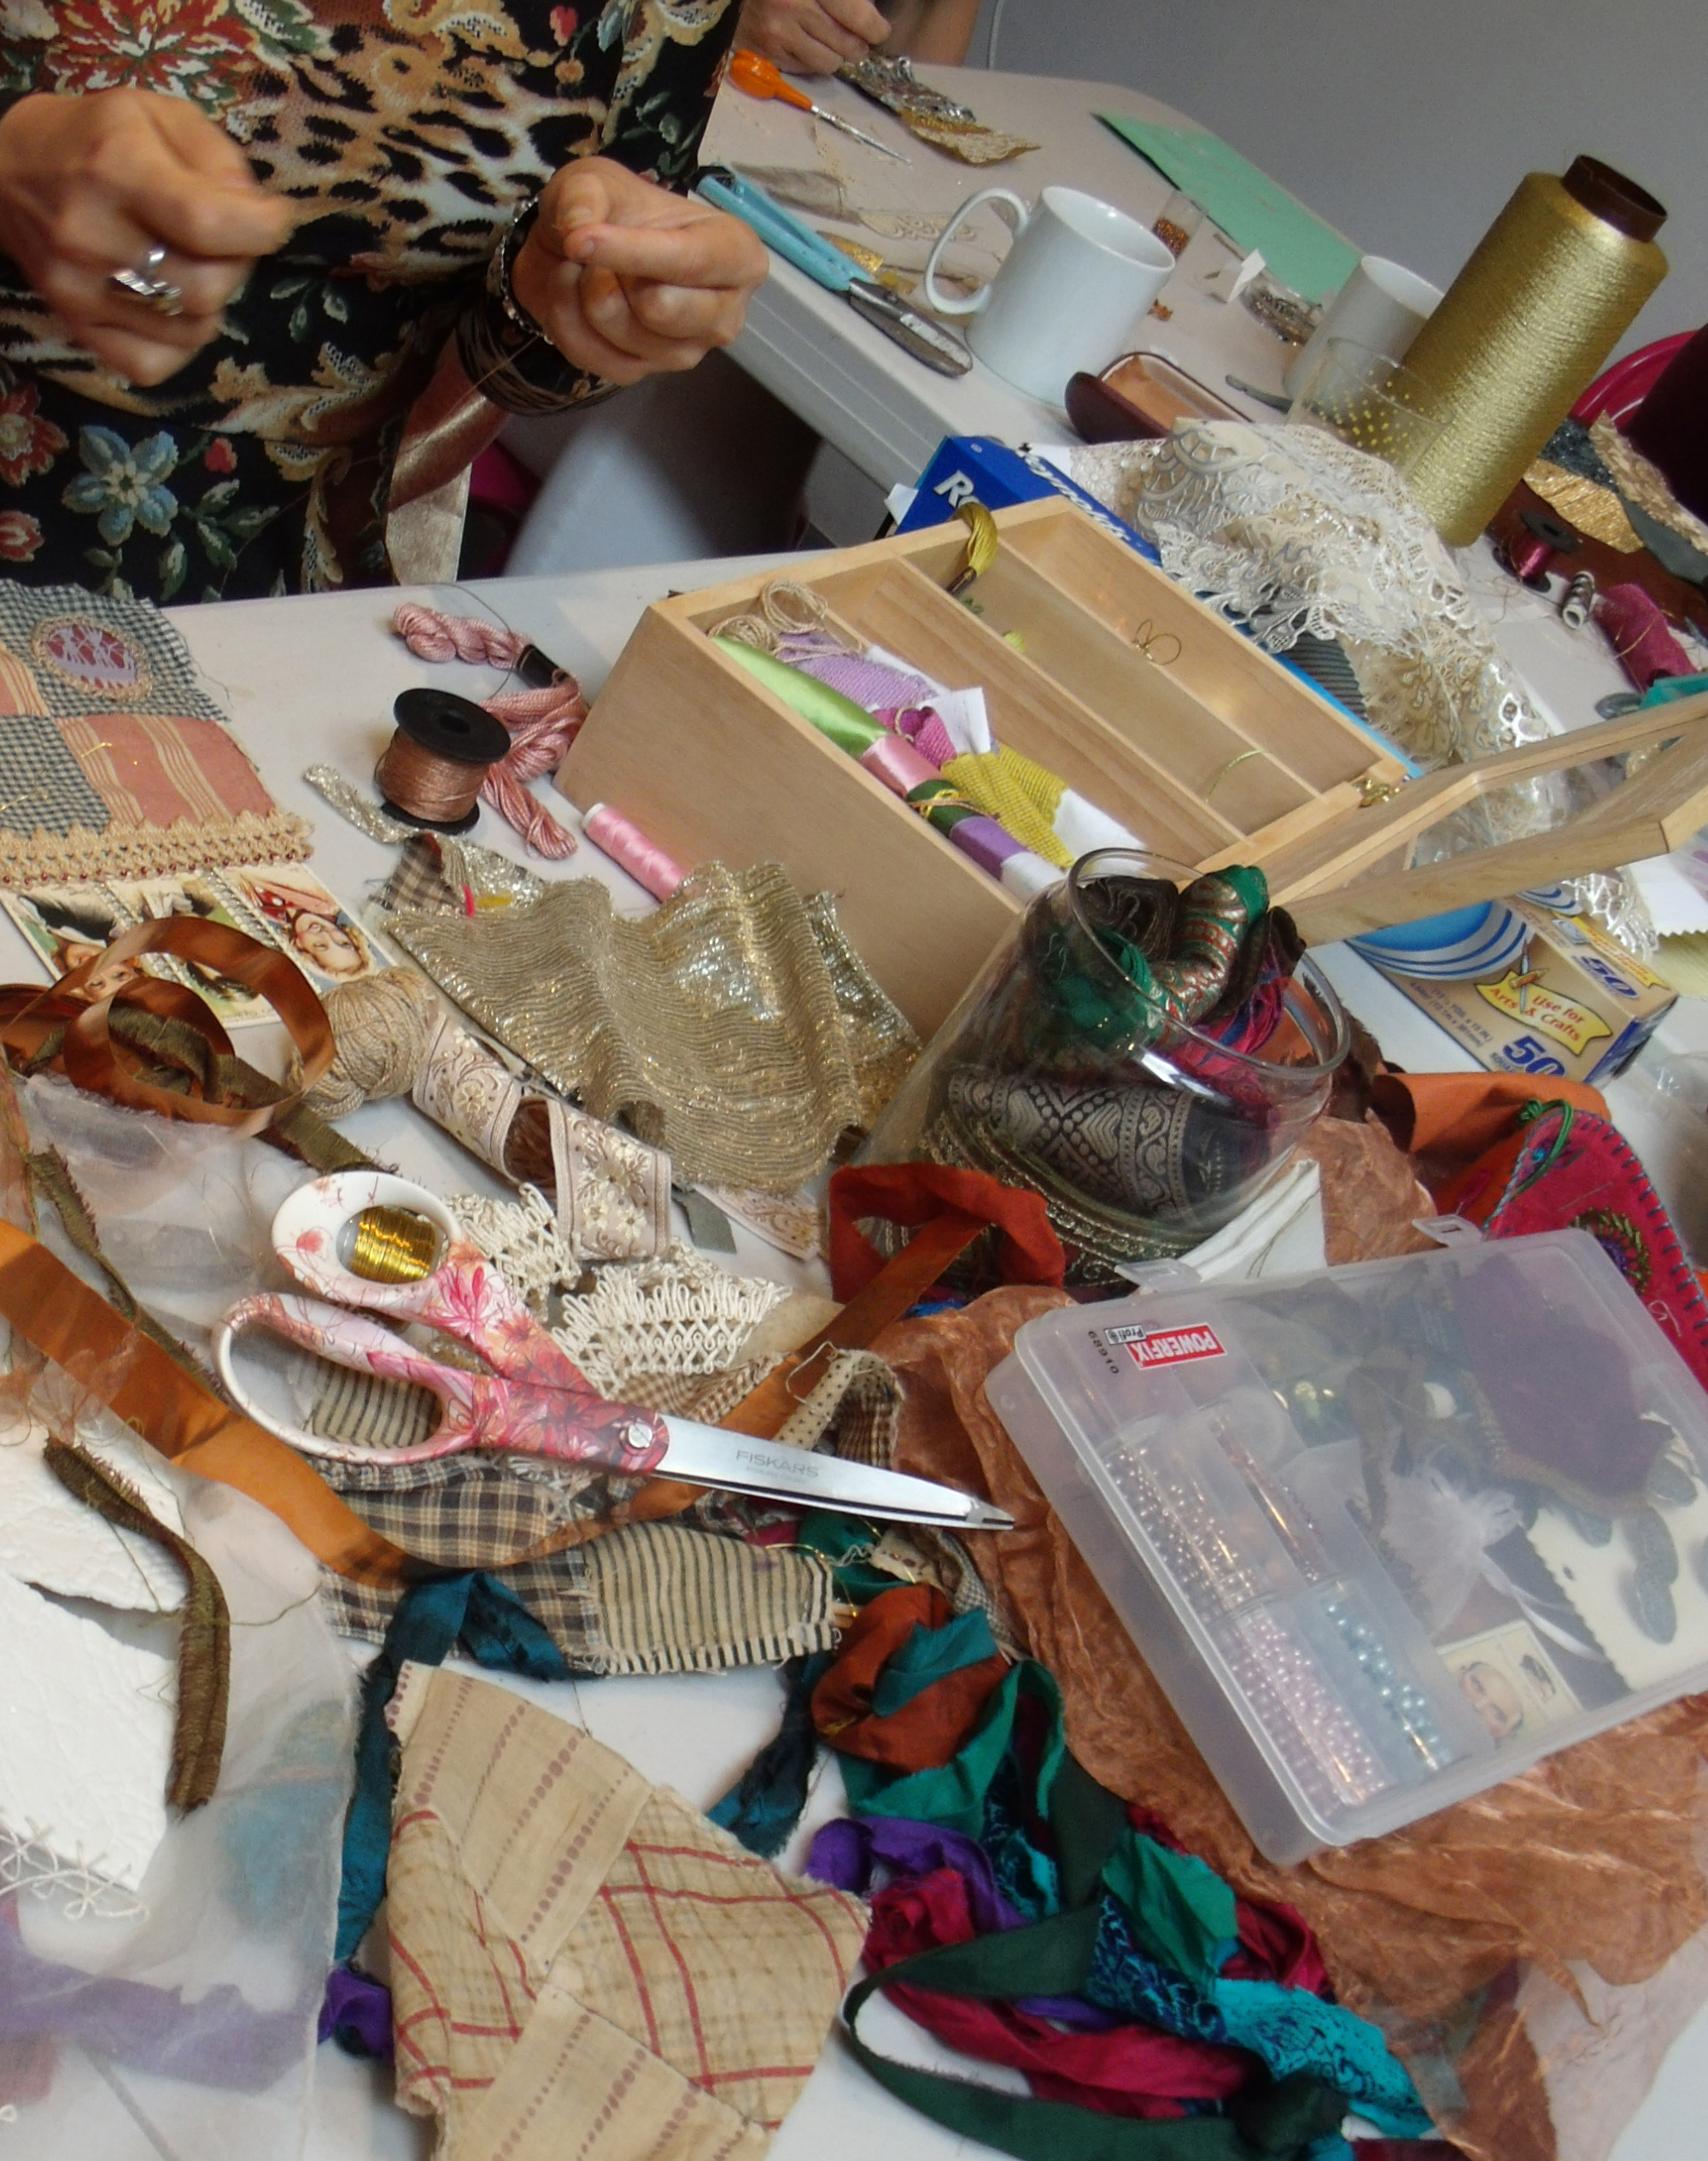
And as Crazy Patchwork samplers have been such a success at Heart Space Studios that I decided to run an Away Day for the tutors and staff to enjoy time making together. I asked everyone who could attend, to bring their own favourite materials and their tools. Each person would make either a strip sampler or a crazy square sampler by using decorative embroidery stitches to join the materials together.
tutor’s own stash of hand made wool felt
the administrator’s collection of everything vintage
Most people brought their own stuff to share between the group, I am always impressed by the generosity of makers in workshops like this. The group dynamic is encouraged so that people really want to help one another. What is also an added bonus is finding a shared love of a particular technique or material, even makers of different ages and styles come together when they find they both appreciate a particular aspect of their chosen discipline.
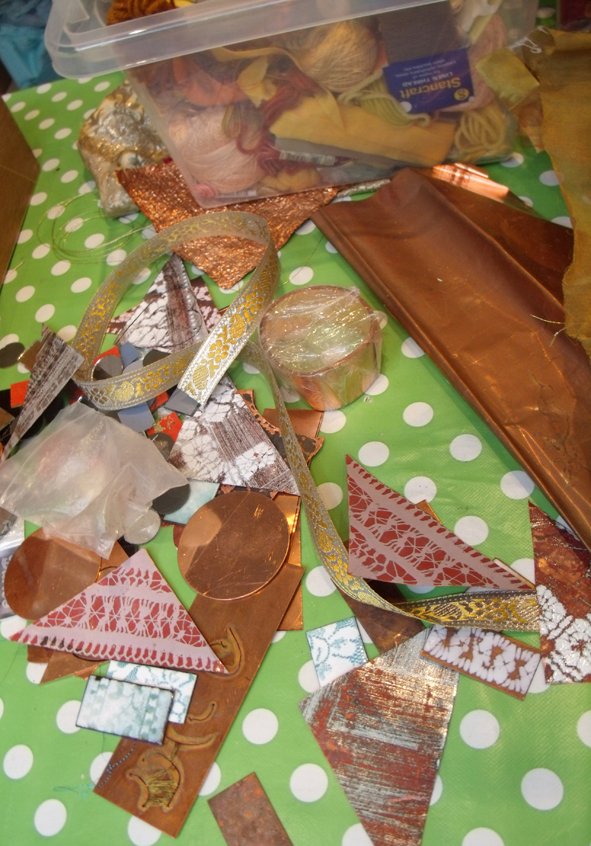
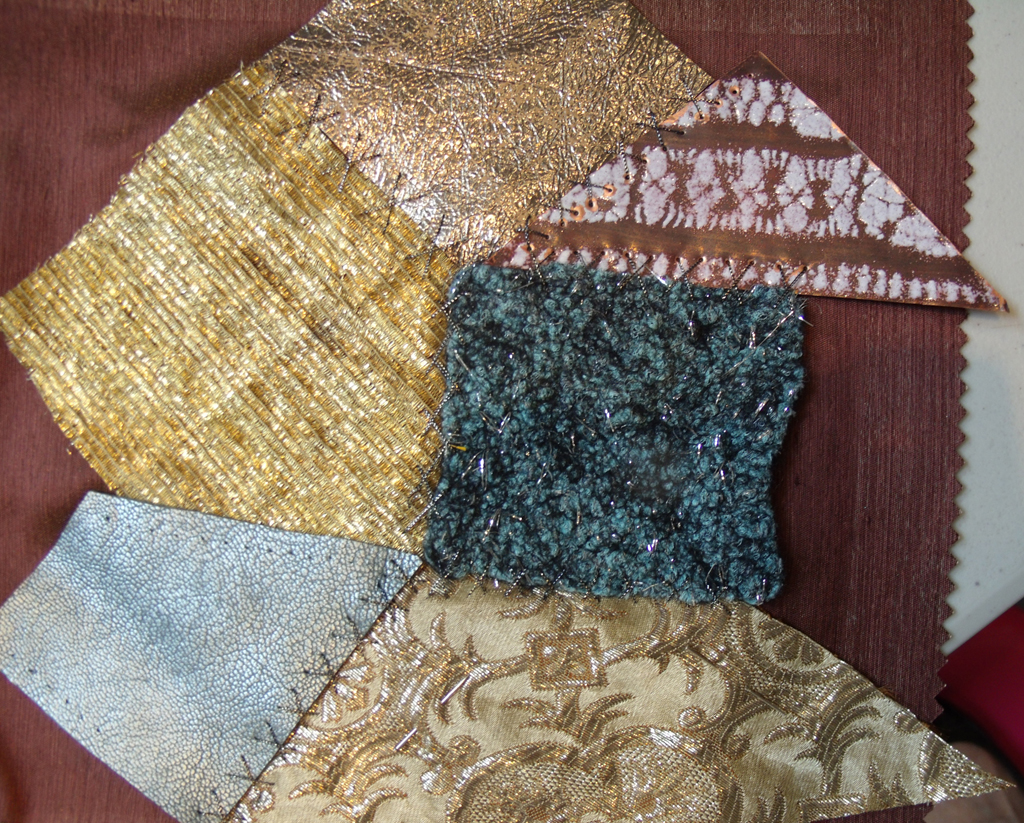
I also brought a large selection of materials from my home-based studios, all kinds of things: woven metal fabrics, stencilled enamels on copper, leathers, plastic lace, metallic damasks and other fabrics – and also the tools to drill stitch and manipulate them.
one of the best things about attending any materials based workshop is the abundance of new and unusual stuff that is introduced by people who are experienced in working with it – this can save days of researching.
my stash of copper discs, enamelled triangles and metallic braids
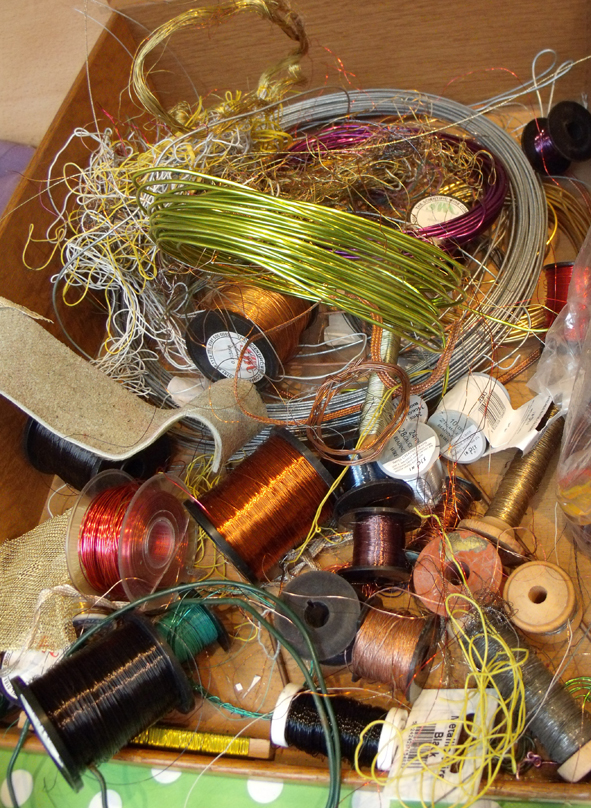
copper and aluminium wires for working with in any way possible.
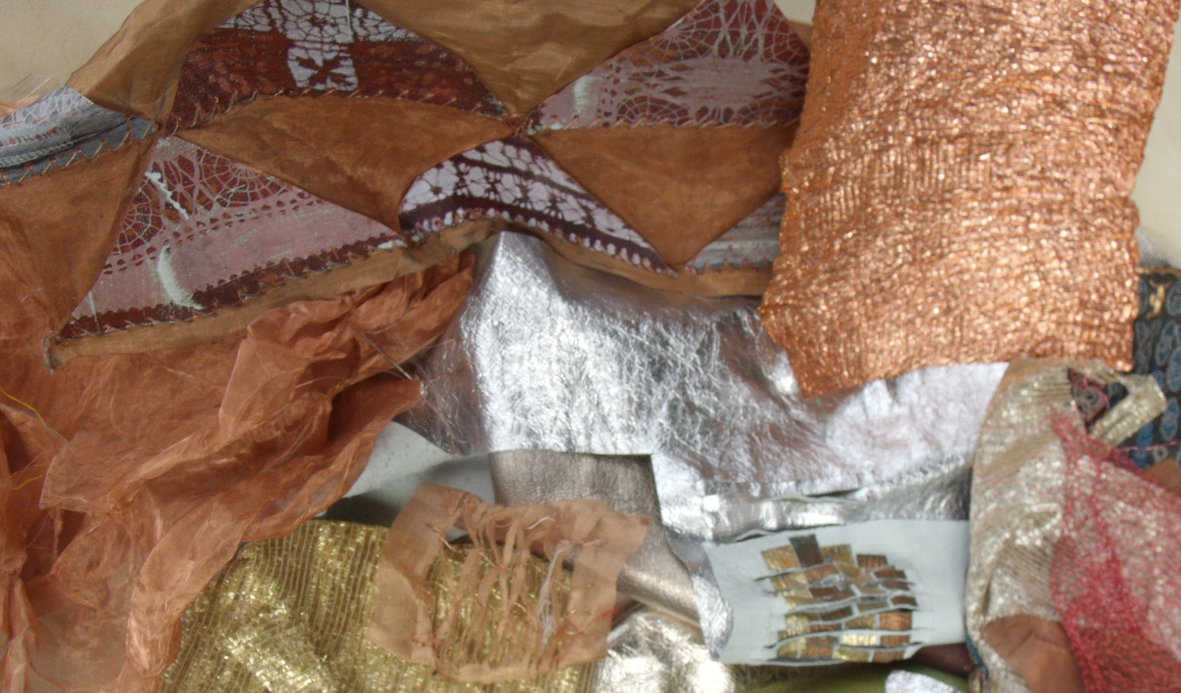
I particularly like metallic leathers and fabrics, so I brought lots of these in for everyone to sample, as well as scraps of thin copper, some patterned with vitreous enamel. such a shame I had no time to experiment with the other tutors’ materials for this research session.
metal meshes and pressed copper foil, enamel applique and metallic leathers.
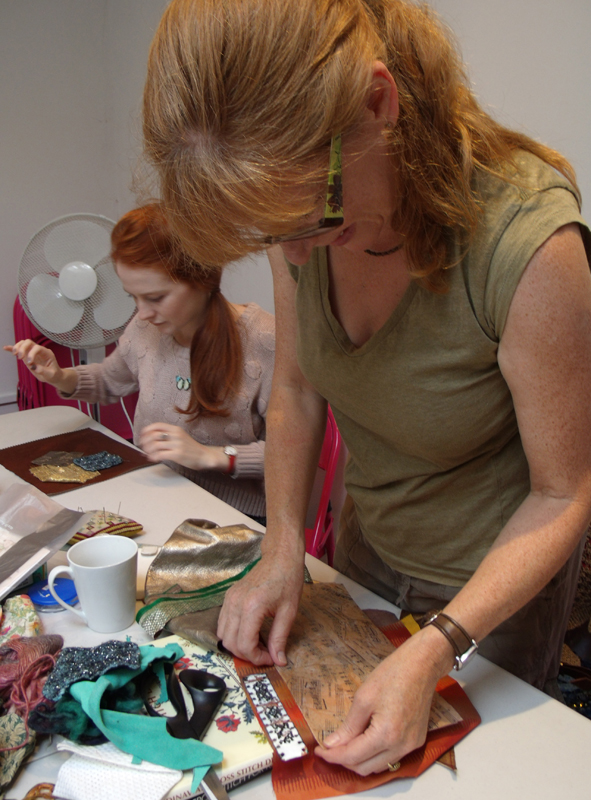
The task for the morning was to choose 3 different materials and join them together using their own preferred techniques or I would teach anyone various embroidery stitches and techniques. As the group comprised experts in knitting, stitching, crochet, felting, print as well as display, administration and even a drama student (a daughter on a flying visit), it proved to be a mixed bag of talents, attitudes and experiences. Perfect for generating new ideas and enthusiasms
colour co-ordinated mother and daughter
Everyone set to work choosing their 3 materials and laying them out, the strip sampler proved to be the most popular as it is the easiest to co-ordinate; odd crazy shapes take a lot longer to set up.For the task of joining two of the disparate materials together – colour, surface texture, weight of each material has to be considered as well as the selecting the technique.
traditional crazy shapes
strip sampler of cotton, leather and paper
I showed everyone how to make regular holes in various surfaces, involving textile techniques – a tracing wheel, an old darning needle and a hammer! It works for me every time…..and off they went with mixed but interesting results.
marking out where to make the stitching holes on copper.
At first everyone just chose a colour co-ordinated or used an unusual type of thread to work with…
metallic leather, woven braid stitched together with silky knitting ribbon, awaiting the addition of a scrap of plastic tablecloth.
only to find that when stitched it looked very different than imagined. after a relaxed start the makers’ critical faculties began to kick in!
colour co-ordinated threads and second thoughts
I noticed that the knitters worked completely differently from the stitchers; they immediately made a start by adding a linking system to one edge of a piece of material either using crochet or knit to form an edge ready to accept the next piece of material – this gave them much more contemplation time for what comes next – the stitchers are able to join 2 pieces together simultaneously. Why had I not appreciated this before? However working the wire into fine leather was a fiddly affair – see below right.
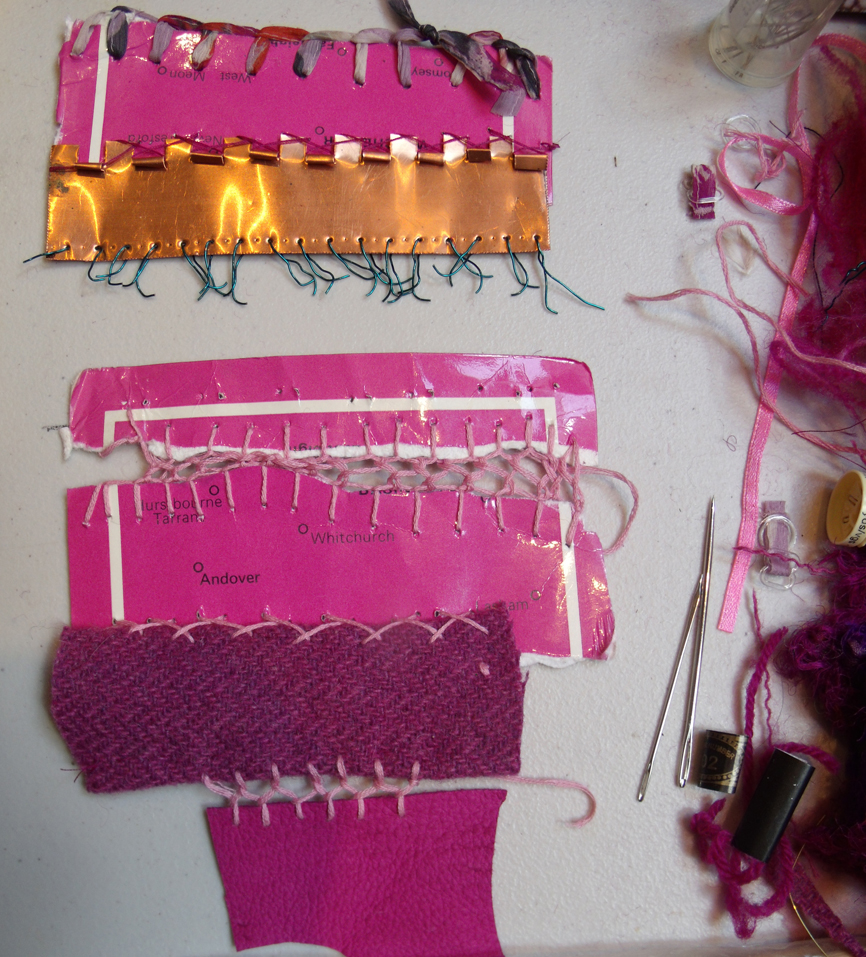
knitting wool onto a copper foil strip
developing the crochet wire joining strip
Now I really must get the knitters to teach how to do this technique. When I first attempted to join metal together using my own stitching techniques I used a different system – making rows of simple cross stitches between the strips of vitreous enamelled copper pieces, so joining each at the same time. It took me some time to try the different insertion stitches. In fact it was an aversion to drilling all the holes that put me off developing this technique for a long time – but now I happily drill rows of holes for hours at a time – well not exactly ‘happily’….maybe I will get to like crochet after all.
my very first attempt at joining metal with stitched wire
When the crochet wire was worked into some copper strips it was very successful…the strong steady base really helps achieve an even texture and the structure gives the metal wire movement and elasticity which is much more compatible to work into fabric.
copper wire crochet edge to copper foil strip
now the strips of materials are starting to look like they belong together
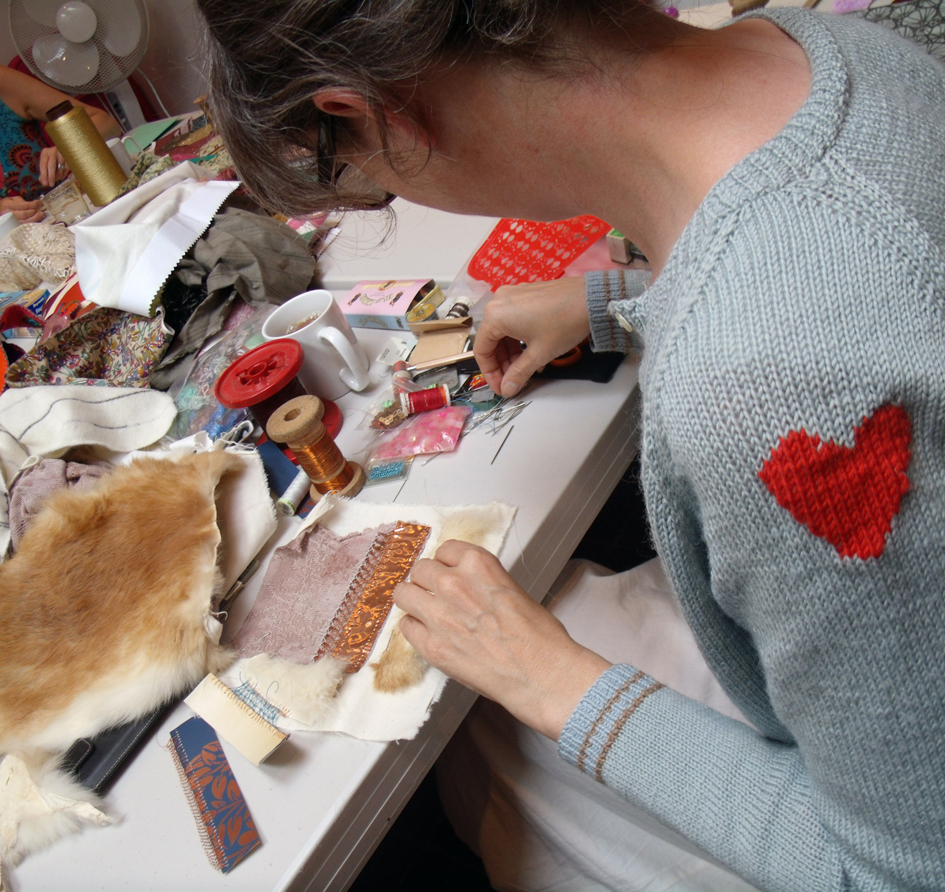
concentrating on the task in hand- and a heart on her sleeve
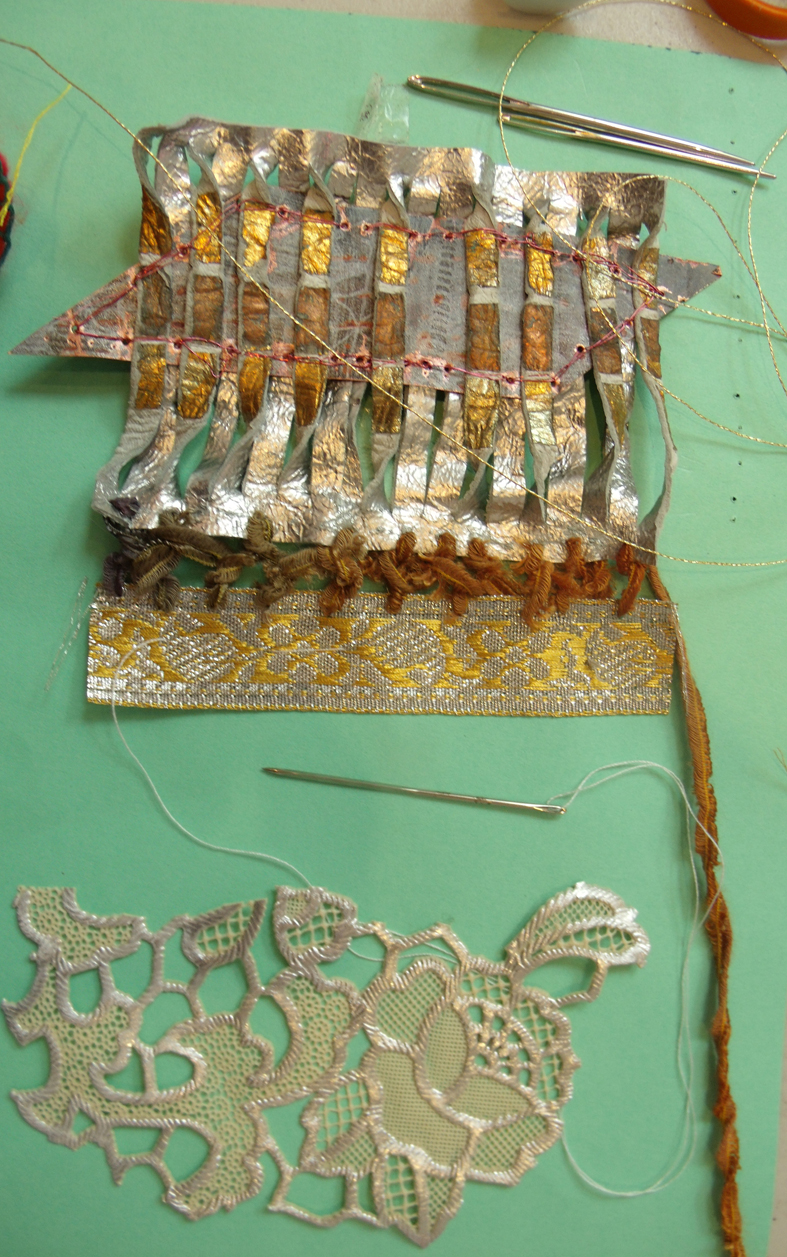
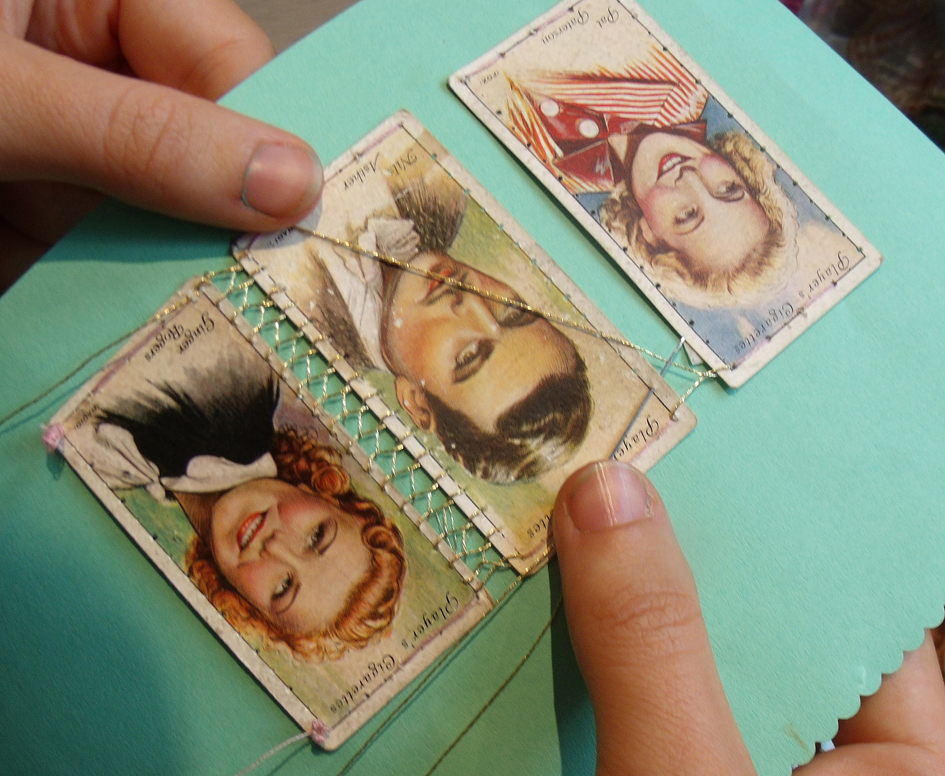
I showed several people how to embroider simple insertion stitches for a lace-like join…securing the fabric to a piece of card first to steady the gap between the pieces, a traditional technique found in my old embroidery manuals for white work.
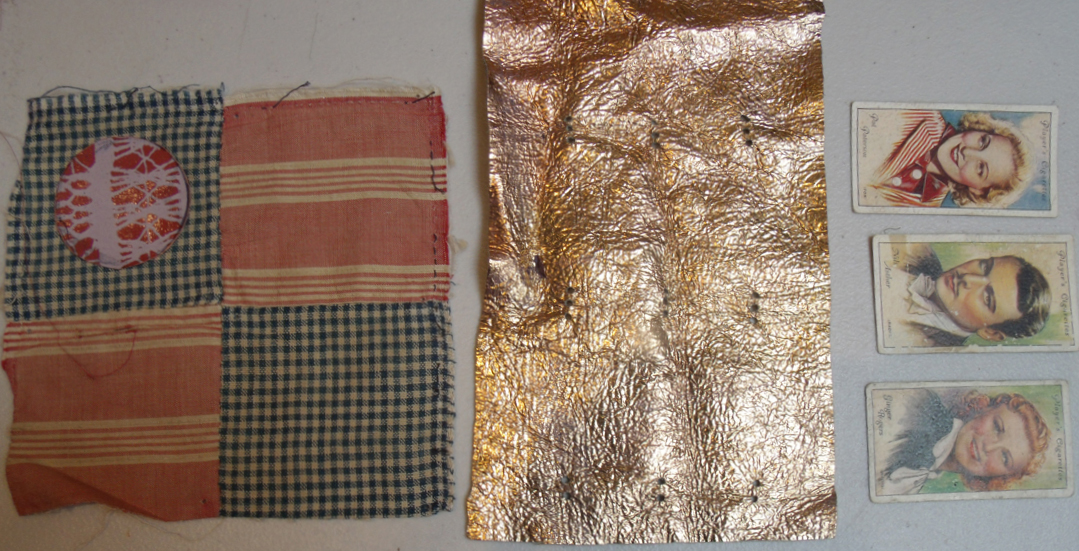
cigarette cards stitched onto paper to steady them ready for gold insertion stitching
Now the invention started to kick in…
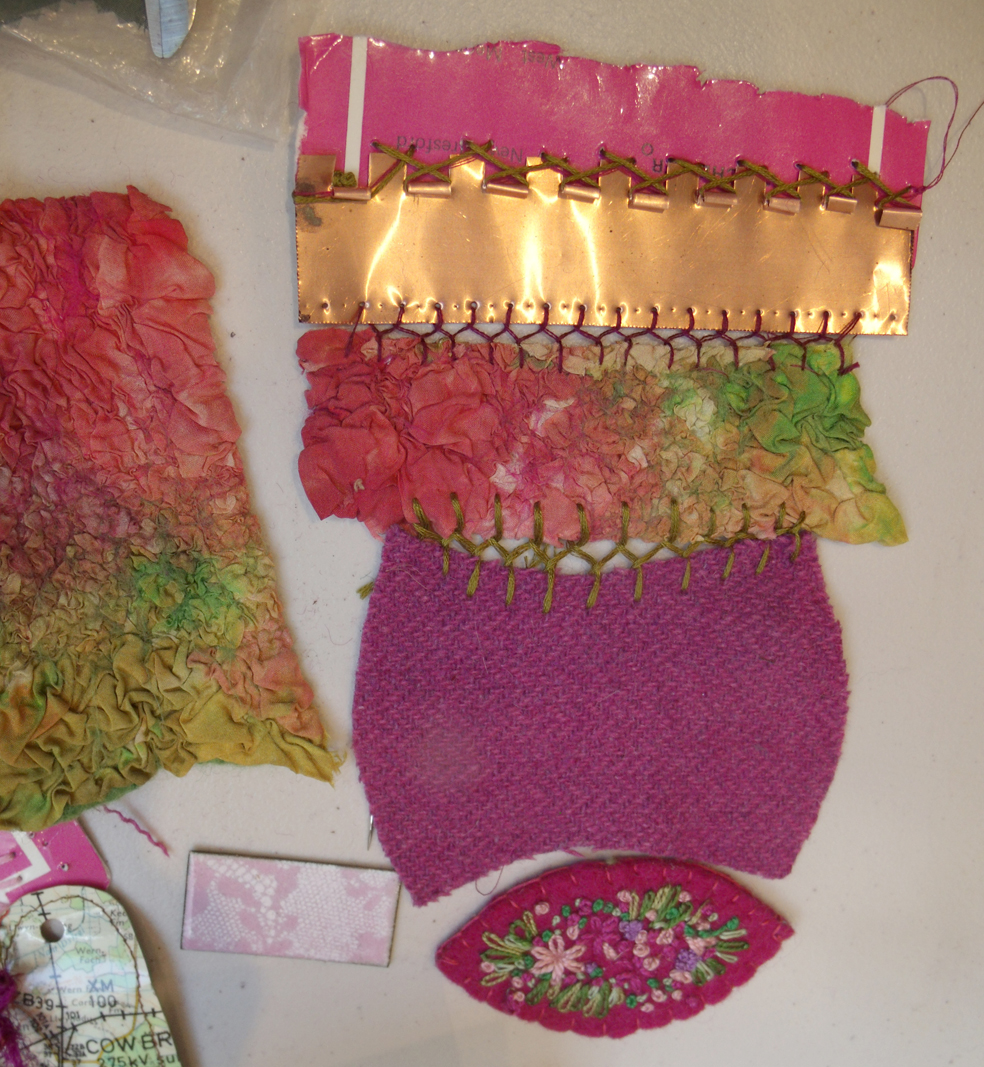
insertion stitches and beaded braid for that vintage vibe – Sophie Bristol
a really crazy mix of materials crocheted together by Avril Best
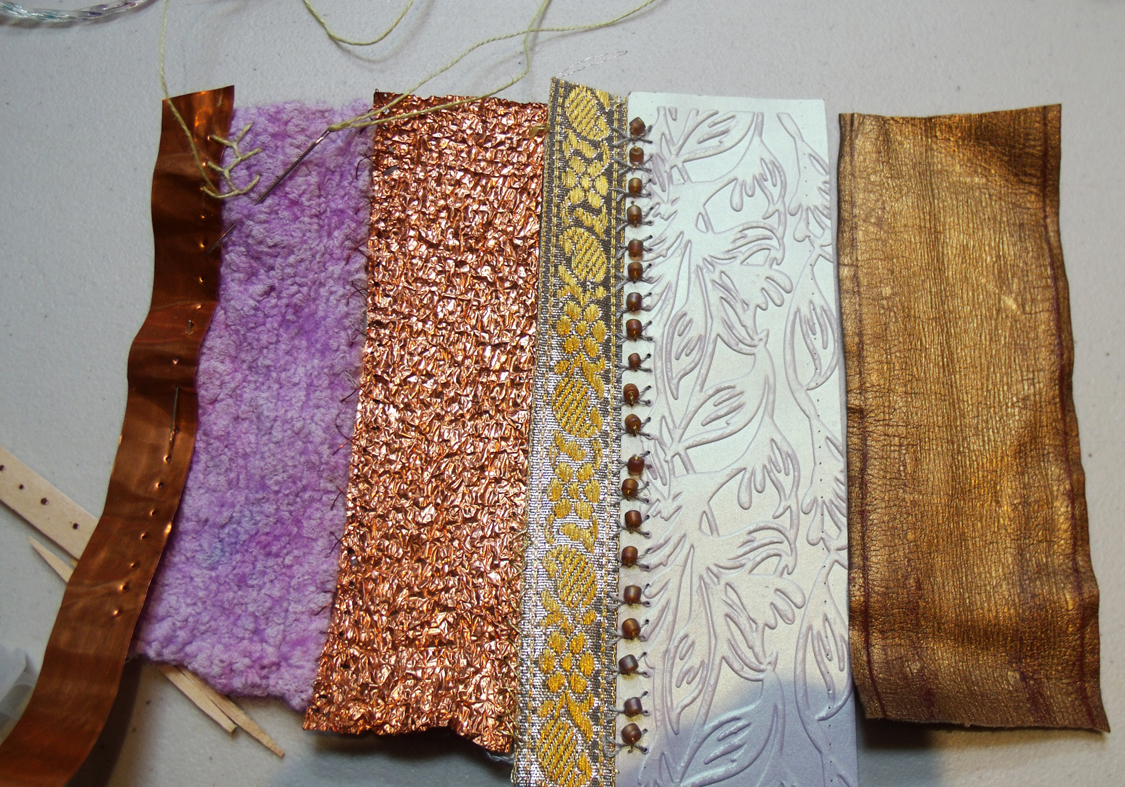
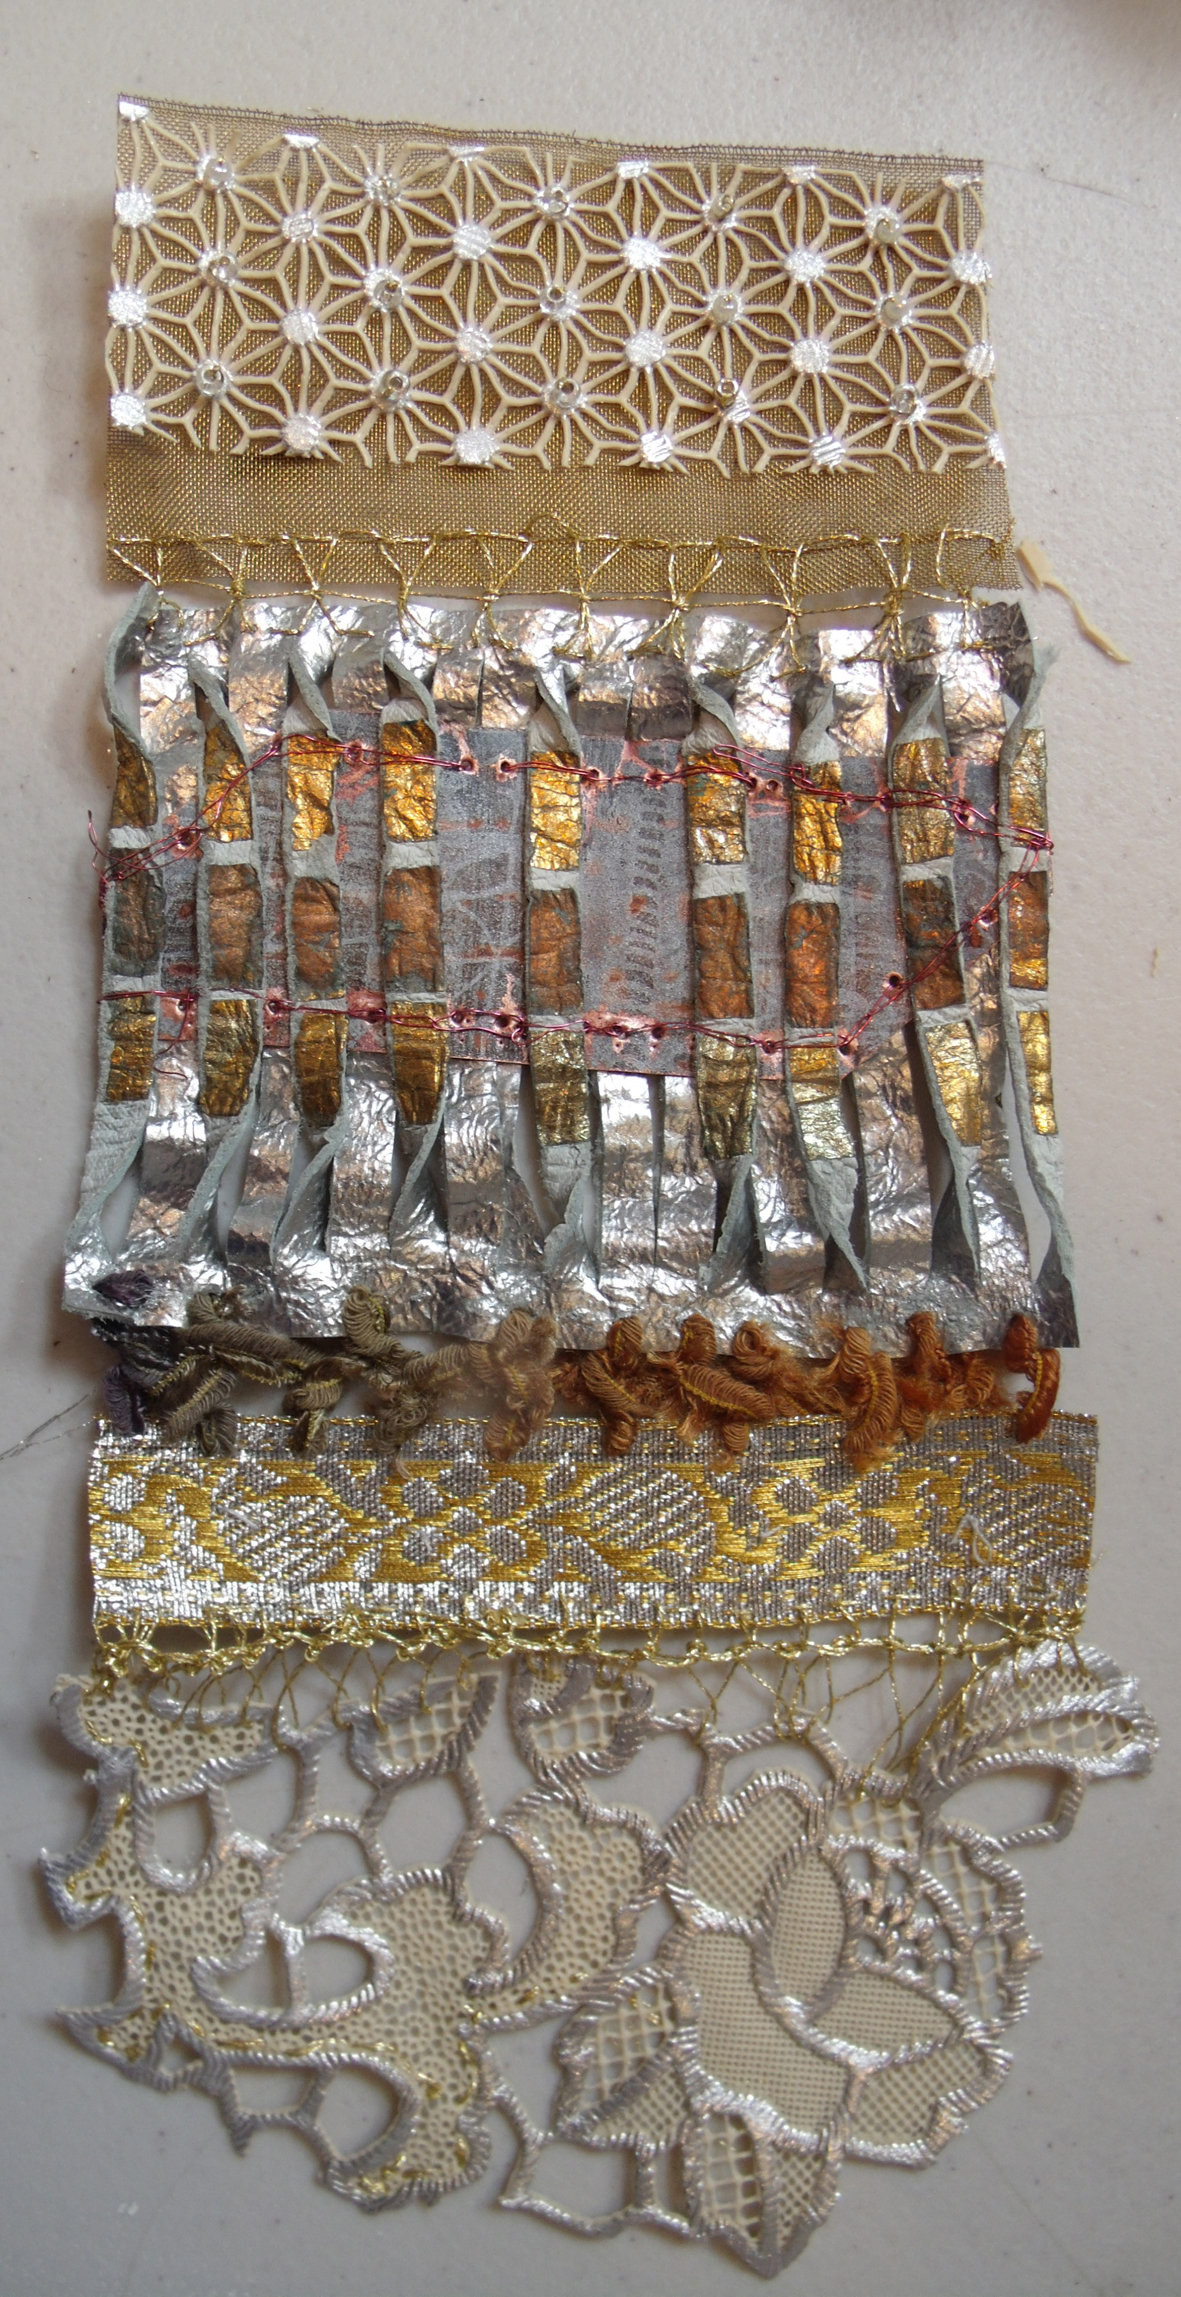
elegant beaded joining stitches between rows of leather, wallpaper, metallic braid, crumpled copper foil, nuno felted silk and drilled copper sheet – Debbie Bird
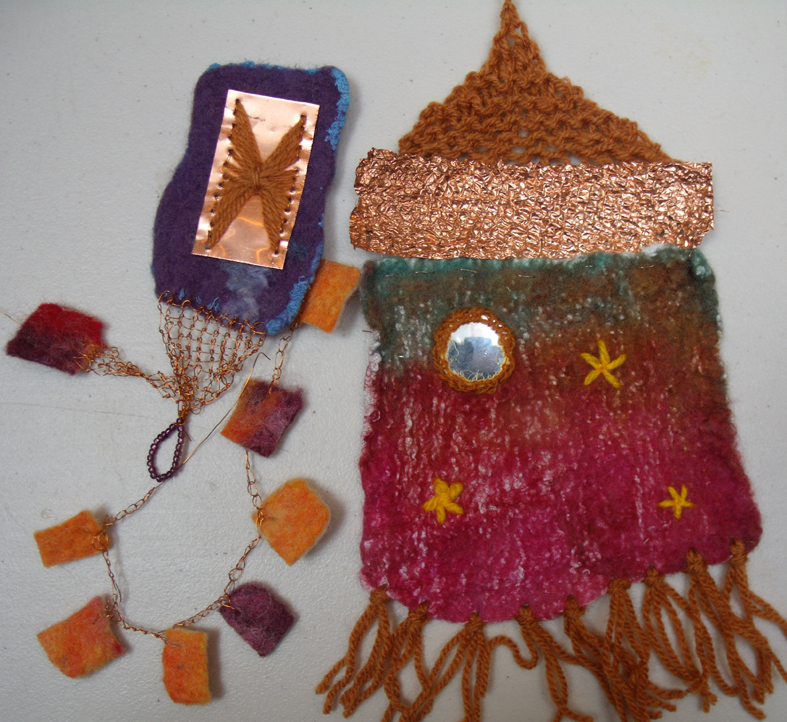
various knitted materials for joining disparate materials;- copper, copper wire, silk and wool nuno felt, shisha mirror in wool embroidery – Clare Griffel
ripped card, copper foil, nuno felted silk and wool, tweed and hand embroidery all joined together in crazy style – Kirsten Hill-Nixon.
interesting how the plastic tablecloth now looks like a precious fabric when seen with the other expensive elements, leather, woven brass and silver fabric. Jane-Marie Mahy
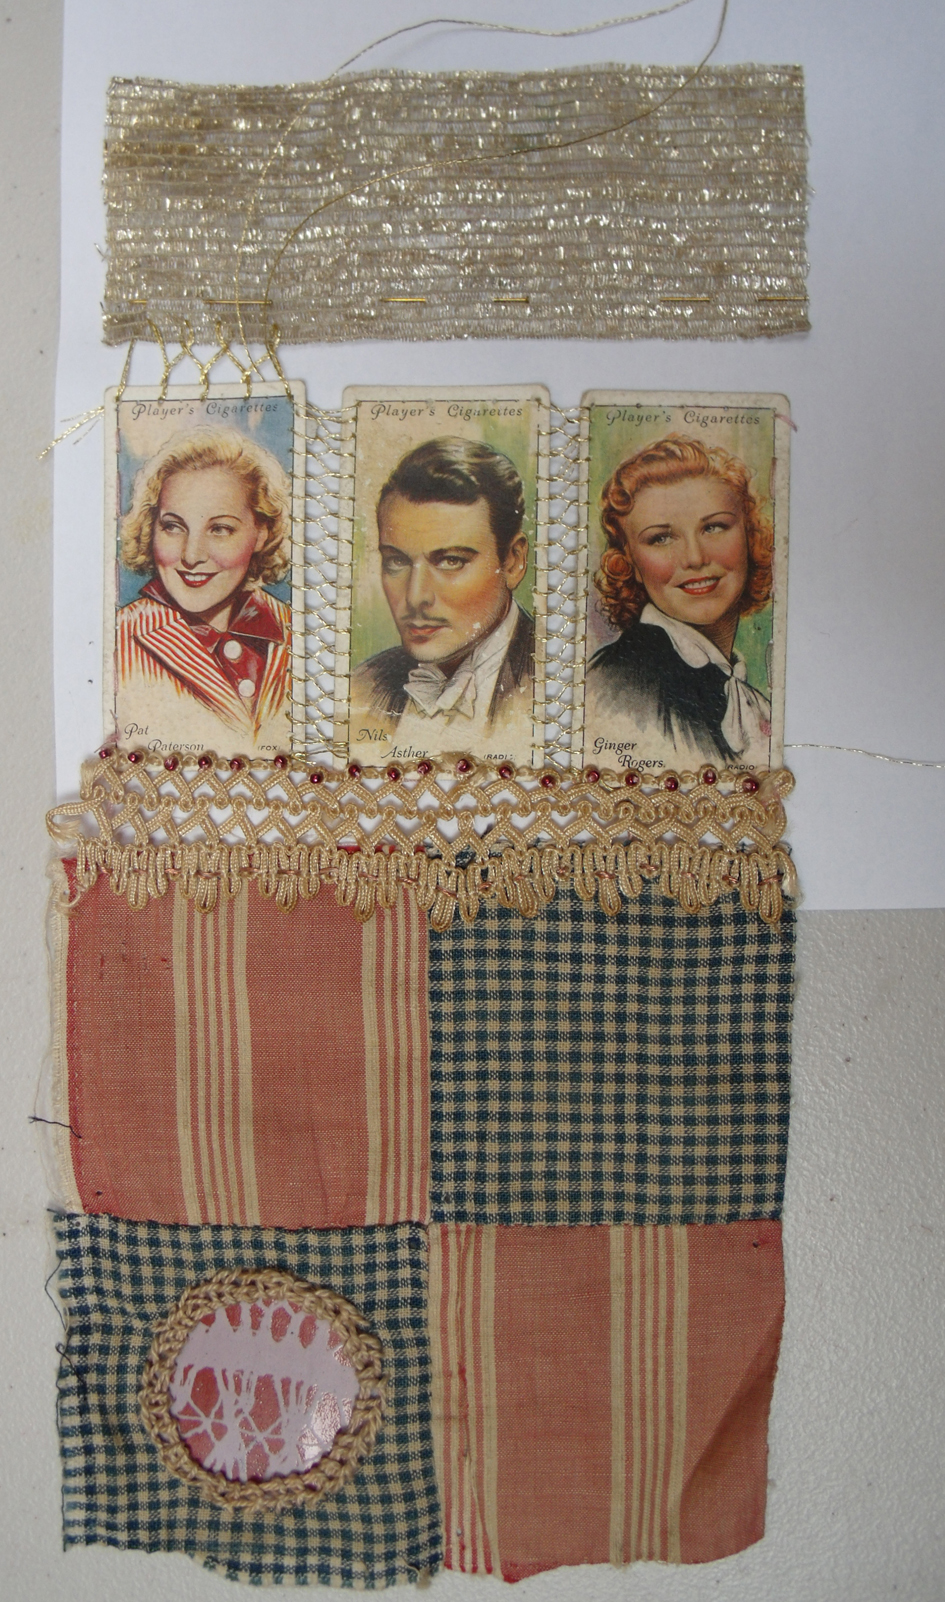
all things vintage – patchwork cotton, linen thread appliqued enamelled copper circle , cards and silver fabric. Sophie Bristol
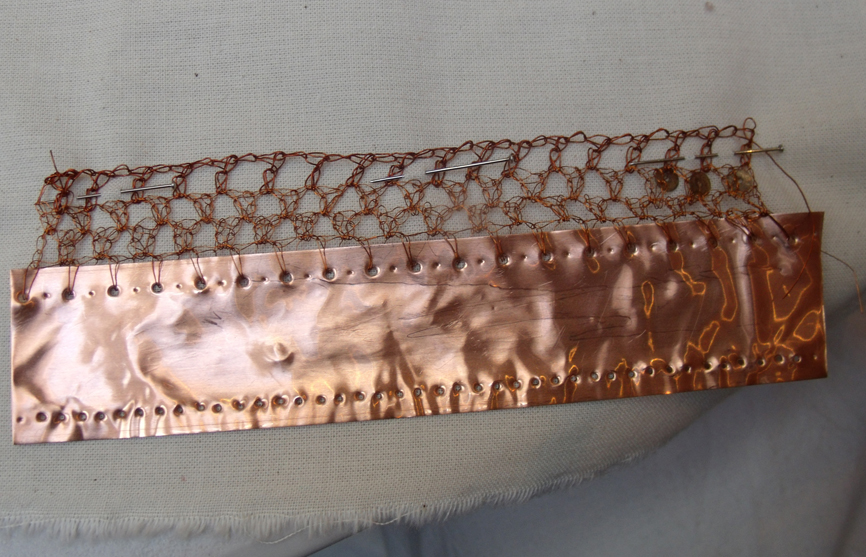
pre machine knitted lace, crocheted copper wire with copper foil and wall paper – Steph Wooster.
And to prove that sampling really does inspire people here is new work from Steph – the day after the workshop she added some of the sampled techniques and materials to her range of knitted hot-water bottle-covers.
new knitted and embroidered samples – Steph Wooster