dog quilt: SERENDIPITY

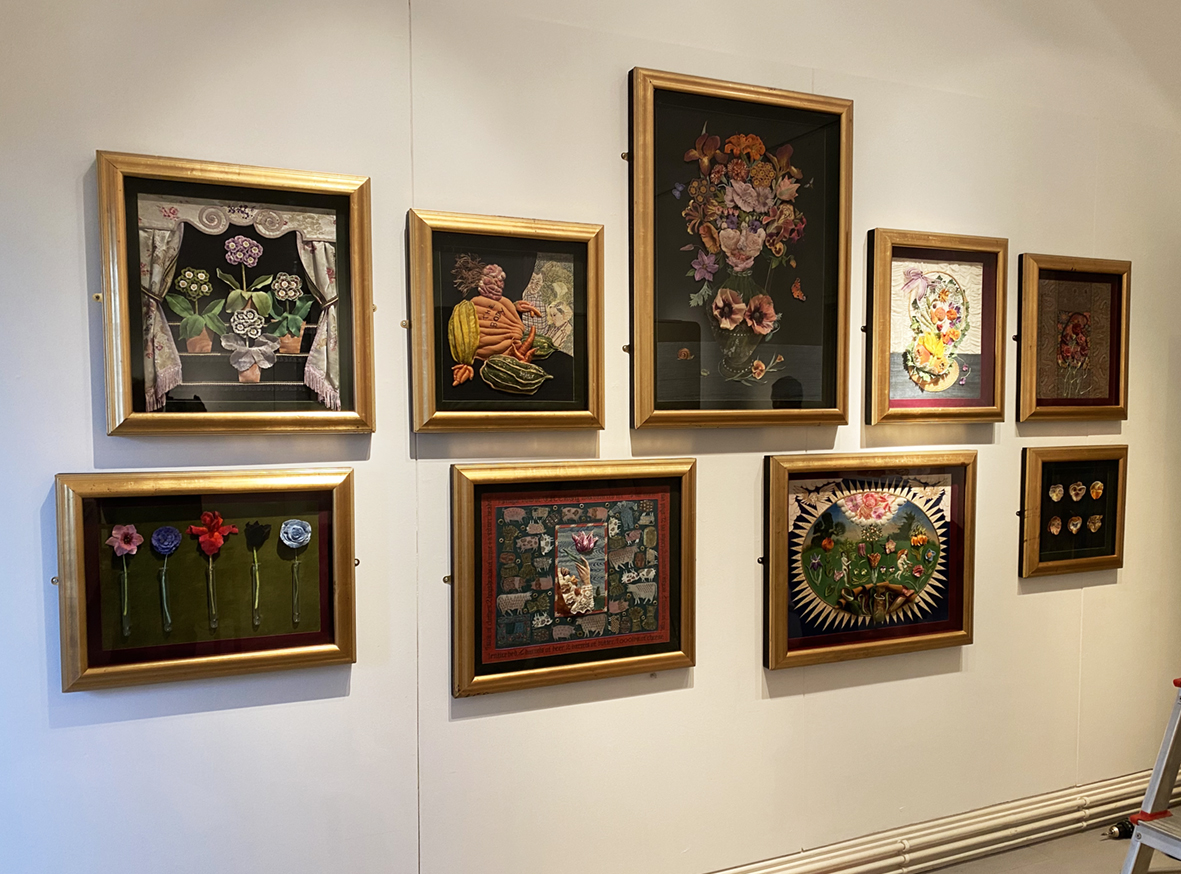
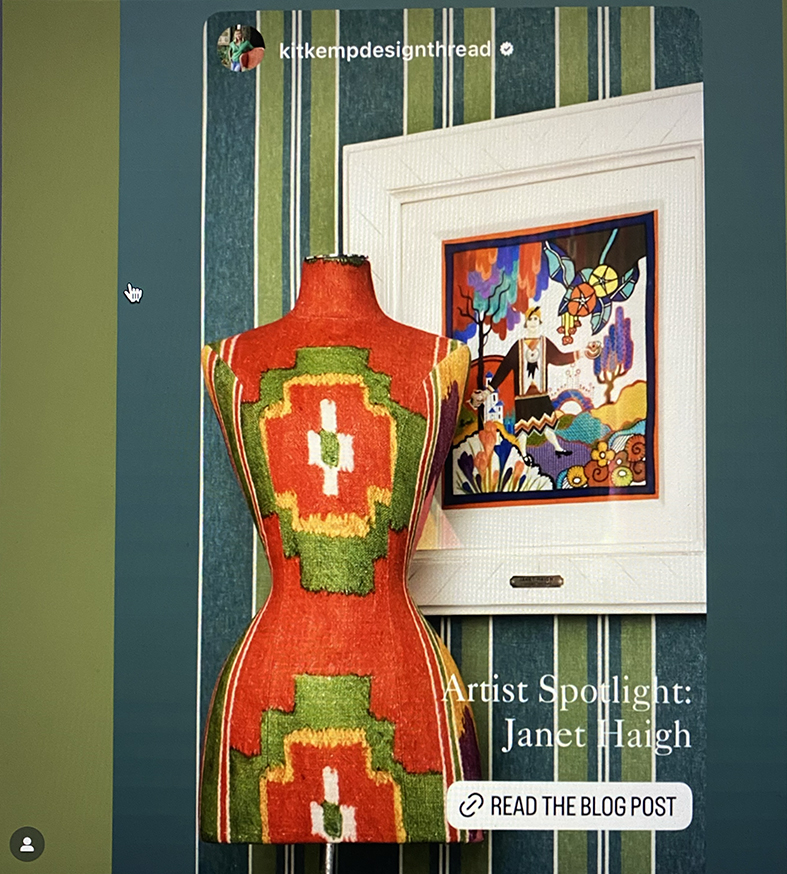
Strange how sometimes things come together: I was contacted, out of the blue, by Marcus Wells at Havilland Designs to see if I undertook commissions? He had framed some of my earlier work (embroidered portraits of women designers) for one of his clients, the interior designer Kit Kemp, who, to my amazement, had spotlighted my work on her blog, showing the perfectly placed Clarice Cliff portrait and lots more. Now read on……

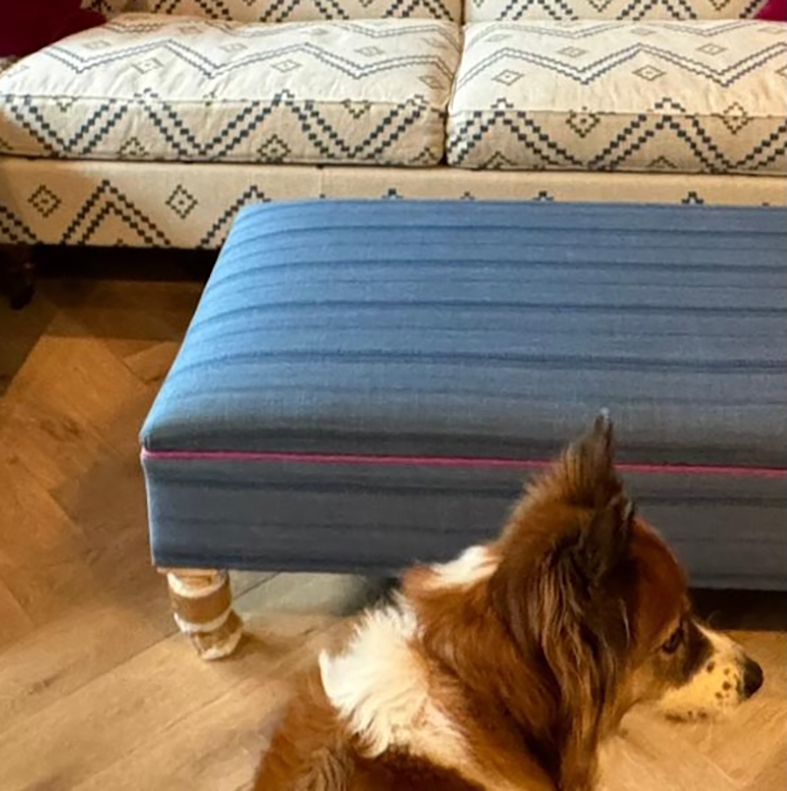
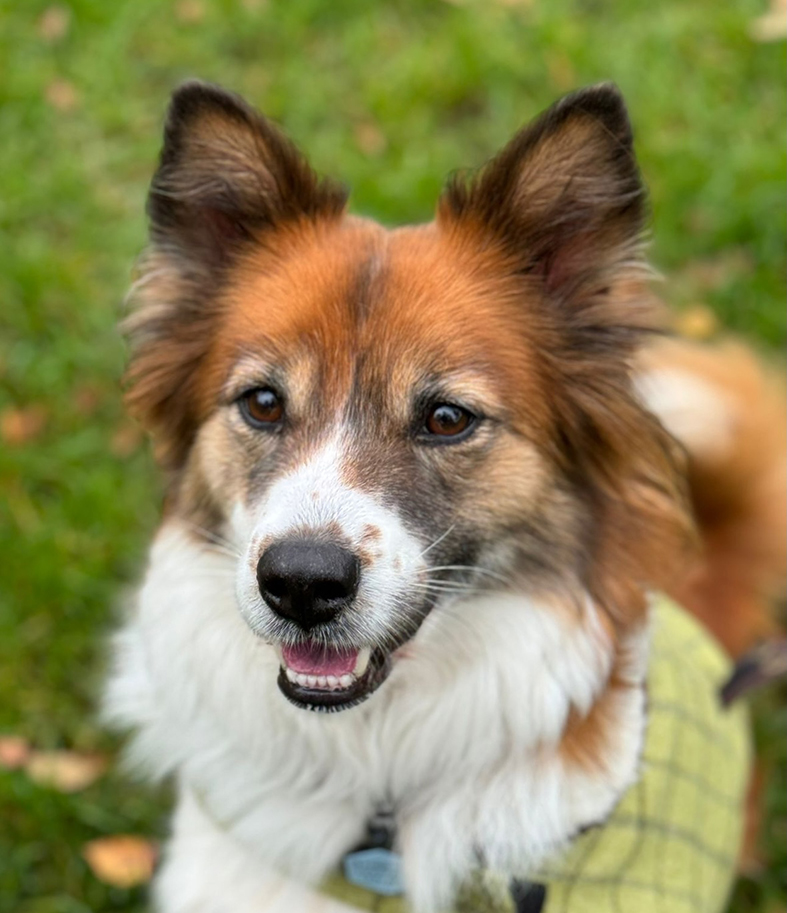
Marcus had a client who wanted a quilt depicting dogs. I am not a quilt maker but I was intrigued and asked him to send me details, sizes, preferred imagery etc. and an overview of the space where the quilt would hang. It was to be framed by Marcus and – no pressure – his client was another interior designer….He sent several images of the room that the quilt was to be hung in and I noticed a small dog’s head on one of them, I asked for pictures of any other dogs belonging to the client.

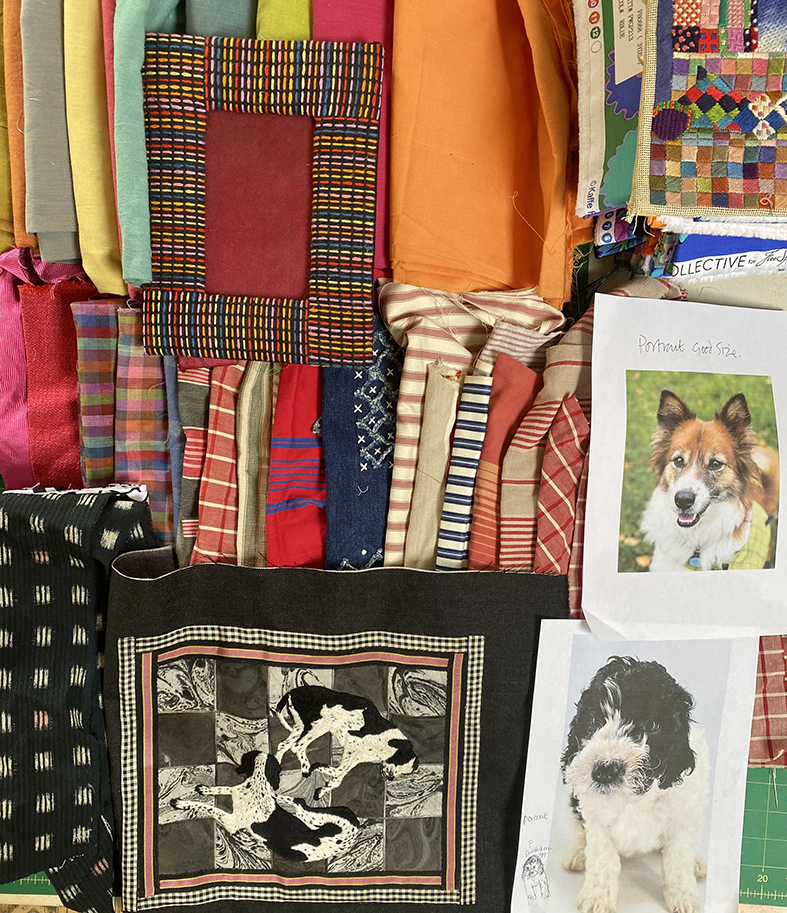
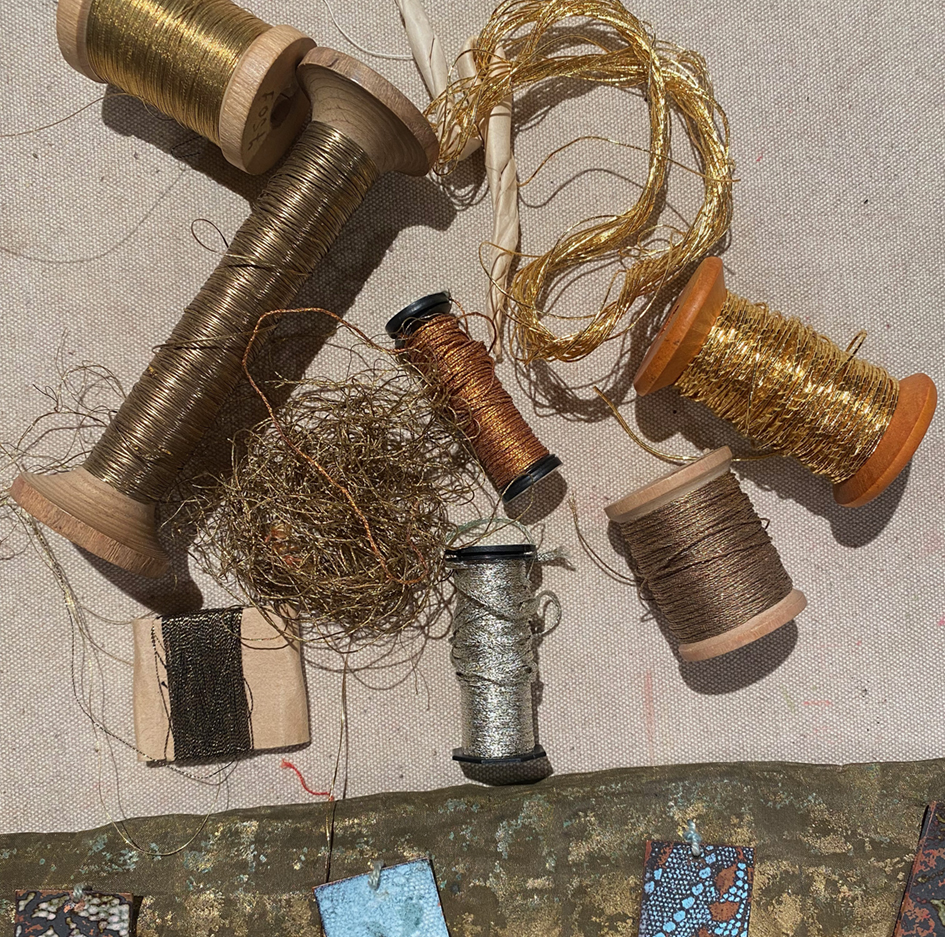
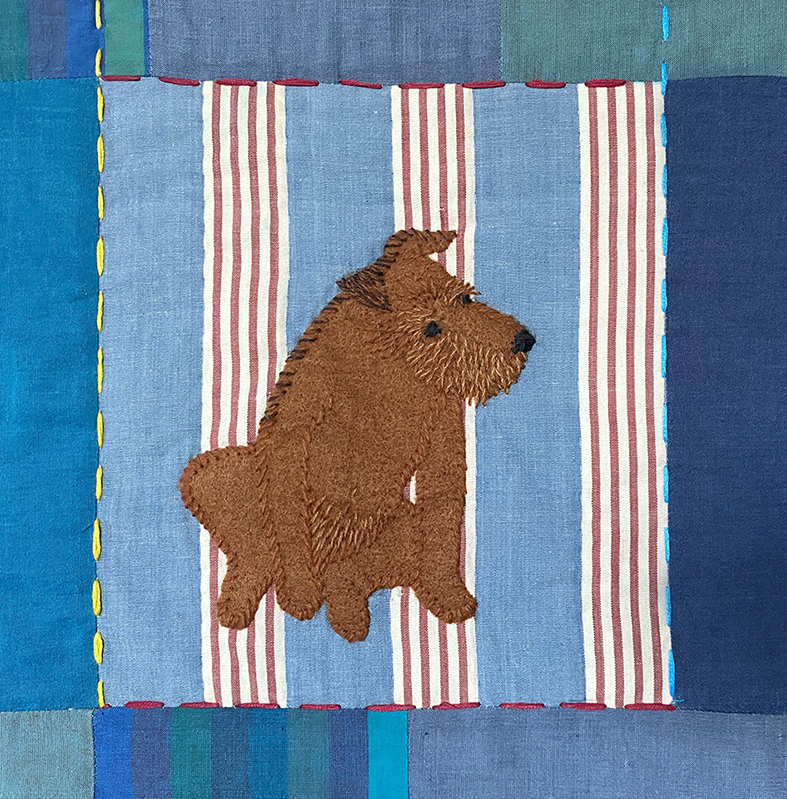
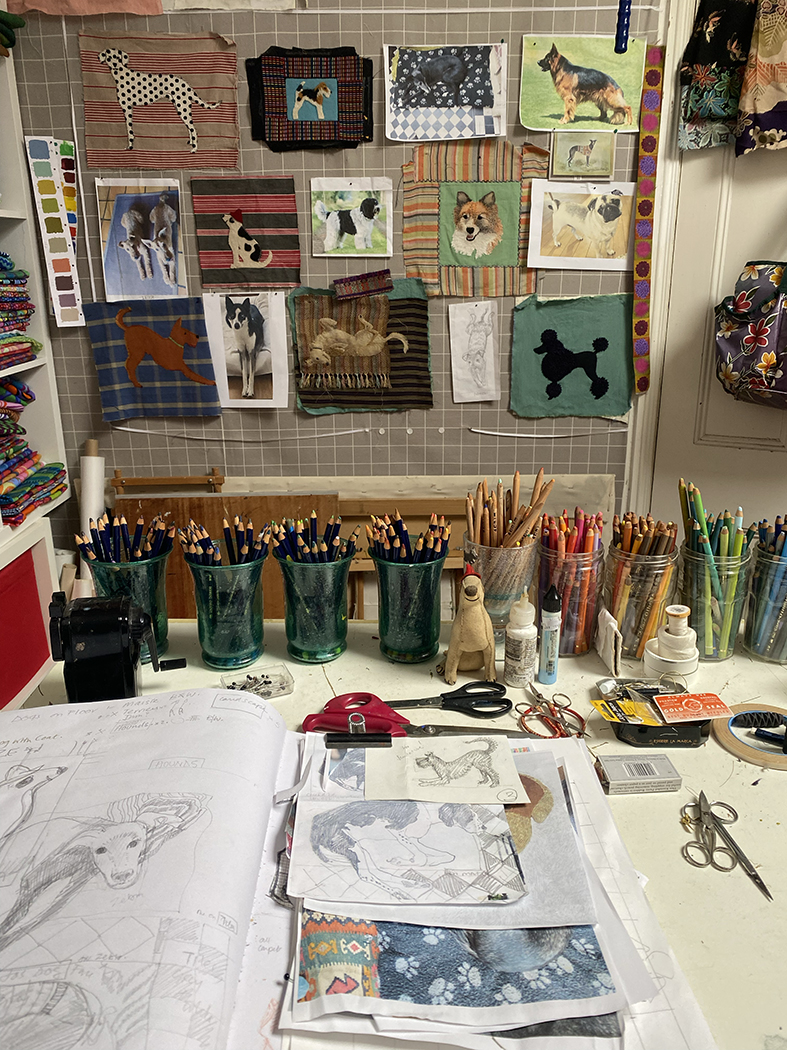
I then made several design sheets for a colour scheme and fabrication, with drawings and 2 embroidered samples using of a range of techniques that I could offer: from the simplest applique design for a spotty Dalmation to a hand-stitched portrait of the small dog in the original photograph. I was given the commission:- a quilted hanging with patchwork blocks of stitched dogs using the different techniques.

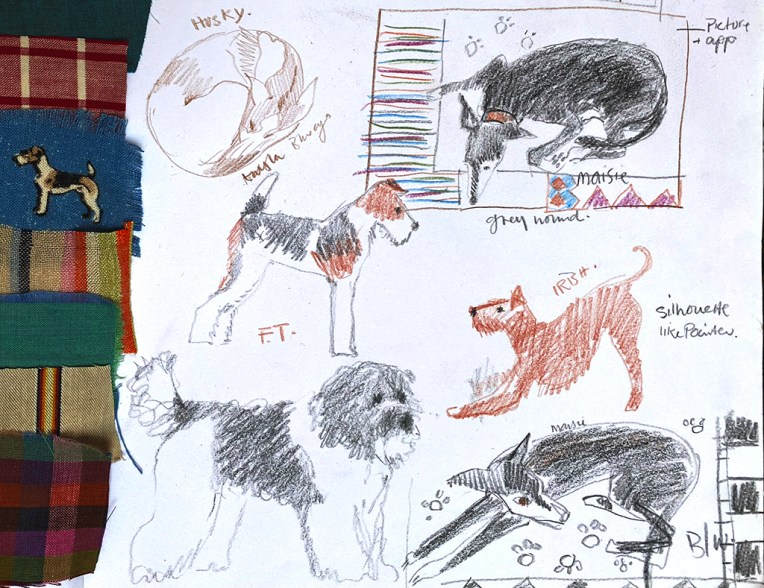
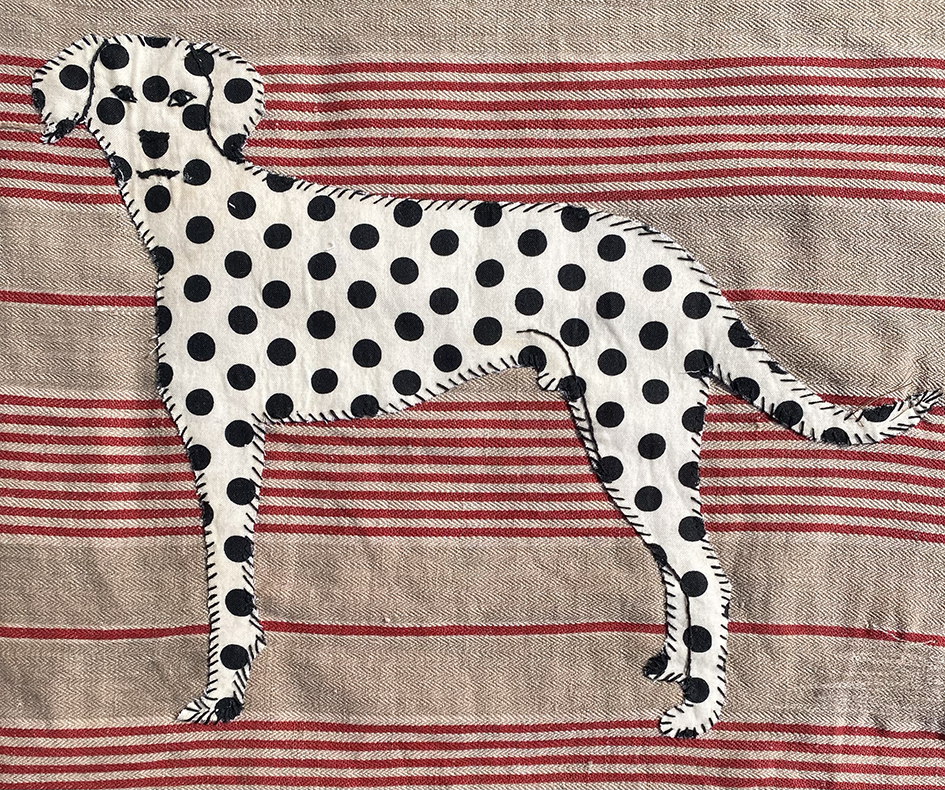
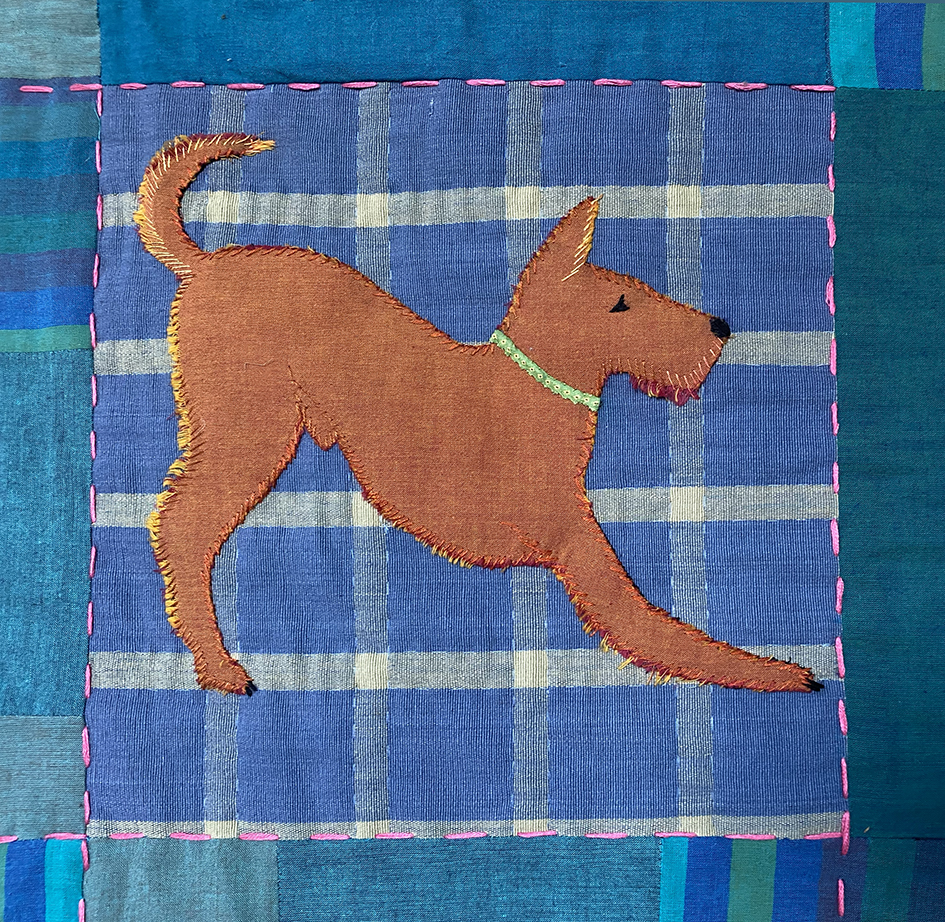
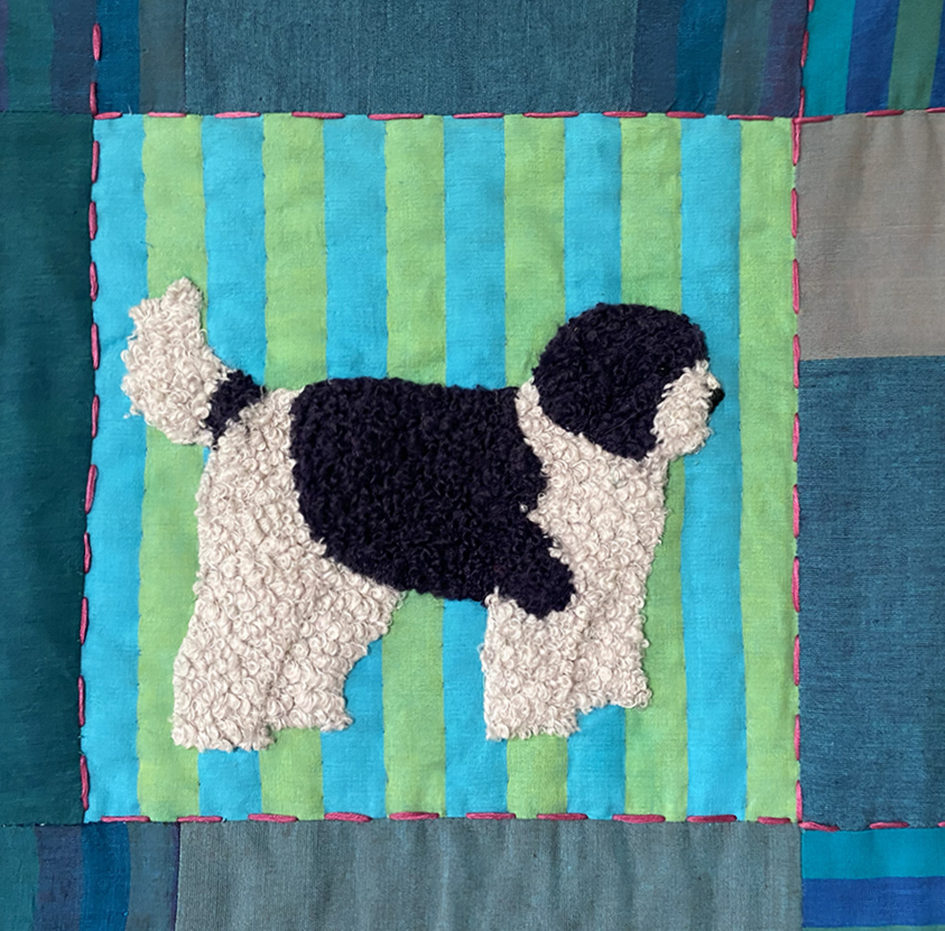
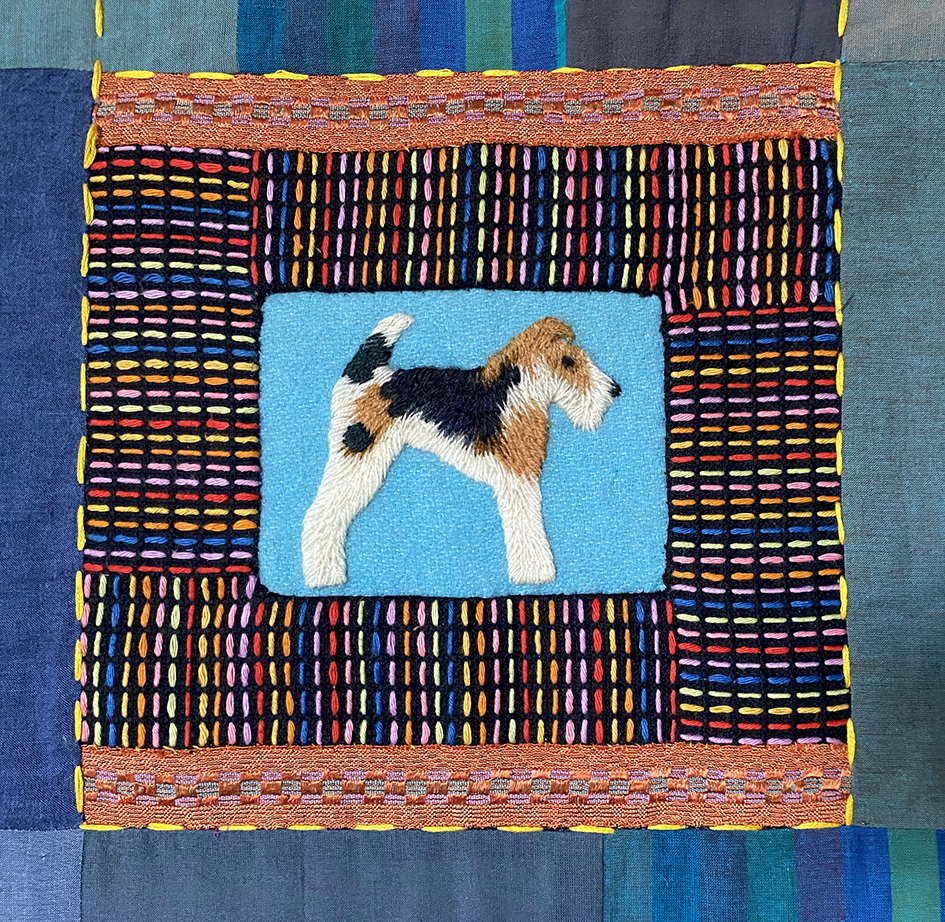
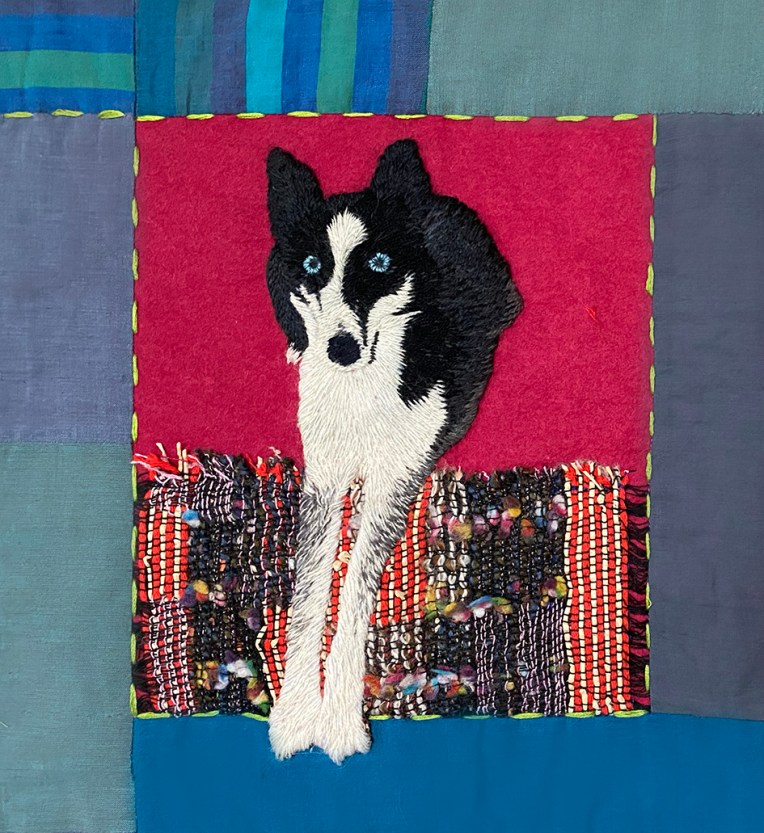
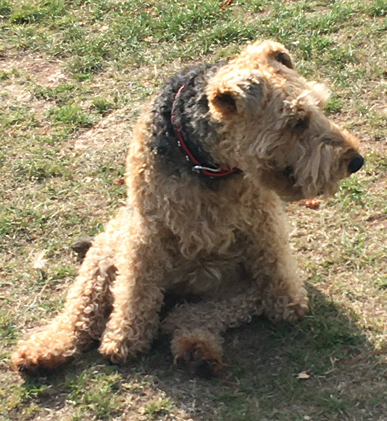
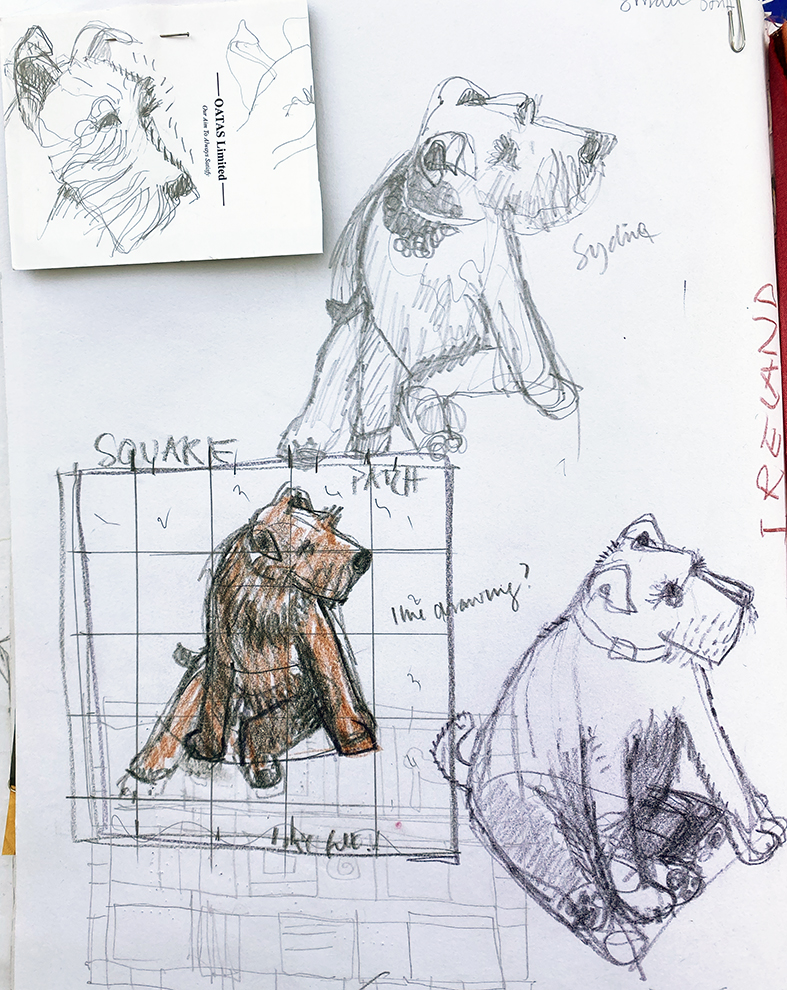
So now to find the extra dogs; my first set of drawings showed typical positions taken by each breed above. I do love dogs and am fascinated by their shapes, specially when totally relaxed. I had started with basic stance like the Dalmation, and just had to include a French poodle and terriers, so an Irish terrier, a Fox terrier and a Border terrier. And hounds, a Schnauzer Leo and even a Siberian husky Twyla, all in easy reach as they belong to friends, family and the local dog-walkers.

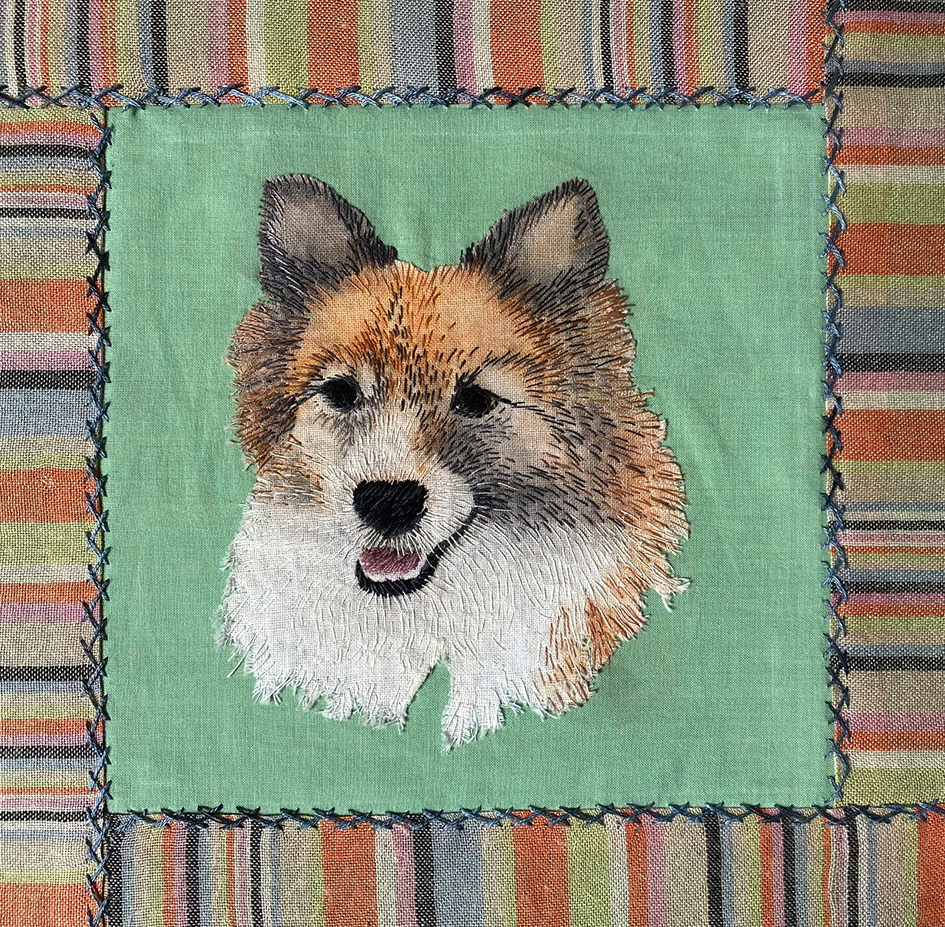
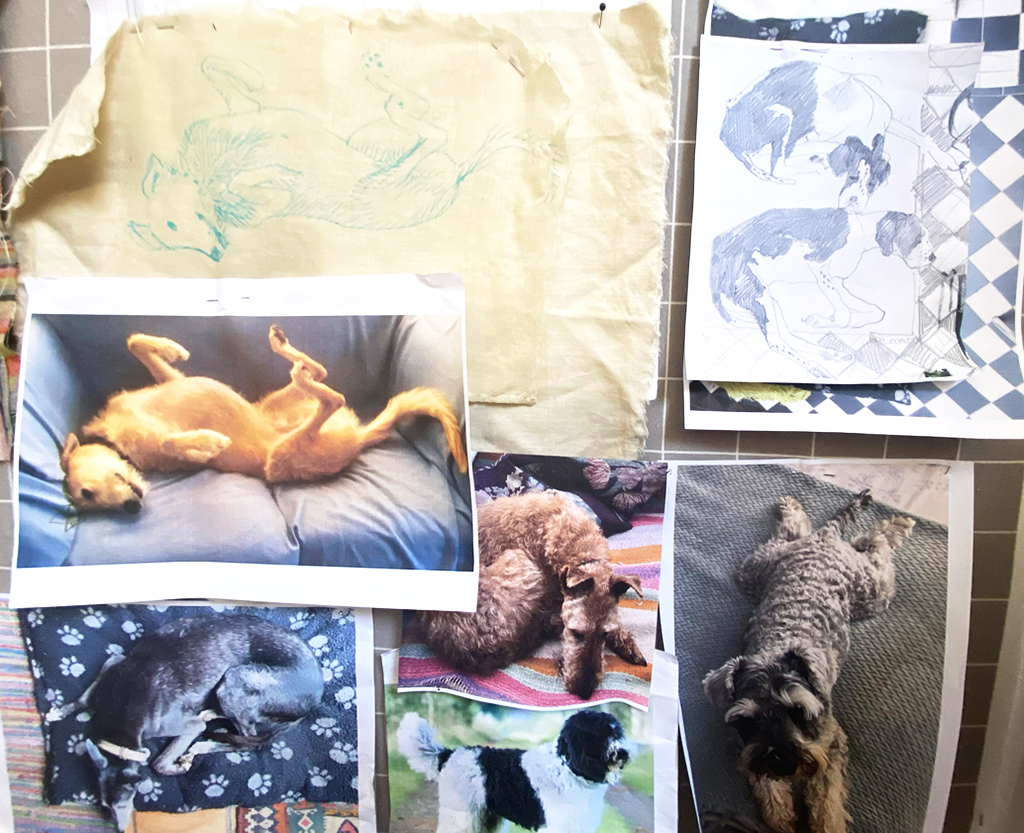
For most of the embroideries I drew the dogs to scale from photographs sent to me by the various owners, to decide which technique used for each dog but sometimes I just copied the photograph! Below are working drawings for the relaxed hound Rodney, and the oh-so-tired Sydney.

But how to assemble them into a quilt? I had been putting everything onto the quilt wall in my studio as I made it – constantly adjusting the arrangement to fit within the required measurement. Not how quilts are usually made I know, but this was created by the love of dogs, not the discipline of the patchwork quilt. The first scribbled design for the quilt shown below and the reality that surrounds it….

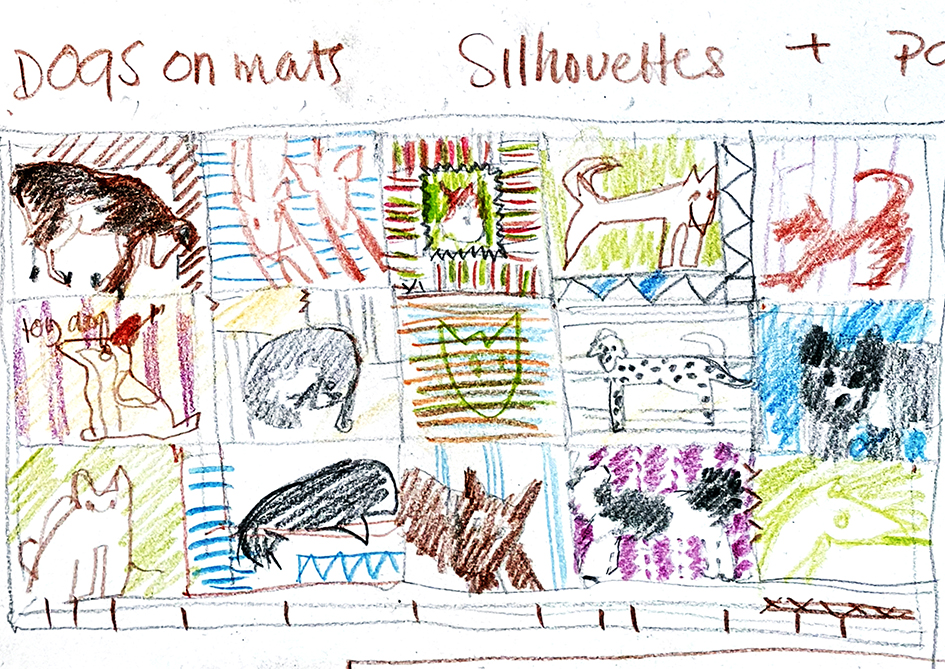
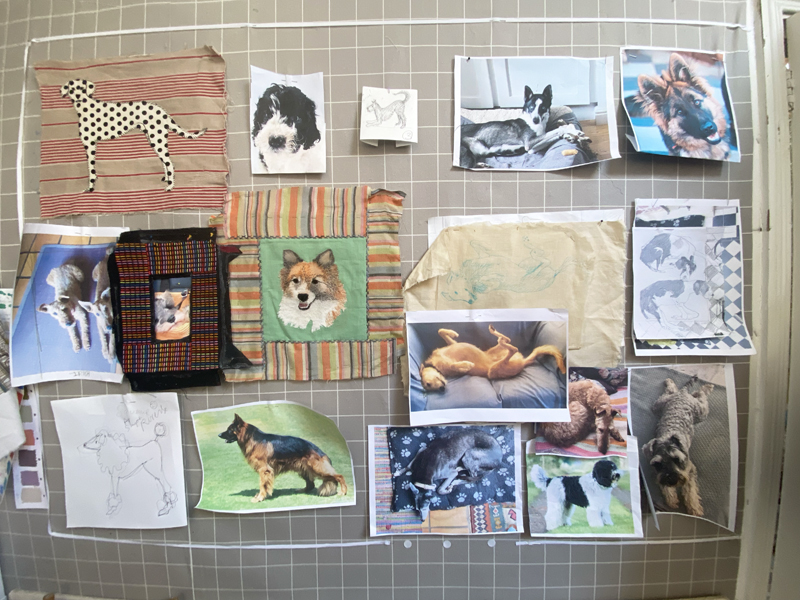
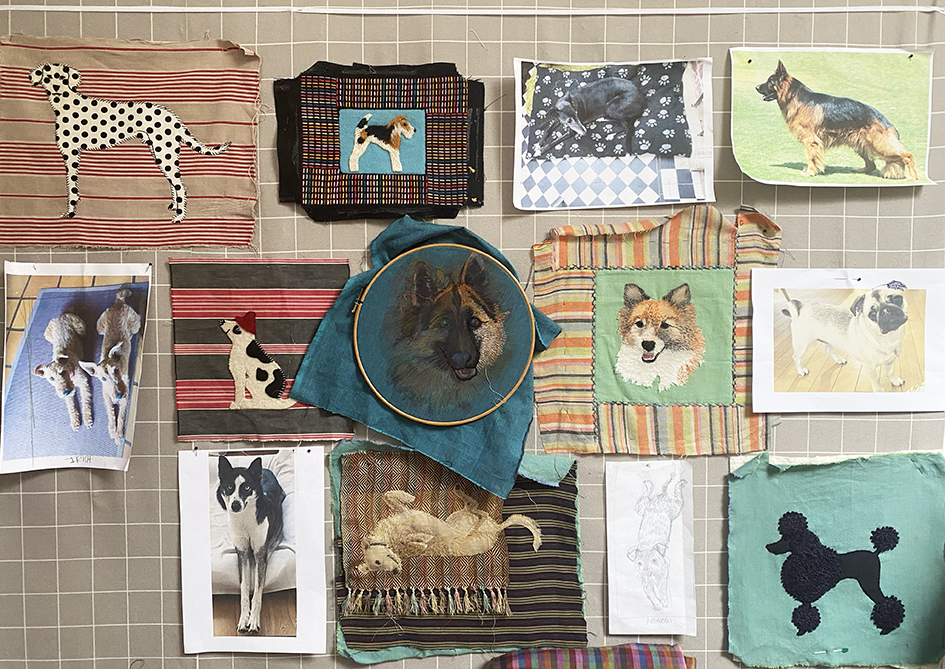
The design chops and changes as each new embroidery is completed and not every dog makes the final cut, but a design finally emerges. There were a few more dogs needed to complete the design, but how to highlight the family dogs (which are actual portraits) and stitch it together as a proper quilt…is the next instalment.

More birds in Skirts

The last week of my exhibition Inspired to Stitch at Hidcote Gardens and this week ,taking stock of the whole experience, I find myself reflecting on, amongst other things, what sells and why. My small prints of the Birds in Skirts are still selling well and in a few weeks will be winging (sorry) their way to their new owners.

But it is often the case that the works I have most affection for (or would like to keep for myself) often do not sell immediately. I am particularly fond of the 2 larger A3 prints with the crazy patchwork skirts. I designed and made these fabrics for my first ever book, Crazy Patchwork, published by Collins and Brown in 1998. These 2 pieces were made into lampshades – yes that’s right, I made crazy lampshades – so I unpicked them from the shade shapes and used the still pristine patchworks for the large skirts.

IF I was buying from this collection, I would choose the lovely old white fabric designs chosen from my collection of vintage fabrics; strips of hand embroidered tape lace, Broderie Anglaise and crochet braids and ribbons that I have lovingly hand stitched together. But not one has been ordered – hey ho! obviously have been overlooked by the more colourful iterations or maybe it is the lack of the pastel skies?

But the Beribboned birds, below, made with the more modern and beautiful coloured ribbons by Renaissance Ribbons are still available….so what do I know?

And my very first versions of designing and stitching the complicated Jacobean embroidery techniques, that took so long to research and develop, have still to find a new home – Hey Ho! But does any designer ever know what will be the most desirable objects of all their creations?

And here is my latest version of the birds, it does not appear in the exhibition but is the result of a swift video made for instagram showing how I made this woven version….maybe there will be more to come as I have recently accepted a commission for one as a special birthday present…..

Flowers & Hearts

The new season’s exhibitions at Jen Jones’ The Welsh Quilt Centre, Lampeter opened a week ago today where I am exhibiting a small show of personal work – work that I make and keep for myself.

On my first visit early in 2023, when I took actual work to show Jen Jones, she offered me a small gallery for an exhibition and I decided on ‘The Flora’ embroideries. However on my second visit to the, now empty, room I immediately realised it would need far more works than I had imagined. I decided to add a more unusual collection of my textiles combining vitreous enamel and based on Mending. It features broken hearts and how to mend them, so Hearts and Flowers: starting at the begining and going round the room: this is the story of putting up the exhibition

In the first week of March I took all my works and with the help of the whole team at the centre the exhibition was in place in a day(apart from a few extra tweaks before the opening)The first wall of work was The Flora. The exhibition curator/editor, Sarah James, remained focussed when I had lost mine.

The Flora flowers give way to a group of ‘Flowers For Our Times’ my most recent hand embroideries..but they continue the themes found in Flora. On the left is a stitched appliqued drawing.

The flower walls give way to hearts (and eyes) so here are my minimally quilted fabric patchworks. This took quite a lot of preparation, pressing on my behalf and for Charles (and Russell) the gallery’s invaluable exhibition men, constantly measuring and sometimes just waiting, but colour co-ordinated!

The large Comfort (Hearts)and Security (Quotes) Blankets and Safety Curtain ( Eyes) had been draped over my bannisters for weeks (above right) but a 3 hour car journey had creased them; I am always relieved to be able press my work before it goes on display.

Moving round next are the metal and vitreous enamel hearts – all broken, discarded, damaged but saved in some way.

The works above are made of metal and glass enamel, they are stitched and embroidered with drawn thread work in copper wires on metal fabrics and copper plate. Patterned by sifting white enamels through Lace and Broderie Anglaise stencils, except for the red sampler that is darned in silk on vellum

The bed in the centre of the gallery is Sarah James’ idea, she thought it would perfectly show off the bedding of Make it Through the Night and she was right! People are really curious and stop to ‘read’ the symbols and it makes sense when teamed with the Bolster.

Eventually we get back to entrance with patchworked and embroidered and flowers but outside in a vestibule there is still something else to see, Russell putting up my framed giclee prints, unframed for sale in the shop with many more flower pieces. And the large ‘Lytes Cary Manor’ woollen wall hanging taken from my studio wall where it has lived since 2001.

The very last picture I took was at the end of the Private View. A group of staff and on the left Jenni of Jenni Smith Sews talking to Hazel (who appears to organise just about everything around the Centre) waiting to hear how to get through the wild Welsh countryside to the restaurant for us to celebrate all the exhibitions and videos on display throughout this amazing place.

PS. my work is not for sale but my new giclee prints of embroidered flowers are available to buy in the fascinating vintage textile and bricabrac shop attached to the centre.

mending the mending….

It is not without irony that I am posting the mending my old ‘mended hearts’ metal embroideries.

Above are the original images of 2 pieces of old work (circa 2010), left is Discarded Heart, and right Crossed Heart. They are just 2 of the outcomes of much experiment with some challenging materials – I was interested that these metal fabrics would last for a long time – far longer than the natural fabrics that I usually use…..how wrong I was!

Searching in my studio I found a drawer full of old ‘fabric enamelsamples, that I had made use of for Discarded Heart. I had often used drawn thread-work as stencils and amazingly found the original stencil fabric , stretched and ready for use.

The most difficult thing I had to do was to repair the cracked enamel square. I wasn’t sure I could do this as it needed to be re-enamelled in exactly the same place as the original – fat chance! I carefully removed the gilded and stitched leather heart and re-gilded it. SO taking courage in both hands I re-stencilled it using a strong white enamel, then fired it at a very high heat and this made both the pattern very feint, and the cracks filled up – result!

Back of centre panel with leather and bronze fabric cut to free heart for repairs
Front of re-placed re-enammelled heart

To get it back into postition I had to re-excavate and re-drill the stitching holes, so that I could painstakingly stitch the whole square by hand using real metal threads, ( trying hard to stick to my intention of NOT buying new materials but recycle anything I already own). I had several real Japanese gold and some copper wrapped threads to choose from, but this thread had to be strong and resilient for stitching through metal and leather.

After several half days of really awkward stitching, I managed to herringbone a wrapped copper thread all around the square.

Relief, as I had already offered the Discarded Heart (as it was it was originally made from lots of my. unsuccessful samples ) to the Welsh Quilt Centre as part of my 6 months exhibition called Hearts and Flowers in 2024.

So far so good, but the next piece, “Crossed Heart” was really badly damaged – mostly by fading but seemingly anything it had been in contact with over the last 10 years….including my hands while working it! Everything seems to mark these refined woven metal fabrics (and I suspect Boysie, an ex fox terrier stud dog). And I thought that these fabrics would be as hard wearing as they are tough to stitch! I didn’t offer this piece for exhibition as I was not at all sure if I could make it look worthy of being exhibited again.

The only area not stained, faded or split was the centre panel of a decorative cross darn in white wire into a heavy copper mesh I had copied from a Darning Sampler in the Bristol City Museum and Art Gallery which has one of the most famous Sampler collections in the world. I kept this, but now had decide just what to keep as signs of legitimate wear and what I just couldn’t aesthetically live with!

The whole sorry embroidery put onto my worktable and pinned into place – the metal fabrics have a tendency to roll up on themselves when left alone; a metal memory even after 10+ years of being stretched on a fame. The staining is plain to see with the general fading and tarnishing, but what you can’t see are the splits on the background fabrics underneath the rows of herringbone stitches.

The first area I felt confident to work was a rip and I cut away the fraying fabric – a mistake – but hey ho, nothing ventured…and started to darn the gap in the metal and nylon woven fabric with 1 thread from a stranded silver hank of 6 strand….very tricky – I may yet go back and rework this!

I was not very confident to continue, but I had started and I am of the sign of the crab…..very tenacious. Here are various ruined areas of the work, with different mends : a proper running stitch strengthener over a pulled thread area, sewing an extra border in a nylon and probably lurex woven fabric (once a very glamorous skirt worn to a 1 very glamorous occasion)to hide the worst of the staining on the outermost edge of the piece ( Boysie?) and then surrepticious stitches to draw the edges of the split fabric together. The herringbone stitches had started to unravel – and by this time so had I.

but eventually they are finished enough for safely re-stretching and possibly have their place in the lay-out for the gallery as part of a group of stitched metal mended hearts…

The mended Crossed and Discarded Hearts

My Patchwork Quilted Room – Da Da.

Here is the open door into my completed ( well just a few more pictures to put up) patch-work room, using fabrics from the Kaffe Fassett Collective. It has taken 6 months to achieve. I started 2020 during the last Covid 19 lockdown in England and we are still not entirely unlocked mid way through 2021.

I aim to take you around the room to see how it all has come together, here the door from the porch has a vitreous enamelled finger plate – now I want to make more of these for inside the room…the enamelled fireplace can be seen with our old furniture and carpets safely back into place.

turning left is the view into the small panelled room, our 2 Irish Terriers and the enamelled fire surround – see previous post for making this….luckily my much loved vintage Deco glass shade tones perfectly…now how did that happen?

Above are 3 views of the chimney corner with 2 different totally different Flag representations. the row of flags at the sea side is an old painting by Stephen Jacobson next to a ghostly silk organza flag by Nigel Hurlstone. this piece of work proved pivotal for me to see how the room could hang together using cooler colours

Once we had started to put the room back together our 2 Irish terriers, Maeve and Murphy took a particular if very relaxed interest in it.

I found on Ebay a beautiful discounted Zoffany silk striped fabric and bought enough to make 4 very large padded curtains for the big Victorian windows in the room. The fabric cost me about 4 times the amount I had spent on the rest of the room…but they work well once I had trimmed them with some vintage woven ribbon that I over – dyed to suit the colour of the paintwork – as you do! And then I found these mazing brass tie backs on-line at my favourite store for just about everything decorative, Anthropology.

Continuing around the room…

In the the corner between the windows hangs an old (and much loved by me) painting by my husband, Stephen Jacobson, of my father’s greenhouse that he built in my family’s garden on the Wirral in north west of England.

From the photographs I have posted so far it is hard to see that the patchworks are all padded and quilted, but it is evident that my ‘in the ditch’ sewing notbetter placed than my hammering in the copper tacks that fasten the fabric to the battens. On the tiled table is a flowery flower vase by Tean Kirby.

the opposite end of the room to the fireplace with the bay window looking out on the overgrown garden

one of a pair of window seats with an old canvas work cushion sample and the luxurious silk curtains and brass tie backs. Then to the other new thing I bought for the room – the glamorous mauve velvet mini chaise – from a TK Maxx sale!!!!!! Well I had to balance the spend on the curtains.

Coming Into Port – Stephen Jacobson

Above is ‘ Coming Into Port’ – I leapt on this for the room when it came back early from a “closed for Covid” exhibition and it fitted perfectly. Basically our house serves as a venue for our joint work. I made the large cushion especially – it uses all the major colours of the room, and in fact the whole house, in my wonky version of Flame Stitch; and I have been commissioned to make a design from this by Ehrman Tapestry so look out for it next year if you stitch canvas cushions.

So here we are at the porch door again – and the gingers are waiting for us – well actually for Stephen with the biscuits to get them to pose….

and that is it – at last after so long – finished enough for people to see it – with the doors and windows open and only 4 visitors at a time!

My Covid Project – Getting There:

Sunday 7th March : Downstairs sitting room

So, by the beginning of March I had at last finished stitching all the patchwork panels, and between long bouts of quilting them, I managed to paint all the woodwork and window reveals in the sitting room.

Sunday 7th April : Upstairs studio

I had decided to make a strippy quilt for the chimney wall, partly to save time but really to overcome the problem of awkward door frames and lots of corners. I calculated the width of the strips on each wall, even taking into account my inexact machine sewing I managed to get them fairly evenly spaced. Well 4 cans of spray starch and a hot iron helped.

I seem to be a lot better at stretching the panels than I am at machine sewing them. We decided to work around the room from the least visible area. I wanted the walls to look like a total piece of fabric or a massive quilt that is just wrapped around the walls like a cocoon – but I had to make some adjustments to the finishing as things progressed….we sort of started with a vague plan trusting to nouse to see us through…..Things were beginning to take shape but I soon hit a construction problem, my errant stitching had made some of the panels far too big and they needed to be trimmed after stretching and folding, securing them neatly was difficult now that they were padded.

Above, the edges of the panels are secured with iron-on fusible web tape and staples to vertical battens before stretching across the entire wall. Then the diamond corners are further secured to horizontal battens with copper tacks.

The large window wall panel was joined to the alcove panel to assist tight and neat stretching into the corner- making it up as we go along!

Having negotiated the large wall panel I now assessed the look of what we had covered so far but was still concerned about the strength of pattern overwhelming everything else in the room ( we have very faded vintage furniture, carpets and fabrics in the house and I did not want to start making new covers and buying more carpets). I tried to think of ways to make the patterns less brilliant… I remembered a patchwork organza flag made by my old colleague and friend, Nigel Hurlstone. It was in a massive pale oak frame, sadly too wide for this alcove, I removed the flag and held it in front of the bright wall, the central stripe was the same size as the strips – it was meant to be.

I asked his permission for showing this de-framed (but as he gave this to me as a present for helping him decorate his first flat about 15 years ago) I thought he may agree and he did. The thing is that the addition of this piece of work suddenly changed the atmosphere of the room, it became more relaxed and so did I!

Over the next 2 weeks we worked our way around the whole room stretching, stapling, tapping copper tacks, while dealing with light switches and plugs using a combination of glues, bondaweb strips, an iron and spray starch.

finally the room is covered, just one last strip to join it all together – under the window. Now to start finishing, covering the staples with wooden picture rails and skirting boards and quadrant in the corners. BUT before we finally put the mirror back into position I write this dedication on the chimney breast -I am hoping it will be many many years before this house is sold and some one else uncovers it!

and here I am again before sorting out the rest of the room – flag in place and now to make tiles for the fireplace and then there are the curtains……possibly one more post ?