A new space has been opened up at Heart Space Studios, the dining room. Until now lunches have been served in whichever of the 2 studios were not in use; now there is a proper dining room between the two studios, but because it is enclosed it has no natural light source …serious lighting had to be considered but I have not got serious lighting money.
the original large paper lanterncollection of paper doilies
I knew that I wanted a very big light fitting because the room is small – a section of the original office area and if you have a major problem when decorating try to make something very positive happen….. no light in a room? accentuate the darkness, or in this case, if the light has to be on all the time, make the lighting really special.
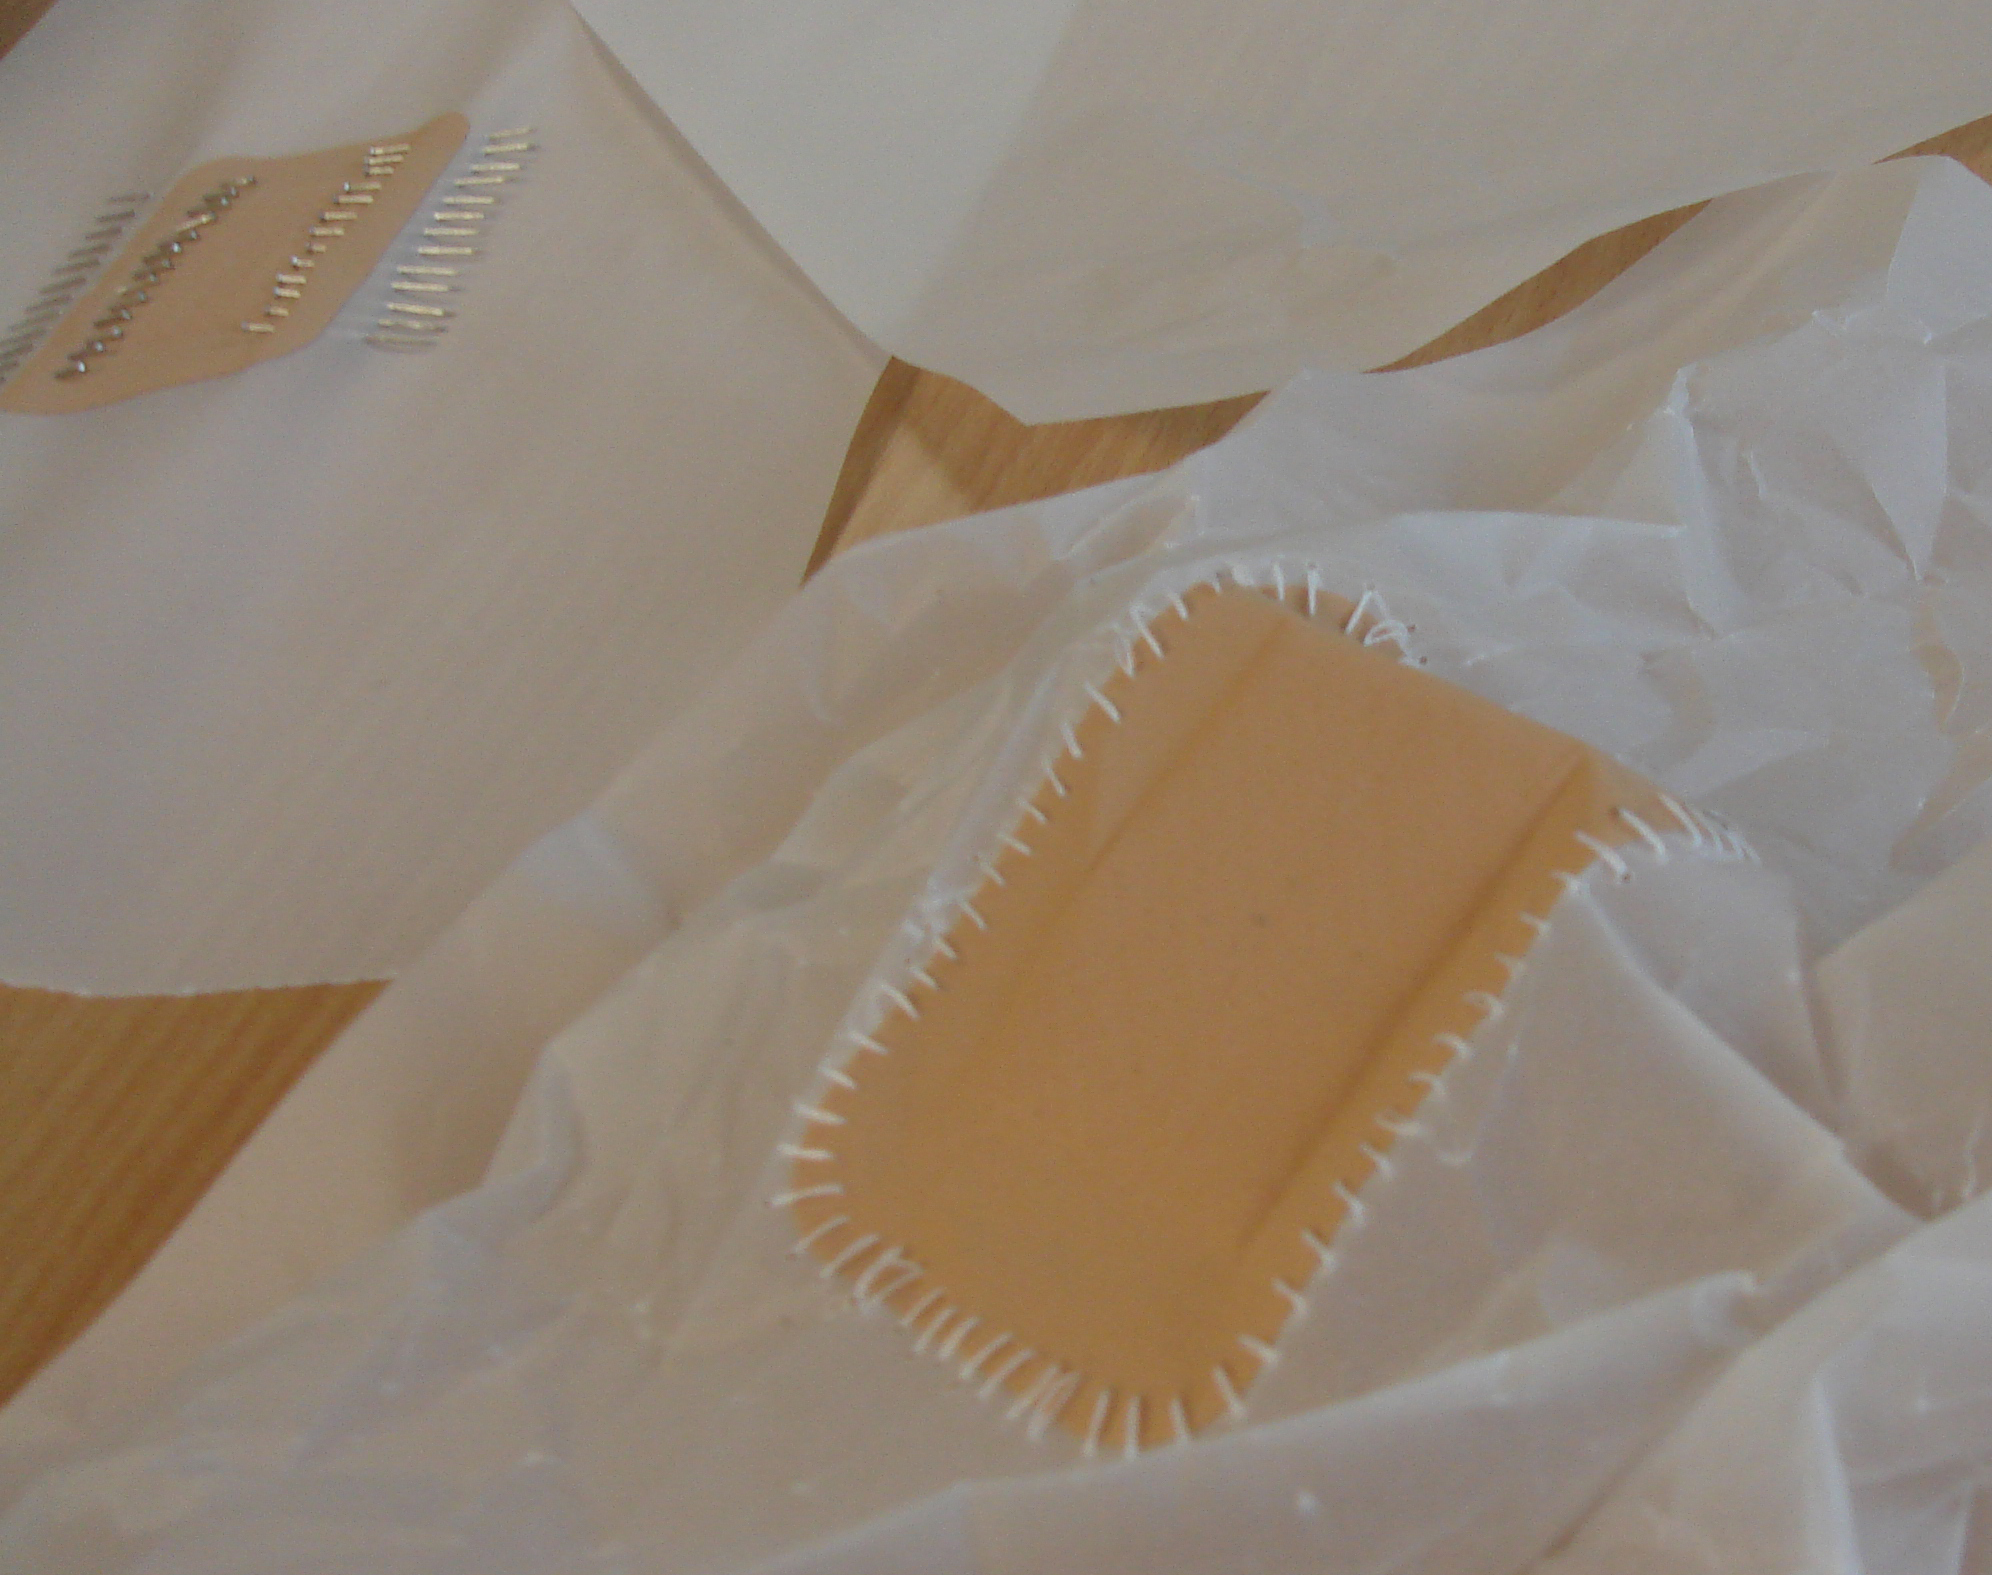
Yesterday I found a huge paper pendant in Habitat, the right size but seriously understated for my needs – but at £5 it had be be bought – I will do something with it somehow I thought – after all the price was perfect.
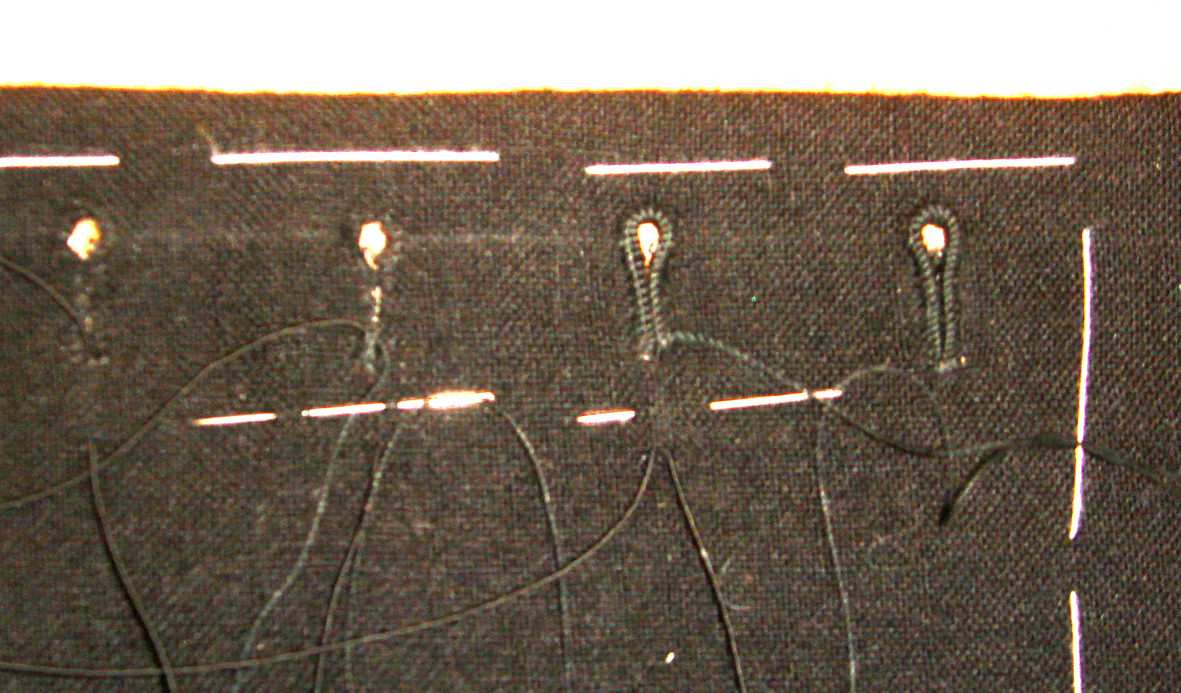
When I got it home I looked around for some lace to stitch onto it – the first thought was to use strips of broderie Anglaise and just wind it round and round between the spiral wires that form the shape…then I thought about circles of lacy fabrics, crochet, lace and tatting I have somewhere in my stash of white work…but then I remembered all the paper doilies I had bought from vintage stalls years ago when I was patterning my stitched enamels. Now where were they? Eventually I found them in the white paper draw in the plan chest – where else would they be?
I fished them out and the rest was easy- peasy, well not exactly easy -peasy, in fact it was really tricky to make this idea work. Fabric could have been eased and coaxed into following the curves of the paper sphere, but my old stamped and fragile paper could not. Luckily the paper sphere was already creased….. I set to work.
pinned paper doily being stitched into place
Don’t ask me why but I never even considered gluing this shade together, which is the obvious way of doing it – I just had to stitch it. But in the long run I think this made it easier but not quicker. Stitching, even into paper, does allow for a bit of ease of movement, whereas using glue is OK only when you are very exact and know what you are doing before you start.
first doily stitched in place with back paper removed
I added one at a time pinning and stitching and cutting the backing paper away to get a lace effect and more light. The first one was easy as it was quite small, the second was big and very awkward. I had to really struggle to get the papers cut away from inside the sphere and this is why I like to sample and design first when starting from scratch with an idea. But for this I just had to figure it out as I made it – I really should make a paper pattern for this as I would like to make some more of these to sell in the shop at the studios.
cutting the original paper shade away from appliqued doily
Cutting the backing papers away was a fiddle as I had to get my hands inside the sphere – but the effect is definitely worth it. I worked all Sunday afternoon and then finished it first thing Monday morning and took it in to be hung at lunch time. I was very pleased with the result; but really I just liked being able to stitch something again – starting a business to teach stitching is not the same thing as stitching for a living and I do miss my old quiet and contemplative working life.
The light behind all the different types and layers of paper looks lovely and the whole room now glows.
the finished shade hangs over the dining table in Heart Space Studios.
map showing journeys of delegates attending the TFSW conference
Last weekend all the samples for the Mending at the Museum project was exhibited for the very first time. They were exhibited at a conference, ‘Mapping – Where Are You Now? – held by Textile Forum South West. Dawn Mason, my collegue and I have been out and about lately giving papers and exhibiting the work achieved by the Stitching and Thinking group. Two weeks ago we gave a joint paper at a symposium on current textile reseacrh for the Textile Society (where we were applauded for developing new methods for practice based reseacrh)and then Dawn gave a presentation at the conference that had the joint themes of mapping and networking.
samples shown at the one day temporary exhibition at the back of the conferecne hall
The conference was very lively and most interest early on revolved around Chrome Yellow Books – even as they were setting up people were browsing and buying – including me.
Chrome Yellow setting out their wonderful array of desirable books
This was really more than a conference as we had many hands-on opportunities to network, notably Kirsty Hall the blogger who helps you to blog better – if you want help to get started or develop your website or blog – visit her sites – or just visit her sites for really lively ideas and projects.
Mapping TFSW members to help members see who lives near them and where we all are now - Taunton
The mapping project was a good opportunity to show everyone present just who was near to them within the south west – the big pompom in the middle is Taunton where the conferecne was held about the centre of the whole region. there was a whole pom pom vibe throughout the day – to find out more go to our TFSW website
pom pom making classes at the mid day break
And there was also a fascinating small set of strings of hanging hearts from the Heart Felt Project, run by TFSW member Jan Connett
Heart Felt hearts
But for me the tiny exhibition of the Mending Samplers was a major triumph, it has taken 2 years to get the Stitching and Thinking project to the point where we can see just what we can make together as a group and Dawn and I were amazed by the way the samples really came together as a group show.
Mending Samplers "Work in Progress" exhibition
The group were obviously all influenced by a few samplers , a red and white rolled stitch sampler bougth by me at an Oxfam shop years ago and an ethereal darning sampler form the Bristol museum and Art Gallery’s collection.
child's 20th century mending samplerQuaker school mending sampler
The small exhibition caused a lot of interest and comment within the audience – and people were wanting to join us for more workshops and future exhibitons.
Dawn Mason's embellished collage with Steph Wooster's hanging wrap and Jess Turrell's mended tablewareJilly Morris - stitched plasters and velum torso.Dawn Mason stitched papers and mended jugs by Hanne Rysgaardmended by me. with small sample of porcelain by Hanne mended by Basil Kardasismy handkerchiefs and mending - motto plate - mended by Jess Turrel mended sweat shirt by Matt Benton with box of darning brooches, Dail Behennah - who was the key-note speaker at the conference
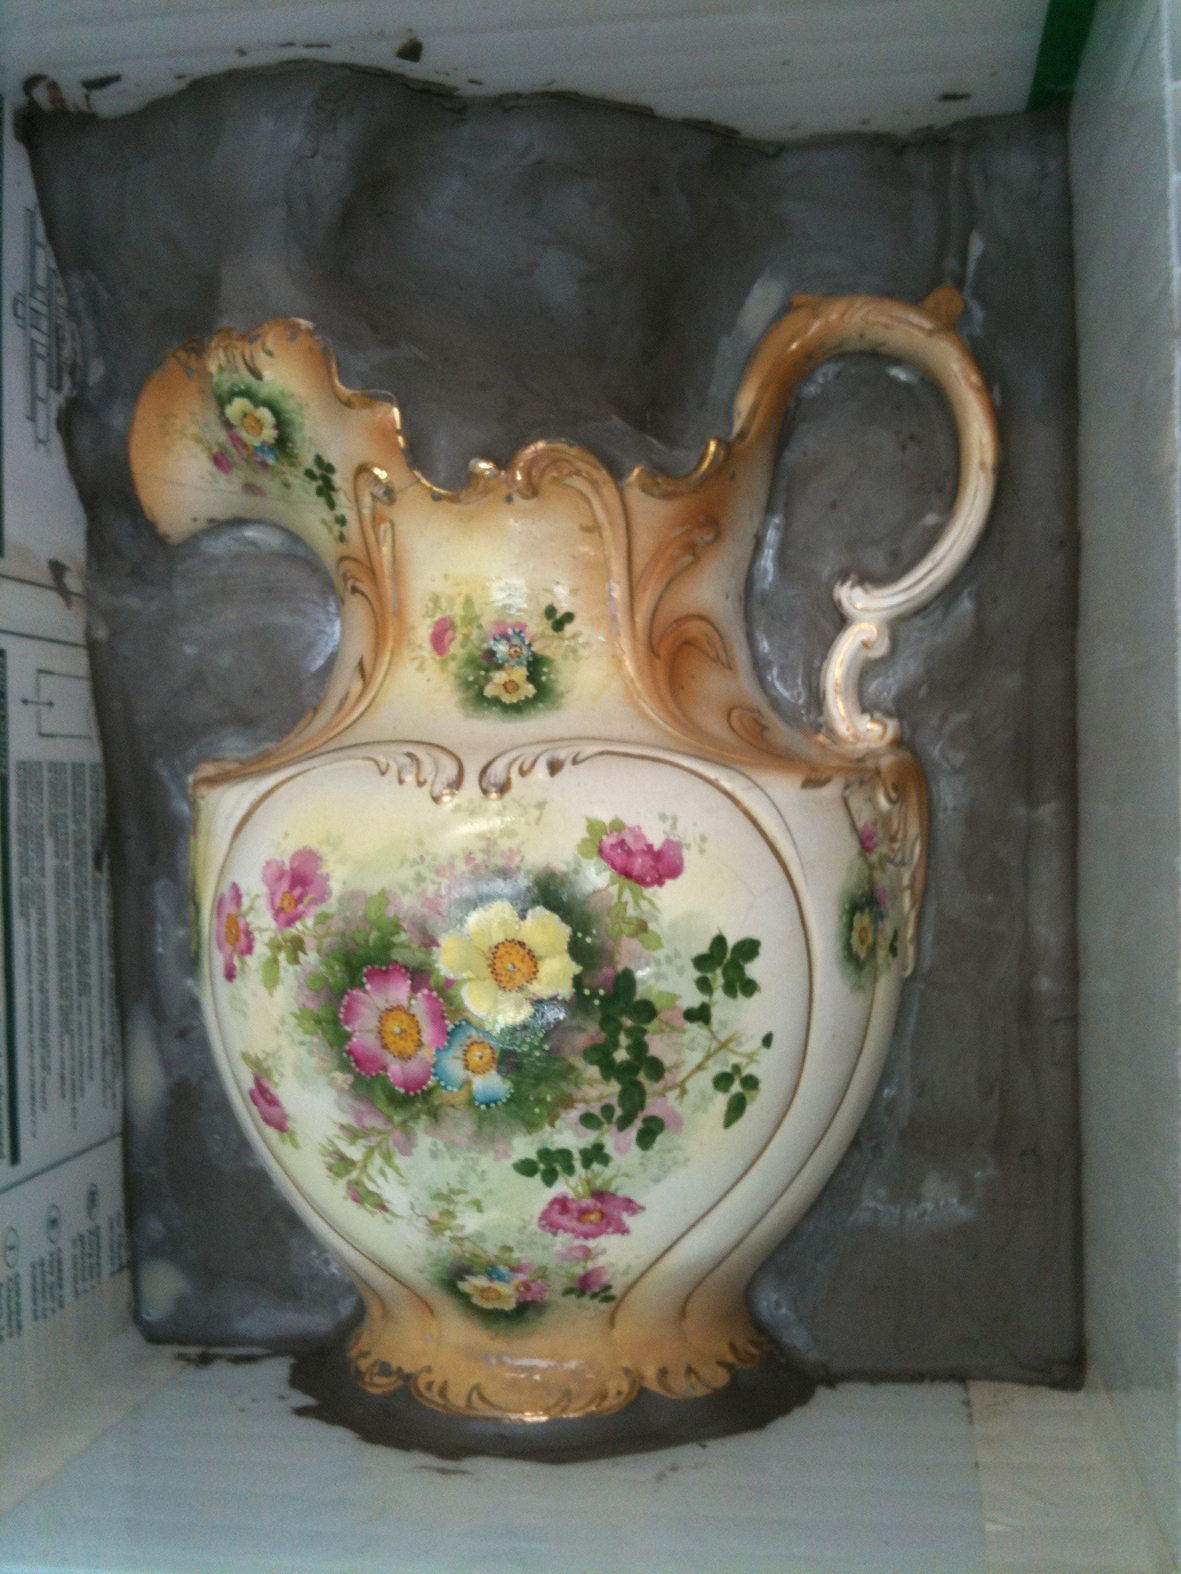
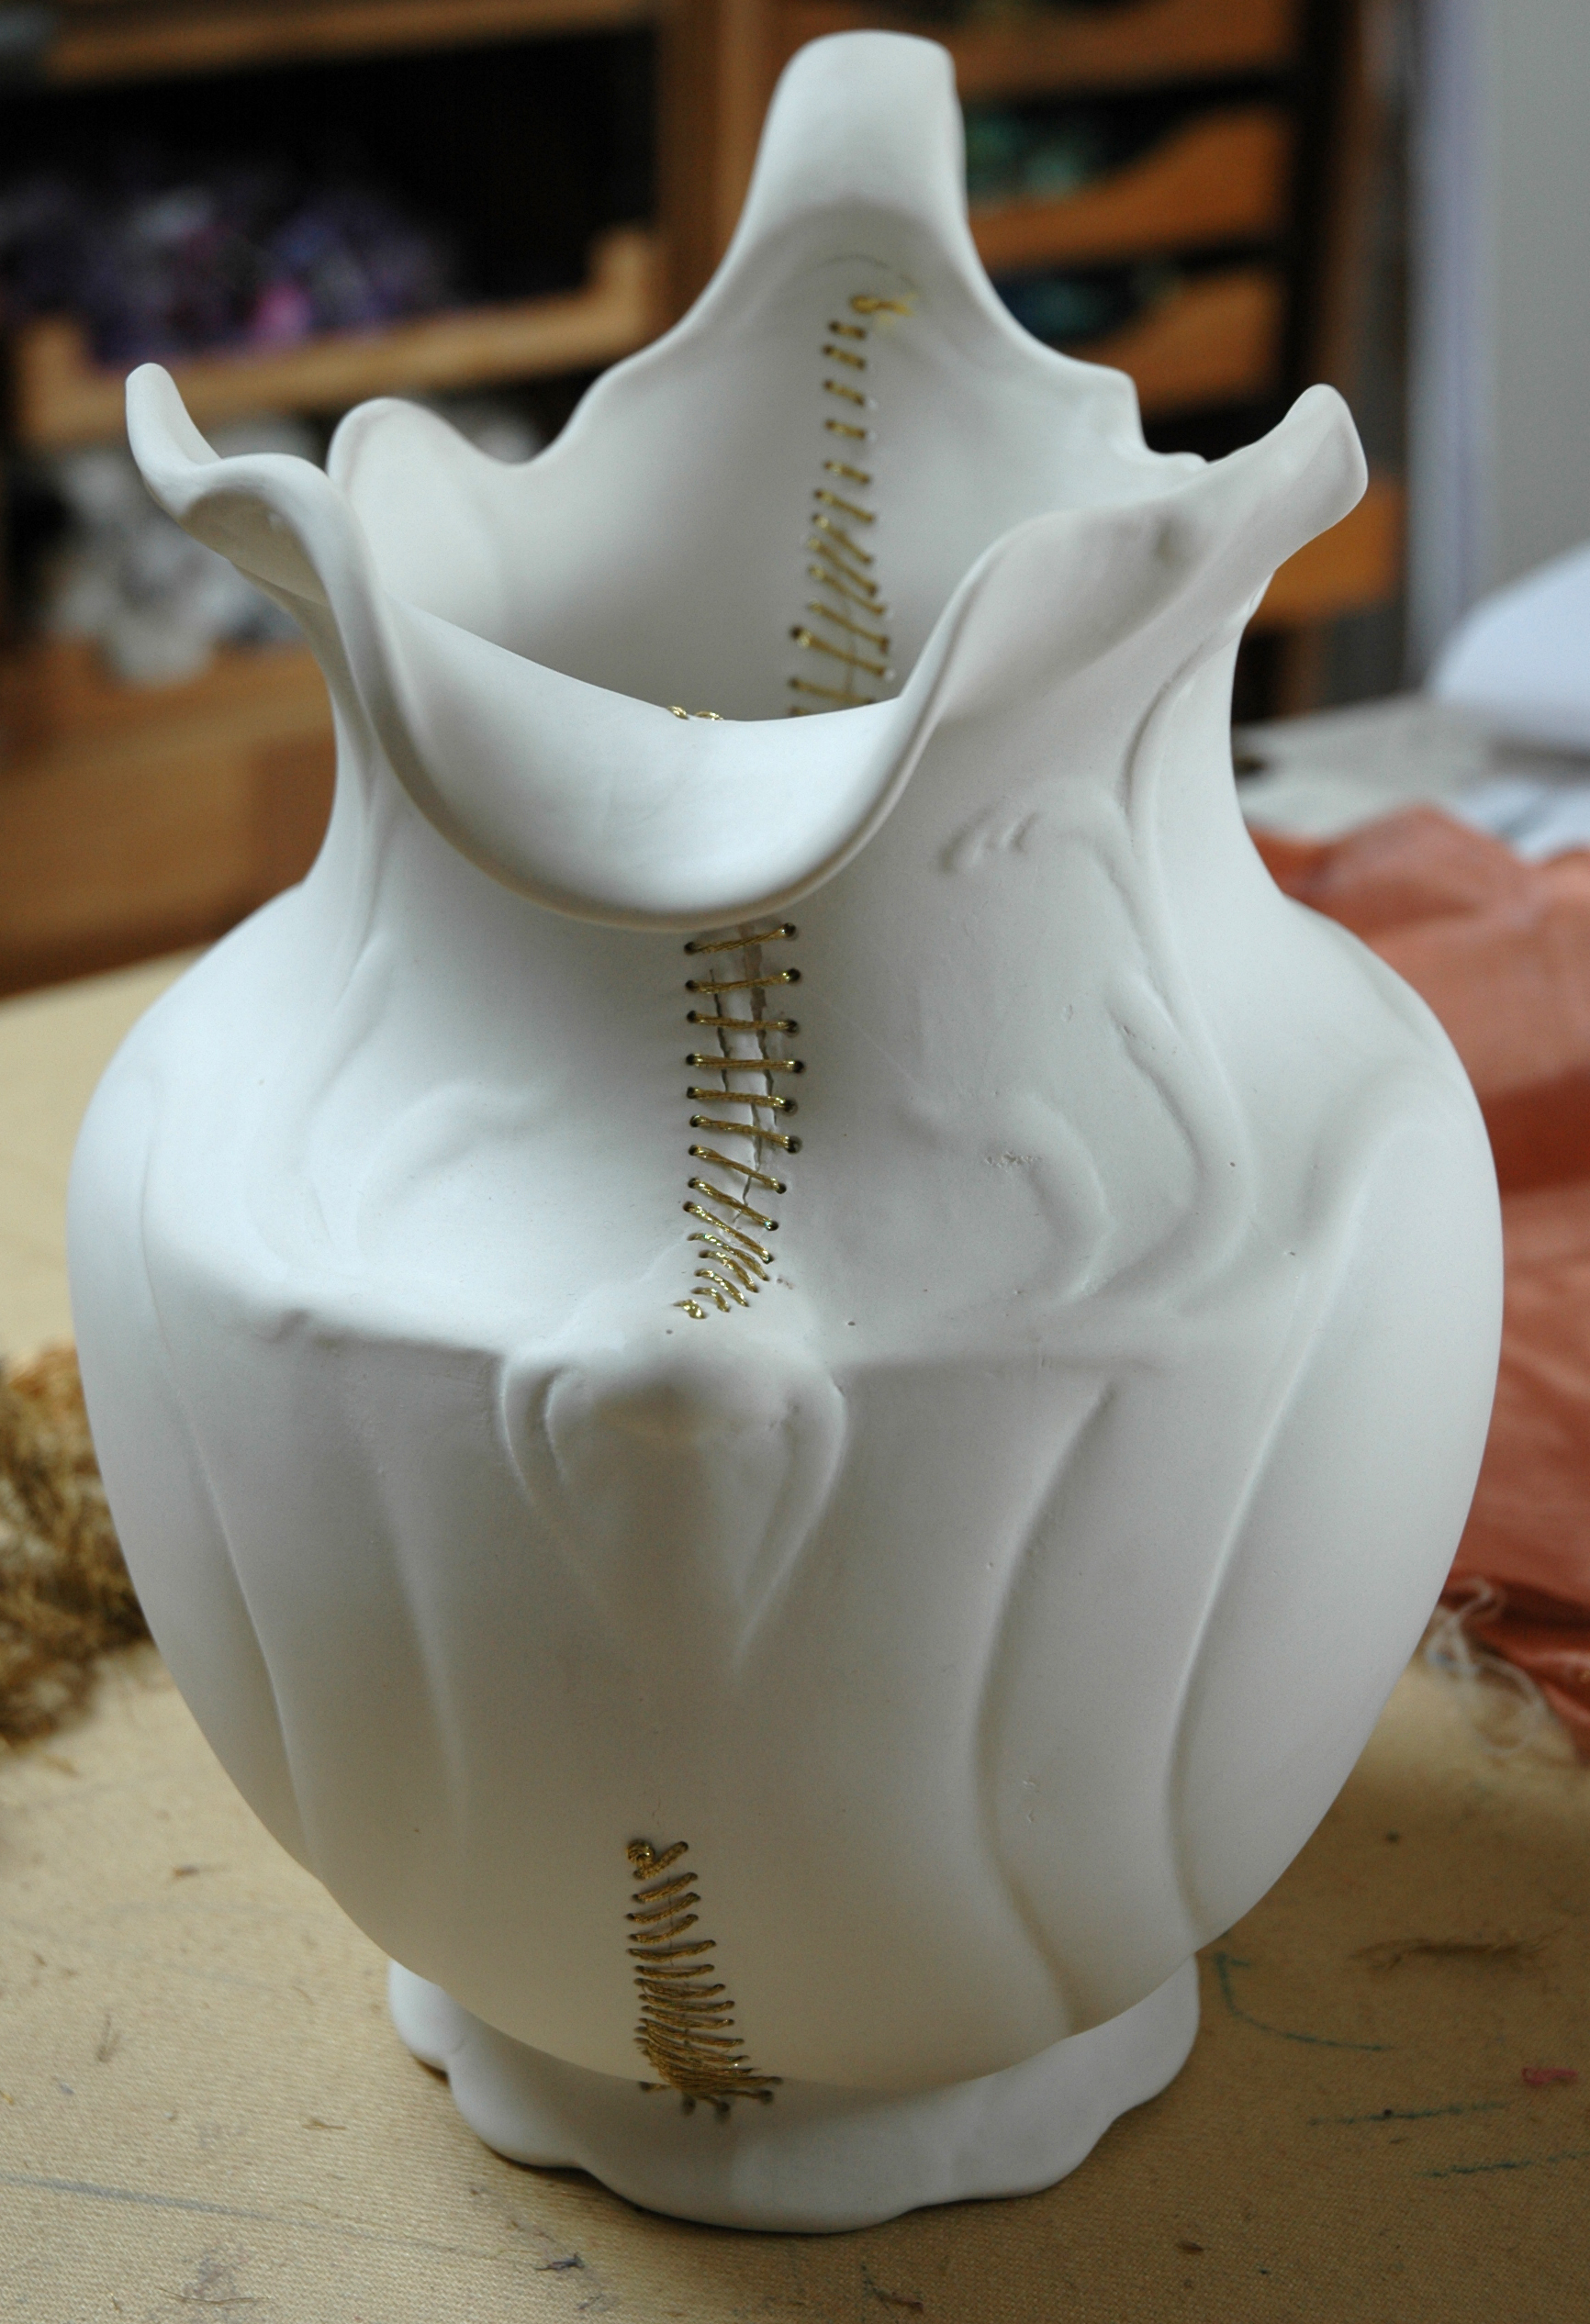
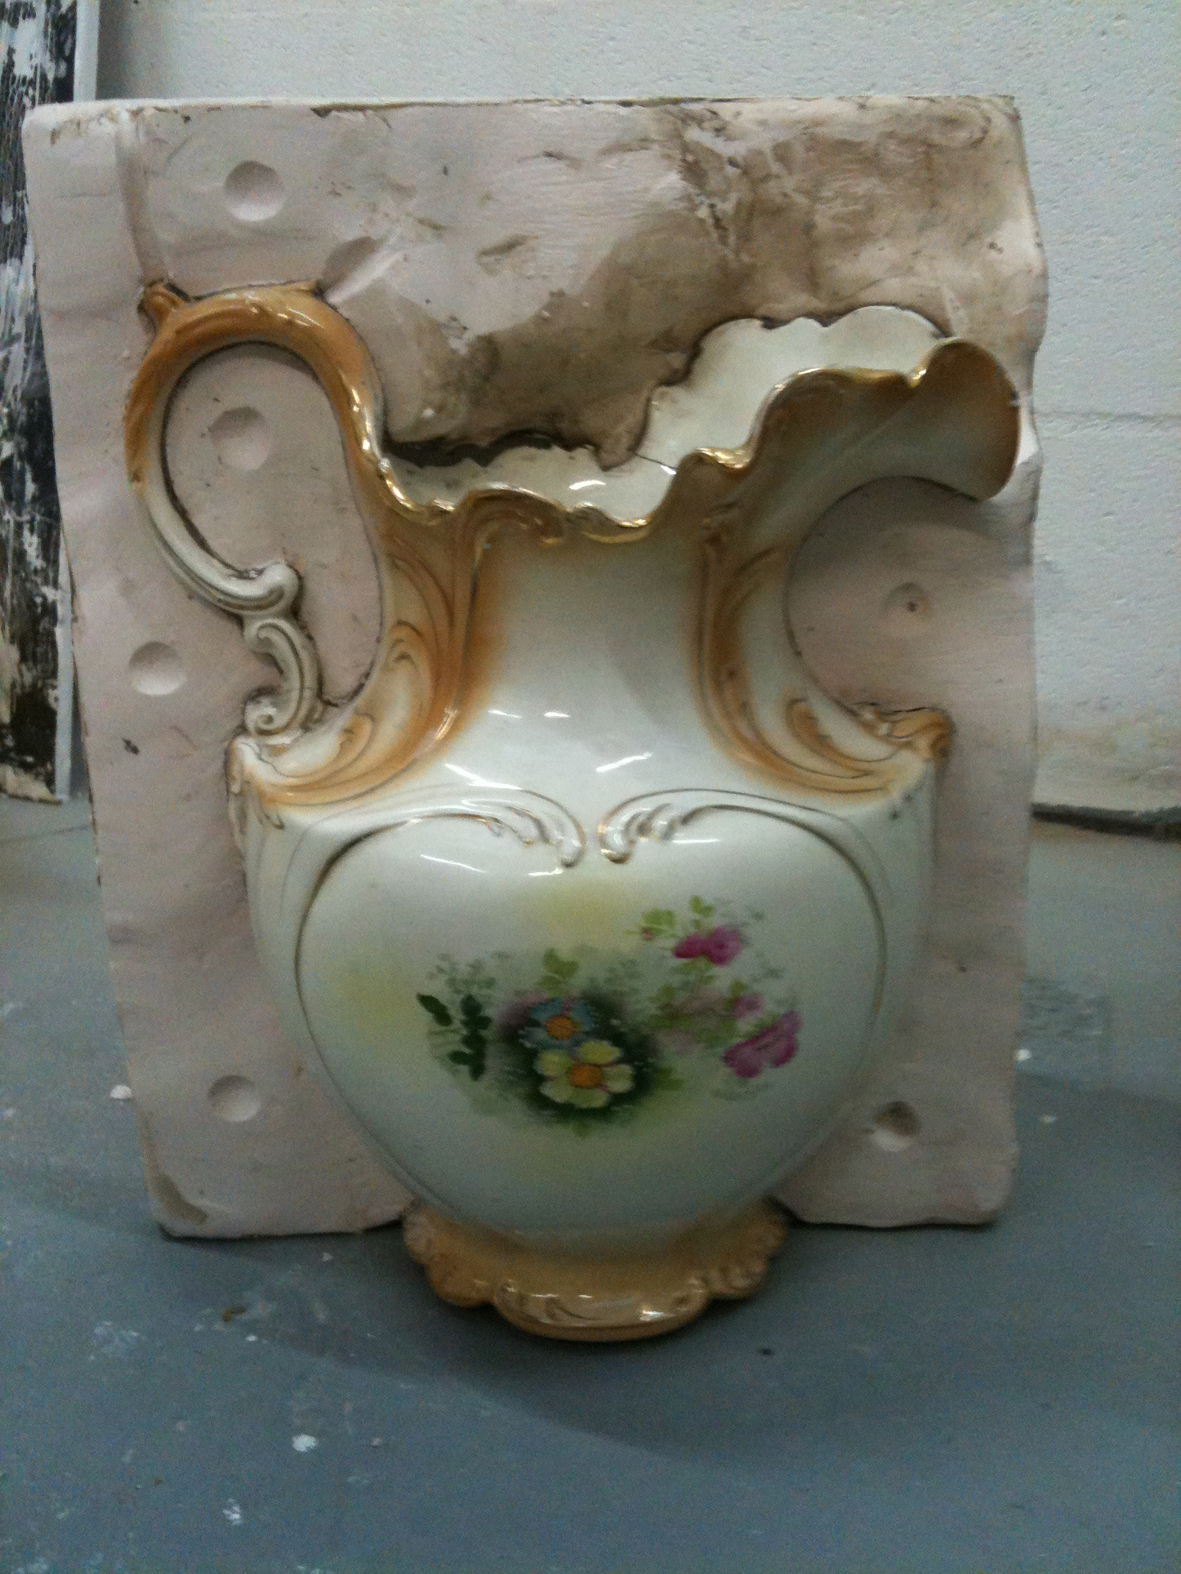
This is a heartening story for menders everywhere. Regular readers will recollect ceramicist Hanne Rysgaard‘s total disregard for mending generally – and mending ceramics in particular – in the previous post ” Oops!”. where I showed the beautiful flowered jug she decided to rebirth as a completely whole and perfect object.
The mold was made and the porcelain poured and then I waited to hear how it appear after firing and what she wanted to decorate it with – but the next time I heard from Hanne was a frantic angry email – Subject “Arrghhh” saying simply “jug got stuck in the mold” Do you also hear the Mending Goddess laughing?
But I knew exactly what she would do now – smash it and start again – so I immediately phoned her and told her to just put pairs of holes either sides of the breaks and I would stitch it back together later; and then we talked a lot about how we have to hear and act on the universal messages we receive…. till she calmed down and agreed.
The next set of images some minutes later made me seriously worried ( see above left) these were truly horrible stab wounds, but later that evening I received another email saying “really liking making these holes now – with a drill” and the holes were getting everywhere
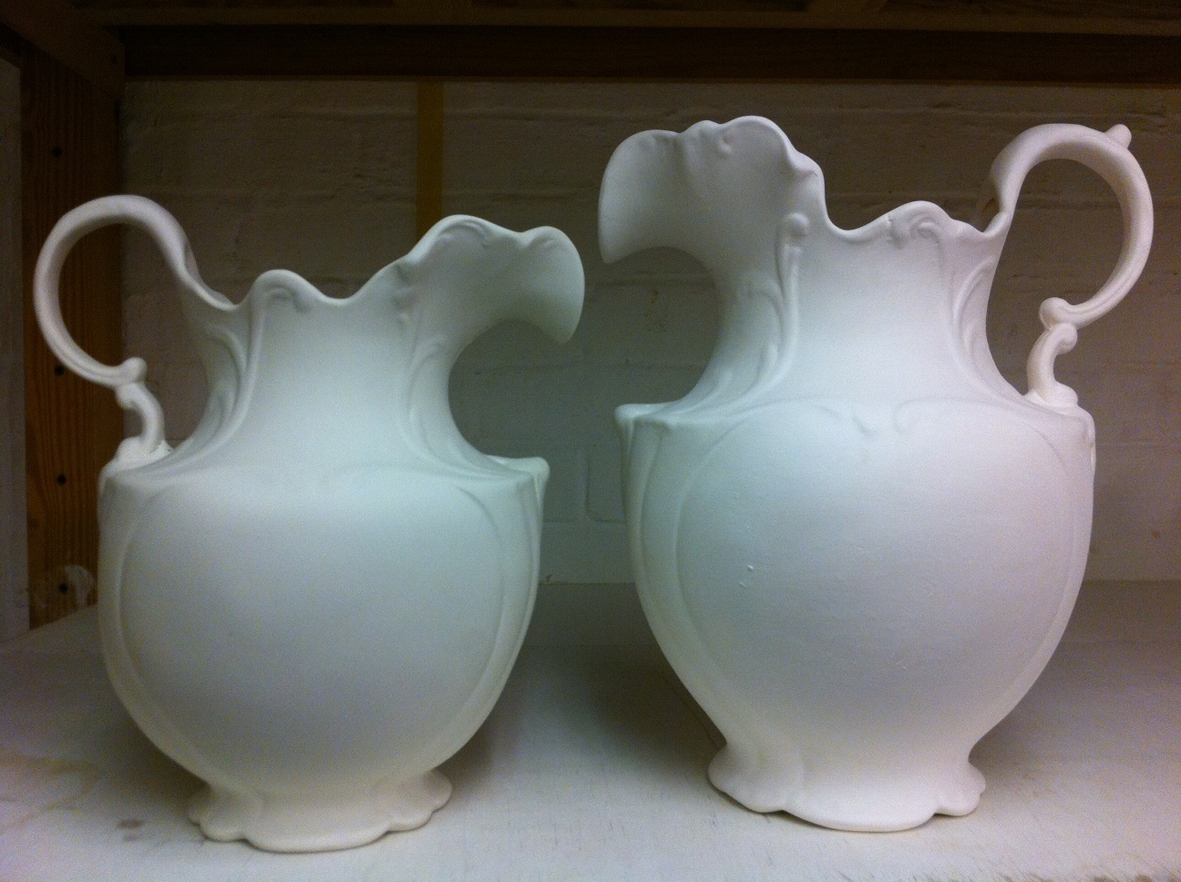
Eventually the jug was fired a second time and placed against the second cast, which only had a slight neck wound, when the third cast appeared perfect, Hanne confessed to being disappointed – nothing to play with and drill.
The jug had lost a a fair amount of size after the 2 firings, above shows the jugs after one and 2 firings, and the original is bigger again. It is interesting to see the whole collapse of the first jug, Hanne says it has “sat down” and that is a very descriptive phrase for the odd shape – but we are about to take this poor sad failure and make it look like some one cared about it.
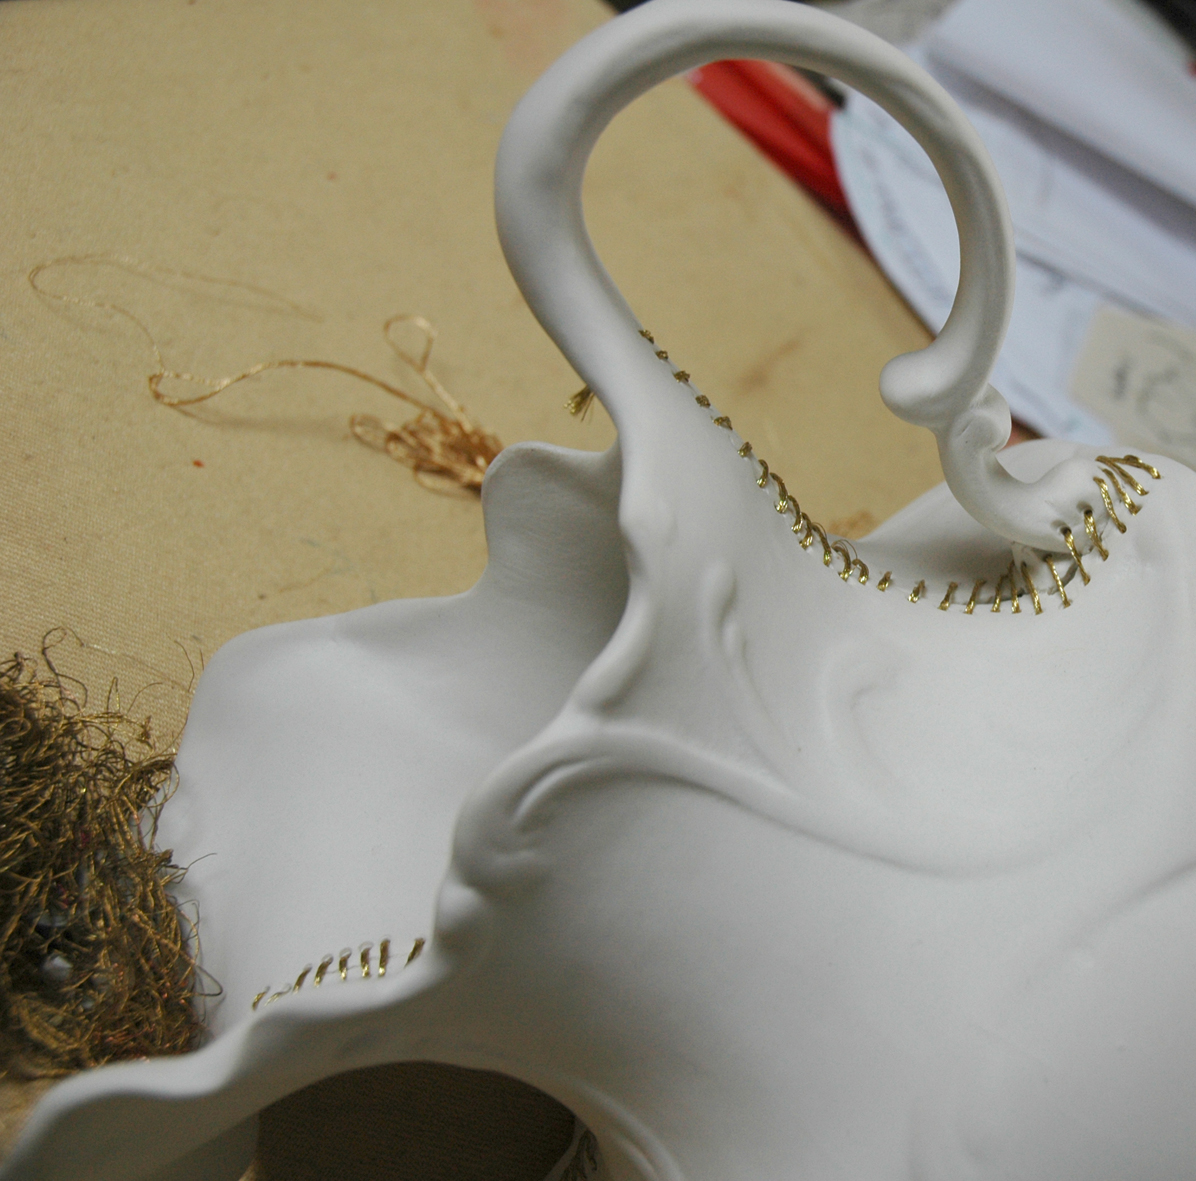
At first we both thought red stitches would make it look right but some aspects of the gaping wounds looked both sexual and scary when stitched in blood red – so gold was agreed.
The stitching was problematical although in essence very simple, I used curved needles to navigate the undulations of the shape and also the stitching needed to look as good inside as well as out.i worked on this for several hours getting the stitches to look as if they were planned perfectly.
But the finished piece makes such a strong impression that all our stress has been worthwhile.
and when I eventually took it to the next meeting of the Stitch and Think group, who are working on the mending project, this is the reaction I was wanting to see – Hanne delighted with her mended ceramics.
I had called a meeting of the Stitch and Think group who are working towards an exhibition around the idea of mending – a reminder that they had all promised to have working samples ready for early March – I was ahead of the game I had made several pieces of porcelain with mending mottoes on and was feeling pretty confident that I had done enough….then getting out of my car to go into the meeting I dropped the carrier bag containing all 4 porcelain plates. KERACK! My passenger Basil Kardasis said “Thank f… it wasn’t me who did that —– this has happened for a reason Janet”. quick thinking on his behalf but I felt strangely elated.
the inspirational break
When I unpacked the bag of broken bits, only one plate had survived – my W H Auden poem plate – more of which later. But on seeing my pile of broken crocks the group became animated, they fell on the pieces re-arranging back into plates and all said they preferred them broken, because now I have proper mending to consider not just simulated, contrived and controlled versions. For myself I felt sick – I was so proud of those plates; then, OK – move on; then, suddenly – FREE ! I no longer felt I had to remake them in a way that would not compromise Hanne Rysgaard’s standards, Hanne had helped me make the plates and she is a stickler for skilled work. So now just my handkerchiefs with the embroidered mending mottoes will be developed for the exhibition, as the group thought they were a better idea – leaving the plates as research development. Meanwhile, jeweller Syann van Niftrik, had started to look at the way the stitching had been exposed by the break…
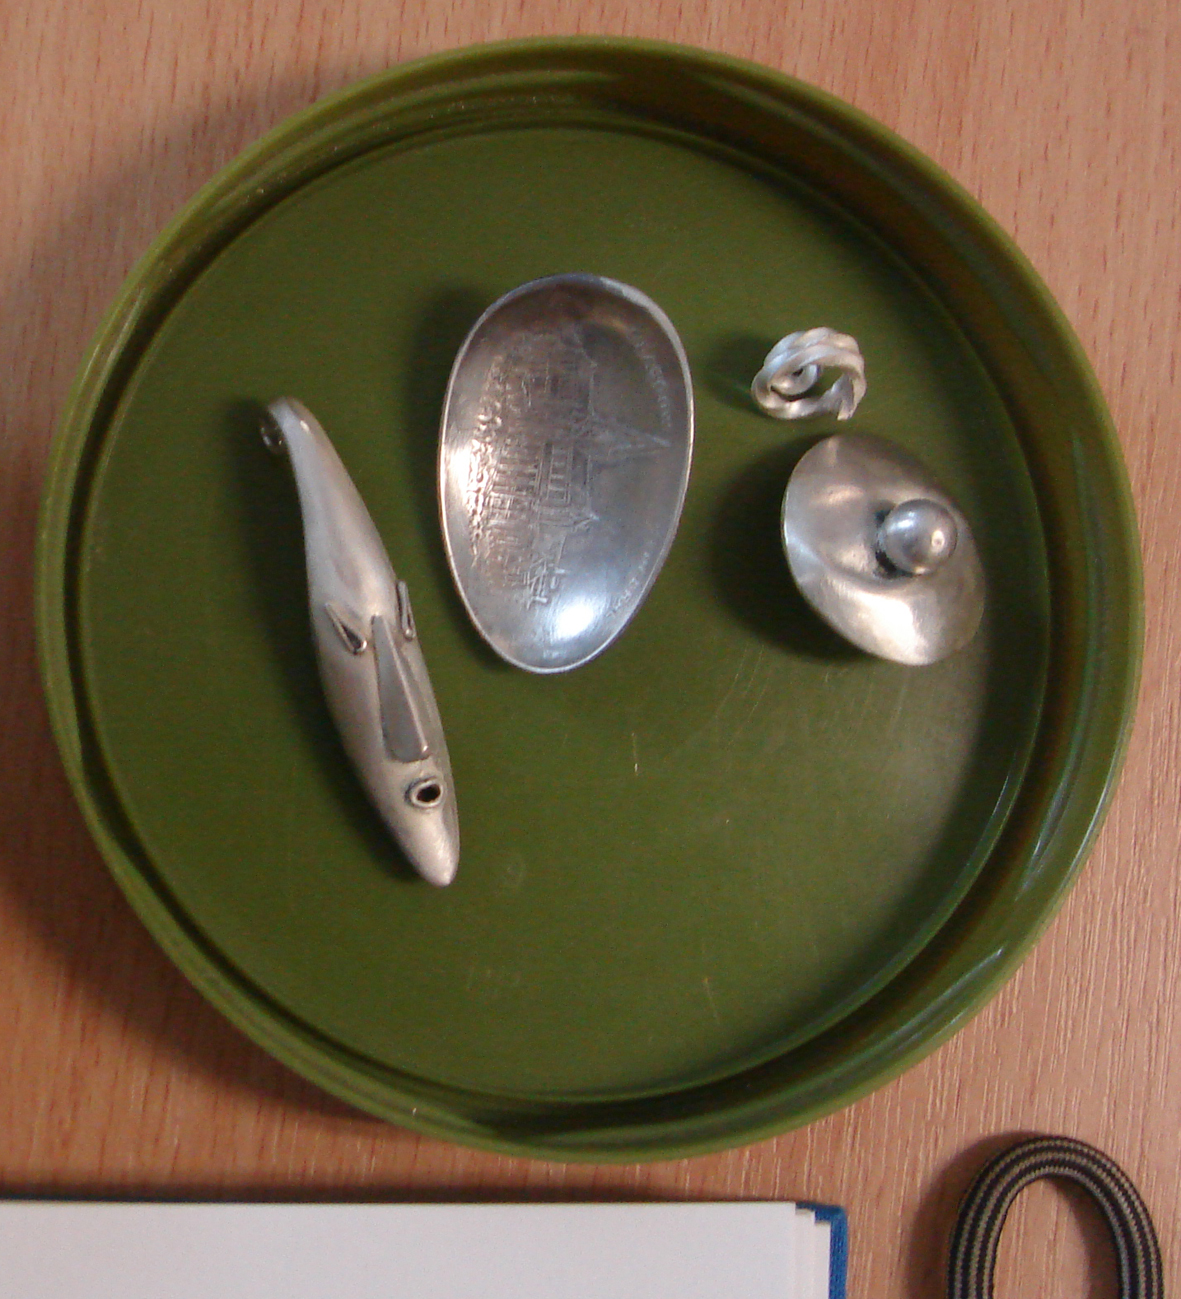
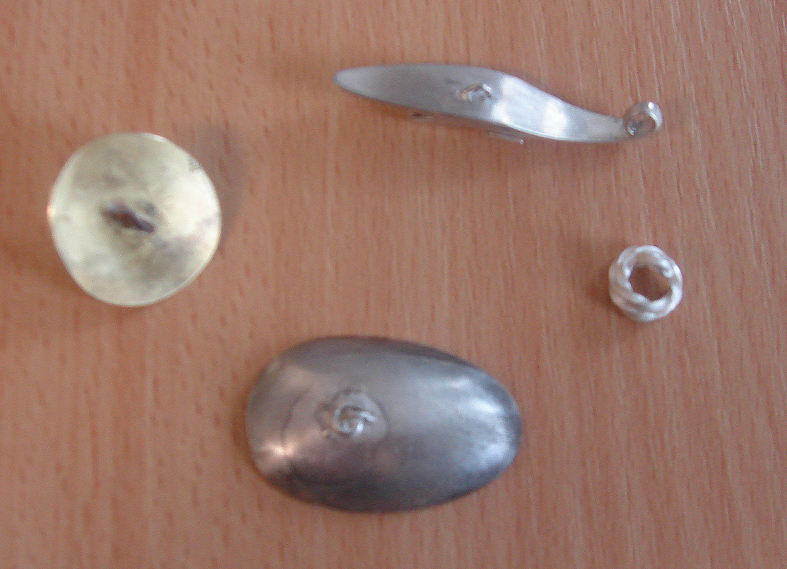
Syann van Niftrik’s mended silver objects.
she photographed it saying I had given her a great idea – well it’s an ill wind. The work Syann had brought with her in response to the museum visit was a set of buttons, made in one afternoon, from various cast off metal objects from her studio. She had soldered loops onto their backs to make them useful.
soldered backs of the buttons
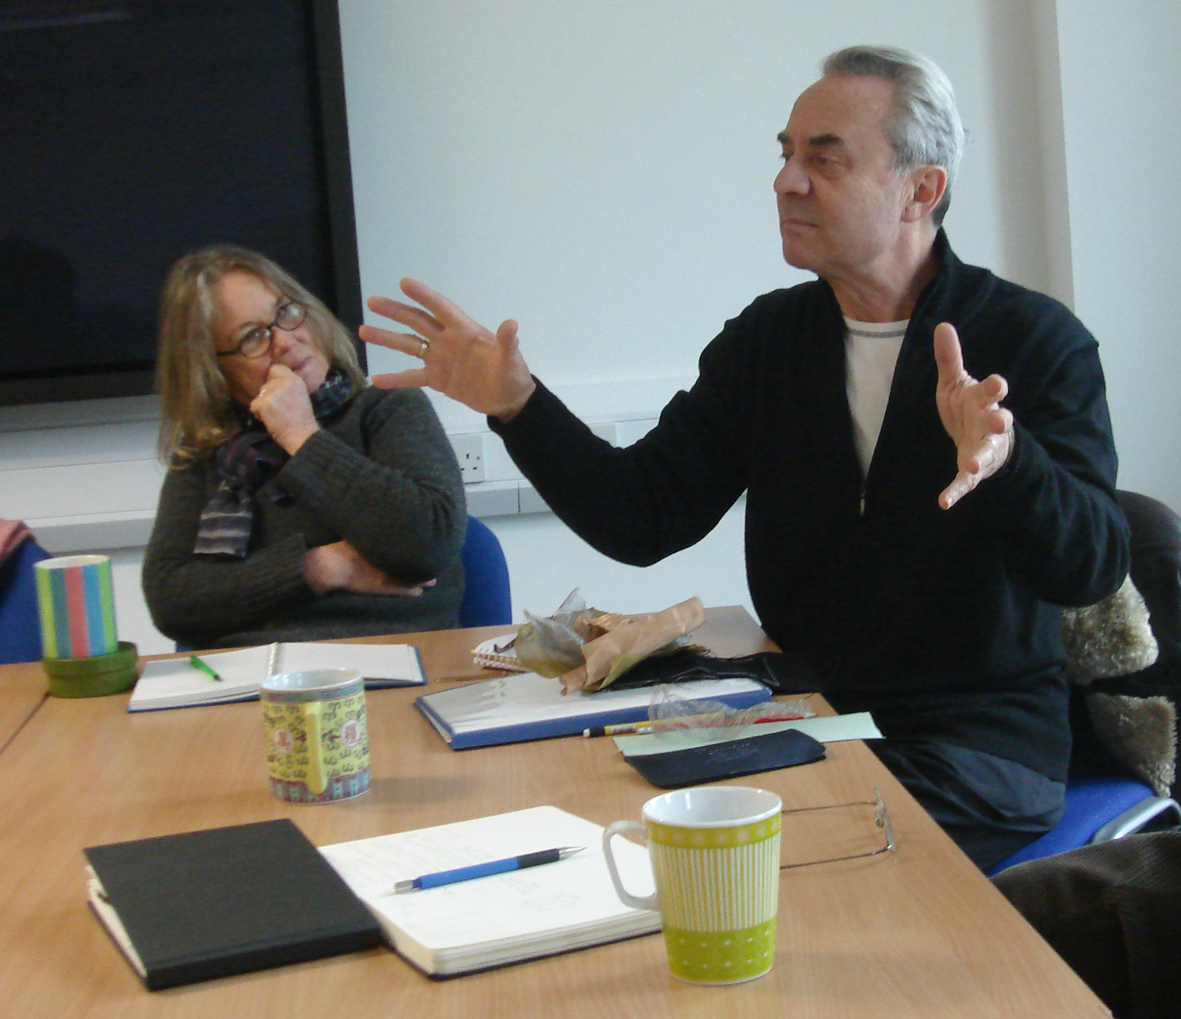
Syann van Niftrik watches as Basil Kardasis holds forth
But when she saw my broken plate it reminded her of the carapace of Chinese Cracker fireworks for the Chinese New Year celebrations, so she now is planning to make cages of wire in the form of the exposed linen stitches – to put together as necklaces.
The button idea has developed through a collaboration with Syann, Basil Kardasis and Dail Behennah – they have been not exactly working together on an idea for making buttons to fasten a collection of significant fabrics to fashion into a garment. Basil talked about a maxim of his father’s, who was a tailor – a decently made buttonhole was truly important – you could die if it is poorly made. Think about this.
buttonhole sampler (detail)
So he has found an old sampler of how to make tailored buttonholes and and has requested us all to bring him pieces of fabric which we feel are personally significant and he will buttonhole them all together to make a sort of group portrait – I think!
Meanwhile Dail Behennah had been looking at developing her mending jewellry or rather jewellry to hide moth holes, she has been using sewing dictionaries to develop different shapes to stitch in precious metal wires. Below are her pieces base, the lower one based on the arrow head used in tailored garments to strengthen edges of pleats and pockets. The Bristol Mending Samplers have been a real source of inspiration.
Dail Behennah – gold and copper wire mends to hide moth holes and stains
new shape for repairs jewellry Dail Behennah
Another decorative and functional mending system has been devised by Matt Benton, Matt works in several media but uses vitreous enamel for much of his work. He has made mend shaped small enamel plates with drilled holes all ready to be stitched onto a worn area of a garment.
enamel shape tailor made to stitch into position Matt Benton
drilled enamel shape placed into position for stitching
While everyone seems to have been inspired by the mending idea, one maker hates the idea of mending anything to use again. Hanne Rysgaard, who I have been working and talking with throughout our collaboration, admitted that she thought that anything broken should be discarded, in fact she thought that using broken things was a sign of disrespect for the user – she put it very succinctly “I am worth the best things” and “broken things have lost their energy” these statements caused much argument between us, and although she can see the worth of mending for sentimental reasons (in fact I recently spent some time darning her damaged but favourite red winter scarf ) she still feels that to surround yourself with broken things is disrespectful.
recasting the beautiful cracked jug – Hanne Rysgaard
So what will she make for the exhibition then? She has bought a large and beautiful wash jug and bowl which is only slightly cracked – and as I pointed out to her she would not have wanted to buy it if it at the unbroken price – but she wants to remake this, so is in the middle of casting a mold to give rebirth to a damaged but lovely object – but will she leave evidence of this break?
back of jug with the break clearly seen inside neck
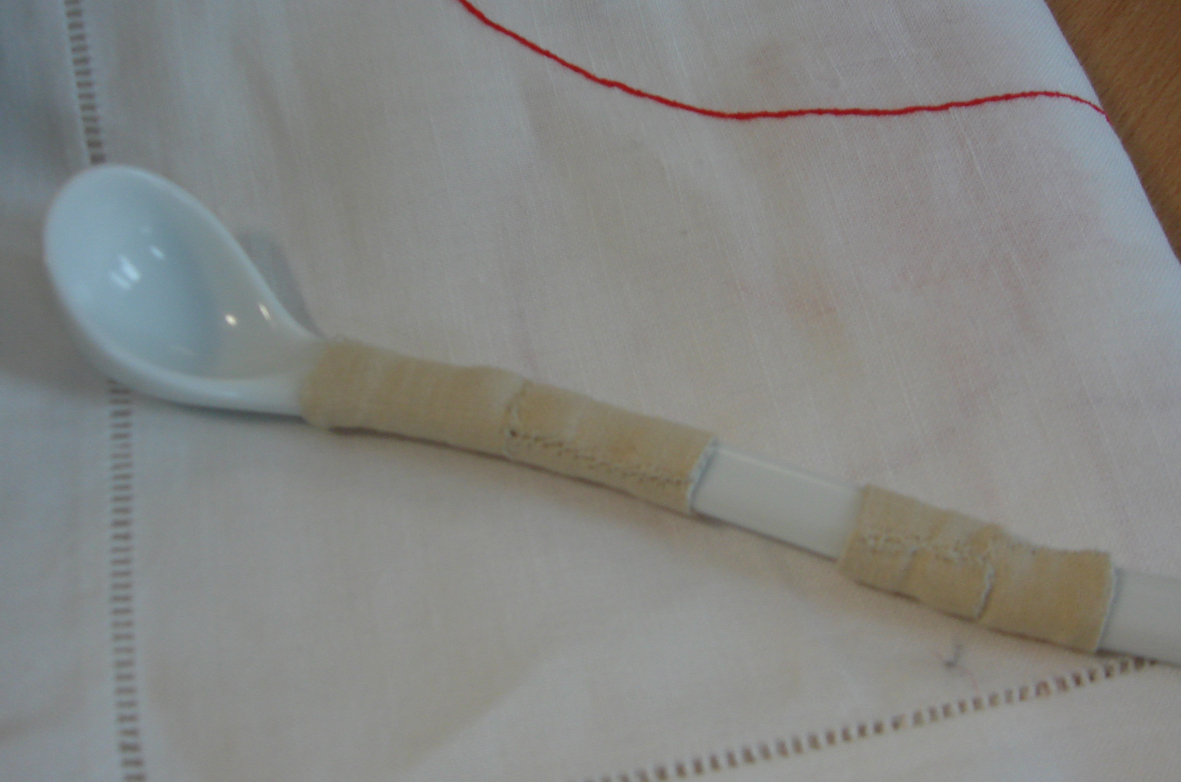
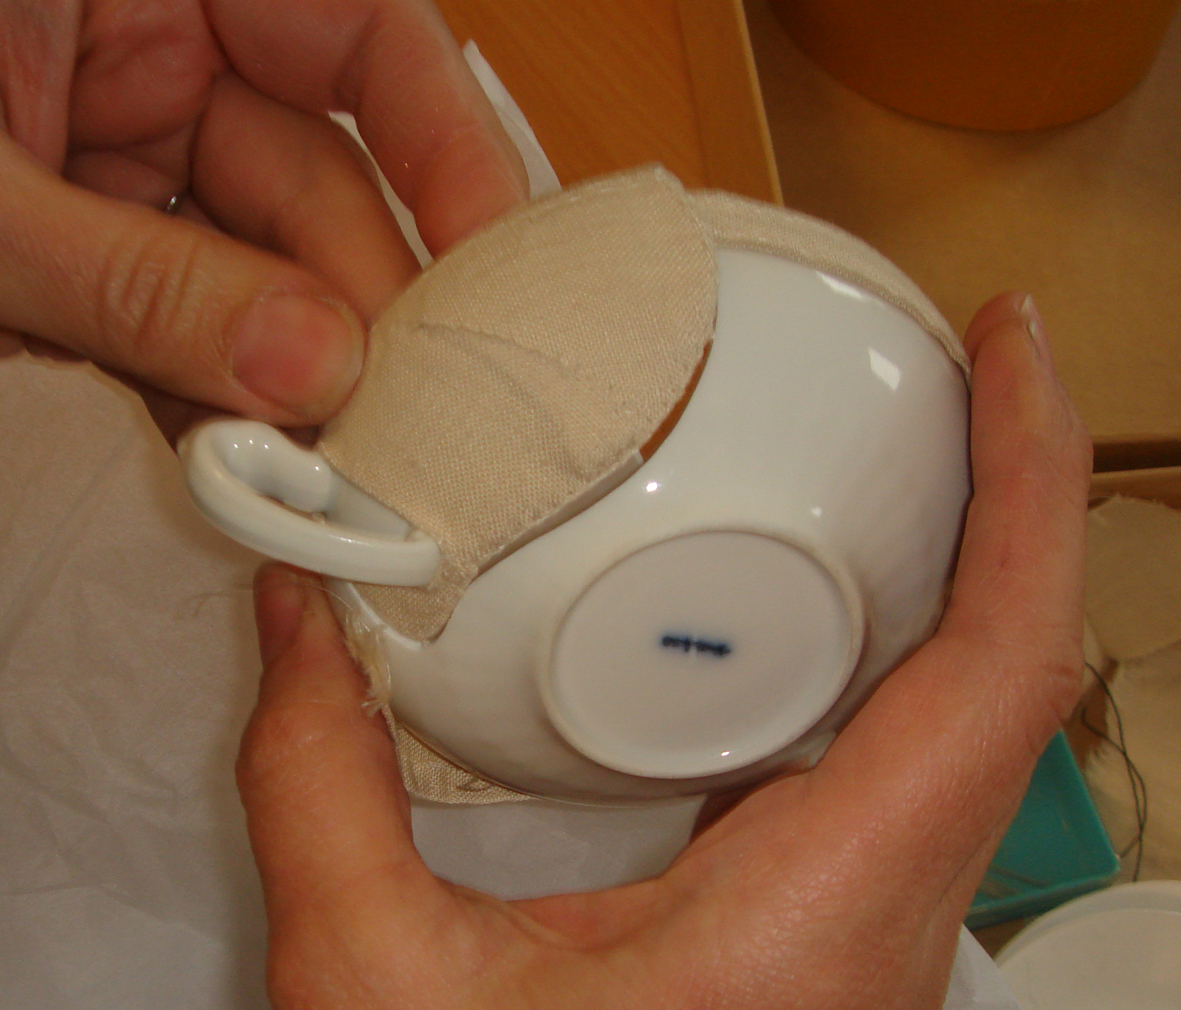
Other makers are embracing the idea of sewn mending wholeheartedly, Jess Turrell,a jeweller and enameller has mended broken crockery by stitching linen covers and it looks like she may cover a whole tea set! This spoon is useless now and she calls it “inappropriate mending”
inappropriate mending – Jess Turrell.
stitched patch for broken cup Jess Turrell
the cups and saucers have become un-useable but several of the group thought they had attained another aesthetic value…oops the slippery slope of the values of art v craft emerge…….moving swiftly on, all the stitchers were impressed by her precise work in fabric, she has an instinctive feel for elegant making with disparate materials.
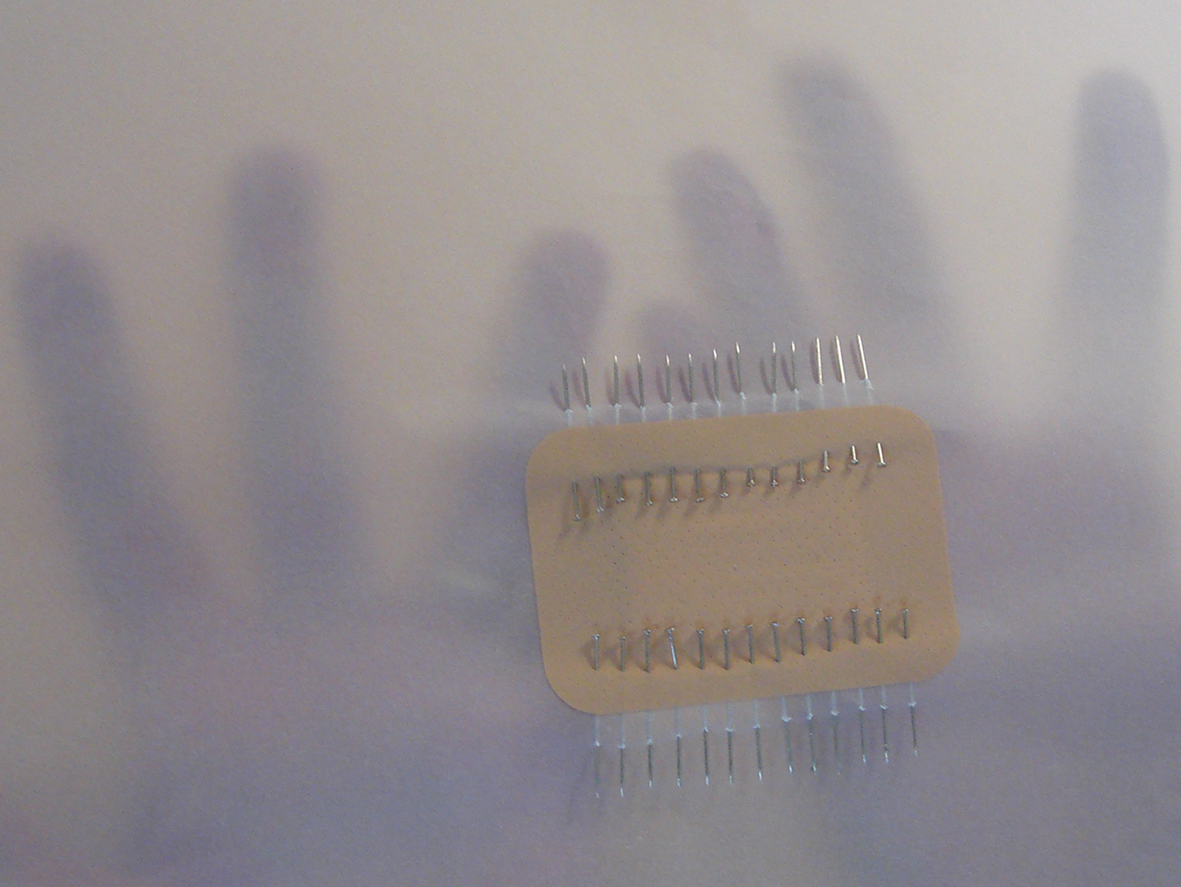
As does Jilly Morris who is an applied artist working across a variety of materials, but here is researching the idea of skin which, for humans, is the area most often in need of mending. She also looked at sticking plasters – below she has pinned them into position onto a sheet of tracing paper liking the translucency akin to areas of our skin.
pinned plasters – Jilly morris
stitched plasters – Jilly Morris
Playing with the idea of the transparent papers she is was advised by most of the textile makers to move towards making her mending ideas in fine animal skins, parchments, seudes and kid leathers which we have given her to play with.
Two makers are using this project to develop areas for their advanced degree studies and both have stayed close to their own materials. Steph Wooster is a knitter and designer, undergoing an MA by Research at UWE Bristol, she showed us some large pieces of patchworks that have been based on the use of straight- jackets
Steph Wooster hugging her straight-jacket inspired samples while Hanne Rysgaard looks on
hand stitched sampling for patchworks Steph Wooster
I won’t go into the details but she has developed the fabrics while researching at a local hospital’s archives; she found the jackets were copiously mended through constant use. Controversially for the group, she thinks that one overlooked benefit in the use of the straight jackets is that the patient has to hug him/herself…………..and that before the use of these garments the patients were chained in cellars. However this has lead to the sampling of some sumptuous fabrics
darned and patched mending diagrams – Dawn Mason
Dawn Mason is studying part time for her Ph.D by Practice, she is course leadr in Drawing and Applied Ats at UWE. and she has used the old making manuals to develop pieced papers which are darned, patched and stitched together. She talked of feeling a sense of loss for the present society’s skill base when looking at the original mending samplers. she is currently researching gauntlet making out of the papers she is stitching together, so maybe a move into 3 dimensions is developing.
hand sized mending papers – work in progress Dawn Mason
Whatever else is thought of in the old practices of mending it certainly is proving a rich research area for all these different makers, The group has truly become more than the sum of its parts, we were all fascinated by the different aspects each maker had discovered for them selves and the truths we had to uncover to start to explain our thinking behind the making.
As you may have guessed by my absence of festival news – I don’t do much in the way of celebrating at Christmas although I do enjoy decorating the house; I decorate on xmas eve and then on 12th night, tonight, it all comes down. I do, however, like to bring in the new year properly and so this year we had a large party on New Year’s day. Lots of people around for lunch, mostly old friends but several new as well and one of the guests who had never been to the house before commented to Rosemary Murphy (her blog has pictures of the actual party ) how he thought that all the decorations were lovely and it must have taken me ages to put it all together. “What decorations- it always looks like this” she replied.
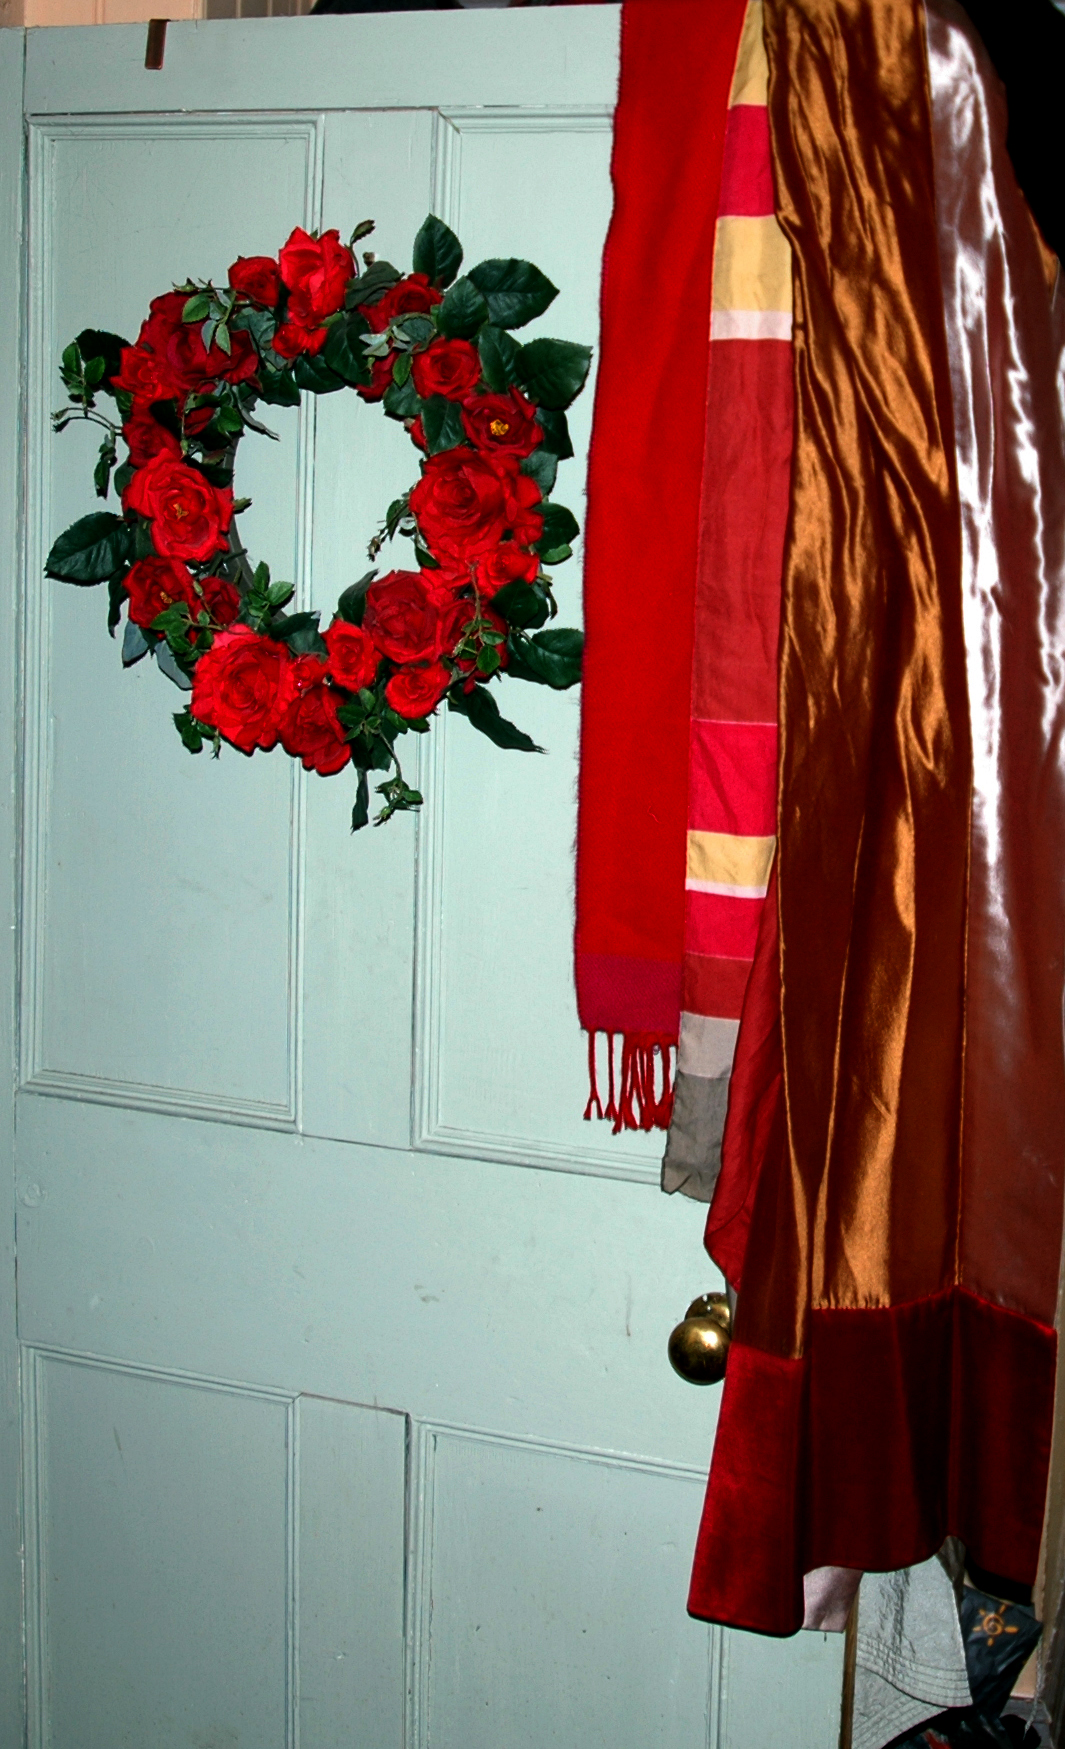
Well, actually there was a front door wreath, I know this usually lives on the landing outside my studio but I added the red berries from the garden and put it on the front door.
And yes I must confess that the red roses wreath has lived permanently on the kitchen door ever since it was brought in from the front door on 12th night 2007 – but it looks so lovely against the Blue Green painted (Farrow and Ball) door and I did select the scarves especially to colour co-ordinate with it. In fact this kitchen door always has a selection of scarves draped over it depending on the season and my agenda so I am thinking that it may provide a fabric series of posts in the future…..and the future is soon going to get very busy – but not just yet!
Moving into the small panneled room where I have shown my seasonal pelmet decoration as the header of this post – you can see how it usually looks above, in fact I quite miss that extra xmas swag right now, but no doubt will get used to the minimal look again.
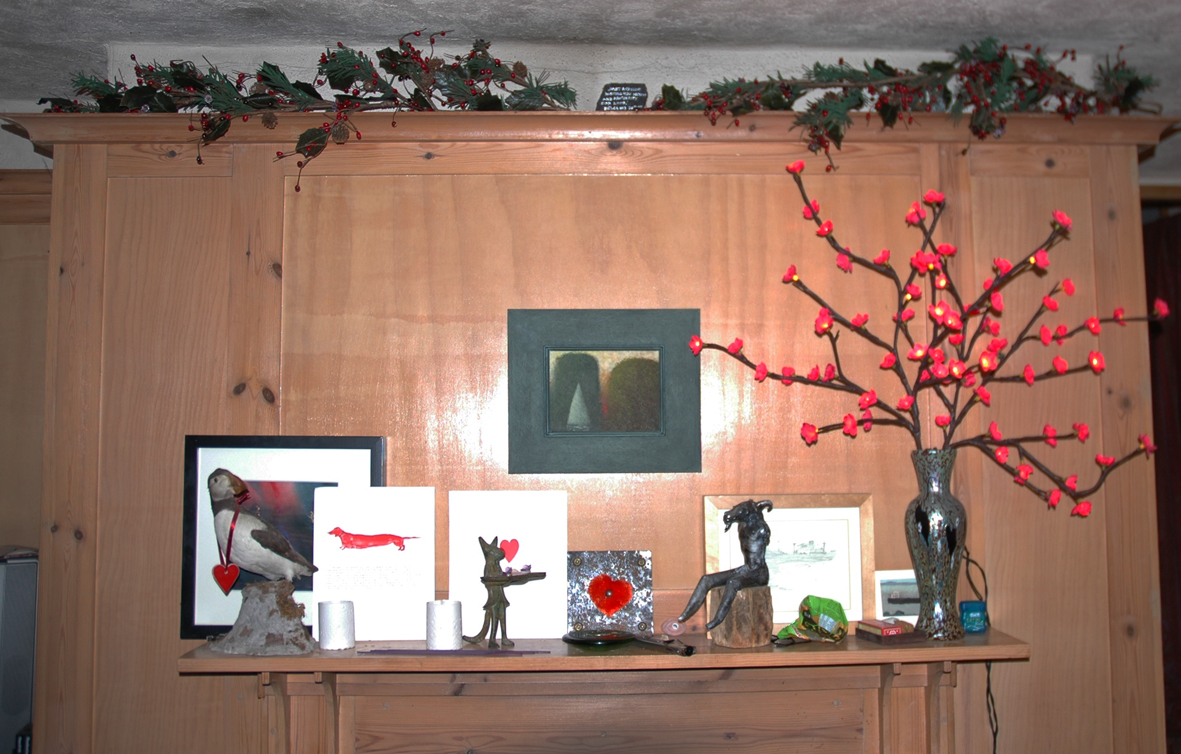
The fireplace also gets swagged for the 12 days,
This mantle-piece holds several art works by friends and colleagues, and by chance there is a red theme to them, so they lend themselves easily to the xmas look – the painting above is by Alfred Stockham, an old friend whose birthday falls on New Year’s day and he was the guest of honour at our party.
meanwhile this little silver heart wreath always lives on the shell wall lights.
And lights are the main area where, I grant you, that the extra xmas decorations are especially hard to spot, but those amongst you who are sharp eyed should enjoy the search.
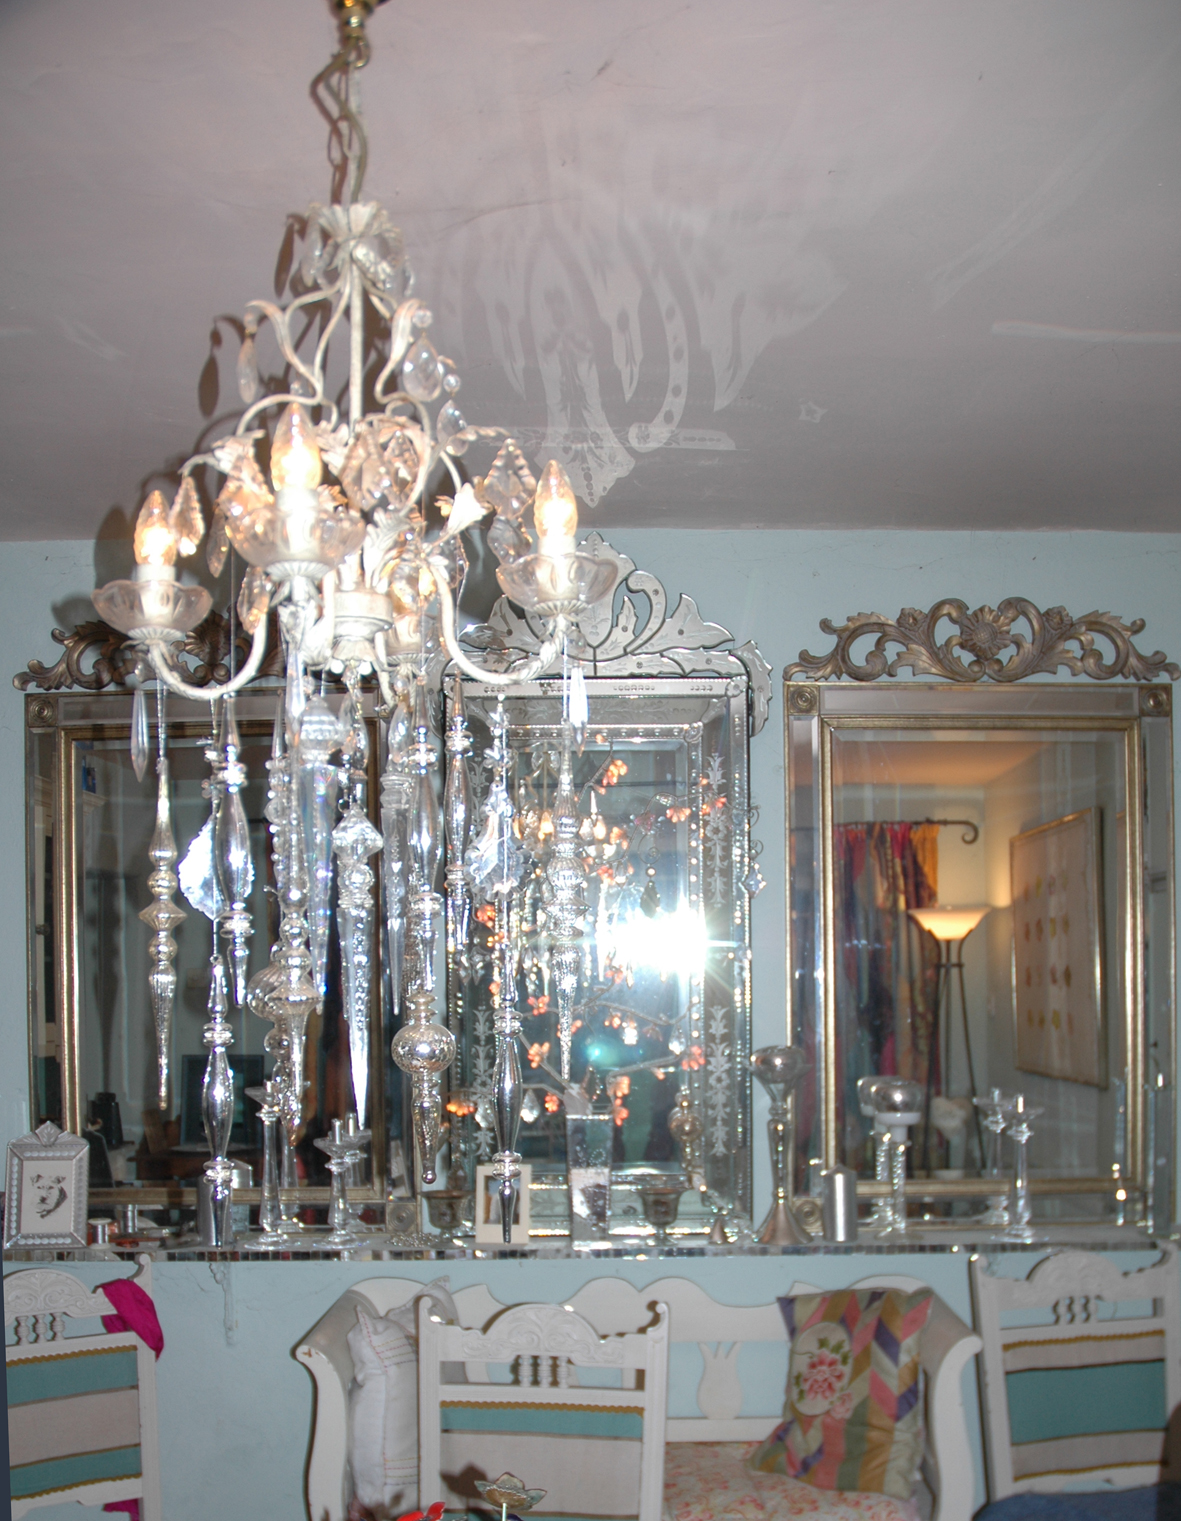
I just had to include the photograph below because of the wonderful reflection cast onto the ceiling from the finial of the venetian style mirror – it isn’t at all apparent in the room itself…and I have just realised it is because of the flash on the camera!
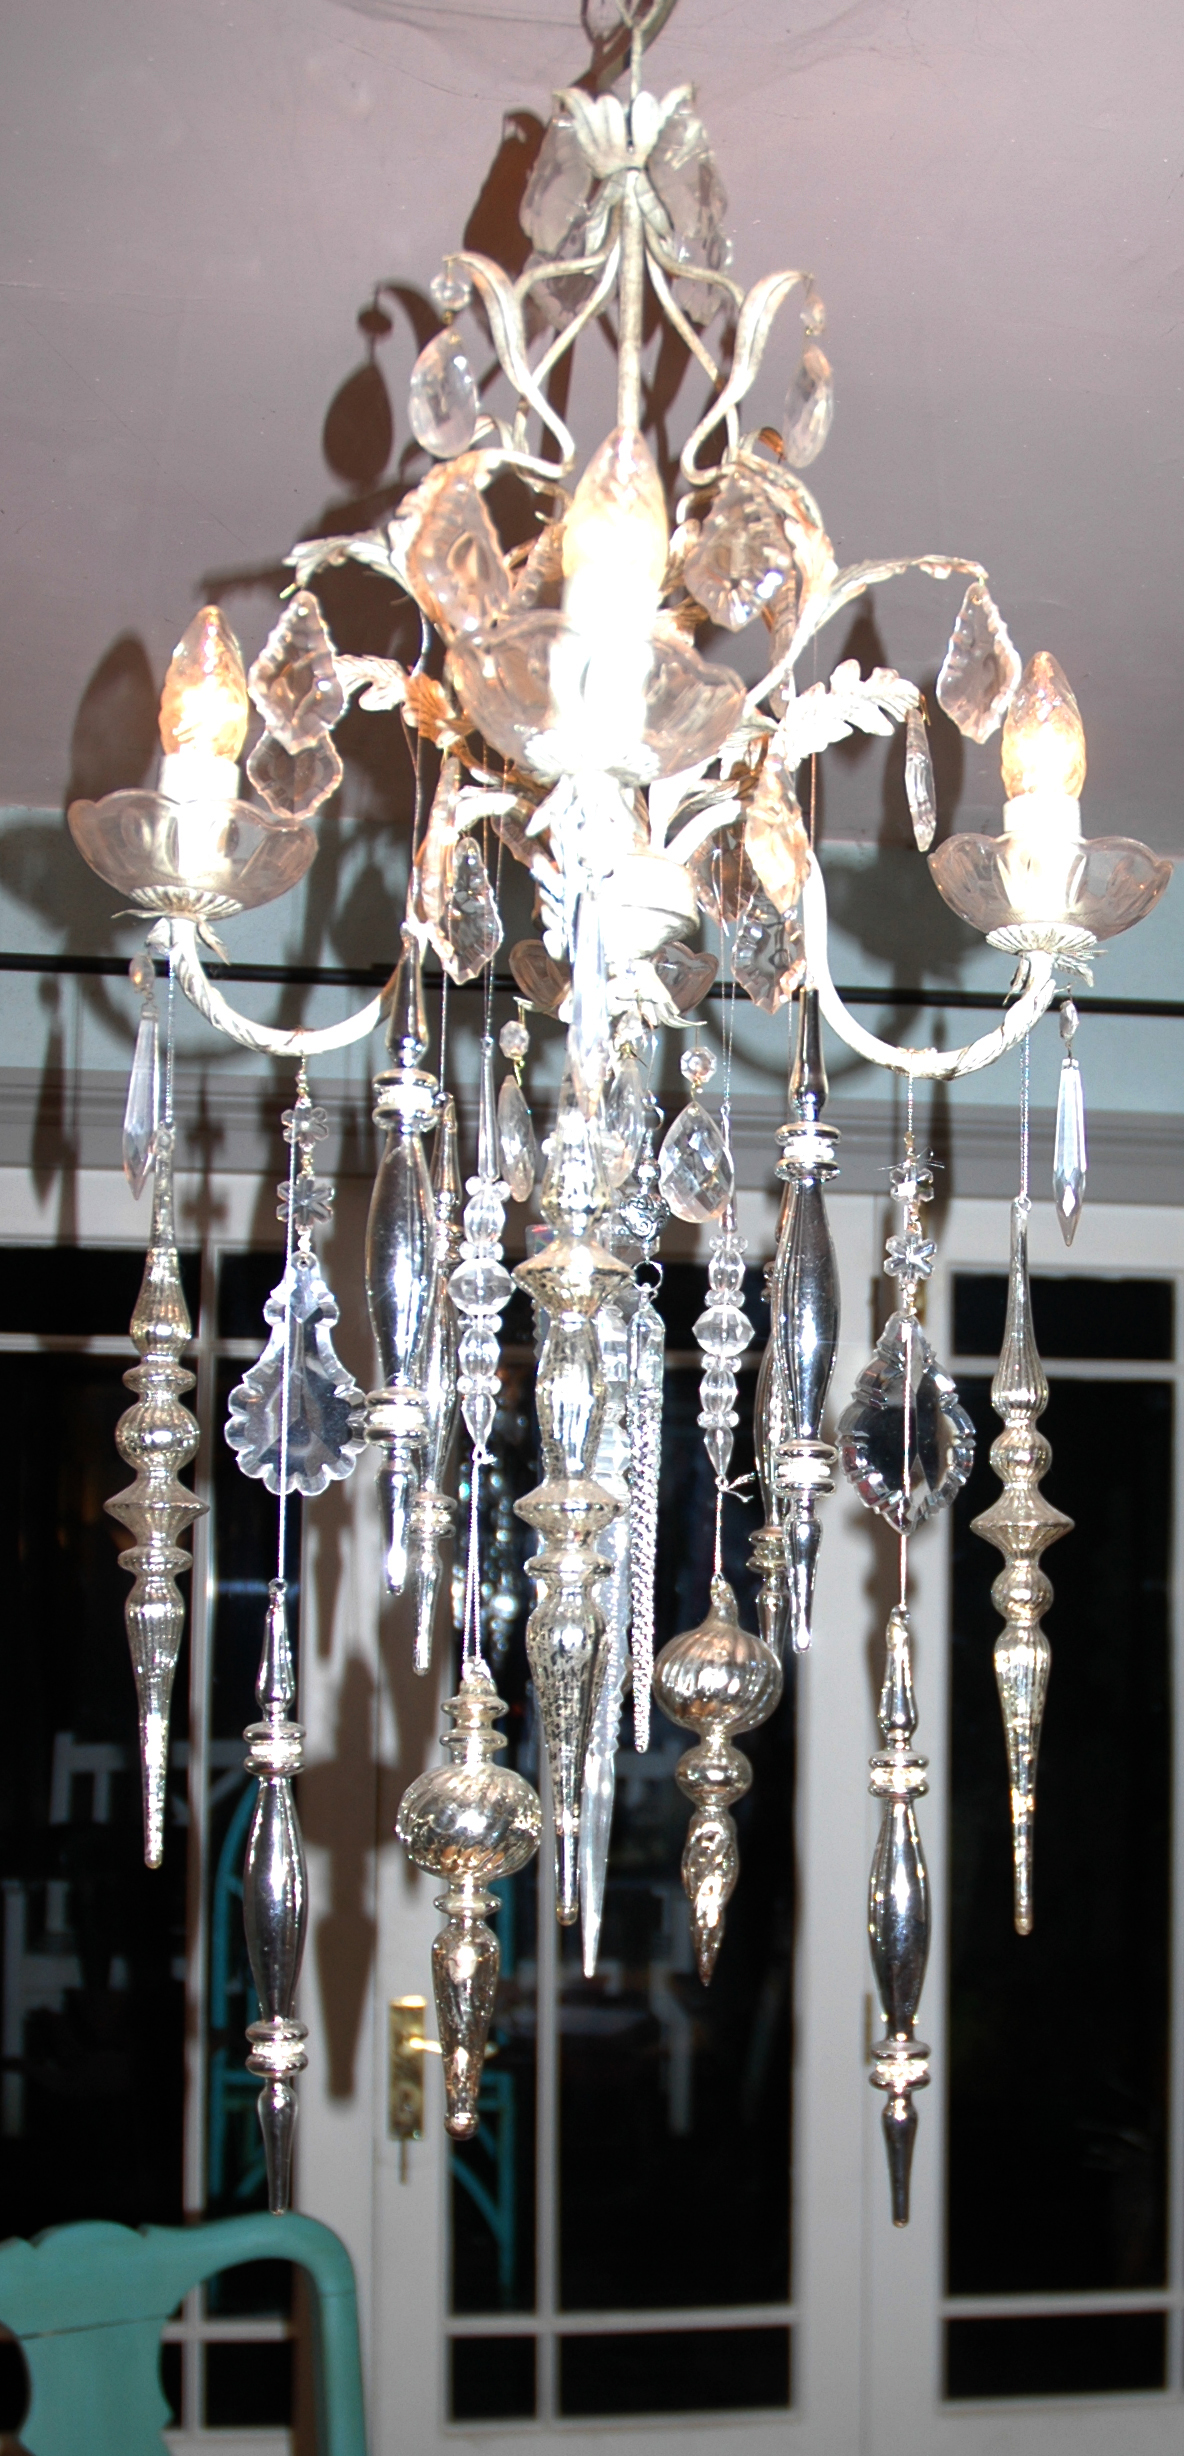
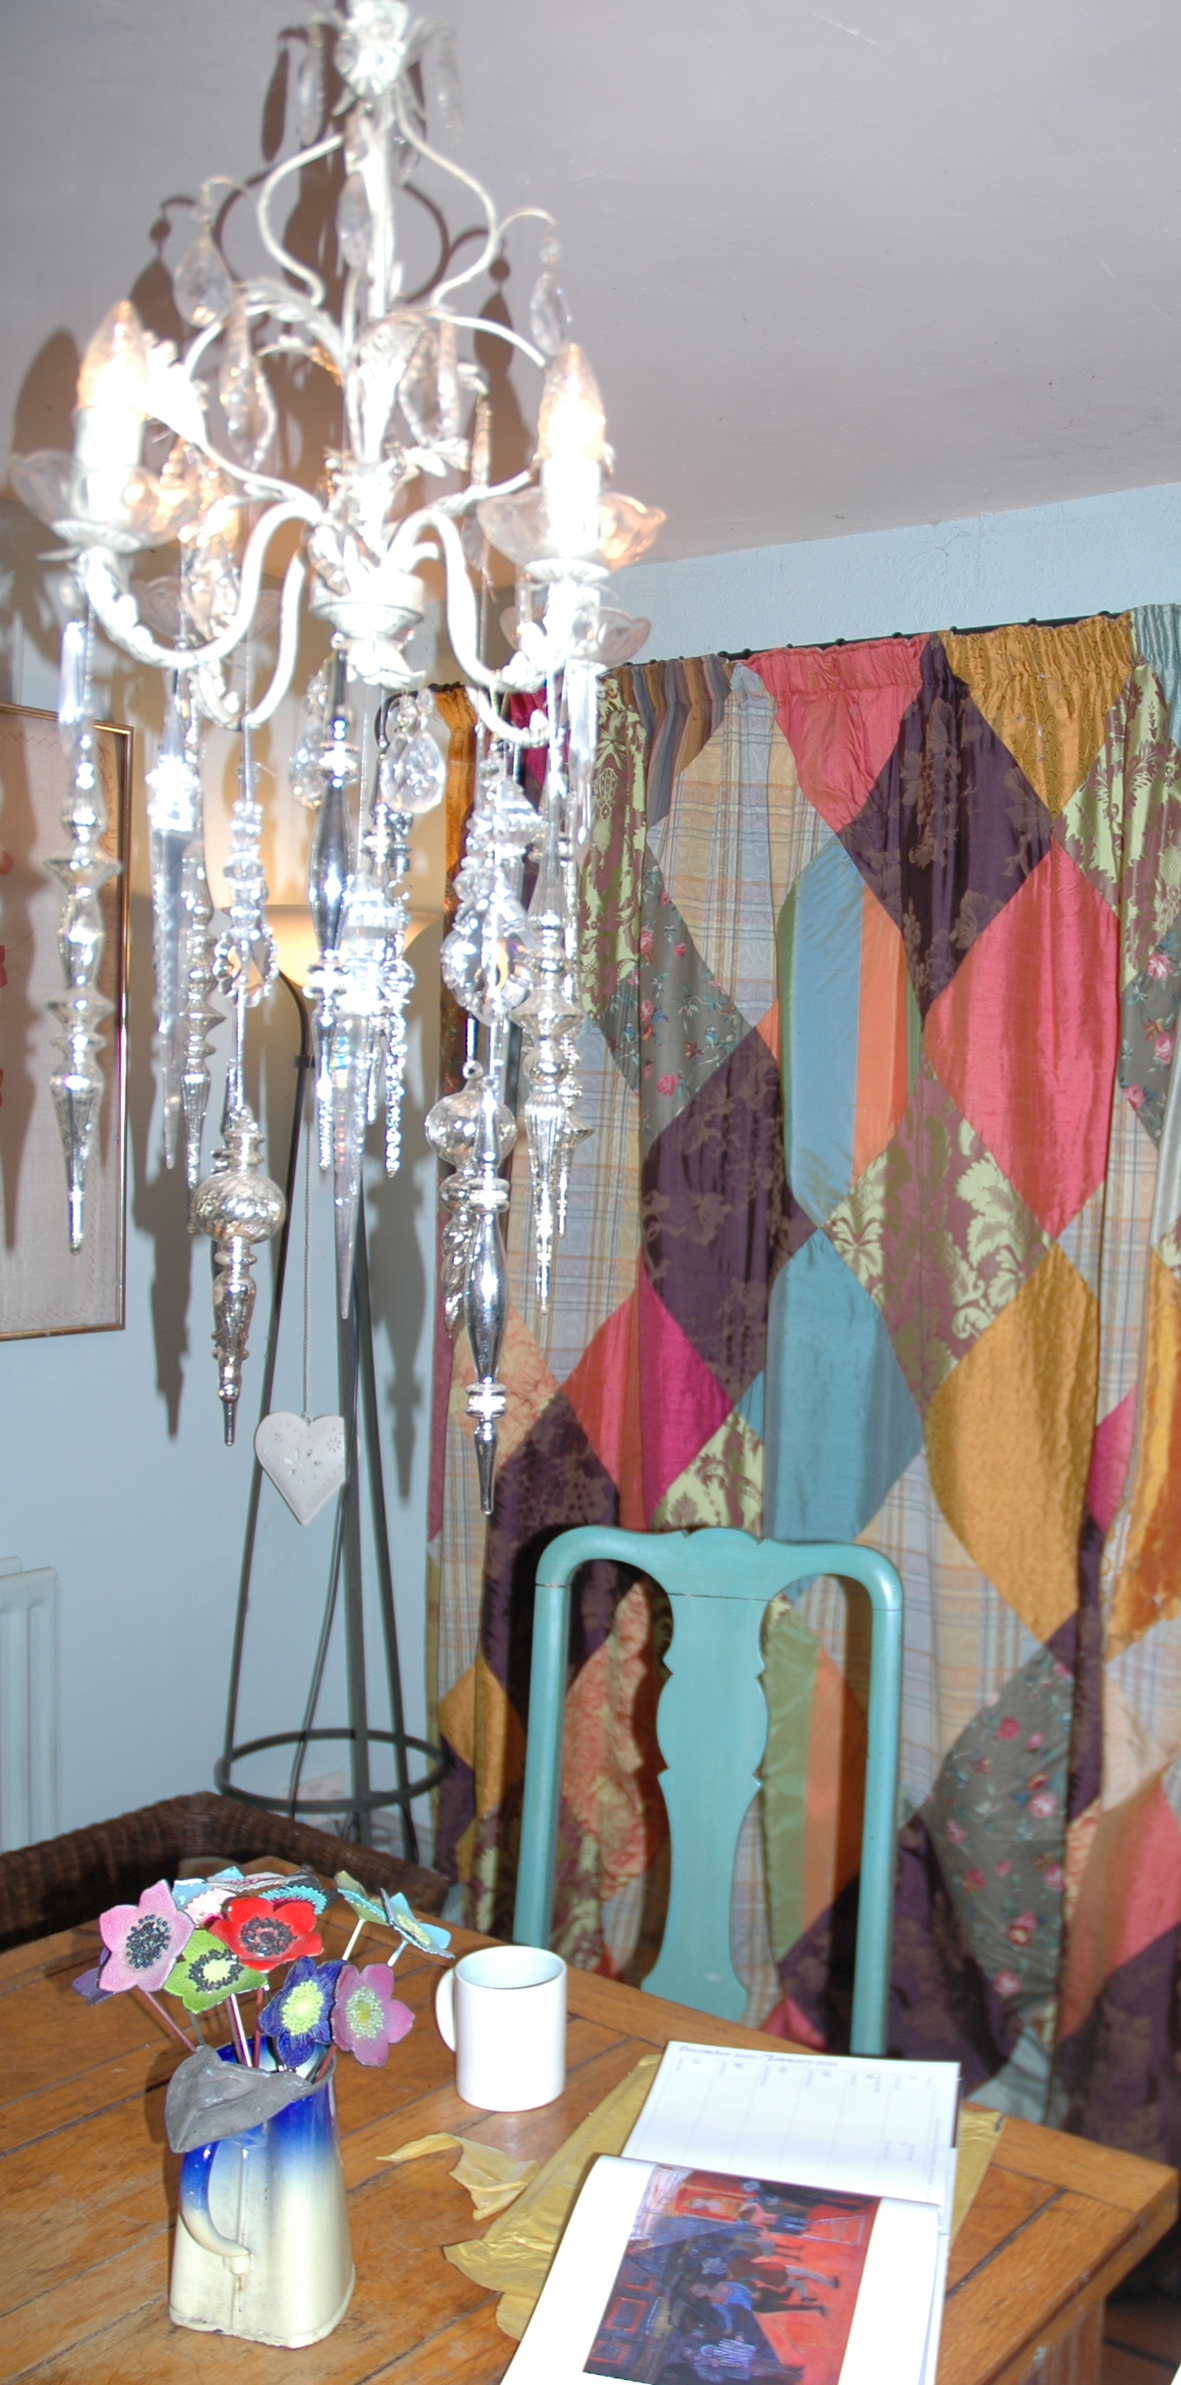
Now I have to own up that this chandelier is festooned with all the past 8 years xmas decorations in the form of plastic, glass or crystal drops which I first started to add to it the year I bought it…and then couldn’t bring myself to remove them they looked so pretty – so this now is a cascade of pure glitz.
And last but not least in the return to textiles and my own work – I must show off my old and getting better by the year patchwork curtains made specially for this room
You know when you get an idea and a light goes on in your head and you think – why did it take me so long to see this? Well this has just happened to me – last weekend I was looking at the stitched ceramic dishes I had made for the Museum Mending project and thought – why don’t I just stitch these images onto cloth? The mottoes, the hearts, the hands….all these relate to my personal project Make It Through the Night so why don’t I include these into this? DUH!
I have done all the research, found the mending mottoes and sorted out the drawings of the hands, but what will I stitch them onto? Well when you are broken- hearted what do need to mop up the tears – a handkerchief – which is a ready- made square of cotton or linen – perfect. And when I looked through my white fabric stash I found a packet of 4 table napkins left over from another project – hem stitched in linen – perfect. I always take these pieces of luck as a sign that I am on the right track.
Counterpane/Counterpain
I thought I should try to match the mends with the mottoes and to use the broken and mended heart as a link to the Counterpane/Counterpain embroidery which features in the Make It Through the Night project in Work in Progress section of the blog. I decided to keep the same stitching techniques and colour.
I started with a cut and darned heart, which would need considerable strengthening at the edge of the handkerchief, so the motto had to be ” that which does not kill you makes you stronger” a proverb that I think has a stoical attitude. Having drawn out my design and checked the correct darning system in an old sewing manual, and taking courage into both hands, I cut from the edge of the handkerchief straight into the heart, tacked a run and fell seam and set to work sewing it.
sewing manual and darning sampler which provide both the information and inspiration
I chose to sew it in red thread as in the little household sewing sampler that I had bought years ago from an Oxfam shop. It is probably from middle of the 20th century and made as part of an infant school sewing class. The choice of red for stitching is a swine as every single stitch glows out whether rightly or wrongly placed, I started to dislike the original needlework teacher – why impose this on to your pupils? – well discipline of course….and suddenly my little basic sewing sampler looked like the work of a consumate needlewoman – poor girl – unlike me she didn’t choose to do it.
finished handkerchief pinned to studio wall
You can see by the finished piece above just how personal this embroidery got for me I have hand written “me” instead of ” you”. This was quite a difficult piece of darning even though I have worked this technique several times before; the plain hem stitching on the run and fell seam above the heart was really tricky to get even on both sides. I would choose something easier for the next one………
I found the motto, ” Red is the ultimate cure for sadness” and decided to use a patching system using a scrap of scarlet linen, I withdrew the threads and darned them onto the heart. Easy Peasy it wasn’t!
withdrawing the threads from the red patch.
The finished red darning piece can be seen pinned to my studio wall, to the side of it can be seen a sample of Darning as Jewellry by Dail Behennah.
red darned patch handkerchief
Dail Behennah’s tiny samples in copper and gold wire for Darning as Jewellry, was also made for the museum mending project
The next piece was also patched, much simpler this time a basic inset patch of fine linen.
mending manual and school sampler
cross stitch embroidered patch ready for insertion
On the left can be seen the set of instructions for basic darning with the sample of the same system next to it. There are many old sewing manuals with all this information in them, up until about the 1960’s when they begin to just talk about machine stitching for darning
For this handkerchief I decided to cross stitch the motto onto the patch beforehand, and on the left can be seen the embroidered patch prior to cutting and inserting it onto the heart on the handkerchief, below.
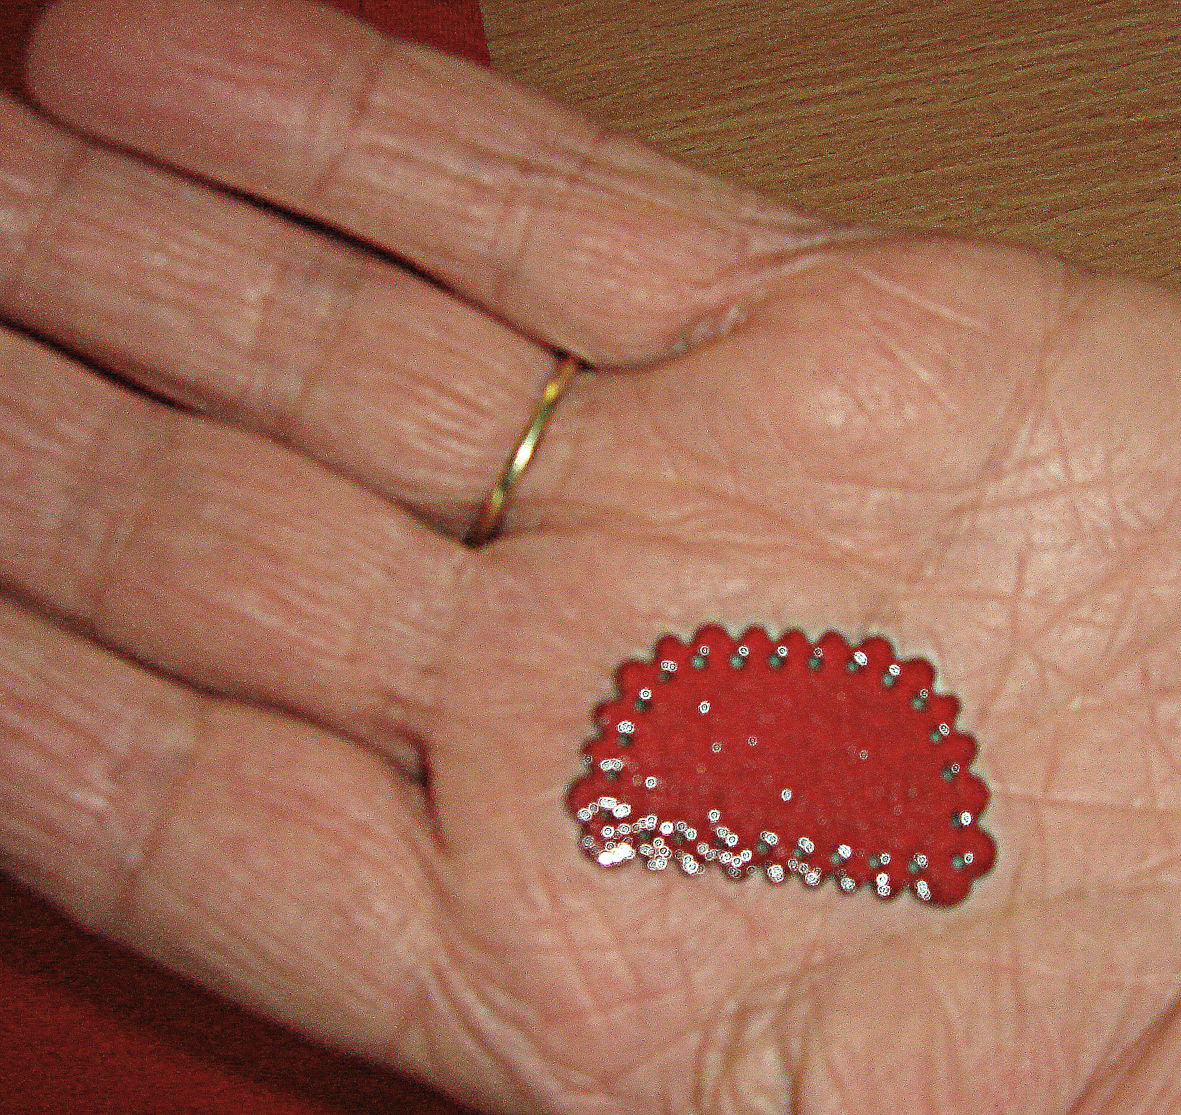
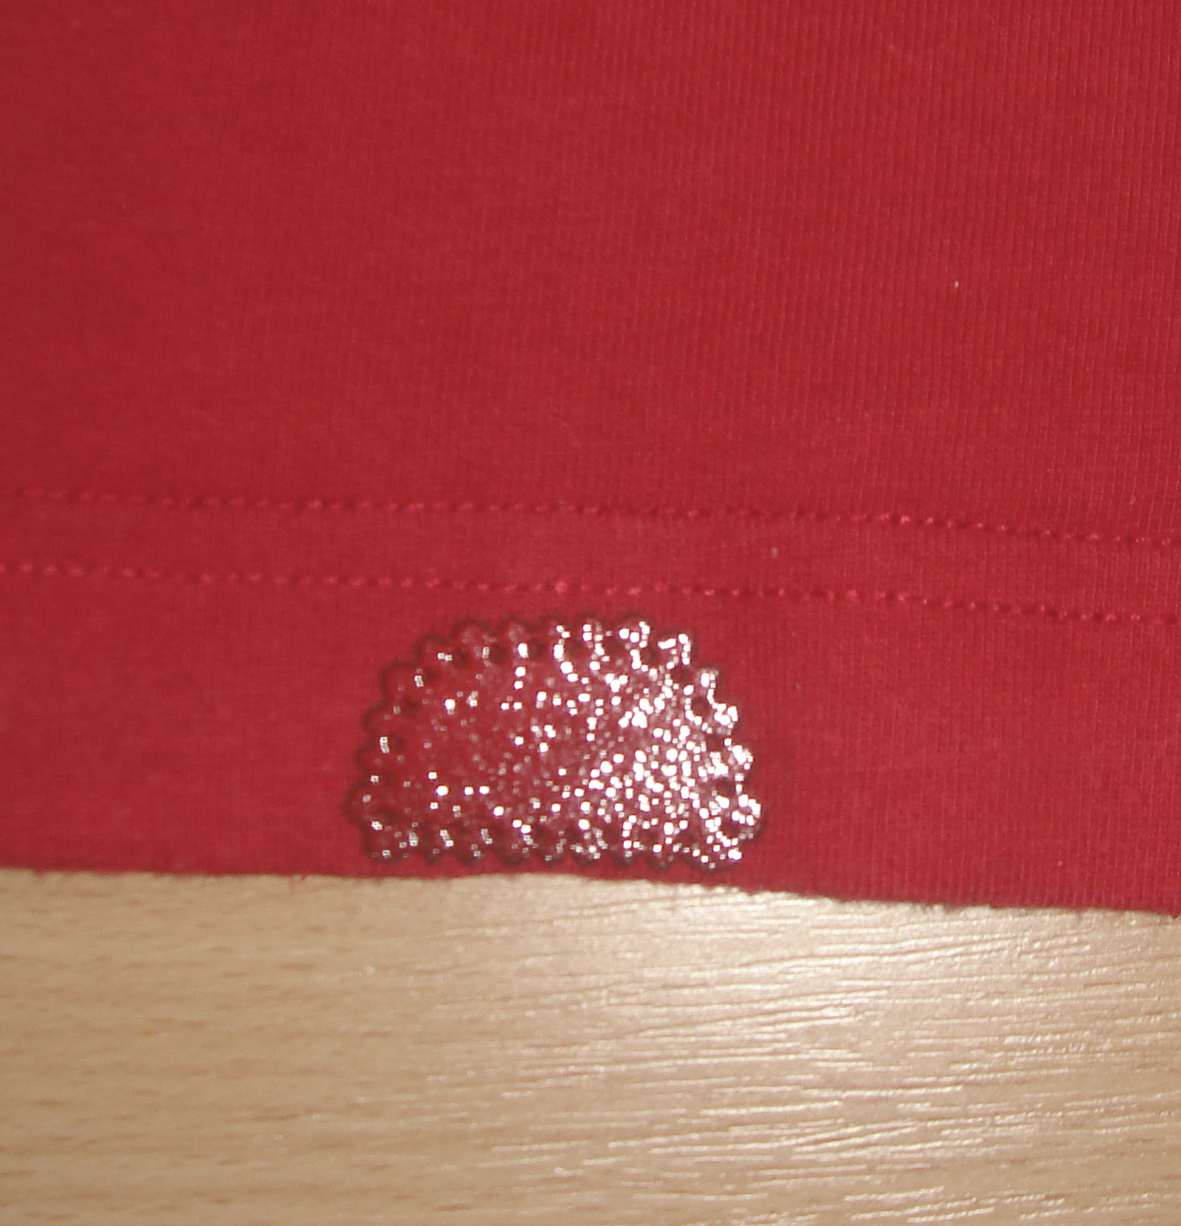
The image of the small pink and red broken and mended heart pinned above the handkerchief below is a photograph of a set of 50 enamel badges I made for an ETC project several years ago. Maybe I should make some more?
patched cross stitch motto
By the time I got around to stitching the 4th mending motto I thought Mend It or End It was a suitable finish to this series, the finished piece is the seen at the head of this blog, simple and effective the simple cross – way darn also makes a good warning symbol to make your mind up – the type of real advice my friends actually do give me when I am dithering about anything…I think these mending mottoes will lead to other handkerchiefs, I particularly like the one about the colour Red, I wonder what other mottoes there are about colours?
first 3 mending mottoes handkerchiefs on my studio wall.
I have eventually found the time to get back to the Stitched Ceramics story. Hanne Rysgaard and I found a few odd days to work together during the past months to develop samples of the plates I want to make. The first thing we did was make some new molds, well actually Hanne made new molds while I took the pictures…….
edited idea from the poetry plate
Meanwhile I got on with drawing out designs for different plates, I had really liked the poem by W.H.Auden and the broken heart image (see the Category Archive, Stitched Ceramics May 18th) I wanted to repeat this design but with a motto instead of the poem or find a poem I could use without having to deal with the copyright restrictions…but Hanne had recommended not writing a great deal as the porcelain would probably dry out too much for me to be able to manipulate the clay into the tears and holes for later mending.
I made several drawings at this stage and some of these initial ideas did survive intact to the finished sample stage – others have been rather rearranged and one has been mended – for real.
several more sketches for the mending motto plates
Hanne rolling out the porcelain on her new bit of kit.
When I returned to the ceramics studio, Hanne rolled out the porcelain for me, gave me the molds she had prepared earlier and went upstairs to look after Blaze gallery.
I had drawn and cut some stitching hands from card for impressing onto the clay and I also used the copper blanks I had previously plasma cut for enamelling, these proved to be the best at making the right amount of depth for the impressions. Using the working drawings, which were pretty basic, see above, I started to work. Nerve wracking stuff – as the slightest mark is not easily erased, so I was forced to be more controlled learning to rely on my instincts – if you make a wrong move you will have to redress it either now or later when it is fired – or discard it – I was NOT about to discard anything I had been given to work with and which had been so lovingly prepared for me; time to get a grip.
card hand placed on freshly rolled porcelain
I started out quite well, the first hand impress although a bit weak, was simple and effective, the finished dish looks more or less as I imagined it would – see below no blocked stitching holes, no cracks, no loss of shape – I should be thankful for beginners’ luck!
finished plate, no problems!
And the rest of the day went well, I made 2 more dishes, well one and a half…I had not enough clay for a whole third plate so started to get inventive….I thought that a half a plate with the holes pierced for stitching another material to it would be interesting…I used a crazy patchwork technique for this.
half a porcelain plate with half made linen crazy patches in my studio
This half dish had lost its shape in the kiln, so I had nothing to lose by experimenting with it and although I feel this version is not working due to the pull of the linen fabrics over the curve of the dish, which may be eradicated by cutting them on a different grain, I feel that there is a lot potential here; Liz Hewitt, another embroiderer, told me about a kind of felt that can be molded when wet and will dry to shape – and it can be stitched ….so I will try this idea again – maybe – if I get the time.
first and unsuccessful sample of crazy patched plate...
But the dish that was to test me most was just simple and pure white with a motto and stitching hand, it needed no further colour, just taking home and darning.
darned dish before firing.....
There was one small problem, several of the holes I had pierced had fused together; I set about filing them out…. I was oh so careful, when one push too far through the actual needle eye and KERACK..the whole plate split in two, right through the hand but, thankyou universe, the darning patch as well.
You know when you just feel sick, sorry and stupid! I wanted to weep, but just had to carry on – Araldite, fast drying Araldite came to my aid. And YES I do appreciate the irony of this…..but I still had to hold the 2 pieces together in my hands for more than 30 minutes and imagine trying to do this when your are telling yourself to just chuck the whole lot away and forget you ever had any ambitions and isn’t this what you always do – mess up because you want too much control…and you desperately need to pee.
Anyway when it finally felt safe to loosen my grip after walking round my studio a dozen times, I tightly bound it in some strips of fabric and left it overnight – unusually I took no photographs of this episode – too sick about it all.
finished double mended plate
After a turbulent night’s sleep, and when I finally stoned off all the last vestiges of glue from the wound and the back of the dish and my hands…and filled the tiny gap with red making it “bleed” under the darned area. I realised that I have discovered another way of working with the ideas of breaking and mending and which I am now really interested in pursuing for the Museum Mending project
But I am leaving you with another motto which just makes me laugh ruefully each time I turn it up in my research book, this needs a very special dish making for it….
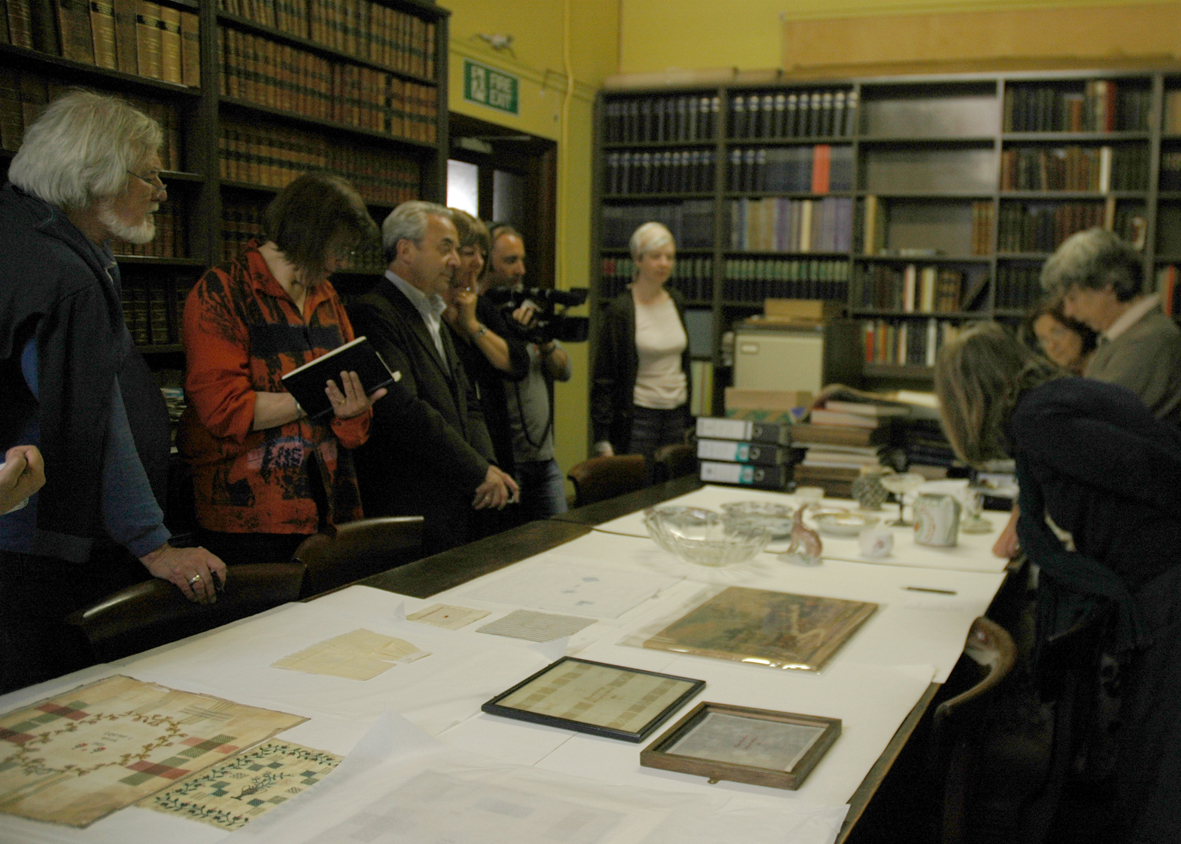
What follows is a pretty much the ultimate in the evidence of mending…you have been warned. A colleague, Dawn Mason, and I recently organised a day at the the Bristol Museum and Art Gallery to research a project called Stitching and Thinking, for the ETC. group affiliated to UWE Bristol. It aims, by way of workshops, DVD interviews, playing with disparate materials and now visiting museum archives, to try to record the thoughts that creative makers, designers and applied artists feel when they are engage with their material.
The group comprises academic and research staff from UWE, experienced makers and designers who run their own businesses – earning a living by making and selling their own work. They are nationally and internationally known and respected within their field: jewellers, ceramicists, basket weavers, stitchers, knitters, enamellers….. we aim to make work together by sharing our skills and philosophies. I also invited a critical writer, an interviewer and a cameraman to record the day. We were given a short introduction to the mended pieces by Karin Walton, the curator of Applied Arts, who I think was rather bemused by our fascination with this odd collection of stuff.
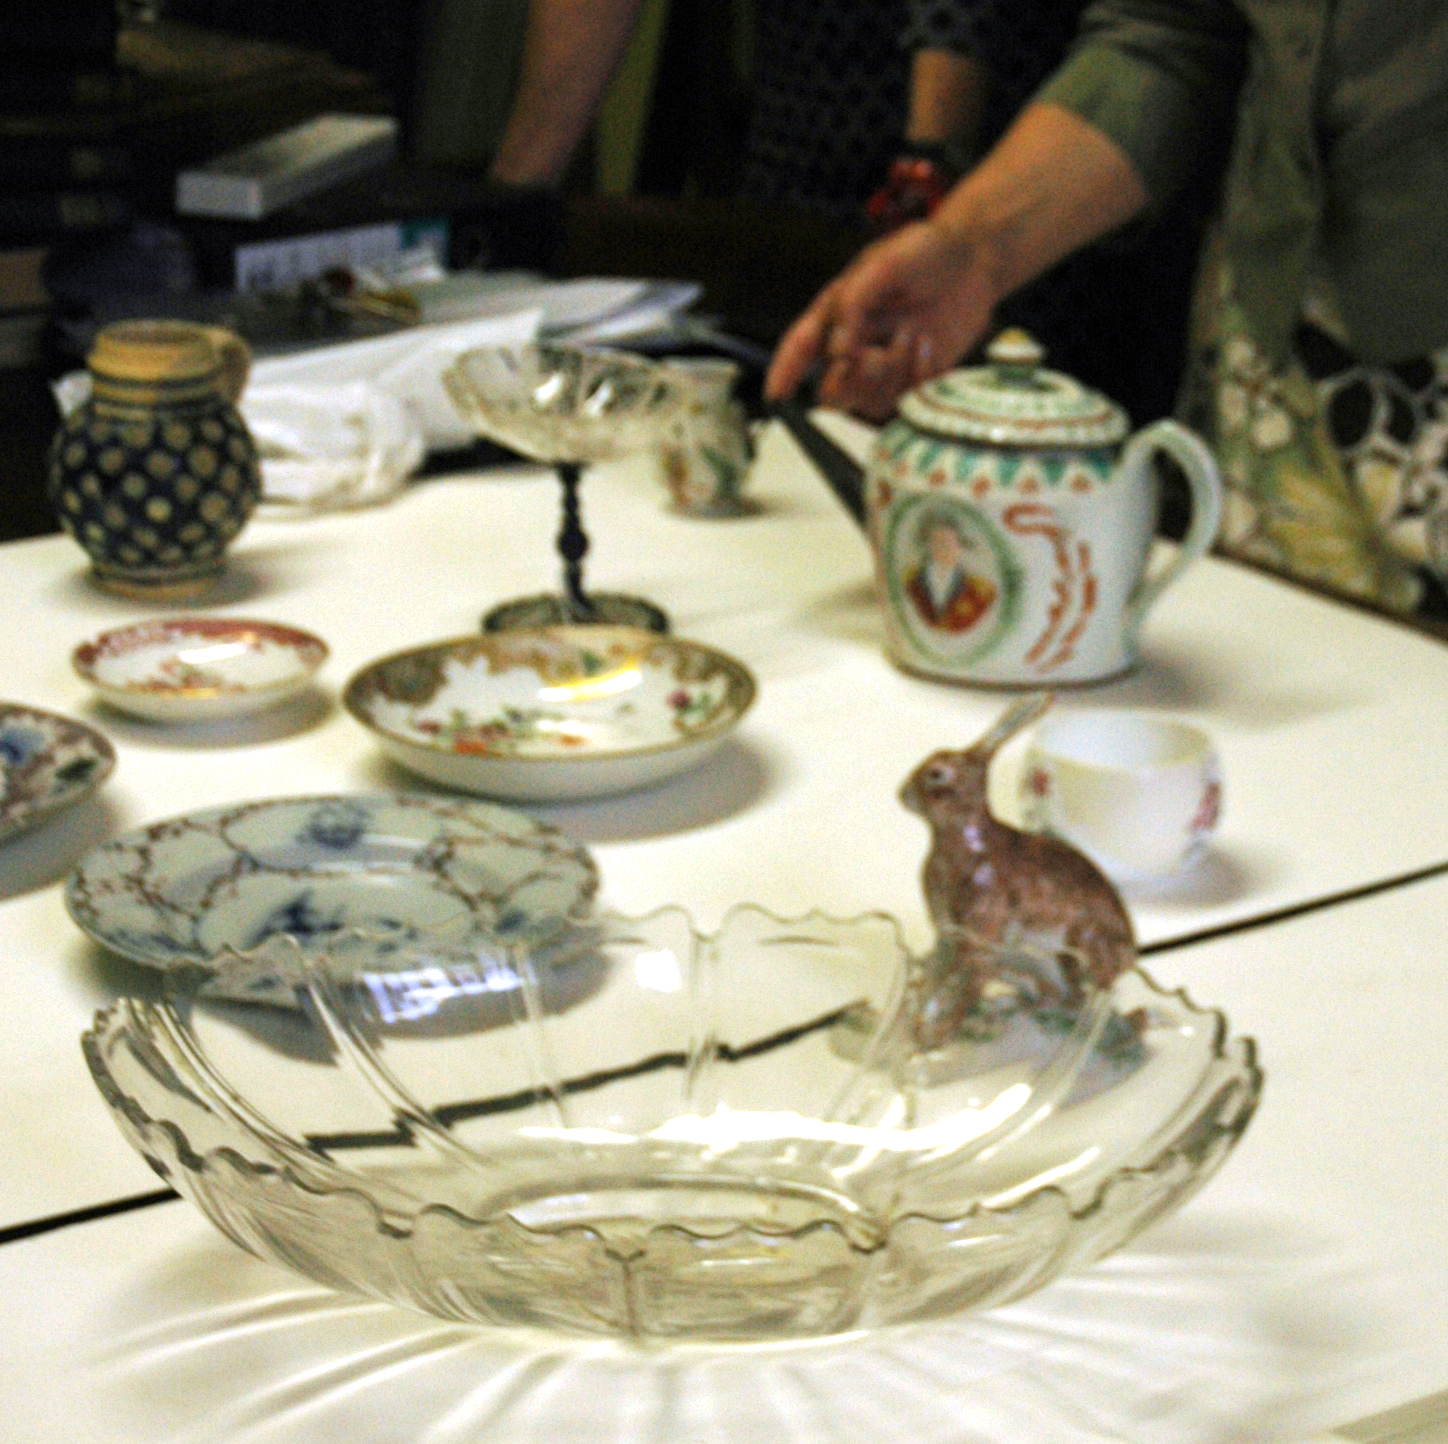
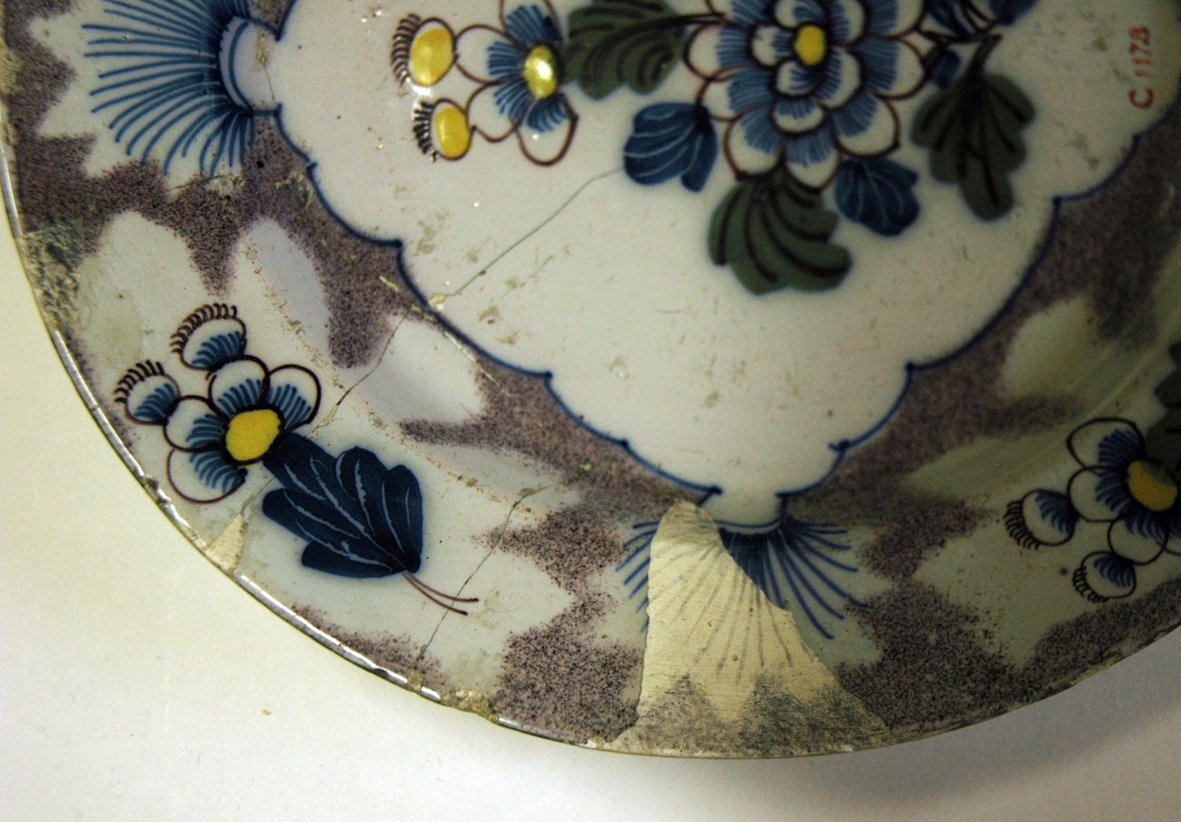
The museum’s attitude to working on anything needing repair is to neither deceive nor detract from the original and all repairs need to be removable. But many objects were mended before they came into the museum’s possession. Some of the pieces mended in the museum are really very refined, they often have carefully painted patterns so that the repair is not too obtrusive; but I think the ethereal quality of some painted repairs adds to the charm of the originals – but I would, wouldn’t I?
Some of the repairs are really lively, just additions to make the item serviceable again, we were all reminded of our wasteful society and how we will just throw broken things away and replace them, in fact most technology is superceded by the latest model long before the original has worn out.
But I was also intrigued in the types of repairs found when turning the pieces over, the staples or rivets in the cracked porcelain and glass were particularly pleasing and I would really like to learn how to make them. They look so simple a solution to holding broken pieces together but they must take courage to drill when the object is of worth. But as I have remarked before in the earlier blogs on mending, a decent mend is a sign of worth.
But I am most intrigued by the blanks in the design left by the restorer when using a plain infill – the strange shapes are perfect “blank canvasses” for me to start to invent into.
The inspiration for this project to develop work from the museum was because I wanted to show the group the stitched mending samplers. Bristol Museum holds one of the most comprehensive sampler collections in the country, it is held at The Georgian House and can be visited by appointment. I have researched it many times and I wanted the group to see these particular samplers so Karin, who has written the catalogue for whole collection, brought over several for us to view. The sampler above is from the local Quaker school in Sidcott, it is so fine and holds a special, and to some people in the group, a troubling presence. I just am concerned about the poor childrens’ eyesight and patience, both of which which must have been strained to the limit.
What is noticeable about the plain workmanlike samplers she brought us is that they are made in schools, the young girls who stitched these were learning useful techniques which would stand them in good stead in the future, either for running their own households of serving in someone else’s.
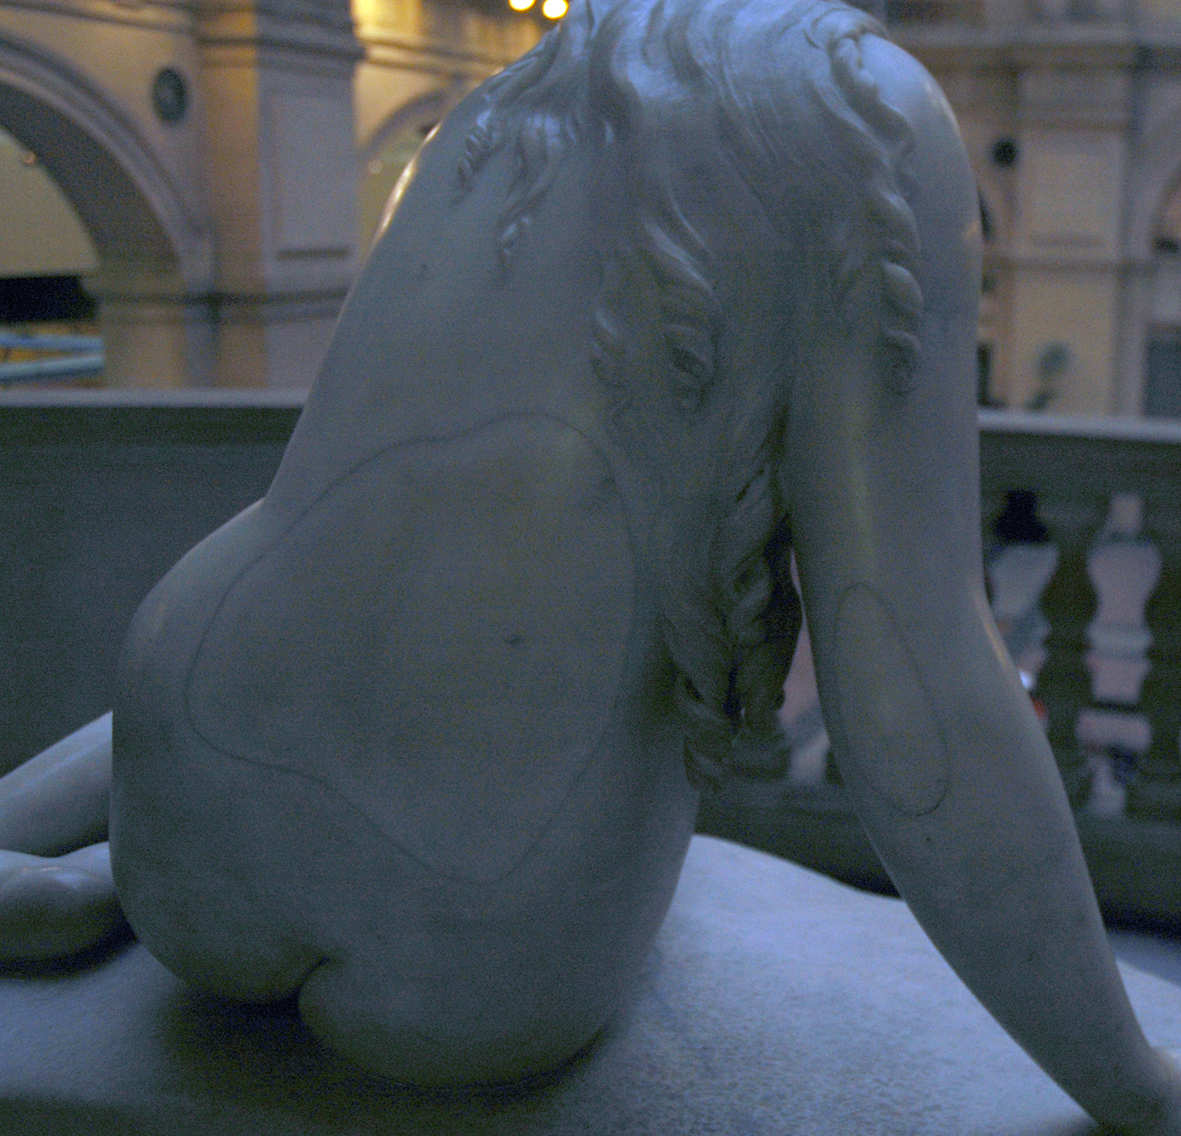
Moving into the museum galleries after our morning in the archives we were all alert to the many mends in evidence, this elegant marble mend on the back of a statue is particularly pleasing, although I would be interested to know at what stage the marble was patched, before or after the caving? But Now the group, myself included, needs to go and start to create work that has been inspired by the morning, I will keep you posted on any future progress.
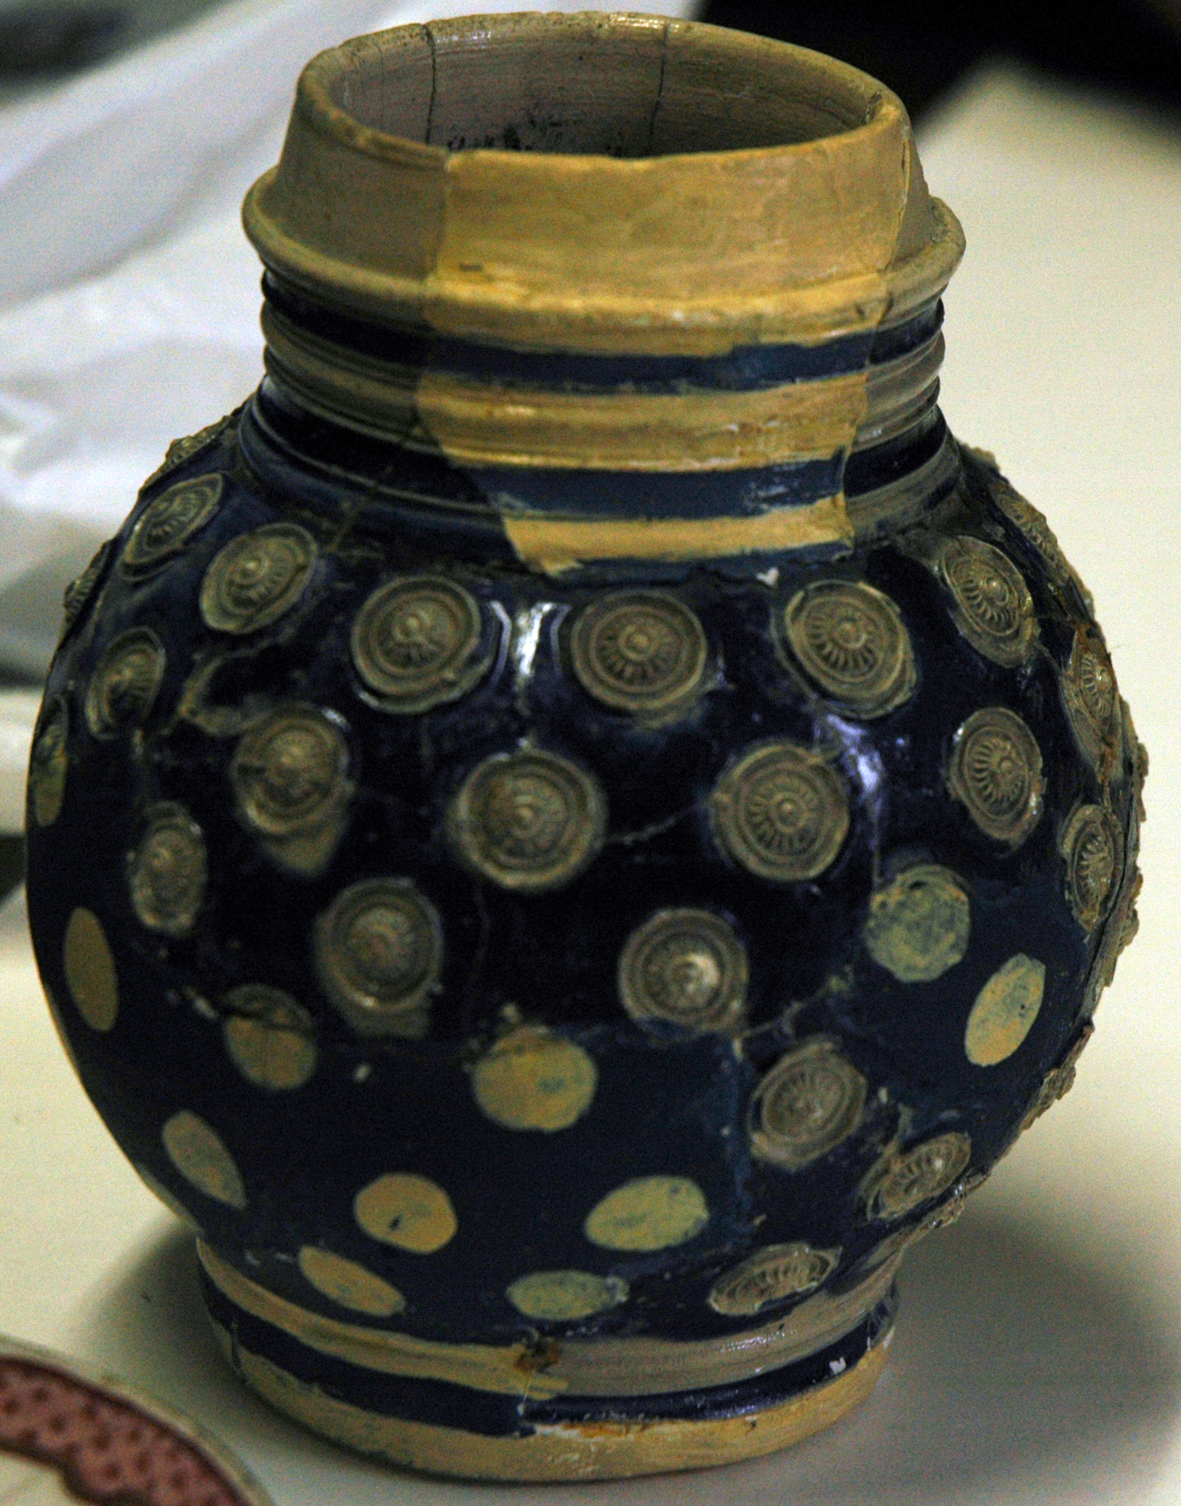
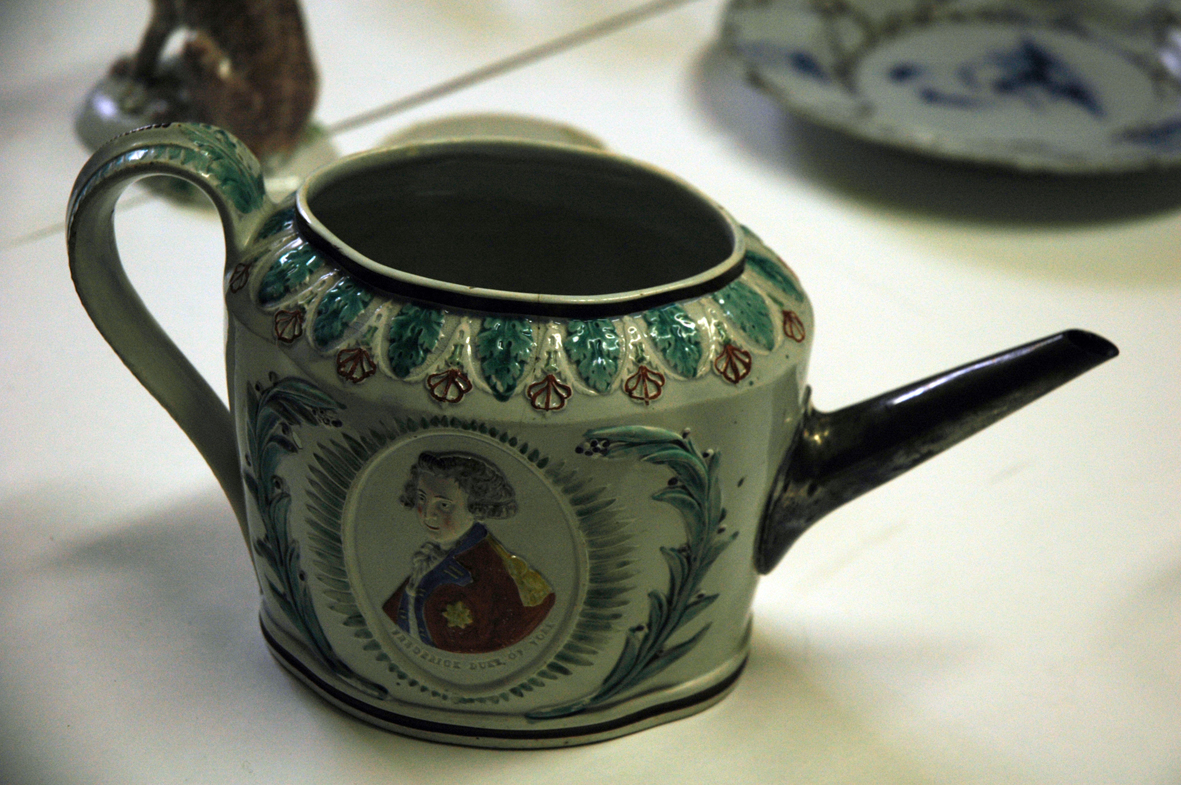
Some new information on mending has been sent to me from Dail Behennah, one of the of makers involved in this project; she has unearthed this archive advert from a Bristol newspaper which looks like the Coombes company or a predecessor, may have had a hand in mending that tea pot with the metal spout…
I am in a difficult position at the moment because I have a whole set of different projects and commissions all at the sampling stage; this is not good news for anyone who is trying for a smoothly running working life. Usually I aim to have one or 2 ongoing sets of work at the ‘mind in neutral’ stage for when I embark on a new piece of work; by which I mean that the work is at the point where it is being manufactured, whether by stitching, enamelling or constructing…this is when you can think about the work as it is slowly progressing or mull over the next piece you will be making. Time to let ideas settle and allow solutions of sampling problems – see last 2 blogs – to rise to the surface.
detail of studio wall with samples for stitching book and original enamel skies joining sample.
But I have 4 main projects starting up at the same time, one is the enamel skies – my own work – so it is now having to take a back seat, but it was necessary to start it, as a website featuring the work is about to go live – it is for North Somerset Arts Week in May next year; 2 is a possible commission for a book on stitching; 3 is the Sheet of Dreams from Make it Through the Night project, again my own work and started in an attempt to get it going so I could just sit and stitch something between the drawing and development of the stitching book – keep up – 4 is another ongoing commission which will need to be kick started again when the artist comes back from her holiday next week after several weeks’ break. Oh and there are the stitched ceramics I am doing with Hanne Rysgaard, so that’s 5.
first illustration samples to size for the pages of a proposed stitching book
And all are at the sampler stage and all need attention – the same sort of attention. So my workrooms are full of bits and pieces of sampled new ideas, good ideas, failed ideas, hopeful ideas, anything to try to get me focussed on the jobs in hand.
The most important project this week is the book presentation as it has to have 3 spreads, or double pages, with all the stitched designs, illustrations, technical diagrams and information organised in time to get it to the art editor who will sort out the overall look of the finished book for printingto show it to hopeful publishers at the Frankfurt book fair in October – as you can see I have been influenced by the work I did with Hanne on the tablecloth – or rather my commissioning editor was…….
The idea of samplers being the traditional regimented rows of perfect stitching is of no practical use to me. The samplers we see in museums had more to do with illustrating young girls’ good behaviour and patience than their creative ability to problem solve – which is how I see the sampling process, an absolutely key component of any making project. I usually collect my samples together and pin or stick them into my work books when I have finished the project. They are often all the evidence that is left of my commissioned work, apart from the pictures of the finished image. But until that happens they are pinned to a wall as constant reference.
printed and stitched sampler for the next Sheet of Dreams embroidery, pinned to a full scale collaged drawing
In my enamel workroom though things are even livelier, enamel is impervious to light and weather so I keep all my old samples on view, they are constantly referred to and I think it amusing that even my metal and glass samples look like mad gingham fabrics.
window sill in enamel studio full of samples for colour references, with stitched wire sampler above
I use these colours so often that I do not need the notes that I made for the first colour samples, I know the properties of each colour well enough.
original set of coloured enamel samples in work book - with their recipes, before they became part of the reference in the studio
All around the enamel studio samples are set out, here the enamel skies are hanging next to my first large stitched steel sampler,
more samplers ready for reference in enamel studio
and on another windowsill are placed the drawn and painted samplers I made for the Chintz Collection in the Enamel Garden (see the Gallery Pages) sadly these are the only flowers displayed in my old conservatory.