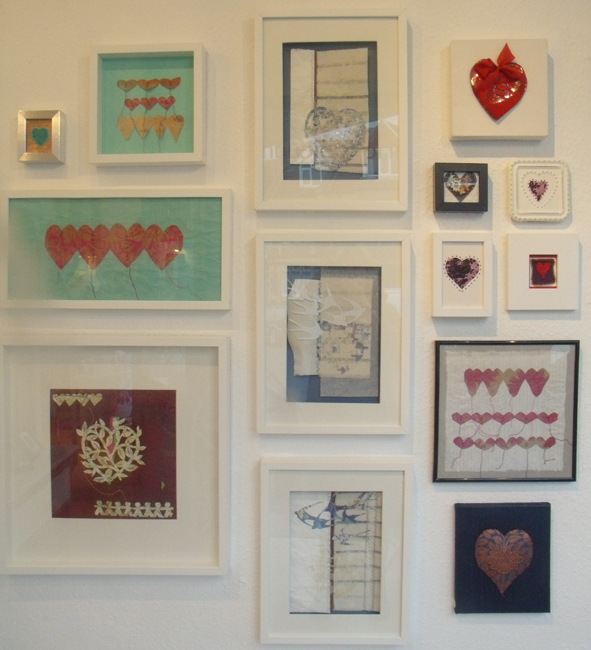
The small but delightful exhibition that the Heart Space Studios staff made in the mixed media session are all framed and ready to go on the wall ….
more stitched paper hearts by Susie Bancroft
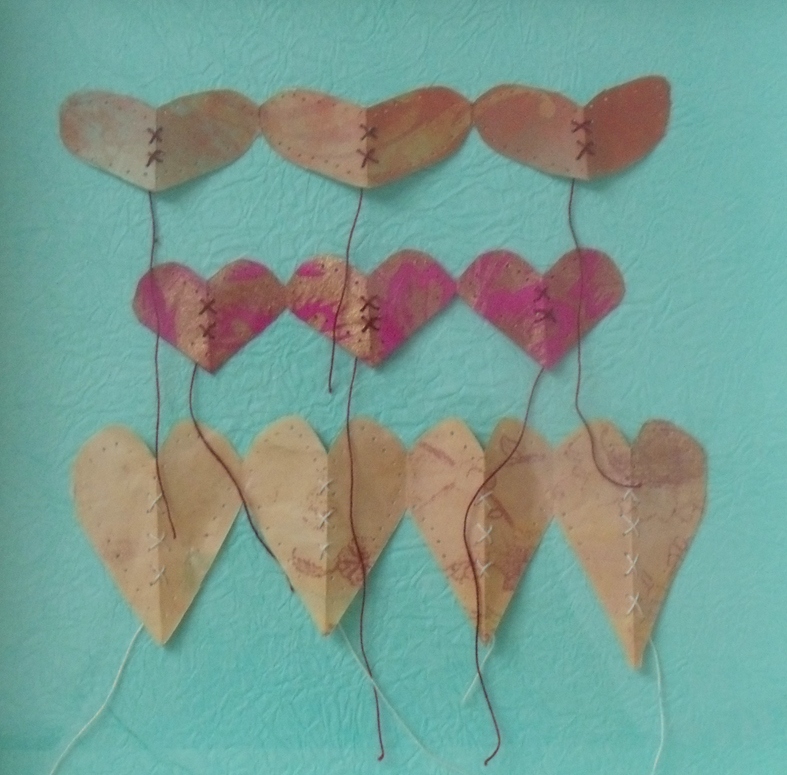
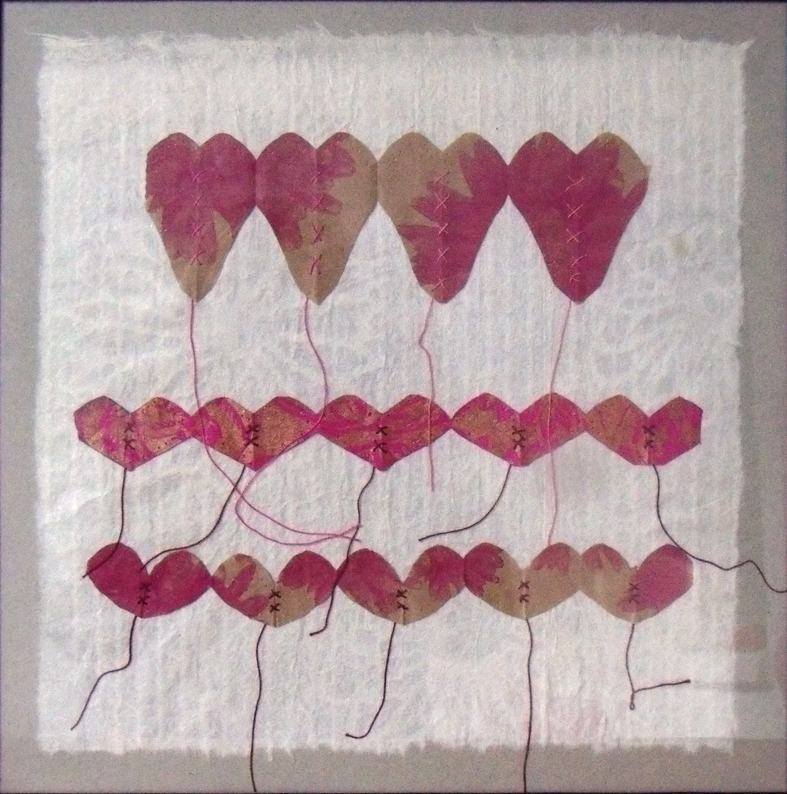
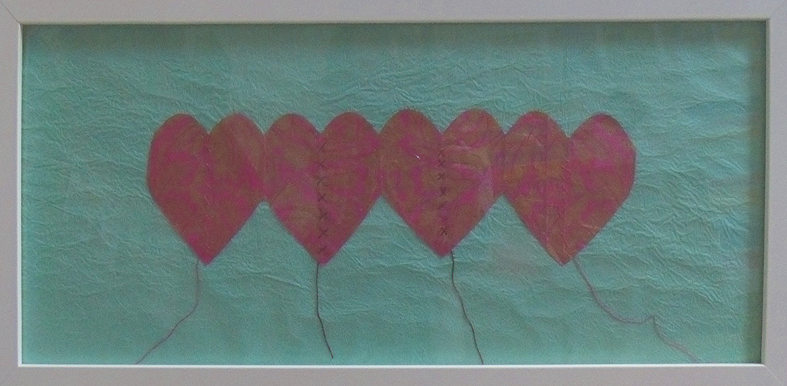
the first to arrive through the post was a box of stitched printed paper hearts from Susie Bancroft – so I set about mounting rows of them on Japanese hand-made paper or crumpled tissue papers ready for framing
row of large printed paper hearts – Susie Bancroft
the cotton threads just going every which way – I think they look like tiny heart shaped kites…….-
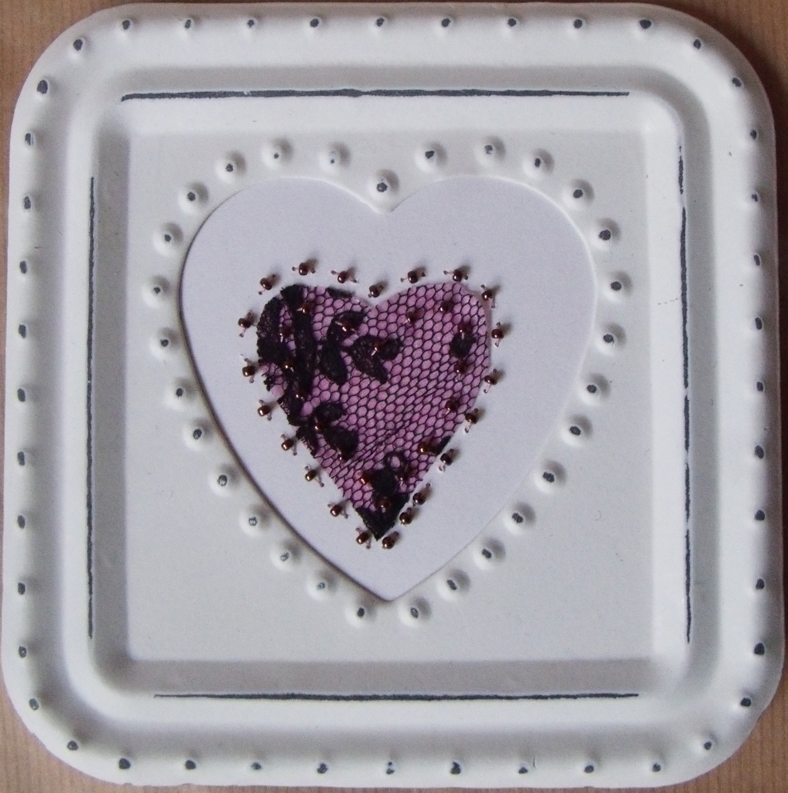
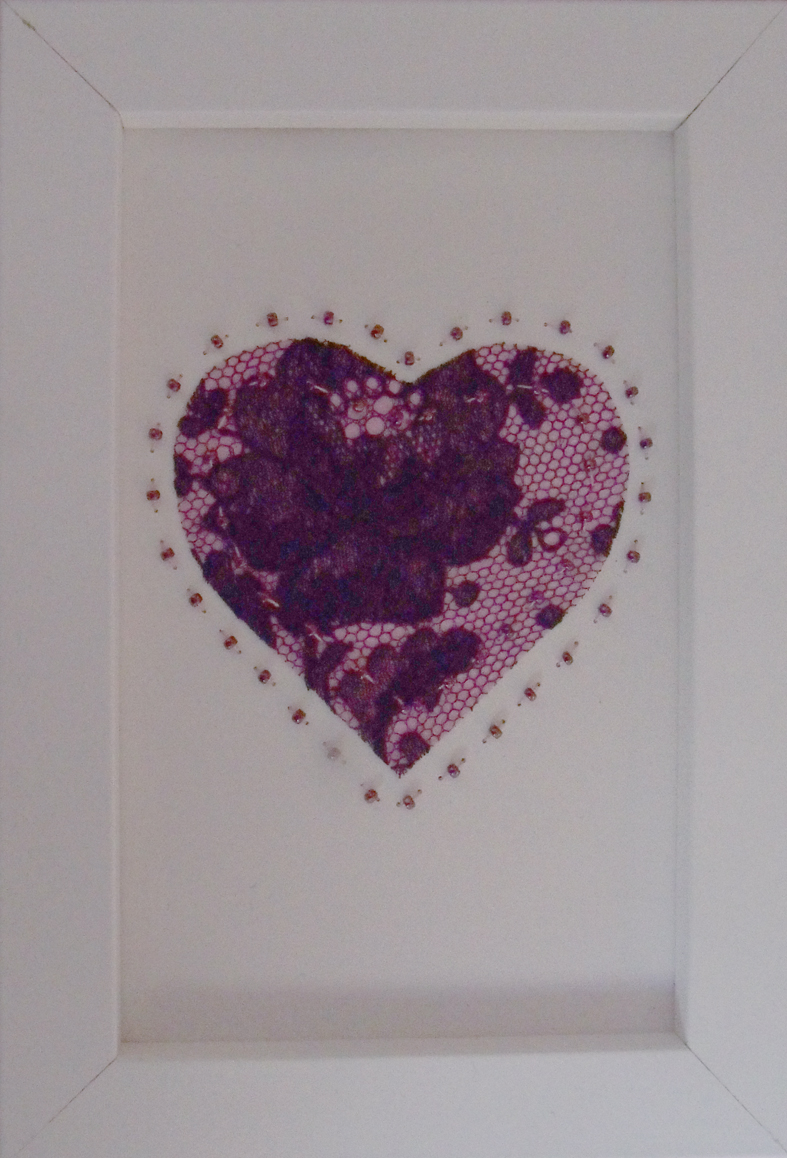
minute beaded black lace heart in tin frame- Jane-Marie Mahy
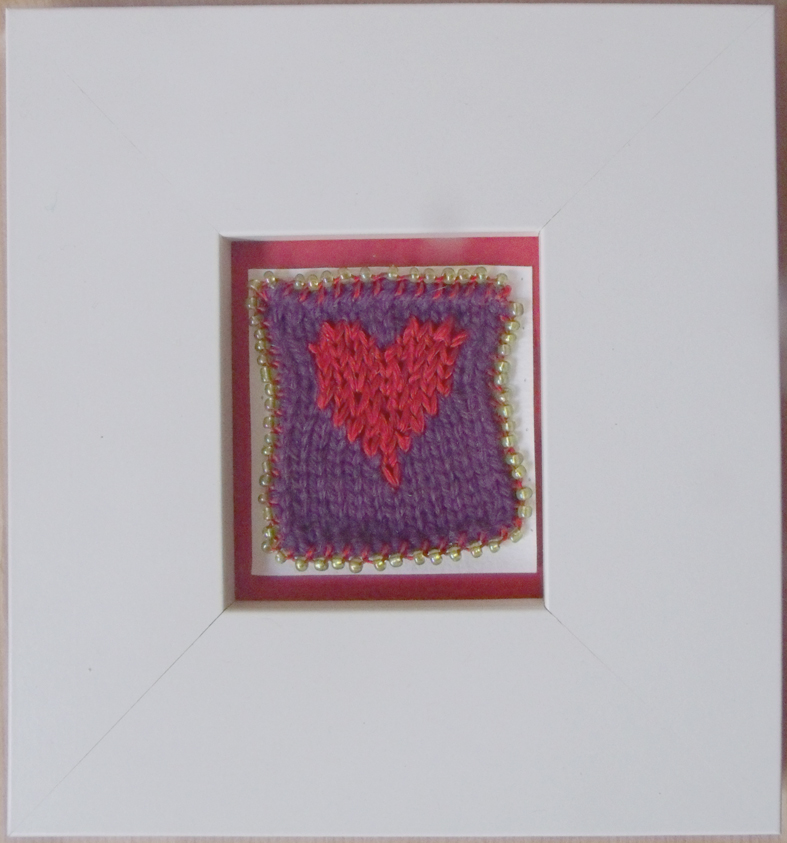
the tiny hearts are somehow the most appealing, they came in all manner of materials and techniques….
hand knitted and beaded heart by Amanda Jones
I must admit that I did take a few liberties with the mounts before framing… the more impact we can give them the better chance to sell them – and this is a selling exhibition
Larger black beaded lace heart by Jane-Marie Mahy
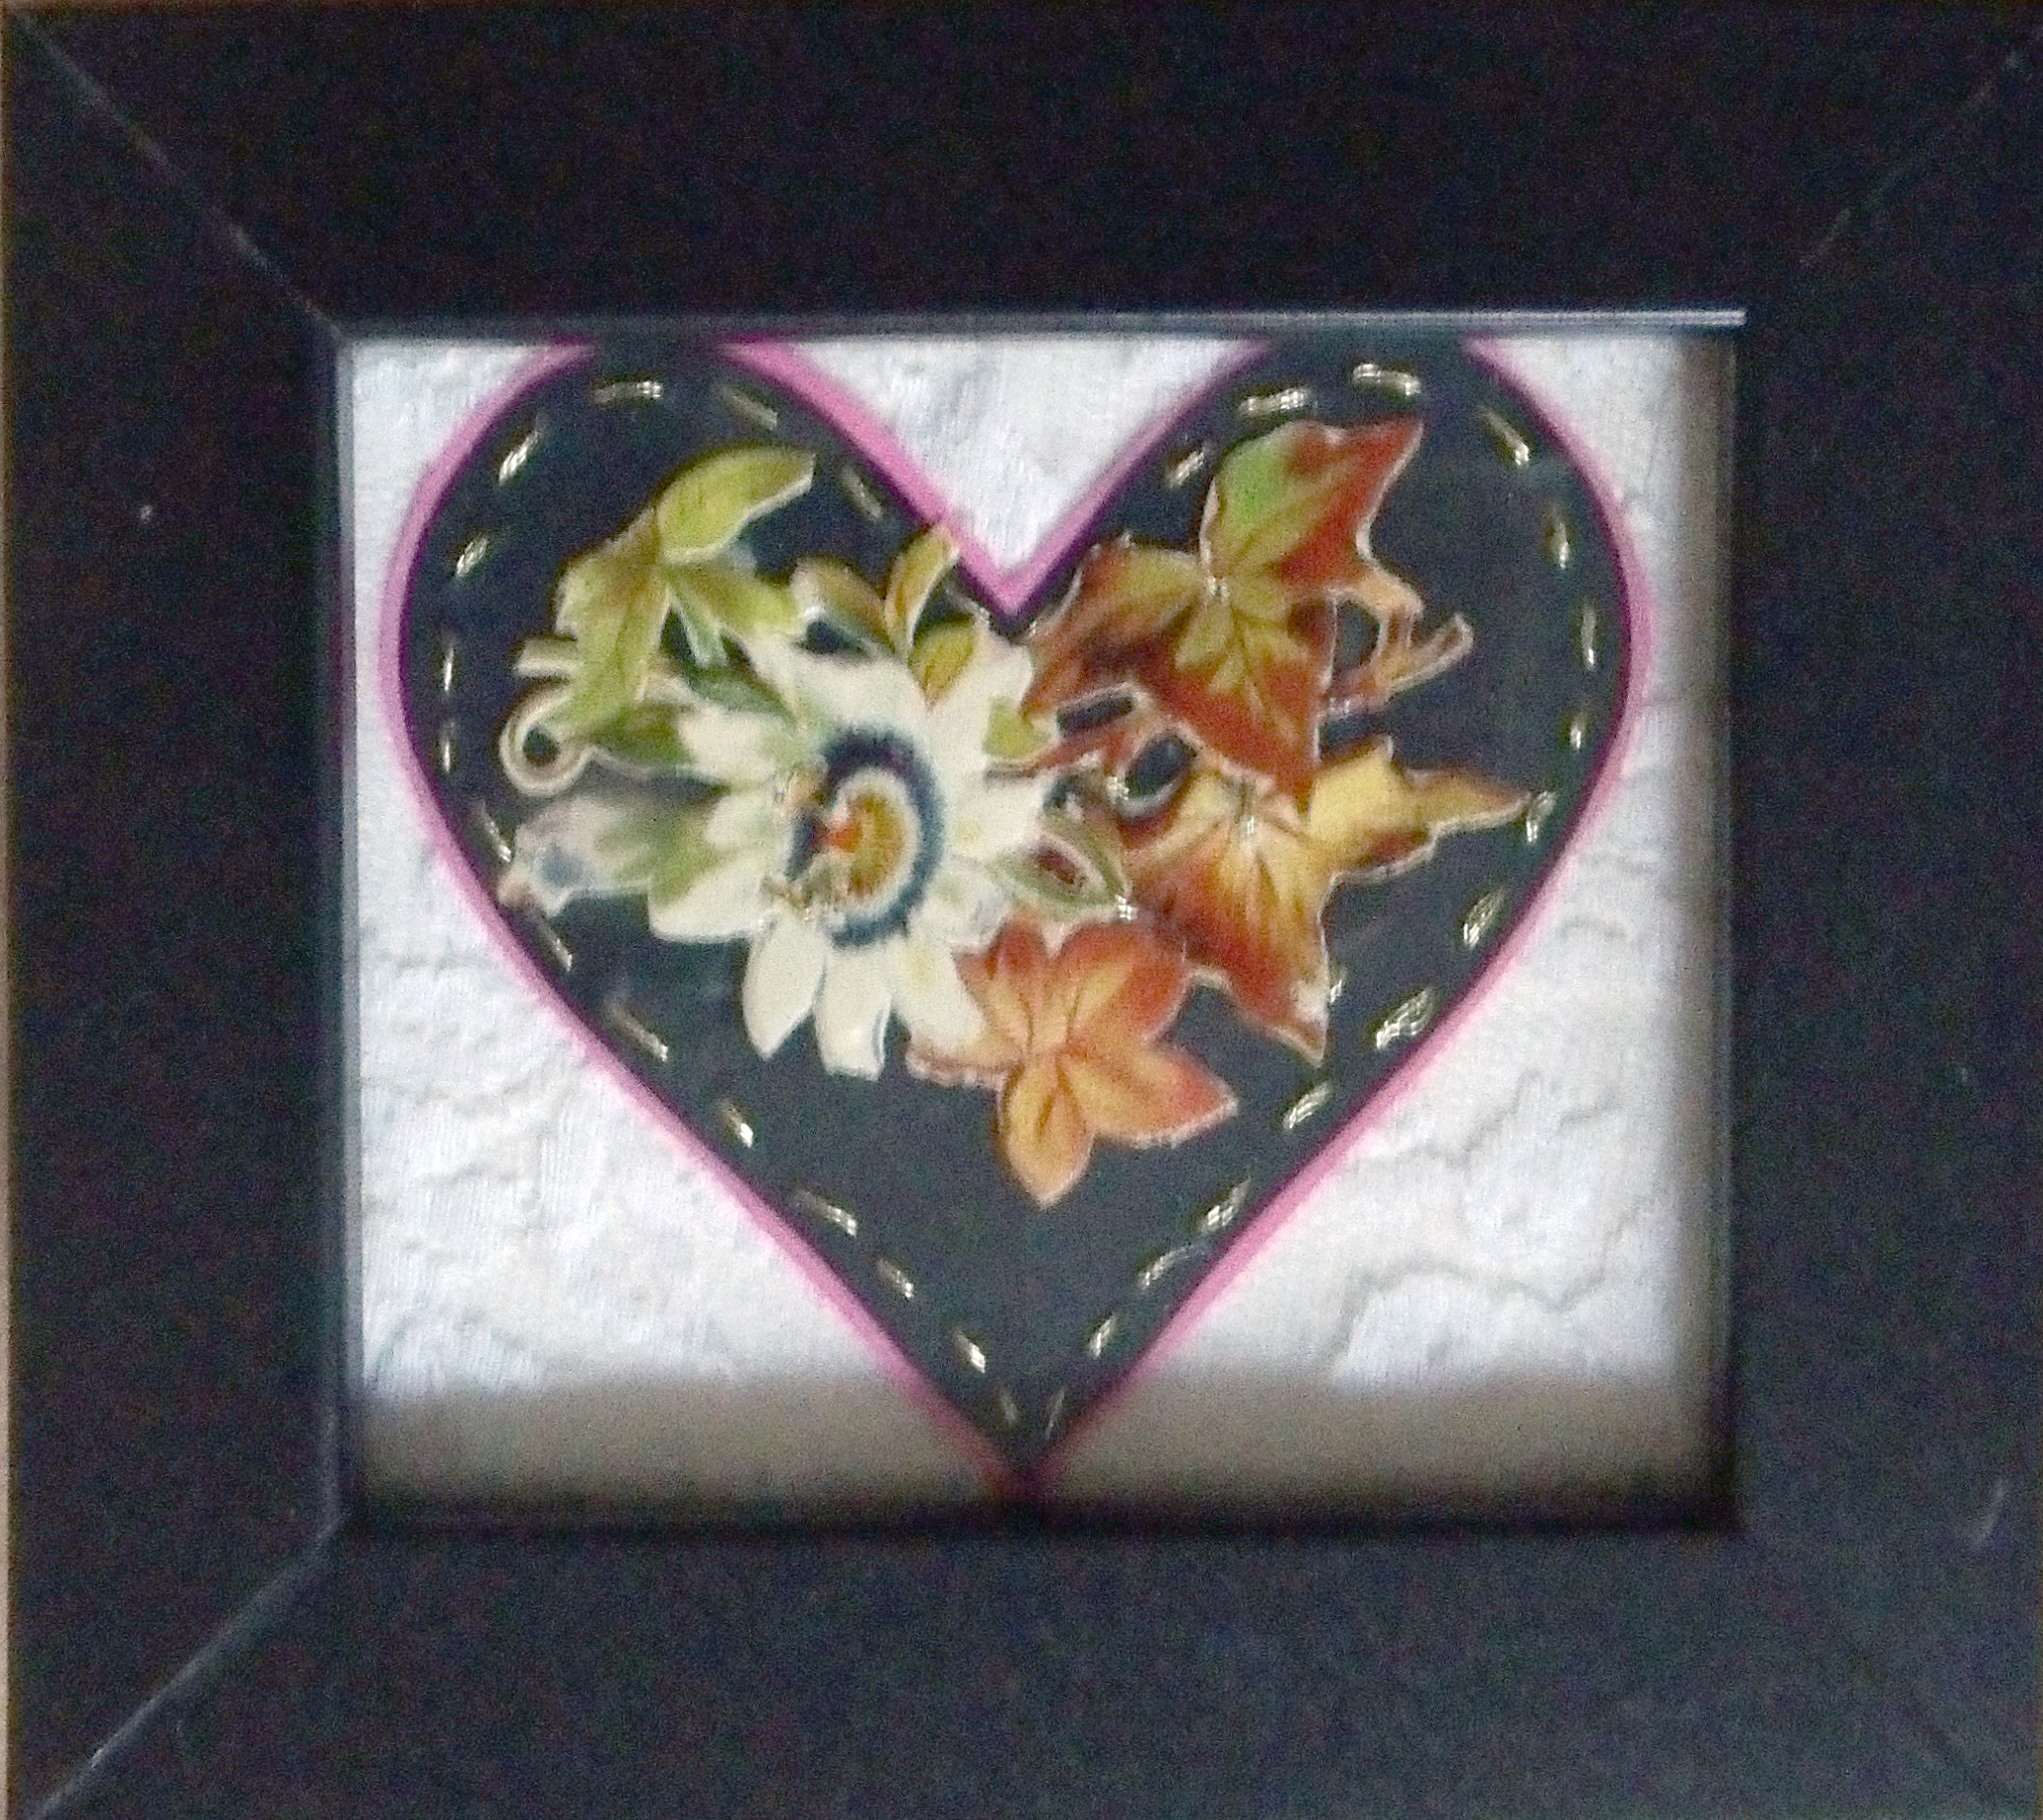
Jane- Marie Mahy Heart Space’s display guru brought hers in already perfectly framed, as did Debbie Bird – her teeny tiny paper printed scraps look very vintage when heavily framed in black
printed scrap paper applique by Debby Bird
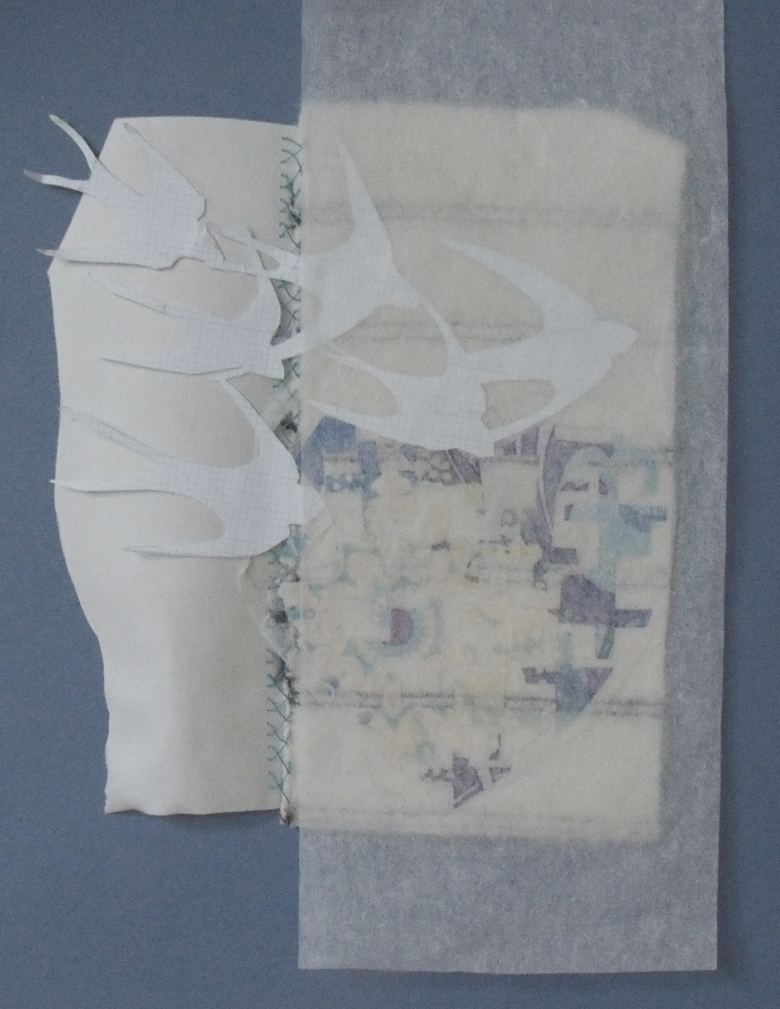
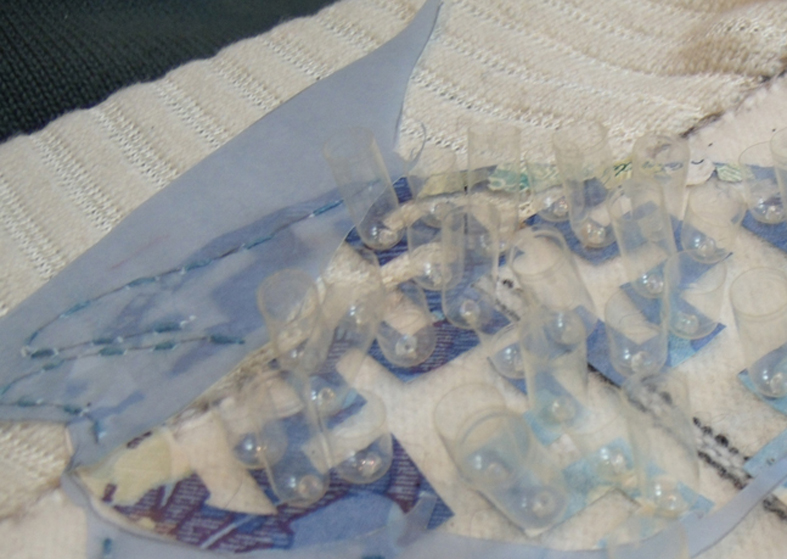
but for something completely different we have knitted copper wires to join paper and fabrics…with a flights of swallows scattered above a nebulous clear pill-case heart
flights of swallows by Steph Wooster
true to her discipline as a designer, Steph sent in 3 variations on her birds and hearts theme,
Steph’s second bird and heart picture
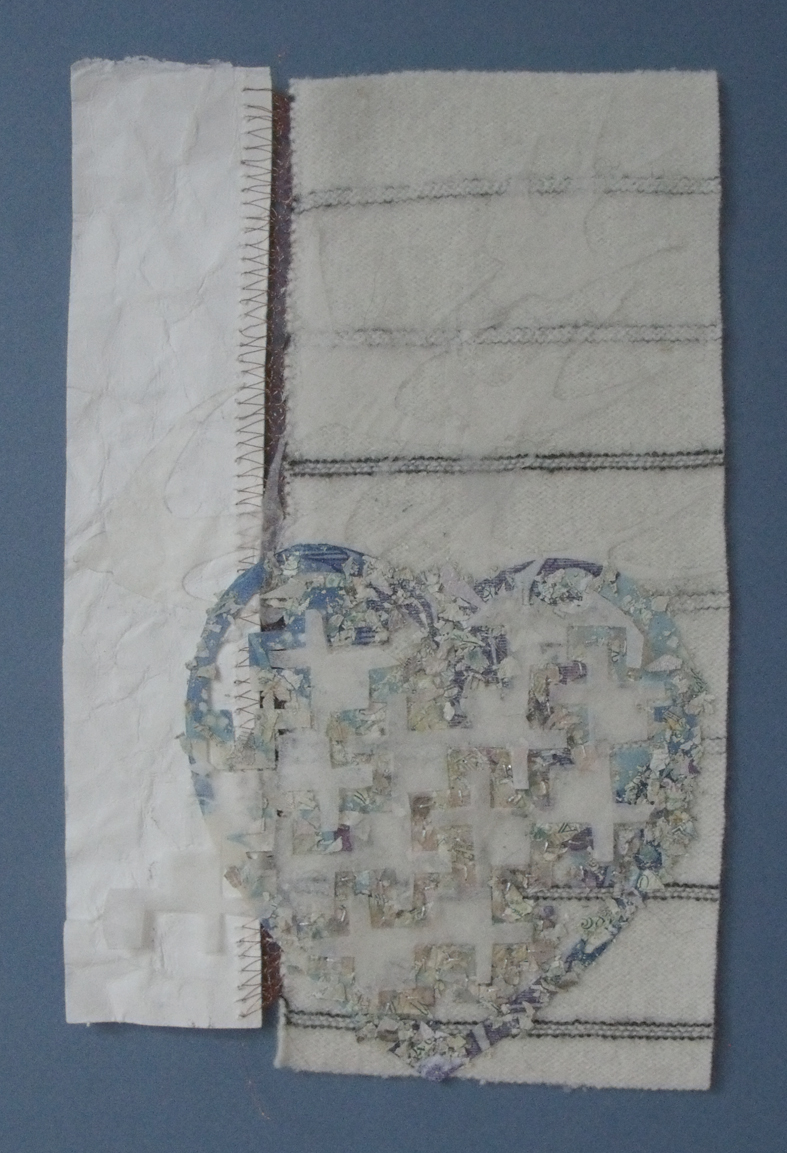
the third piece is an intricately cut applique of shredded bank notes, paper and woolen blanket stitched and knitted with copper wire…now that’s what I call mixed media.
Steph’s totally mixed media heart
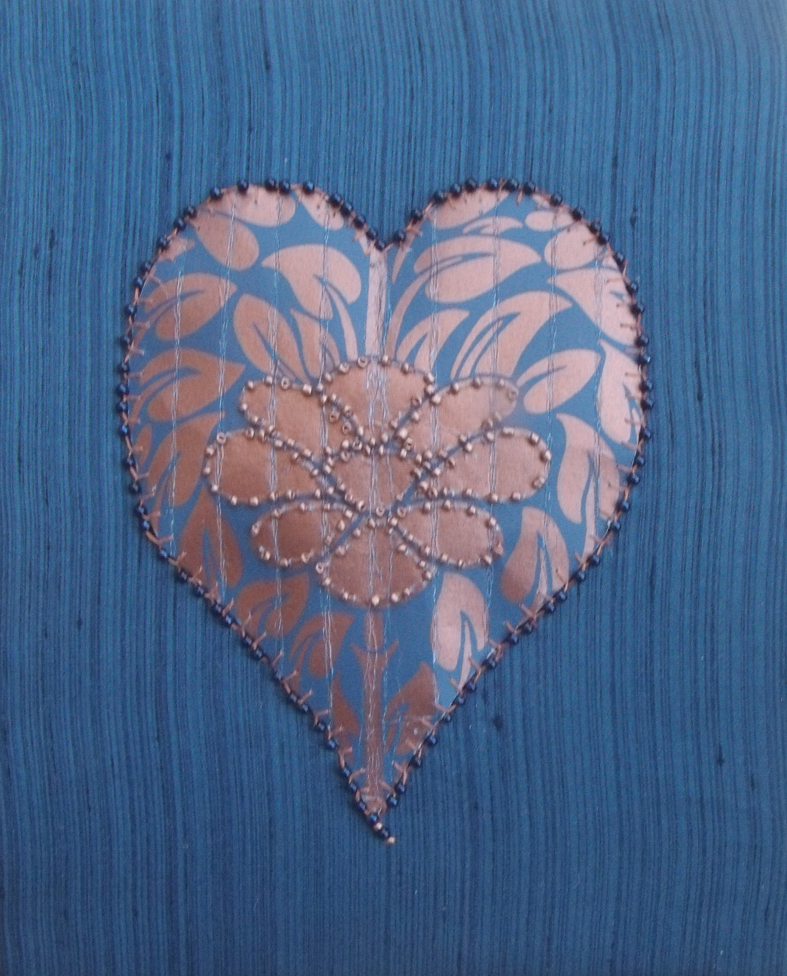
the beaded paper heart by Libby Butler is at last padded and applied to a dark blue fabric ground.
padded beaded paper heart by Libby Butler
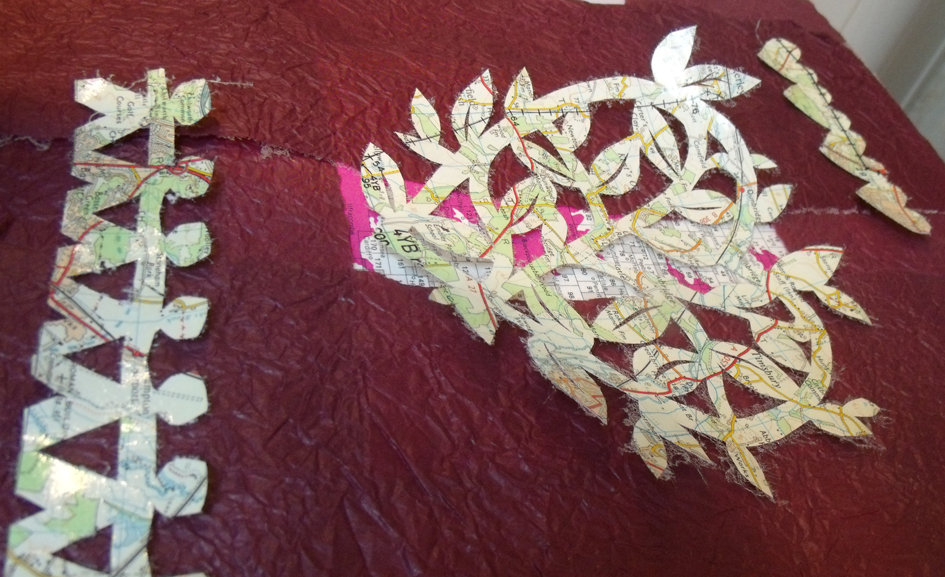
and right at the last minute this evening a lovely folksy map heart came form Kirsten Hill-Nixon…really worth the wait.
crushed paper and cut maps hand stitched applique by Kirsten Hill-Nixon
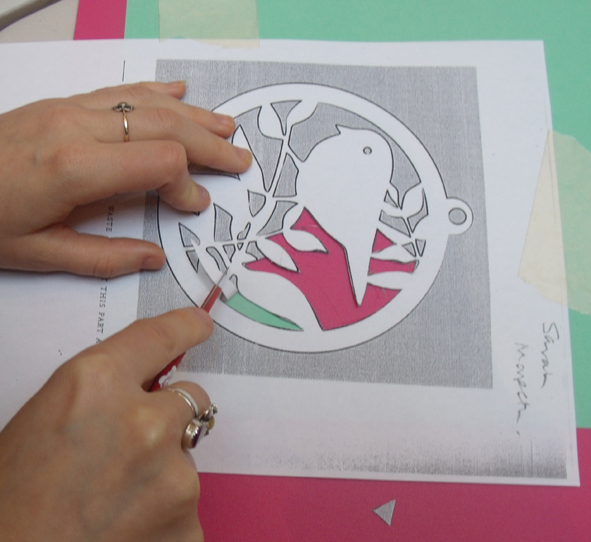
In celebration of Valentin’s day the staff and tutors at Heart Space Studios got together to develop mixed media work based upon Paper Cutting. Debby Bird led the session – a chance for everyone to get to know one another better and swap information, materials and ideas. The project was to make selling exhibition of heart pictures or cards for our gift shop.
bird motif for practicing on
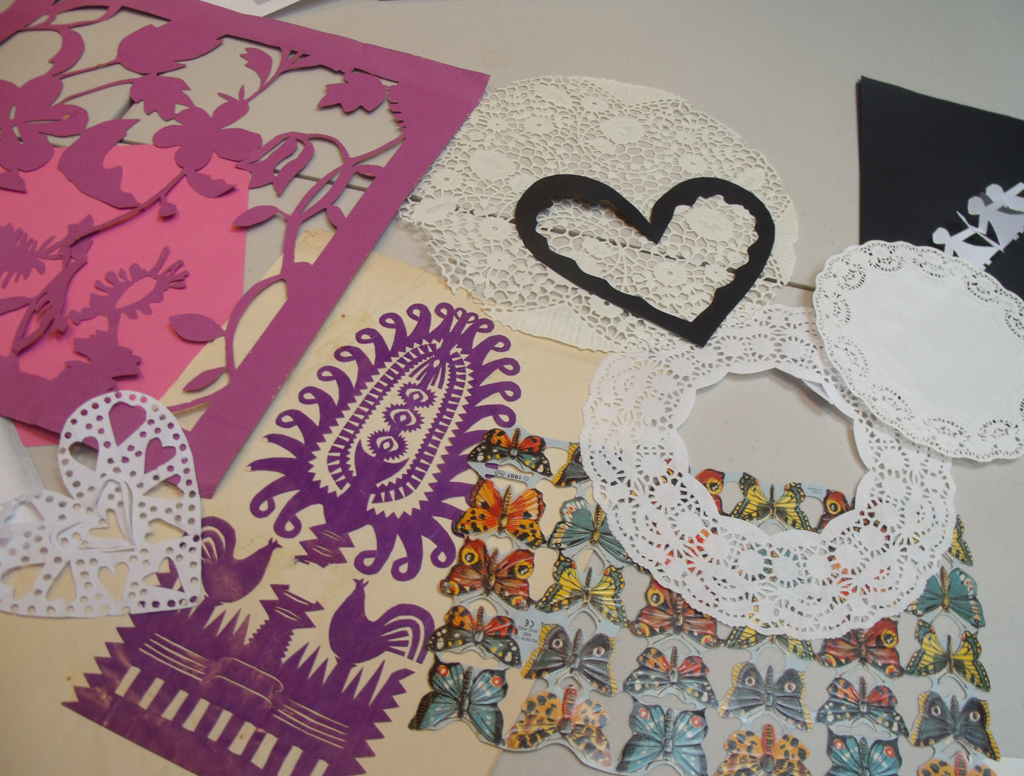
lace bonded onto papers
The tutors had been asked to bring in materials and equipment from their own practice, and so when these came out everyone stared to play with different things..
pre-cut papers, from scalpel to laser techniques
everyone had very different pieces of inspirational materials…
Steph Wooster’s stash of old blankets,woolen yarns, ticking and tracing papers.
the characters of the makers was apparent by the things they chose to bring….
Kirsten Hill-Nixon’s felt tweeds and maps
Each person has developed stashes of very personal things and now they had a good excuse to use them…..
Amanda Jone’s knit and crocheted bead collection
in fact even the boxes and bags the materials had been brought in were inspirational.
Decoupage cardboard box.
Sophie Bristol’s sewing box of exotic ribbons
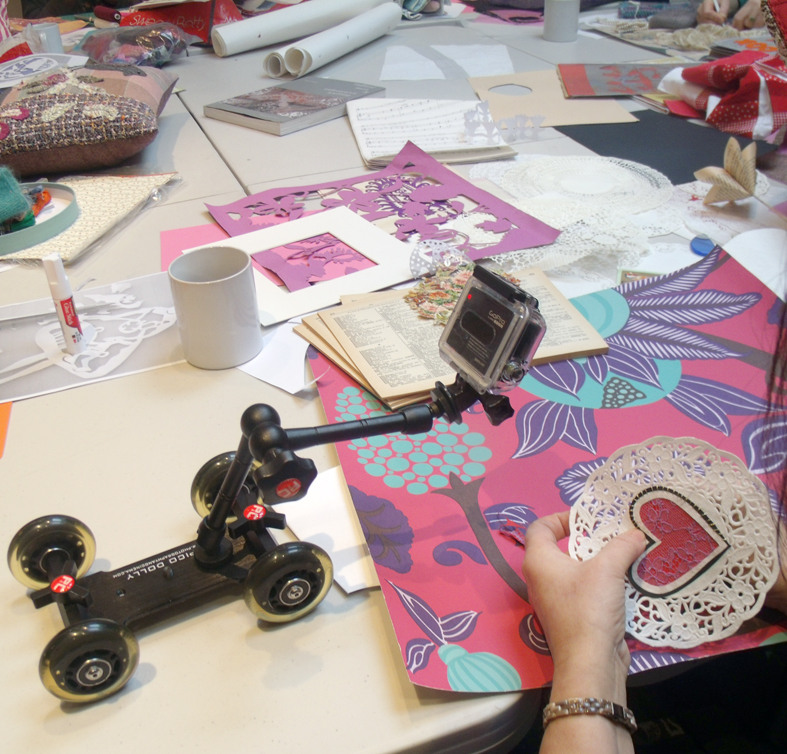
Just as we were getting started we were visited by a camera team to record the workshop for the regional daily news programme on ITV.
Regional news cameraman filming the workshop
Sophie and I were interviewed separately about various aspects of the how Heart Space works, she was fluent and received a round of applause from the group, but I was told by the interviewer that they had lots of ‘sound bites’ from me – I think this is a polite way of saying I didn’t exactly answer the questions.
roving close-up camera checking Debby’s work
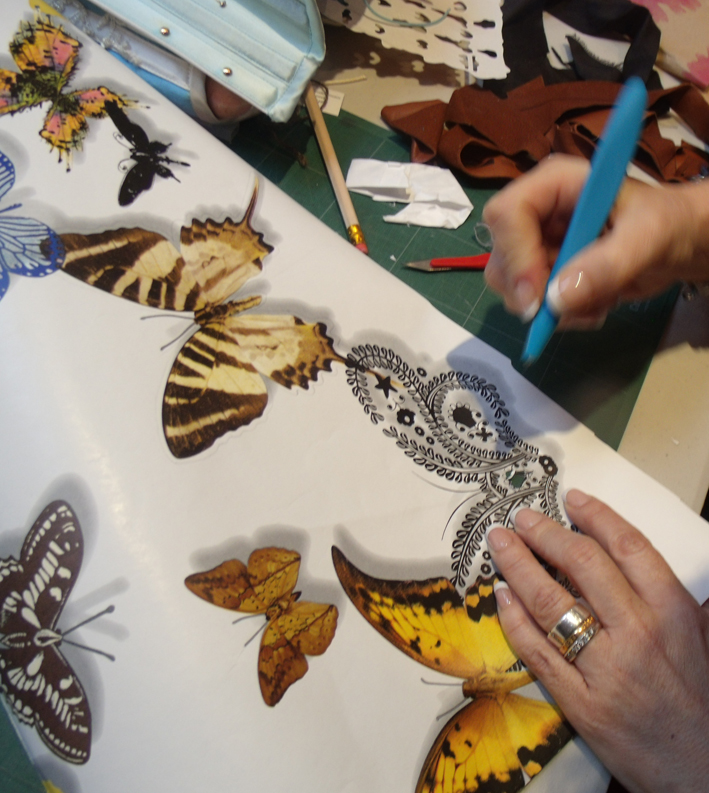
But we were all intrigued by the roving miniature camera used to get close-ups of the techniques were using. Back to work after the excitement and after we had given 5 top tips for beginners – more of which later…..
Lisa Keating starts to cut into a butterfly motif out of a modern photographic wallpaper.
Once the filming was over everyone suddenly seemed to be energised by what they could achieve in the day, they each had to make 1 sample heart picture that would ideally lead to a few other versions when they went home, when framed all this work will make up the Valentine’s exhibition for Heart Space Studios
I was really pleased to see that Libby, who volunteers helping to generate our publicity, used the techniques I had taught at the first session of the Crazy Beading course that run on alternate Saturday mornings – really good to see how simple ideas can be adapted to new materials.
Avril Best’s wallpaper and woollen materials
Avril’s cut paper turquoise heart stitched onto Japanese washi paper
Suddenly hearts started to appear on all the work sites.
Steph Wooster’s seagull legs and heart applique
a close – up reveals a really strange use of mixed media – now who would have thought that medicine capsules could look so glamorous?
medicine capsules or new type of sequin?
a really interesting idea emerged from Kirsten, she placed hearts and figures either side of a large decorative heart all of which she had cut from maps, I liked the idea that she could make links between the hearts and the figures using the map as a route……..
maps to link hearts and people? Kirsten Hill Nixon
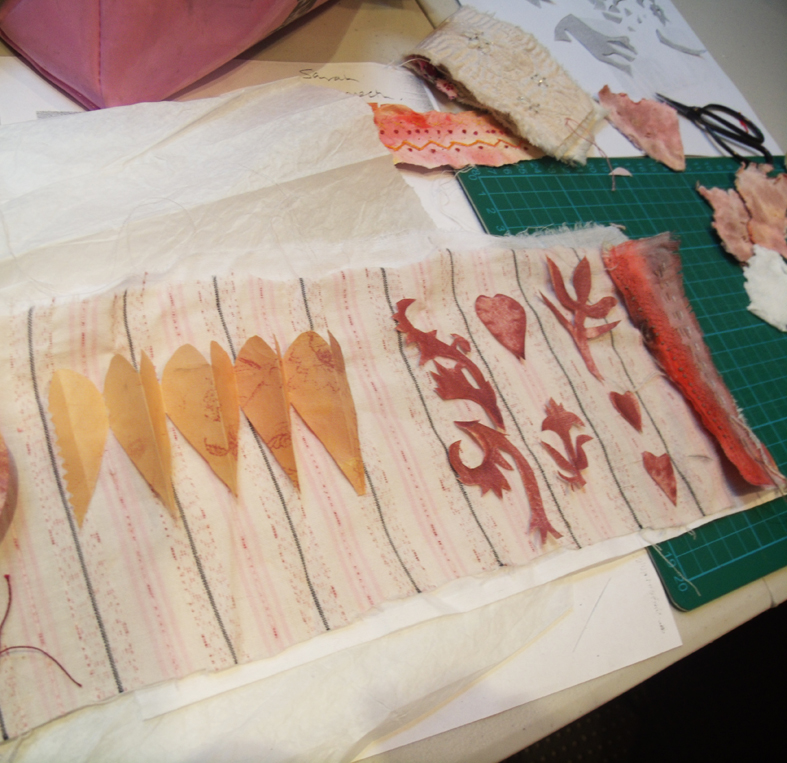
the simplest hearts are often very successful – these stitched, printed, miniature bunting strips are just so desirable.
choices to make for developing finished work
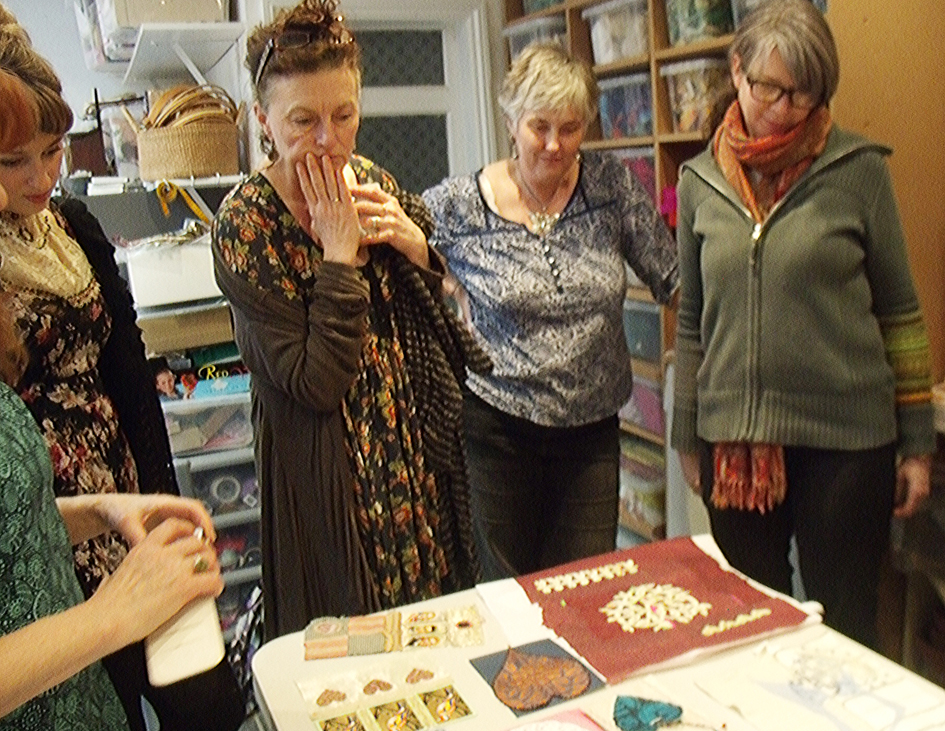
When the sampling session was finished everyone set their work out for viewing by everyone – several people were determined to get more work for next week – which apart from St Valentine’s day celebration is the 3rd anniversary of the opening Heart Space Studios.
some of the group assessing the finished samples – where to go next – doesn’t look too hopeful does it?
Well they all promised to send or bring work for exhibition by the end of the week – so the next post will show the results….Oh and the 5 top tips for staring to make with textiles,
1 when threading a needle 1) cut the needle end of the thread at a 45% angle
2 when threading a needle 2) lick both the end of the thread and the eye of the needle
3 use circular needles to knit garments – you only ever have to make the basic knit stitch ( not alternate with rows of purl) and there are fewer seams to stitch up.
4 use the best possible materials you can afford – always.
5 press as you go when making any garments (this is also my own favourite rule)
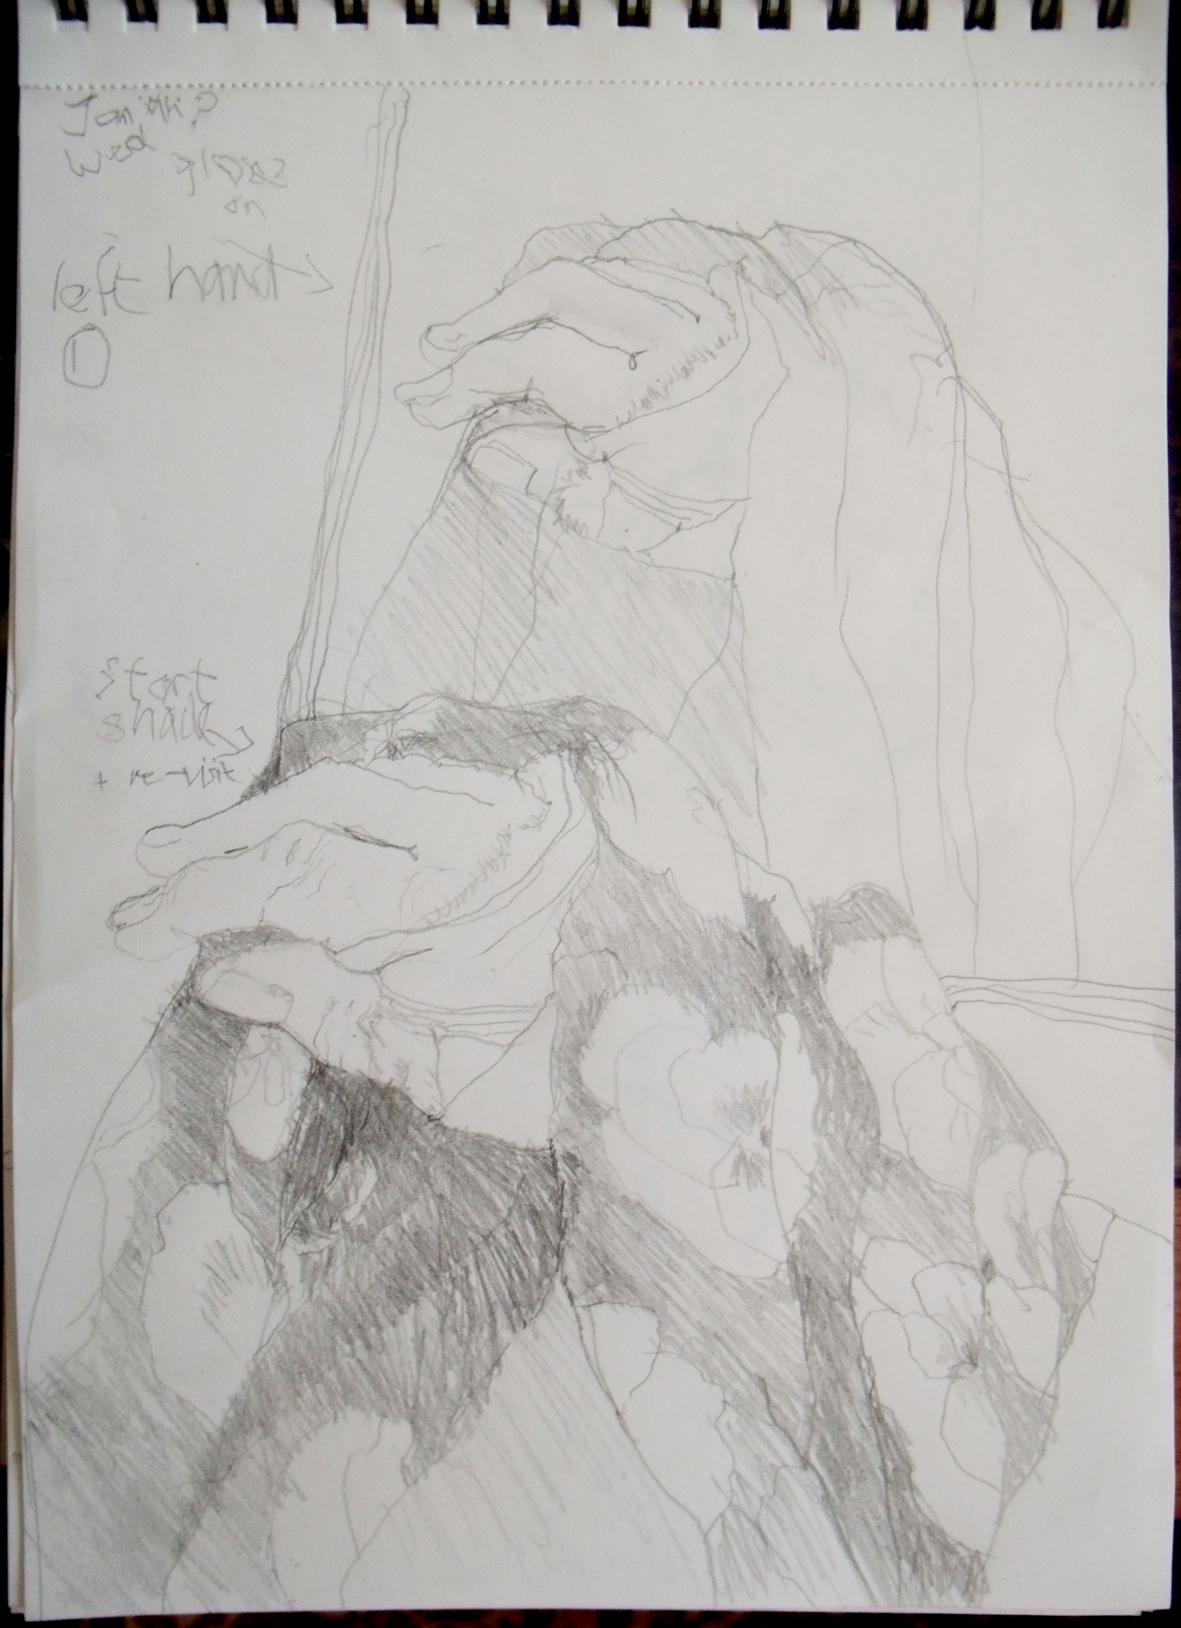
this is the first drawing with my left hand, compare quality of drawing to writing!
Practice What You Preach, is a good motto to live by: so soon after I broke my right wrist, I decided to start drawing with my left hand – as left or weaker hand drawing is one the basic exercises that I often employ when teaching drawing to a group of nervous beginners as it levels out the drawing ability of everyone.
As you can see I decided to make linear observational drawings of the very thing that was ruling my life, the cast, sling and inert fingers of my right hand, also it would stay in position until I was finished. The first drawing took more than an hour to complete – a really long time for an A4 page of black and white line work. I used a propelling pencil, the first thing to hand, so the range of marks was restricted – but this turned out to be a useful restriction.
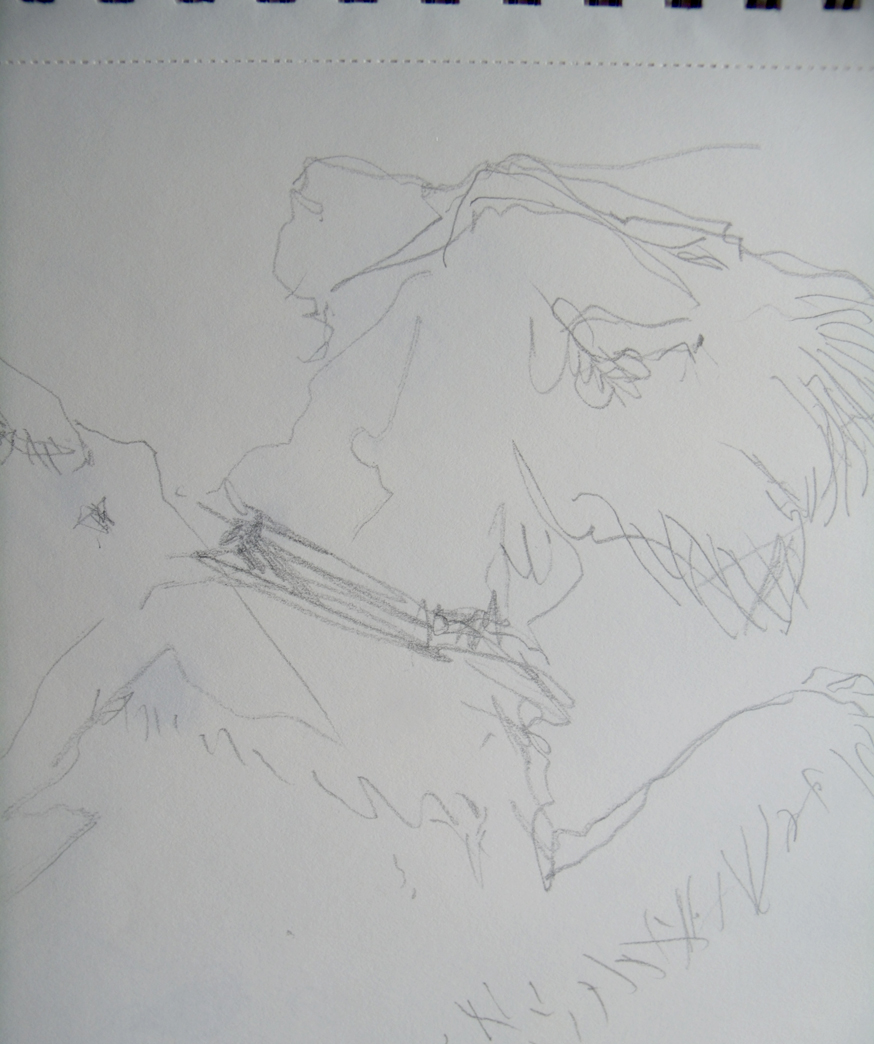
This first drawing has all the hallmarks of a weak drawing having been revised – I decided to make a continual line drawing, ie not taking my hands off the page as I seemed to have lost the innate sense of proportion enjoyed with my right hand, I couldn’t trust my judgement of angles and distances between the elements of the hand and arm. When I had finished the first lower drawing it looked really weak and wobbly and lost on the page, so I filled in the background of the scarf – this took a lot of time, my left hand has no strength and the shading looked scribbled instead of nuanced to describe the density of the fabric and the contours of the folds. Then I drew a line drawing of the first drawing, I was surprised that these clumsy drawings do sill look like my work…drawing is like handwriting.
my second sling line drawing
The second drawing appears simpler because I had more confidence after drawing for an hour and I used an eraser as a drawing tool – a very blunt instrument in my left hand. Still keeping the continuous line as a discipline this study suffers from overdrawing – a thing I absolutely hate in anyone’s drawing . The second firmer line that covers the first attempt is invariably clumsy and the drawing looks stilted ( see fingers); better a light wispy drawing than a second deader line. But even the writing is a bit more controlled. I also began to change the way of describing the fabrics, the dotted lines are my version of the crepe bandage.
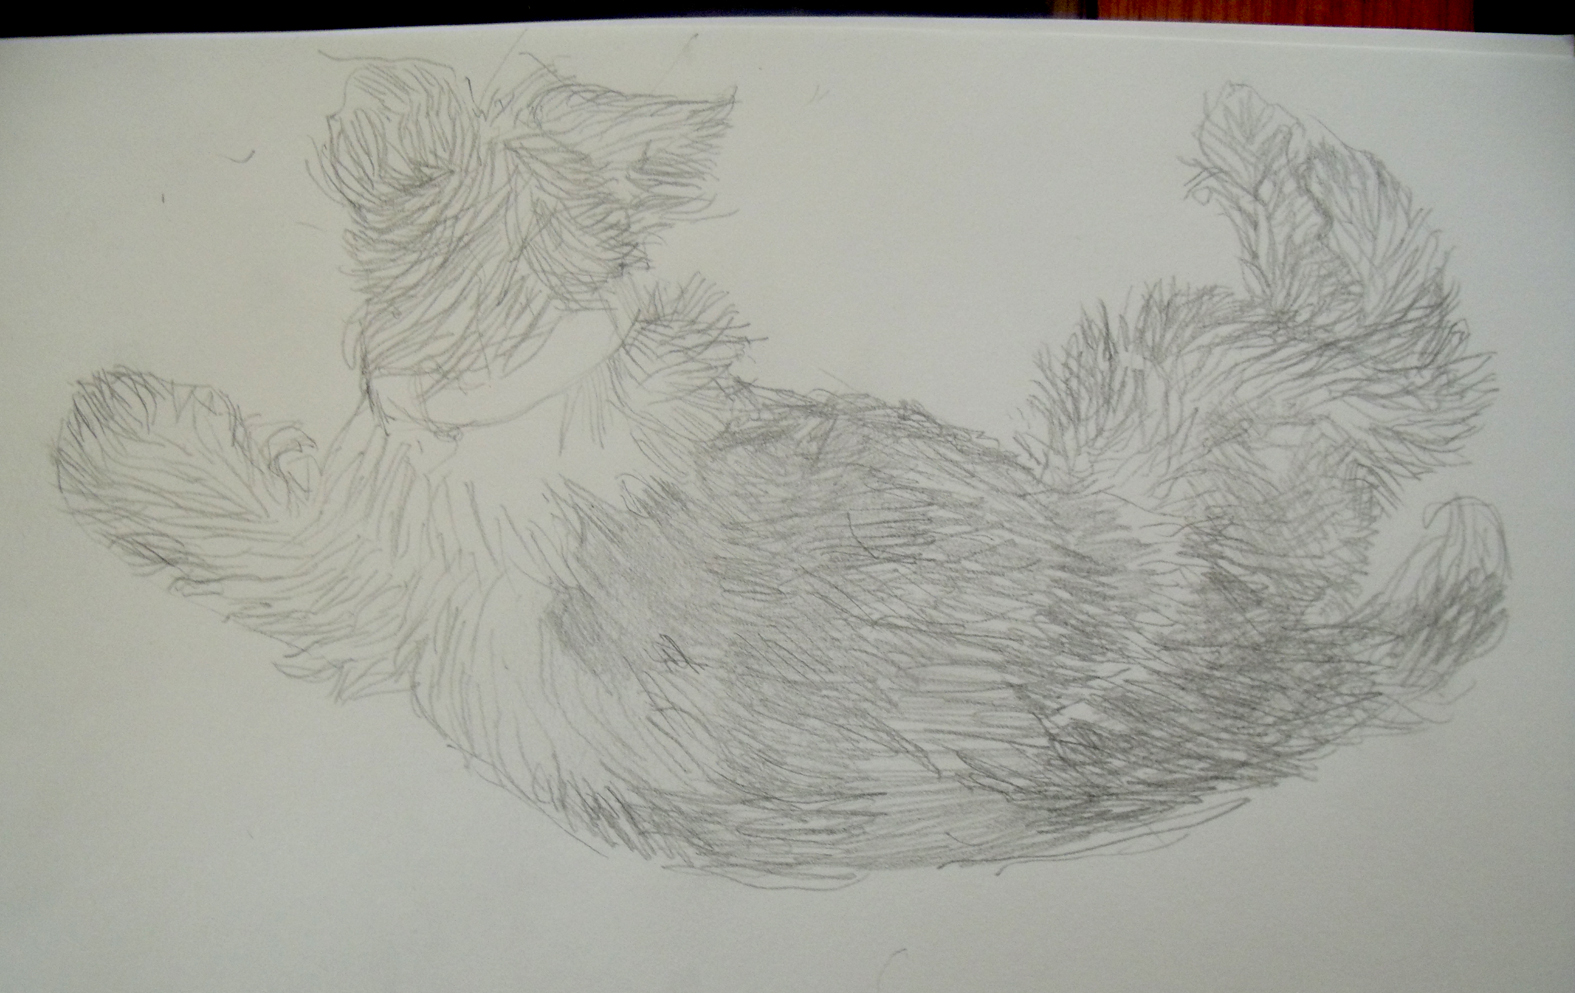
my third drawing – sleeping terriers.
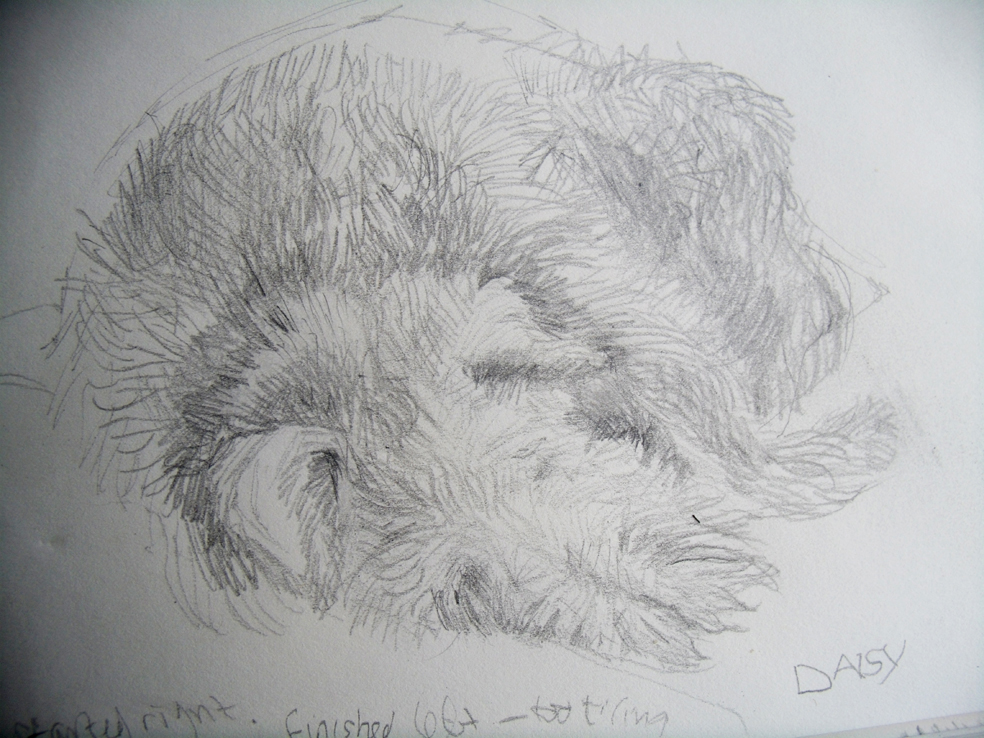
Deciding on making descriptive pencil marks rather than the continuous line drawings, the next day I embarked on drawing my dogs. I was confined to the sitting room to keep my arm still and propped above my heart to try to alleviate the bruising, and they had taken to settling down in front of the fire where they snoozed all day, although they often just got up and walked away mid drawing. The full length sleeping dog drawing above looks exactly like my dog Daisy, but not at all like my usual drawings.
I have written frustrated comments around the page – “line easier than shading” but I was finding that shading with a softer drawing pencil meant that I had very little control of the angle of the point – it was like drawing while looking in a mirror. The lines are fuzzy with the pencil lead wearing down quickly as I worked, I was unable to manipulate a sharpener – let alone a knife. The surface is getting rubbed with my left arm as I work and looks really lifeless.When using pencils I rely on the range of different tones available from even an HB pencil – but they rely on pressure to make them.
Daisy lying down
Reverting to the propelling pencil I attempted to make a more linear study of the dog’s fur; the way it grows is one the most interesting things to draw. I tried to add shading to the line without resorting to smudging and rubbing to get darker marks, but my left hand does not have the strength of my right to press down for a blacker thicker line. Again this drawing seems clumsy because of how I chose to make my marks I simply can’t use many of the refined marks available with my right hand. I reverted to my line drawings – they made me feel better!
my reversion to line drawing for Boysie’s head.
Now this really started me thinking about how I relate to my drawings, they aren’t just a useful tool to free the ideas in my head – although this is their most useful service to me; they actually explain the world I see to me and to everyone else who cares to look – they are the most direct and personal extension of me. I have spent a long time (way over the 10,000 hours required to make a craft skill second nature to the maker) developing a fluent style of drawing, almost shorthand, that enables me to both understand what I see and/or imagine. Look at my drawings and you will see who else I am – beyond the person in front of you – and they are how I want to be seen. Heck!
more recent left hand drawing of Boysie’s sleeping head
2 weeks on and I have started drawing the dogs again. My right hand, still in the cast, has some movement but it is too painful to use often. The drawing of the sleeping terrier above is a fair portrait of Boysie and also my line has become more descriptive. I am learning to make smaller studies, not expect too much – must remember to deal with details when teaching beginners.
Daisy asleep on Sofa next to me. using both left and right hands
Although these drawings are still very clumsy to my mind and painfully slow to make – they are of my scraggy terriers and friends can recognise them individually. The sleeping dogs above were both started with my right hand, I mapped out the whole area to be drawn first using my right hand, you can just see the outline. Now whether my belief in the outline made me feel more secure to use my left hand to work the details or whether using my left hand for the last month has given me more control I do not know – but these are drawings that do not look like they are made with the weaker hand.
But just so that you can see the model that I worked from, enabling you to judge if I am back to my fluent line – here is Daisy still asleep long after I had finished the study above.
my dog daisy – still asleep
There are all sorts of things written about drawing with your weaker hand – you are more in touch with your inner being, using the opposite side of the brain unearths alternative visions etc. All I have to say is that it is very slow, very demoralising to begin with and completely exhausting – just like learning to draw with your strong hand!
To celebrate my return to posting my blogs I am showing a small selection of decorative arm slings – yes dear readers I have a broken wrist, my right wrist; so there has been no writing, stitching and perhaps worst of all no drawing/doodling/scribbling for more than a month now. But I determined to make something visually interesting for HER WORK from the whole unhappy event as soon as I could manage to use my Mac beyond typing/tapping with my left hand
my old favourite pansy scarf
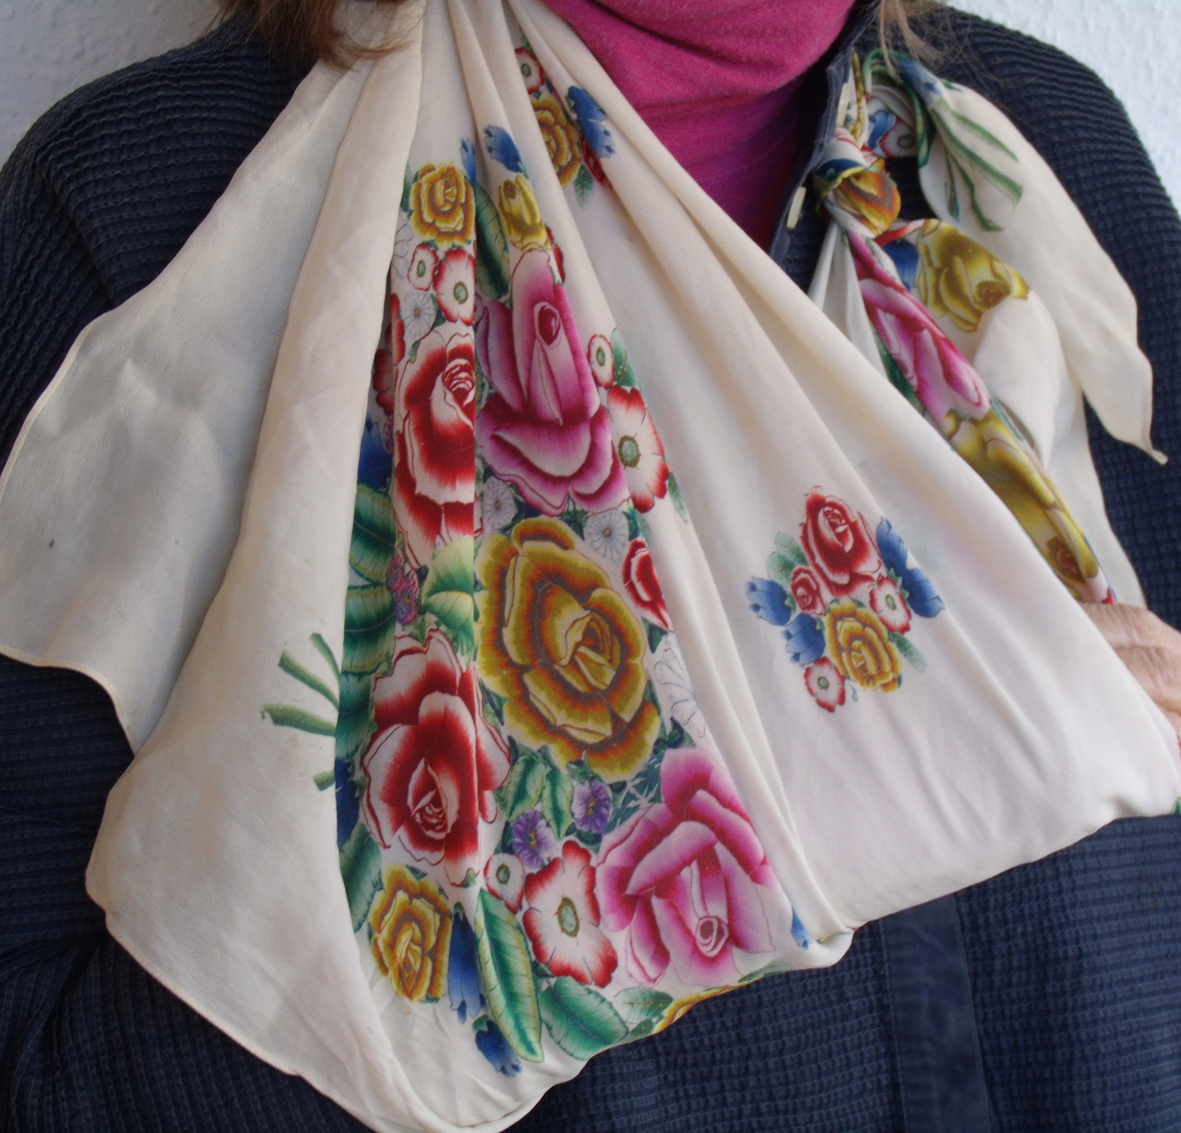
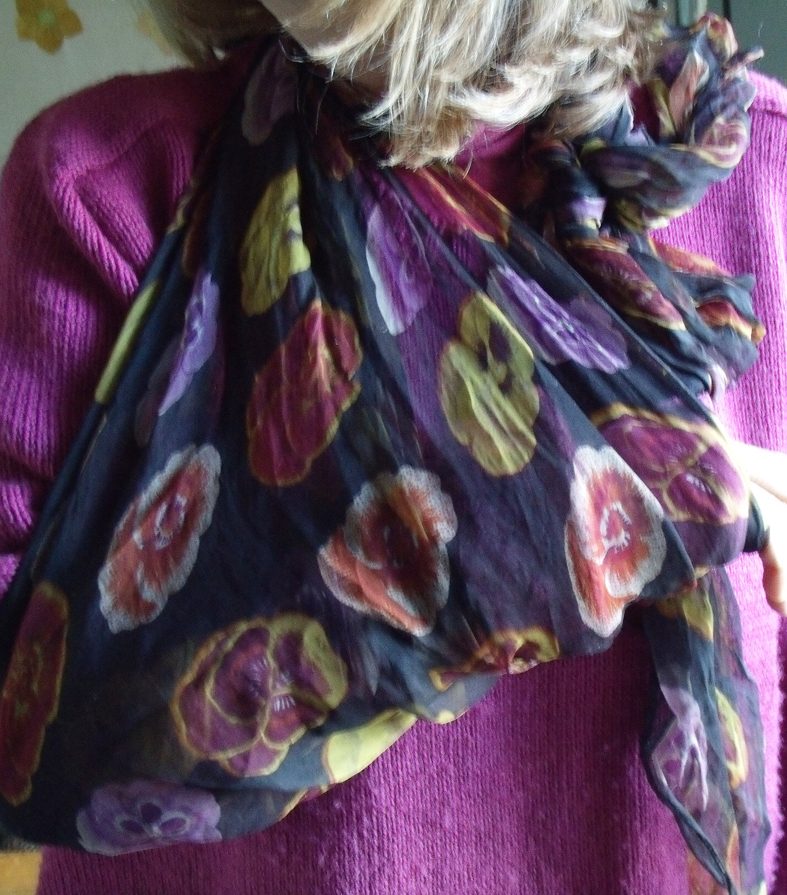
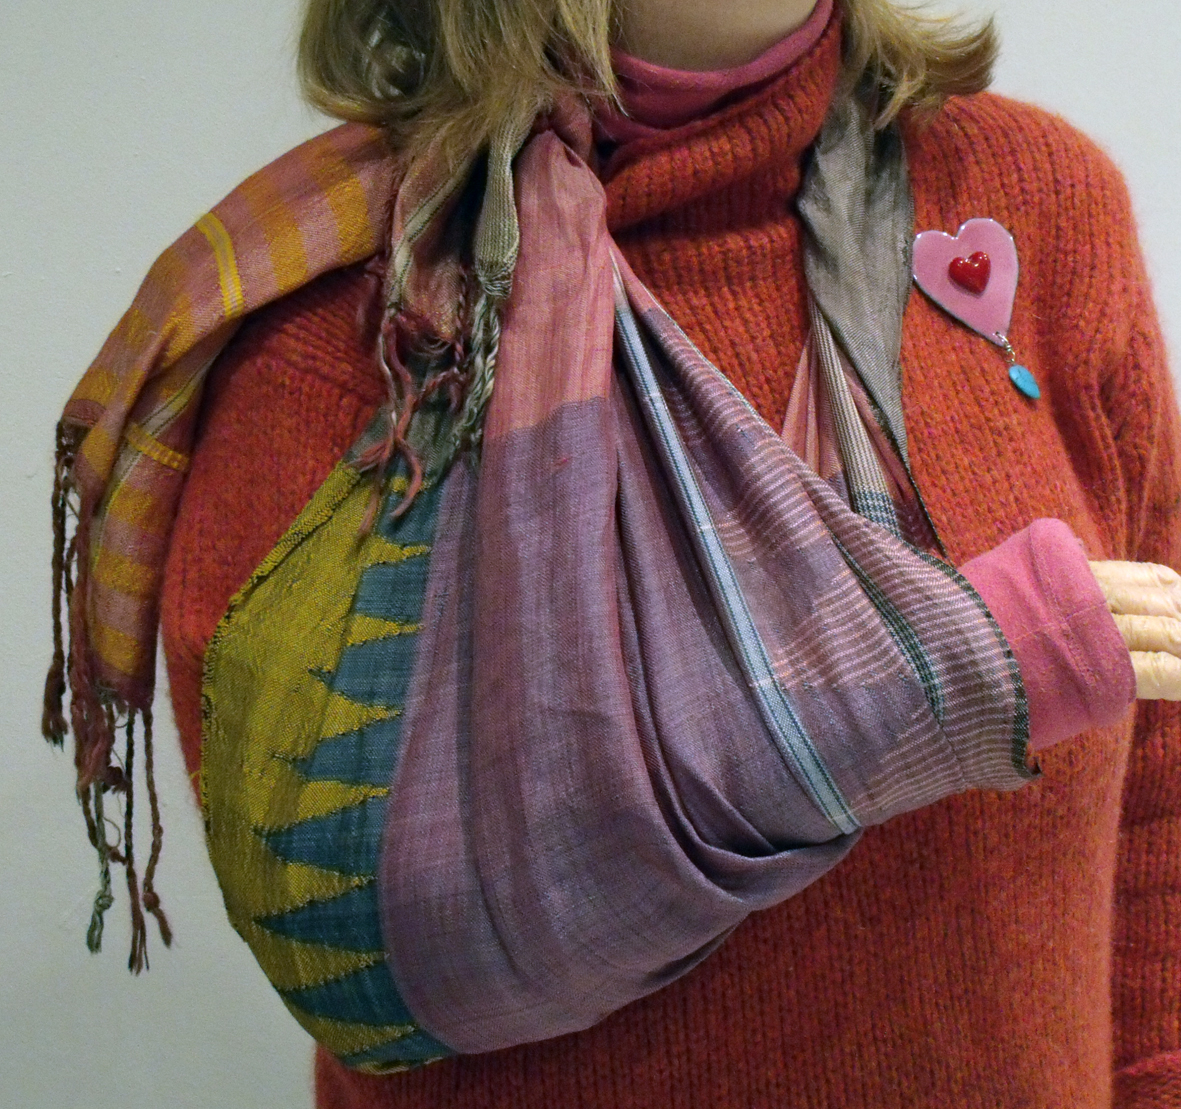
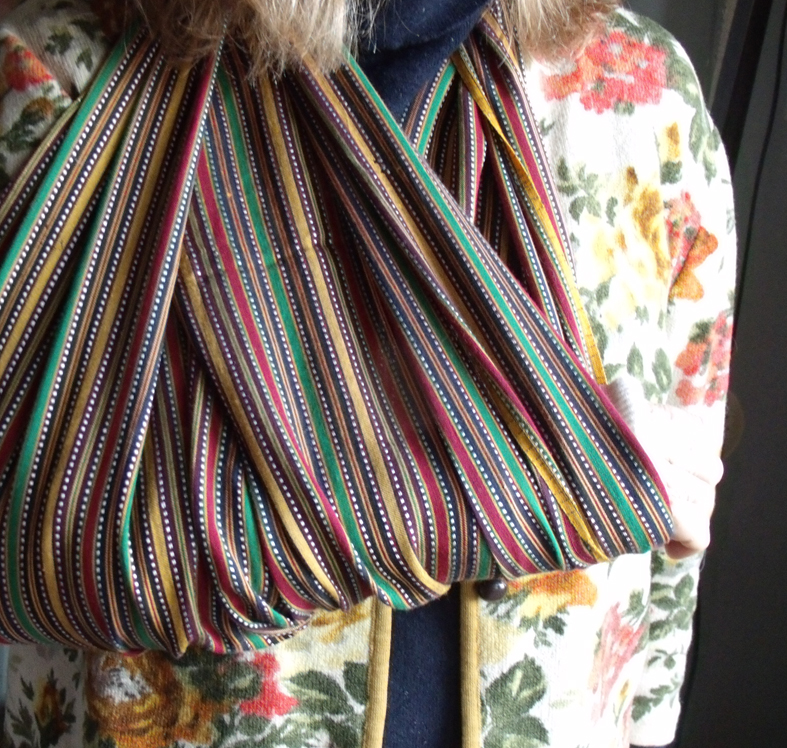
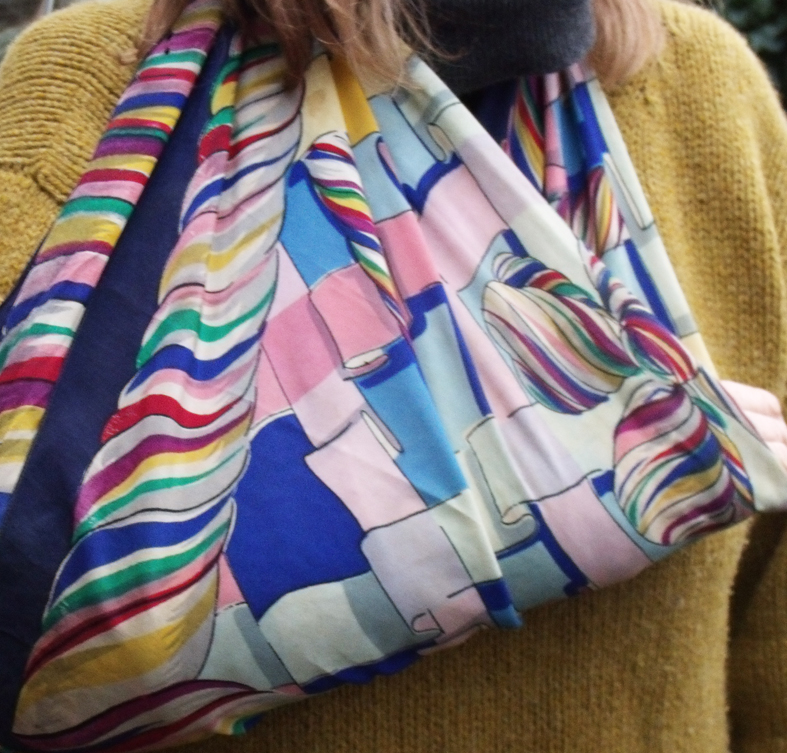
Sensing a dressing -up opportunity I got rid of the NHS white cotton sling as soon as I could – like the next day, and instructed my husband, Steve, to take pictures each morning of mt slings. The commercial alternatives for the longer term support were in dreary colours – as if you wanted to hide the injured limb – I want everyone to see clearly my affliction and Keep Clear! So I determined to find alternatives from my stash of both vintage and modern scarves, let’s face it any excuse to dress up !
my shot silk woven scarf with my co-ordinated enamel heart brooch and new pink cast
in fact I welcomed the opportunity to wear these old scarves, using them as slings affords much more are pattern to seen, tied around the neck only a small area is glimpsed if you have long hair.
a really wide and draped stole sling
the really wide slings hide my new bright pink cast when it doesn’t tone with the clothes.
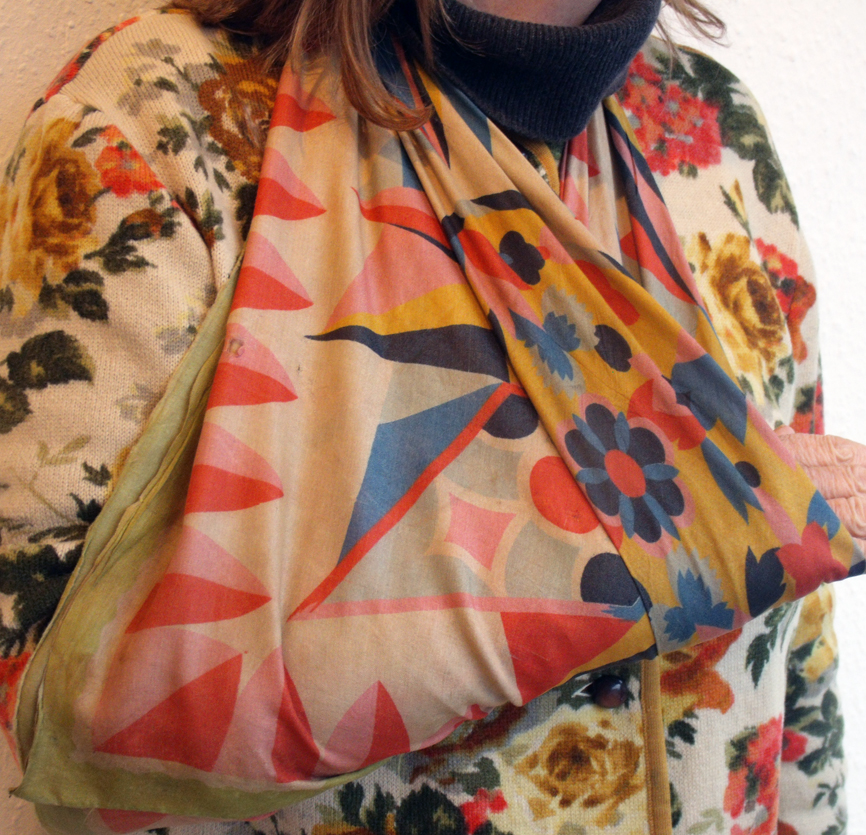
vintage 1950’s printed scarf sling
I am especially pleased to be able to wear the original art deco head square, very dynamic and such unusual colours and pattern clash.
my art deco scarf looks so modern worn like this
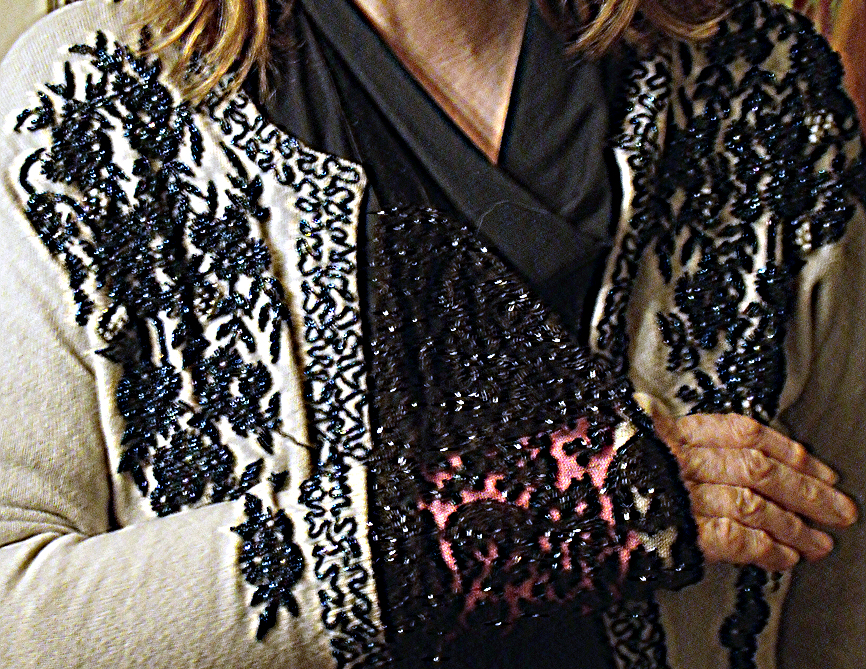
and last but not least my actual ‘bling sling’ which is a length of vintage black beaded net, that I had previously stitched to a length of velvet ribbon in order to wear as a belt. I went to a party, the only party of the season that I had managed to attend; and I apologise for this bleary image but this was taken after the party had finished and we were both a bit tired and emotional,
the original bling sling with my vintage beaded cardigan
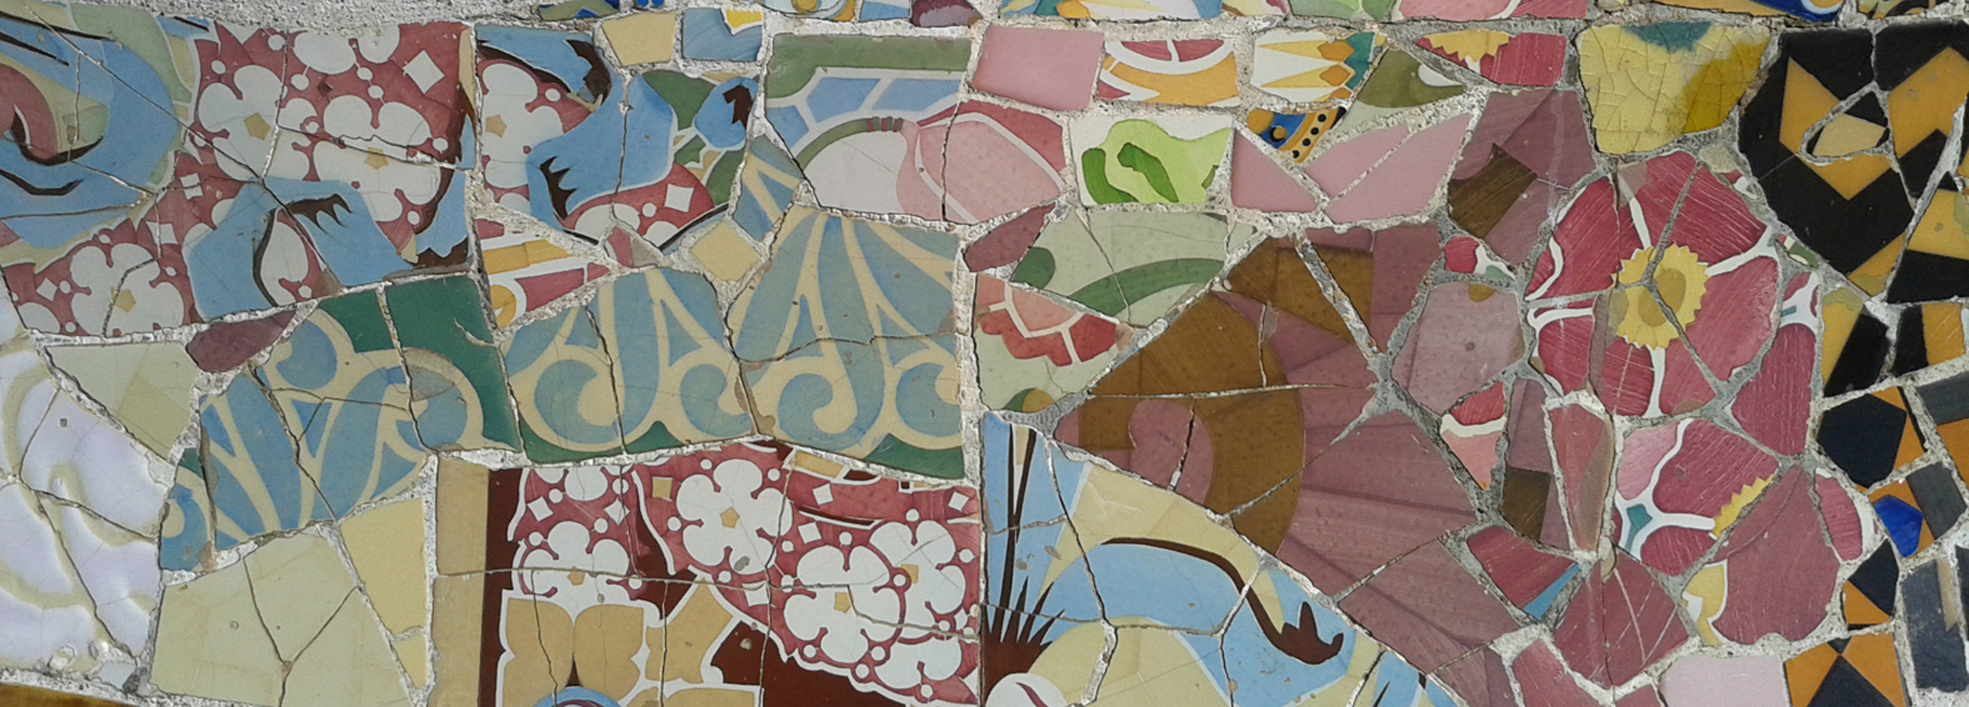
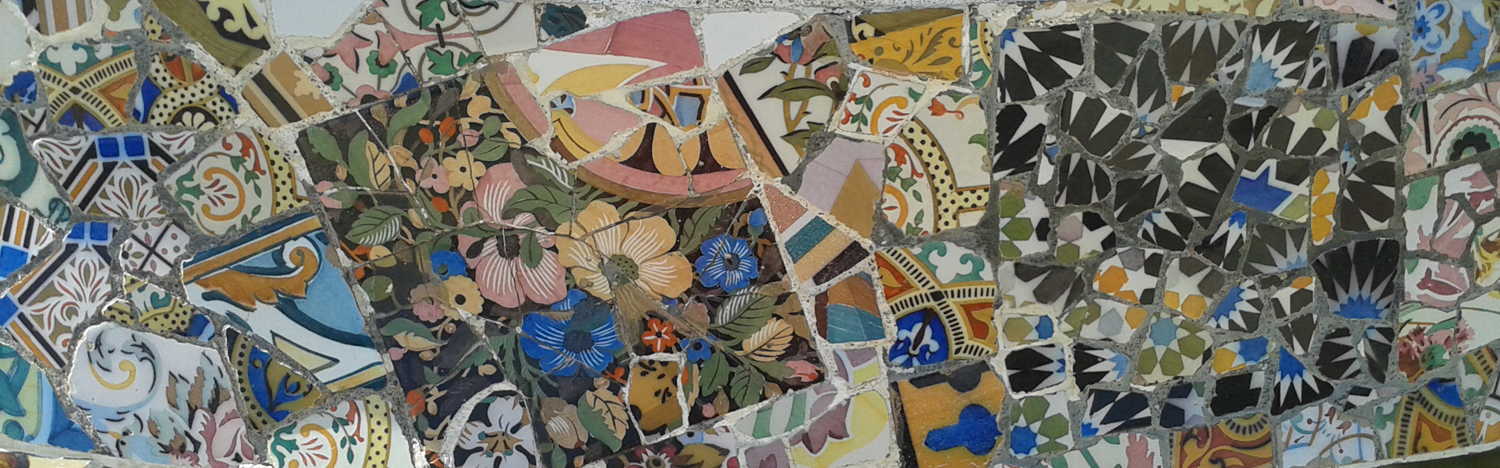
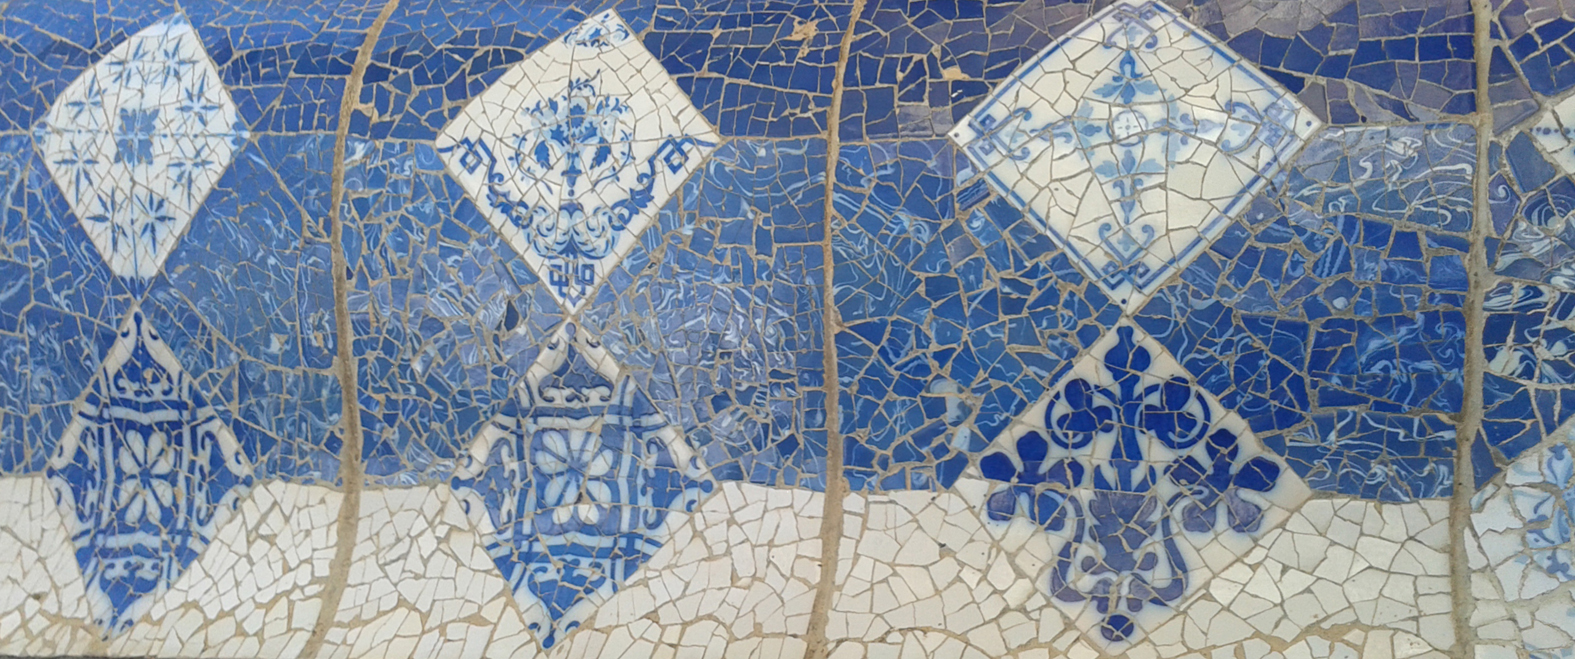
crazy mosaic by Antoni Gaudi at Parc Guell, Barcelona
Crazy Barcelona – crazy patchworks everywhere, but not in fabric – in ceramic, stone and marble. OK then, crazy mosaics, but whatever you call them there is no better place to appreciate them than at Parc Geull, designed and built by Antoni Gaudi in the first 14 years of the 19th century. I have seen images of these mosaics before but never appreciated the size and the sheer exuberance of the patterns.
undulating crazy seating on the terrace
view of the entrance to Parc Geull from the crazy mosaic seating
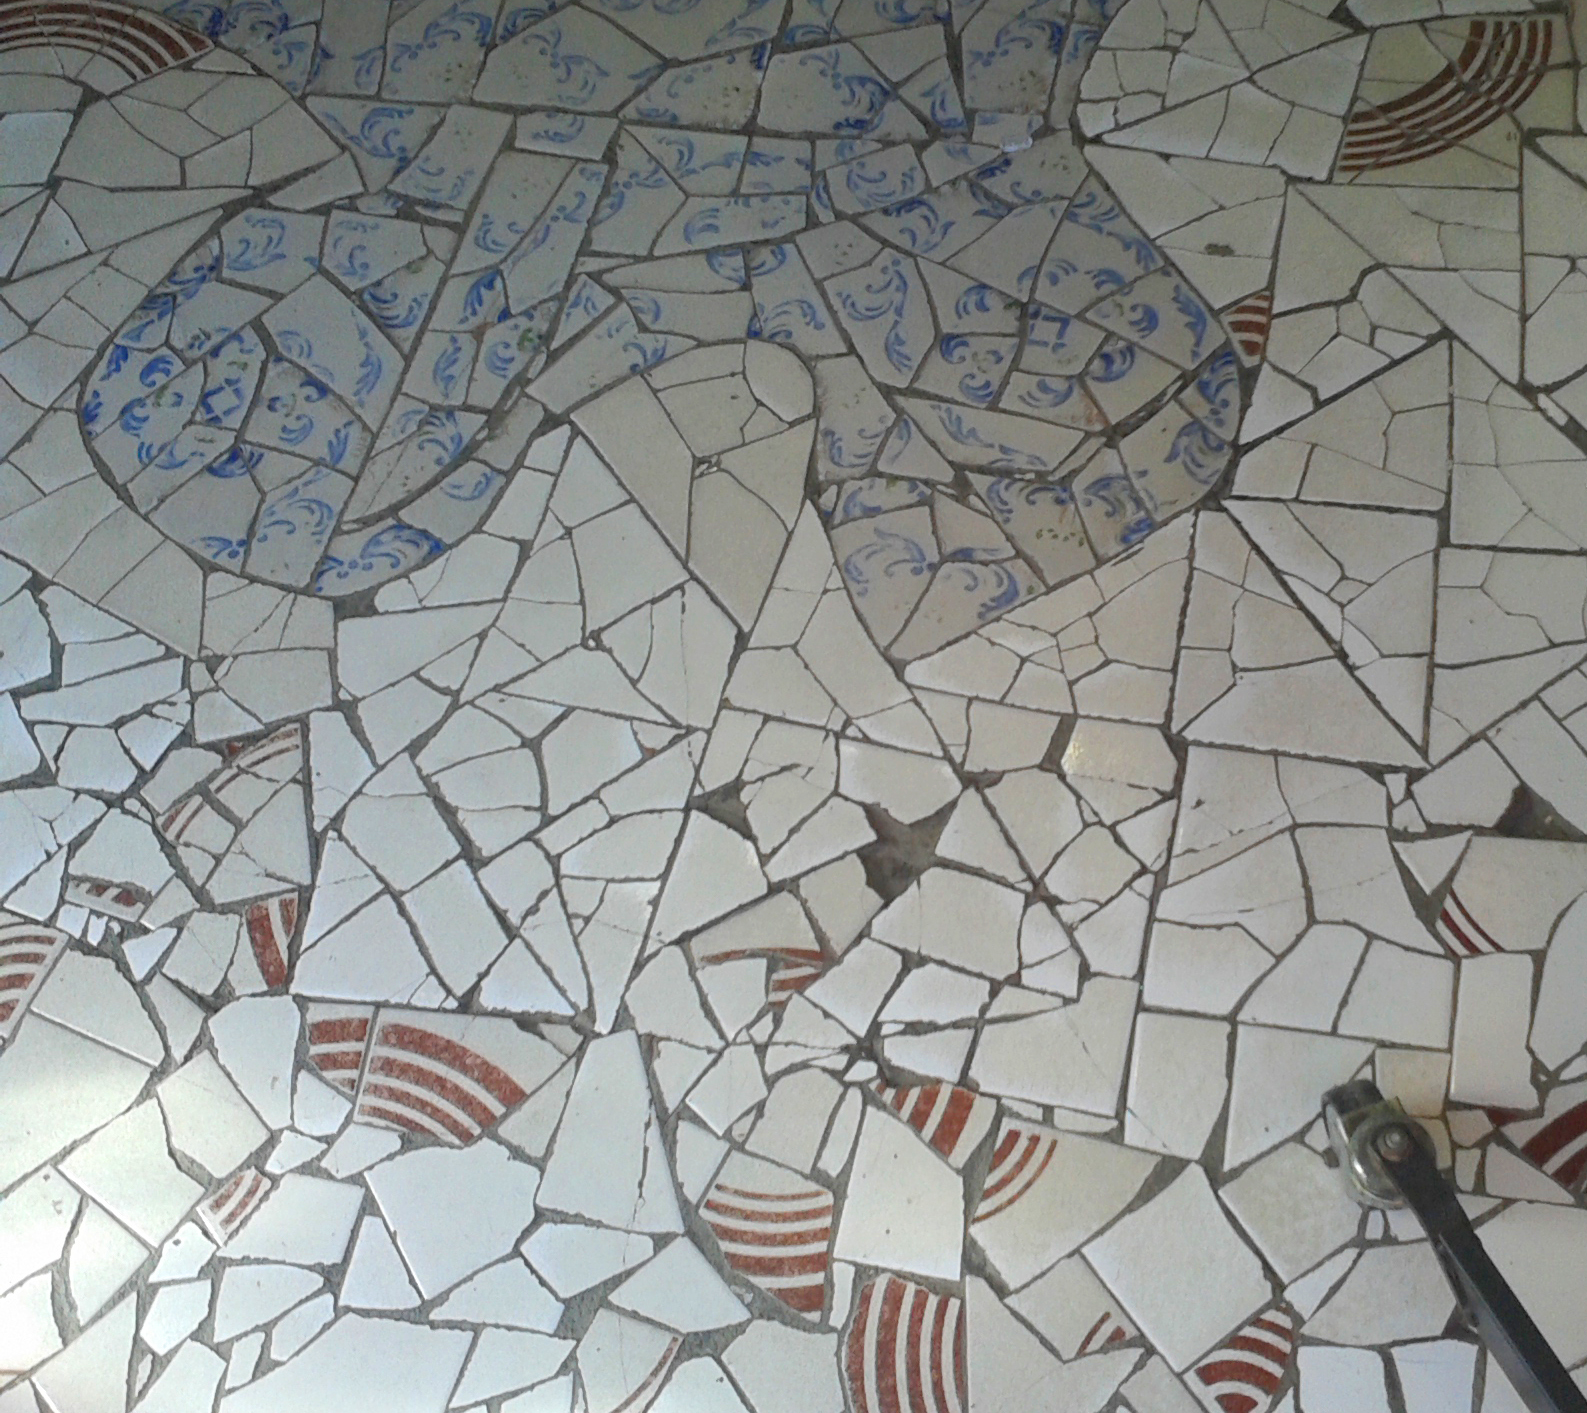
I was delighted to see broken plates, tiles, and rounded roof ridge tiles put together in a myriad of ways, some where just pretty with sections with large flowers that had been broken but kept intact when cemented together and then surrounded by all shades of one background colour. Here is inspiration indeed, but immediately I thought of the Crazy Embroidery classes that I teach at Heart Space Studios, lots of new ideas to create crazy samplers.
broken flowered ceramic tiles and plates with narrow borders
I started to see how the sustained patterning of the whole site didn’t just merge into one long visual porridge; there were sections of patterns with plain areas between them and the way that the patterns started to drift into plain areas was really brilliantly handled…
chintz patterns give way to a plain white area.
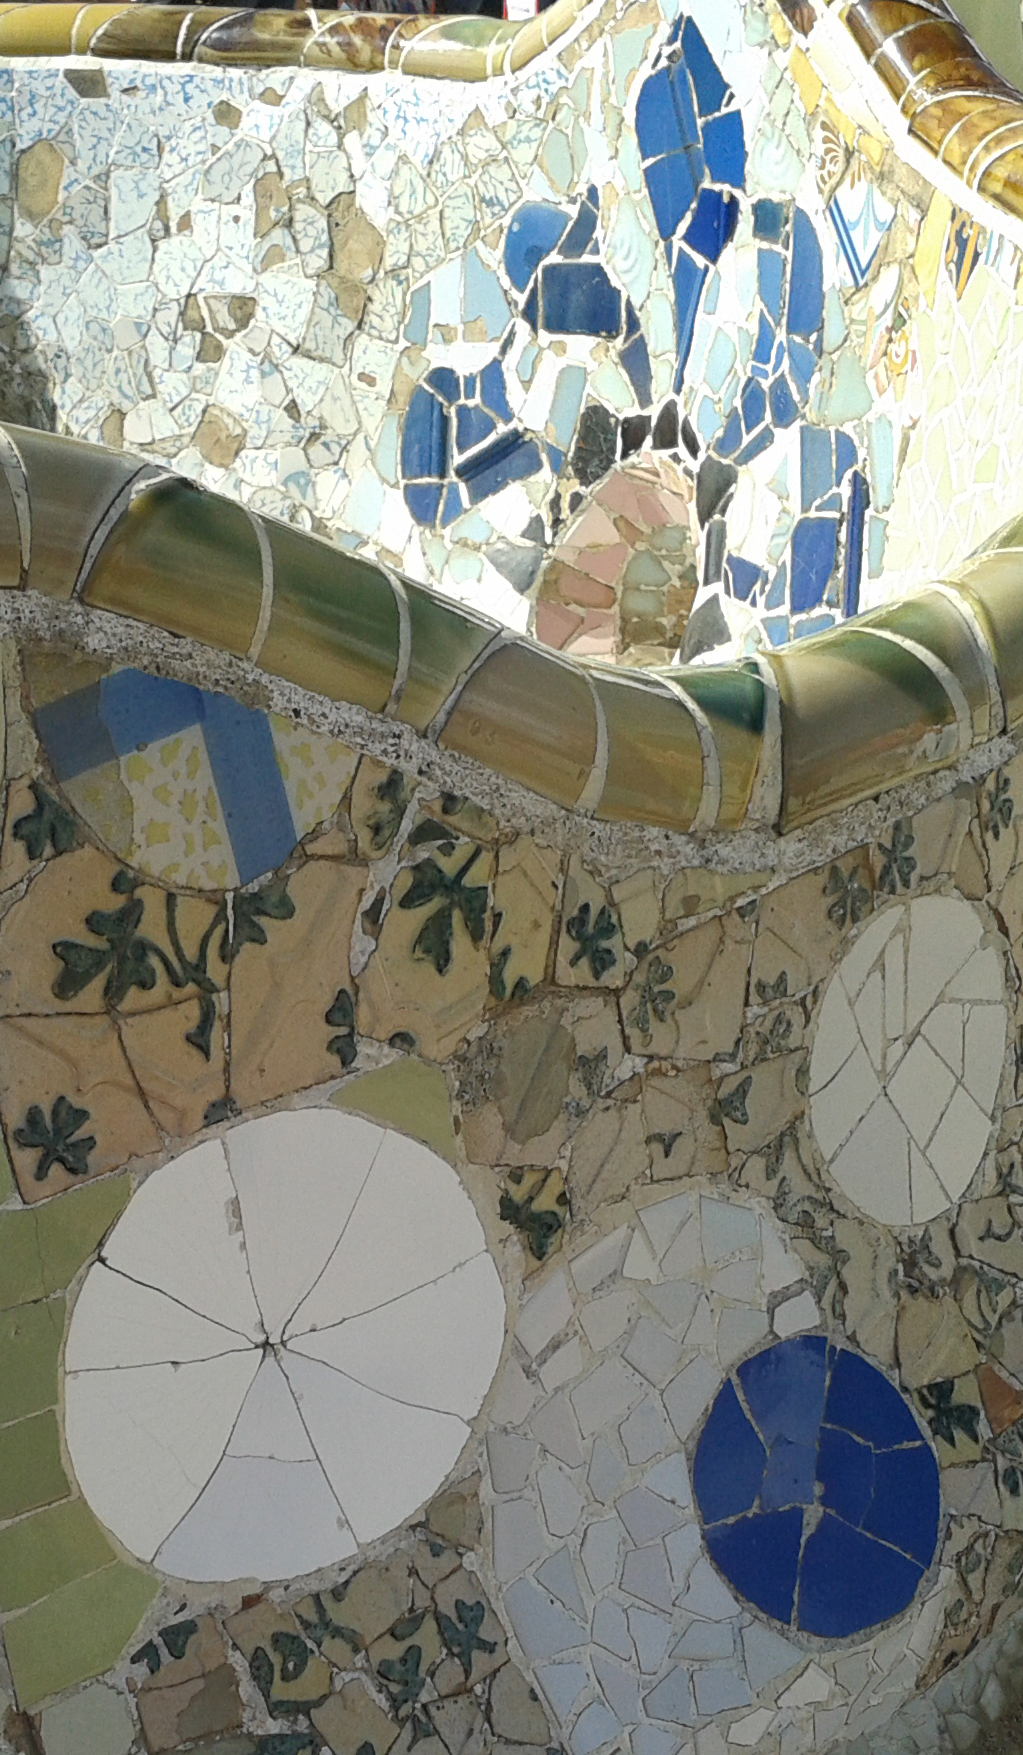
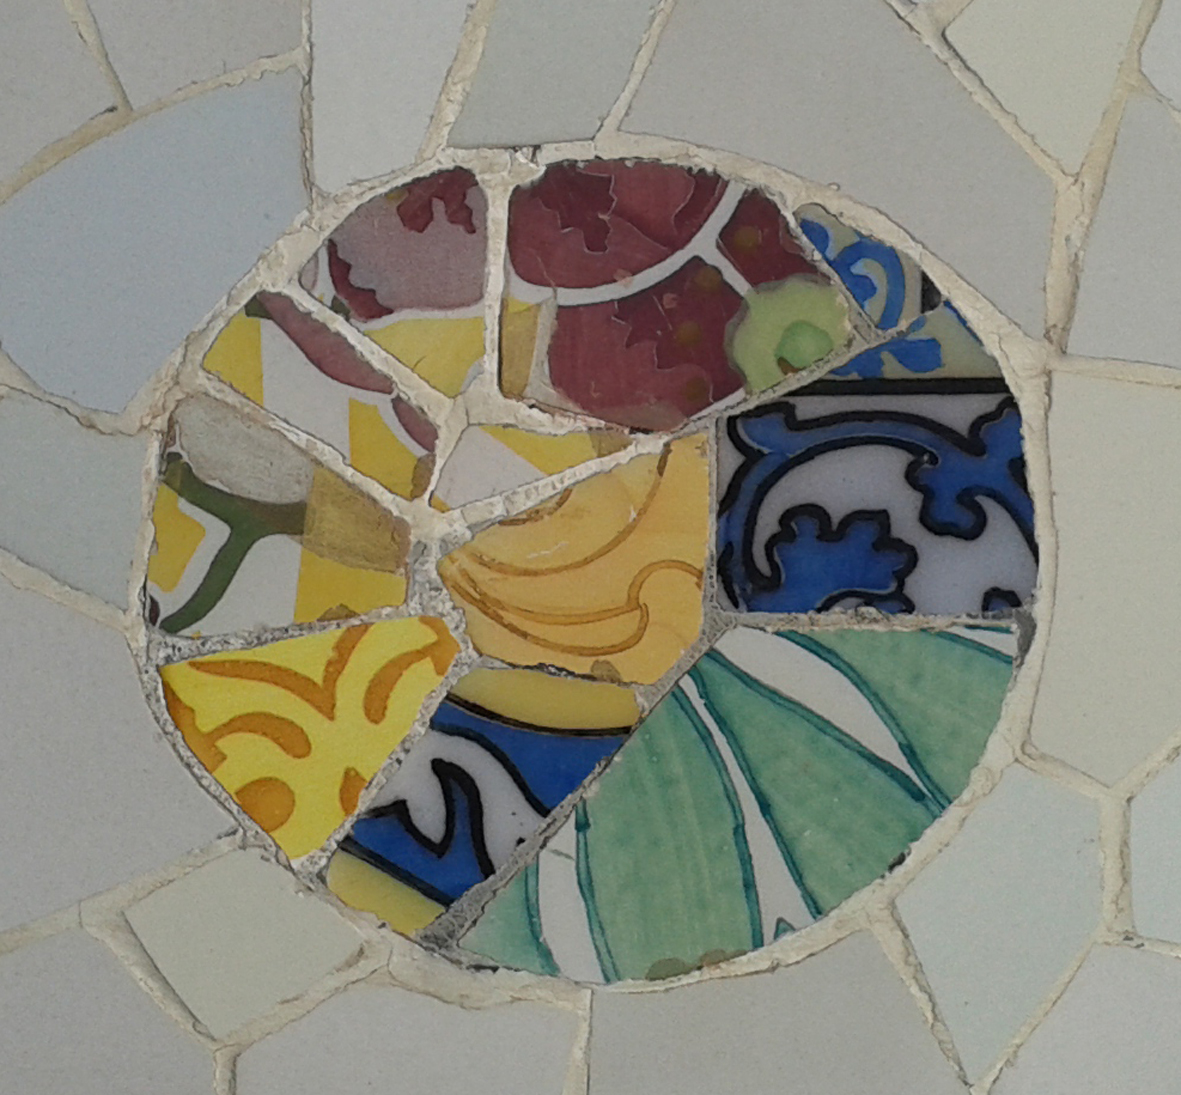
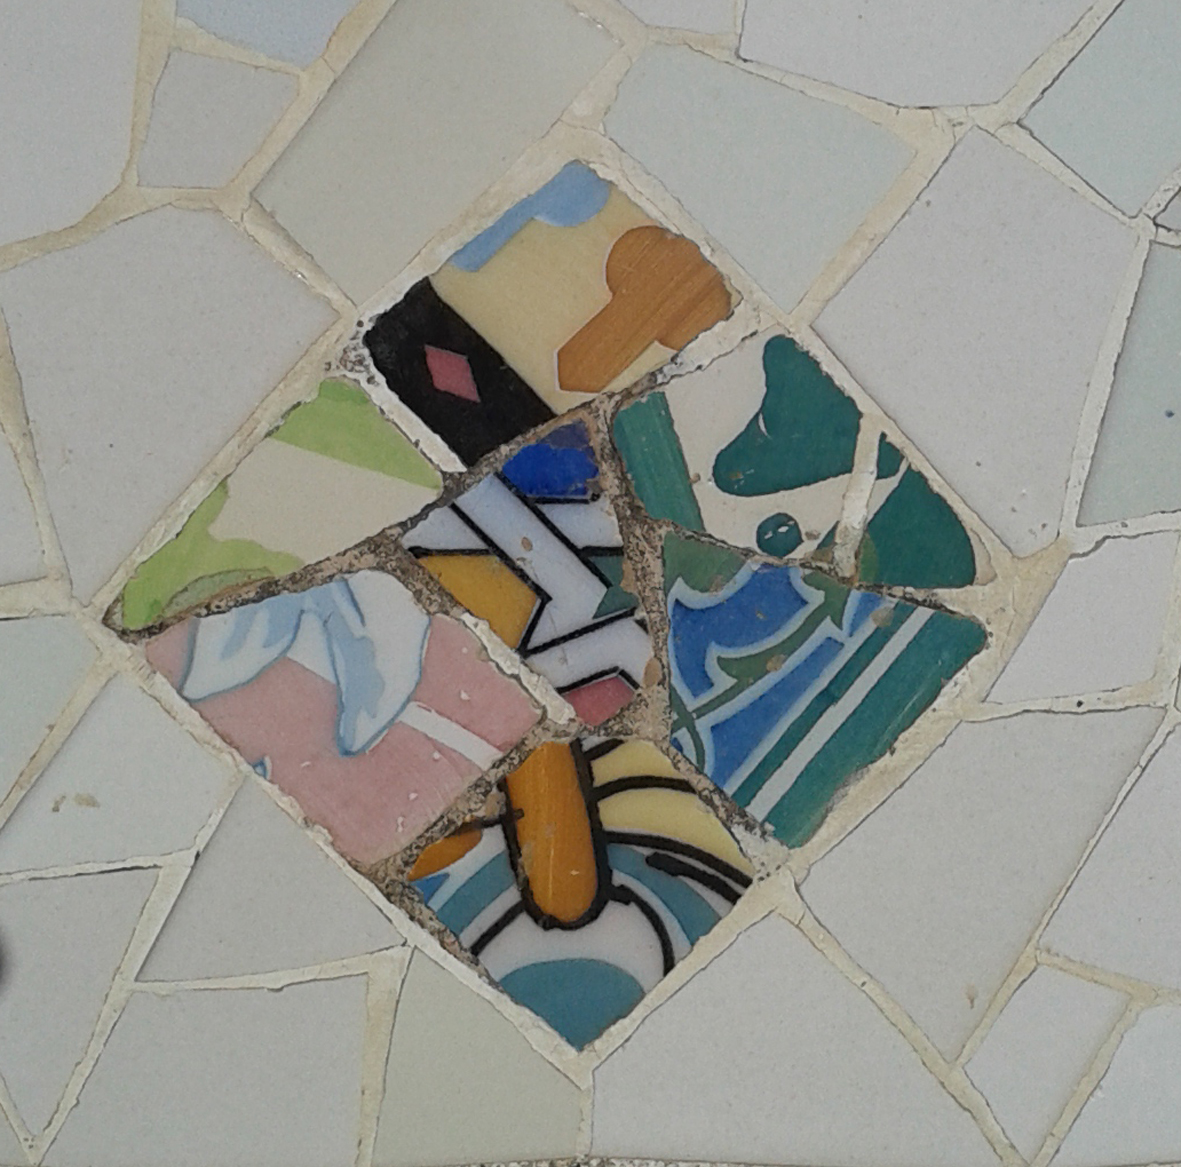
Sometimes the crazy patches were confined to simple shapes and surrounded by a sea of broken ceramics in a wide range of whites, the use of white ceramics when fired and glazed to produce many different variations is a major feature in this garden.
circle of crazy within white surround
diamond of crazy with mixed white surround
many different crazy whites shapes make for gentle and cool seating surfaces
there were other more fluid shapes contained by the white ground….
amorphous paisley shapes
commas placed in a line around the base of a column
I also really enjoyed seeing patterns within patterns,
patterns within patterns
I really like these wonky squares set in a sea of crazy patterns; the makers must have had such a good time doing this work. Transitions from patterns to solid colours was just masterful in places
this transition from rich colour to single coloured patterns is masterful
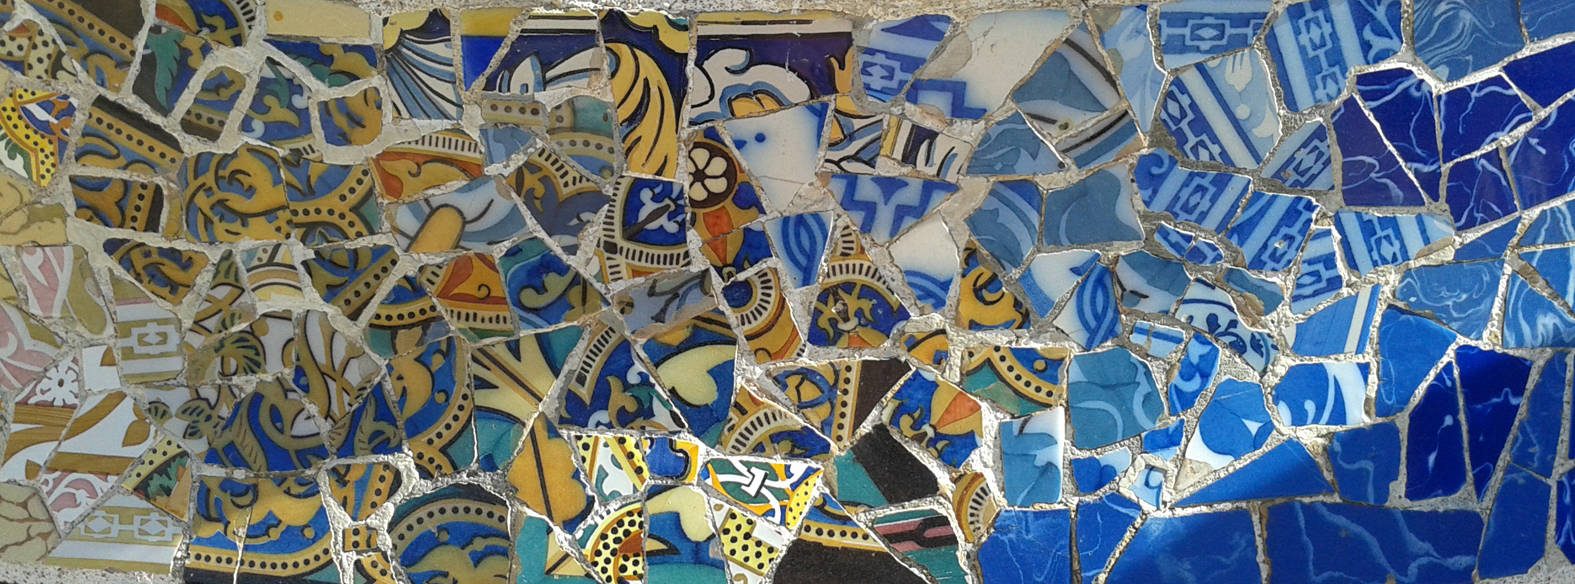
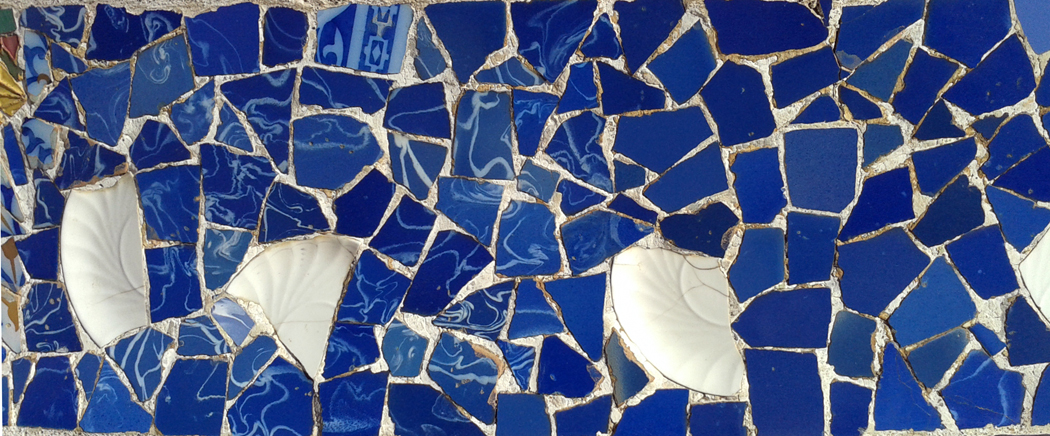
in fact the single coloured sections were simply beautiful – here is a range of crazy blue patterns
broken plates in a sea of blue
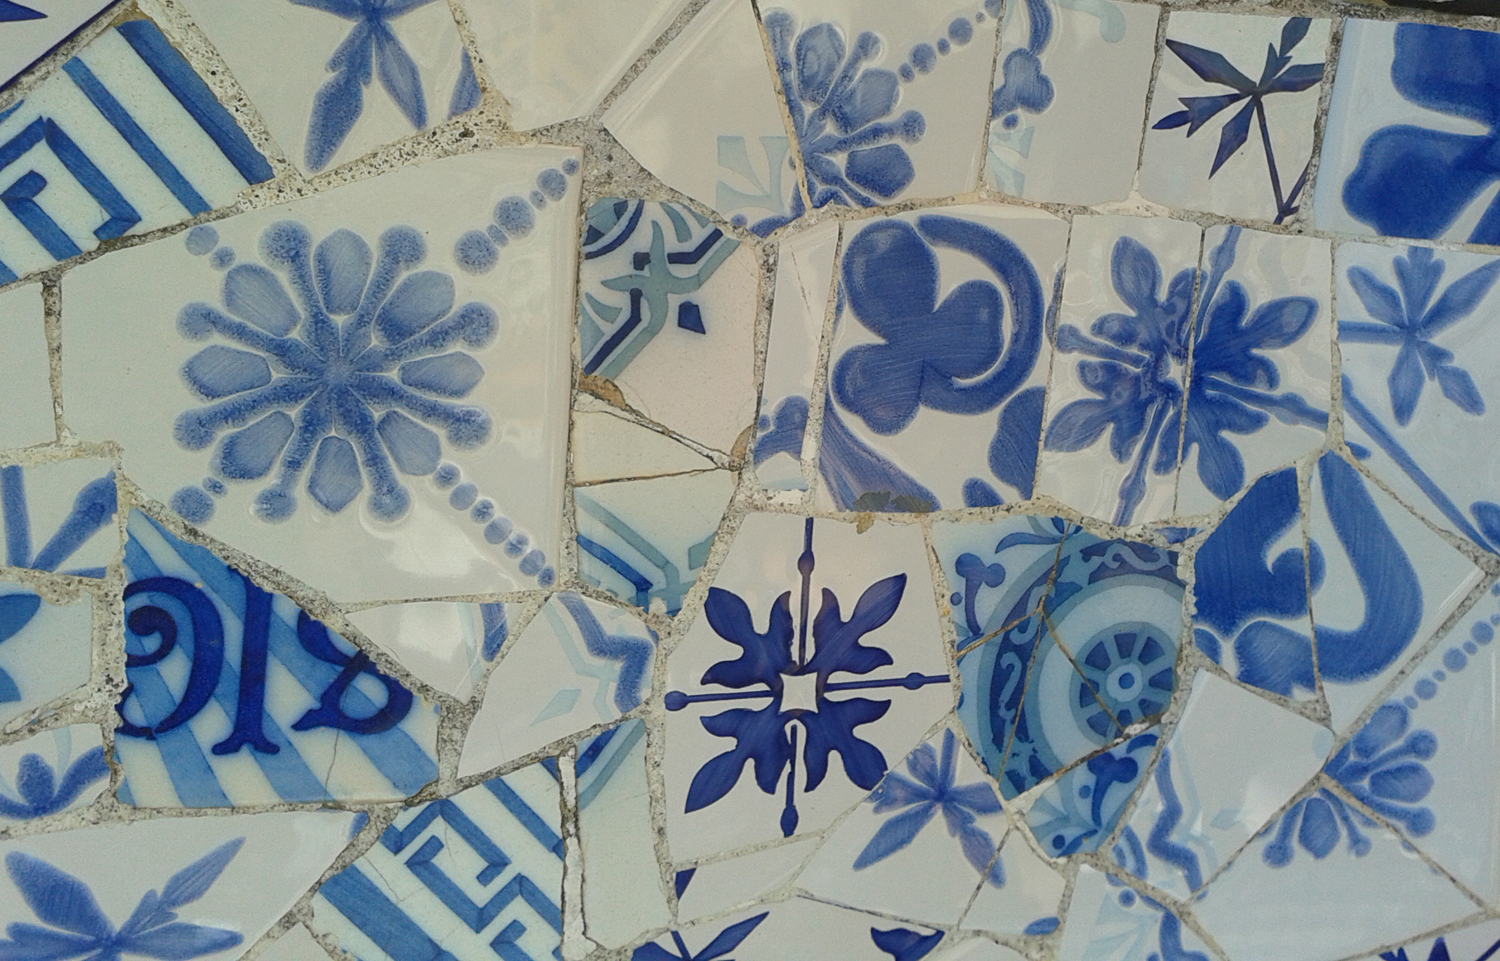
typical Spanish hand painted blue tiles
refined diamond designs on blue and white striped ground
while most of the ceramic patterns are traditional in flavour there were also some more abstract patterning to be found,
abstract patterns must have looked strange in the early 1900’s
but this whole set of designs is made from re-cycled materials, apart from the abundance of beautiful old and broken patterned tiles from the Spanish ceramic factories, I was happy to see this poorly fired plate used to good effect.
poorly fired glazed plate has been put to good use.
After an hour of my visit I started to see evidence of Crazy everywhere..
the sandy ground in the park is impressed with crazy patterns
looking down at the sandy pathways I saw crazy patterns impressed by the soles of many different shoes, and once out of the park, everywhere I looked was Crazy Heaven.
the Crazy cafe floor
and the Crazy marbled walls
So now I have decided to try to develop some of these ideas into new Crazy Patchwork designs for cushion cover designs to show Hugh Ehrman at Ehrman Tapestry company for their future collections.
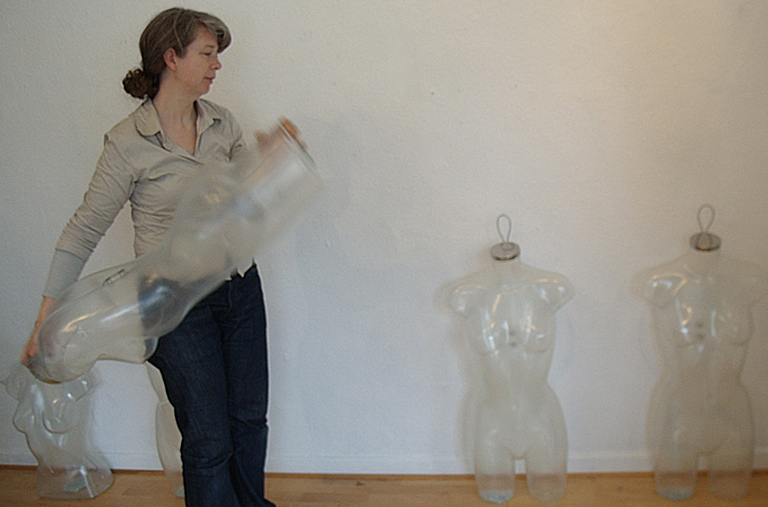
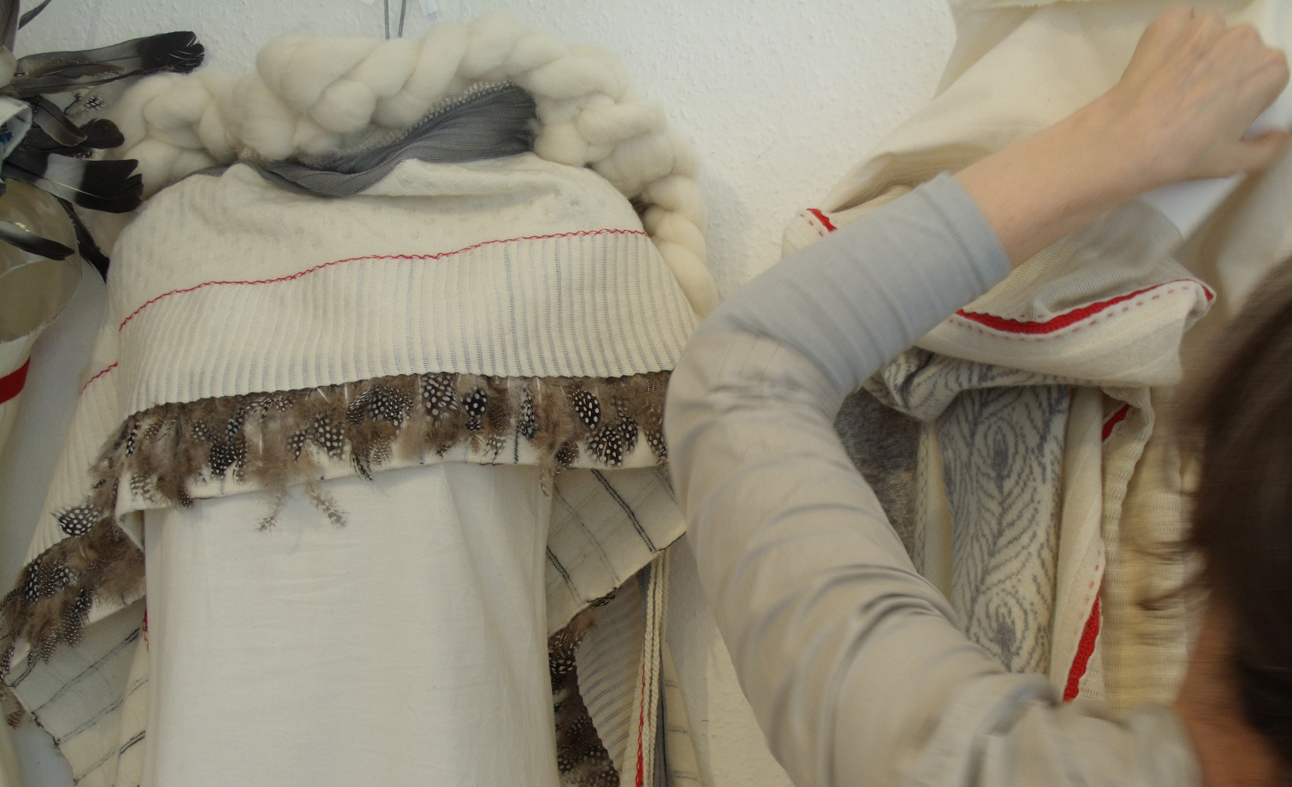
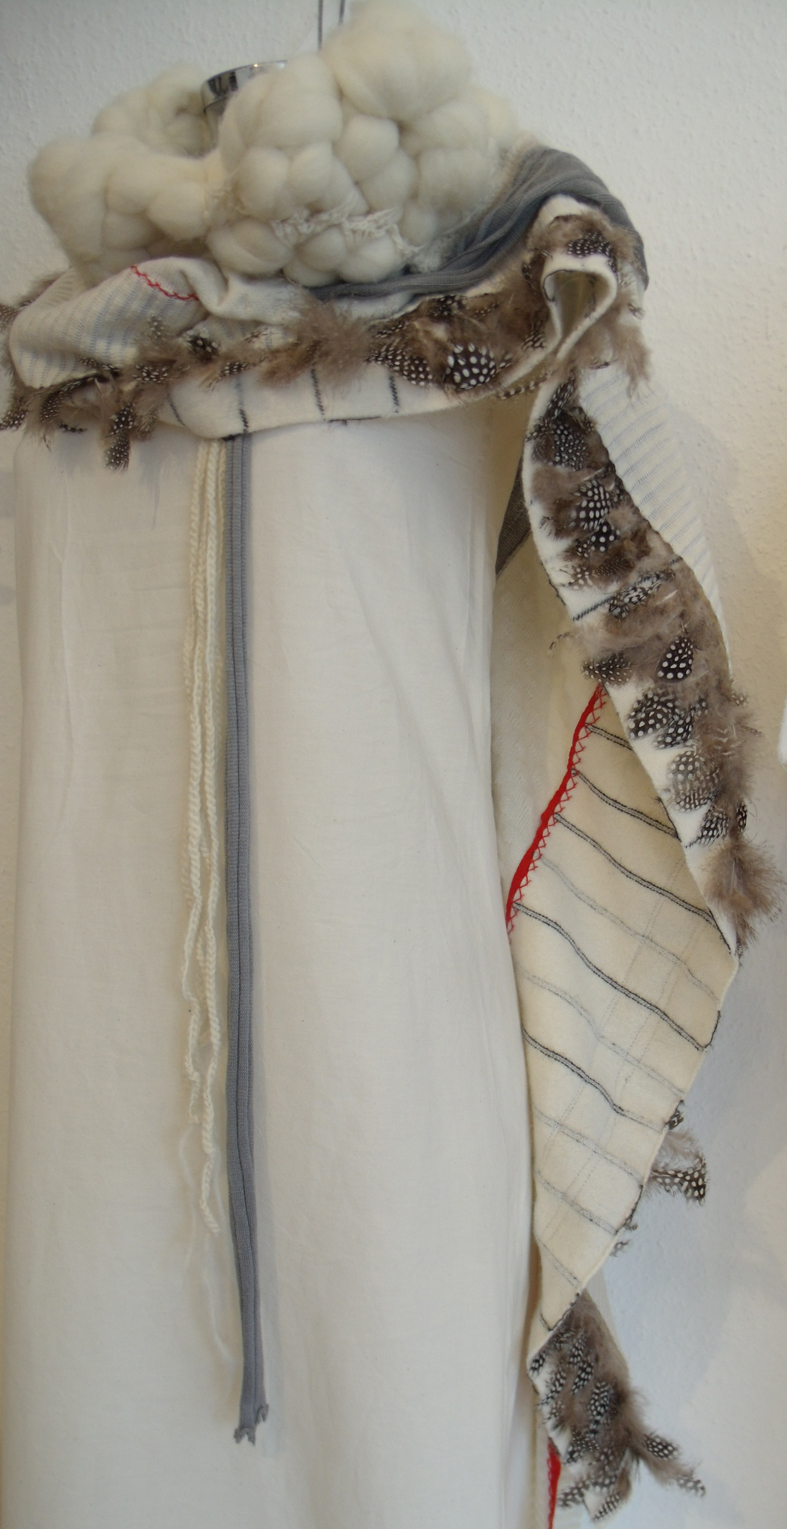
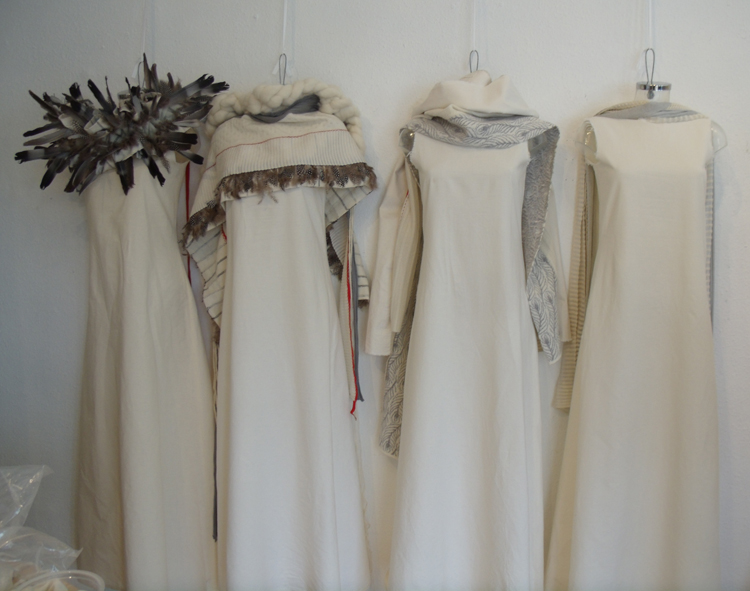
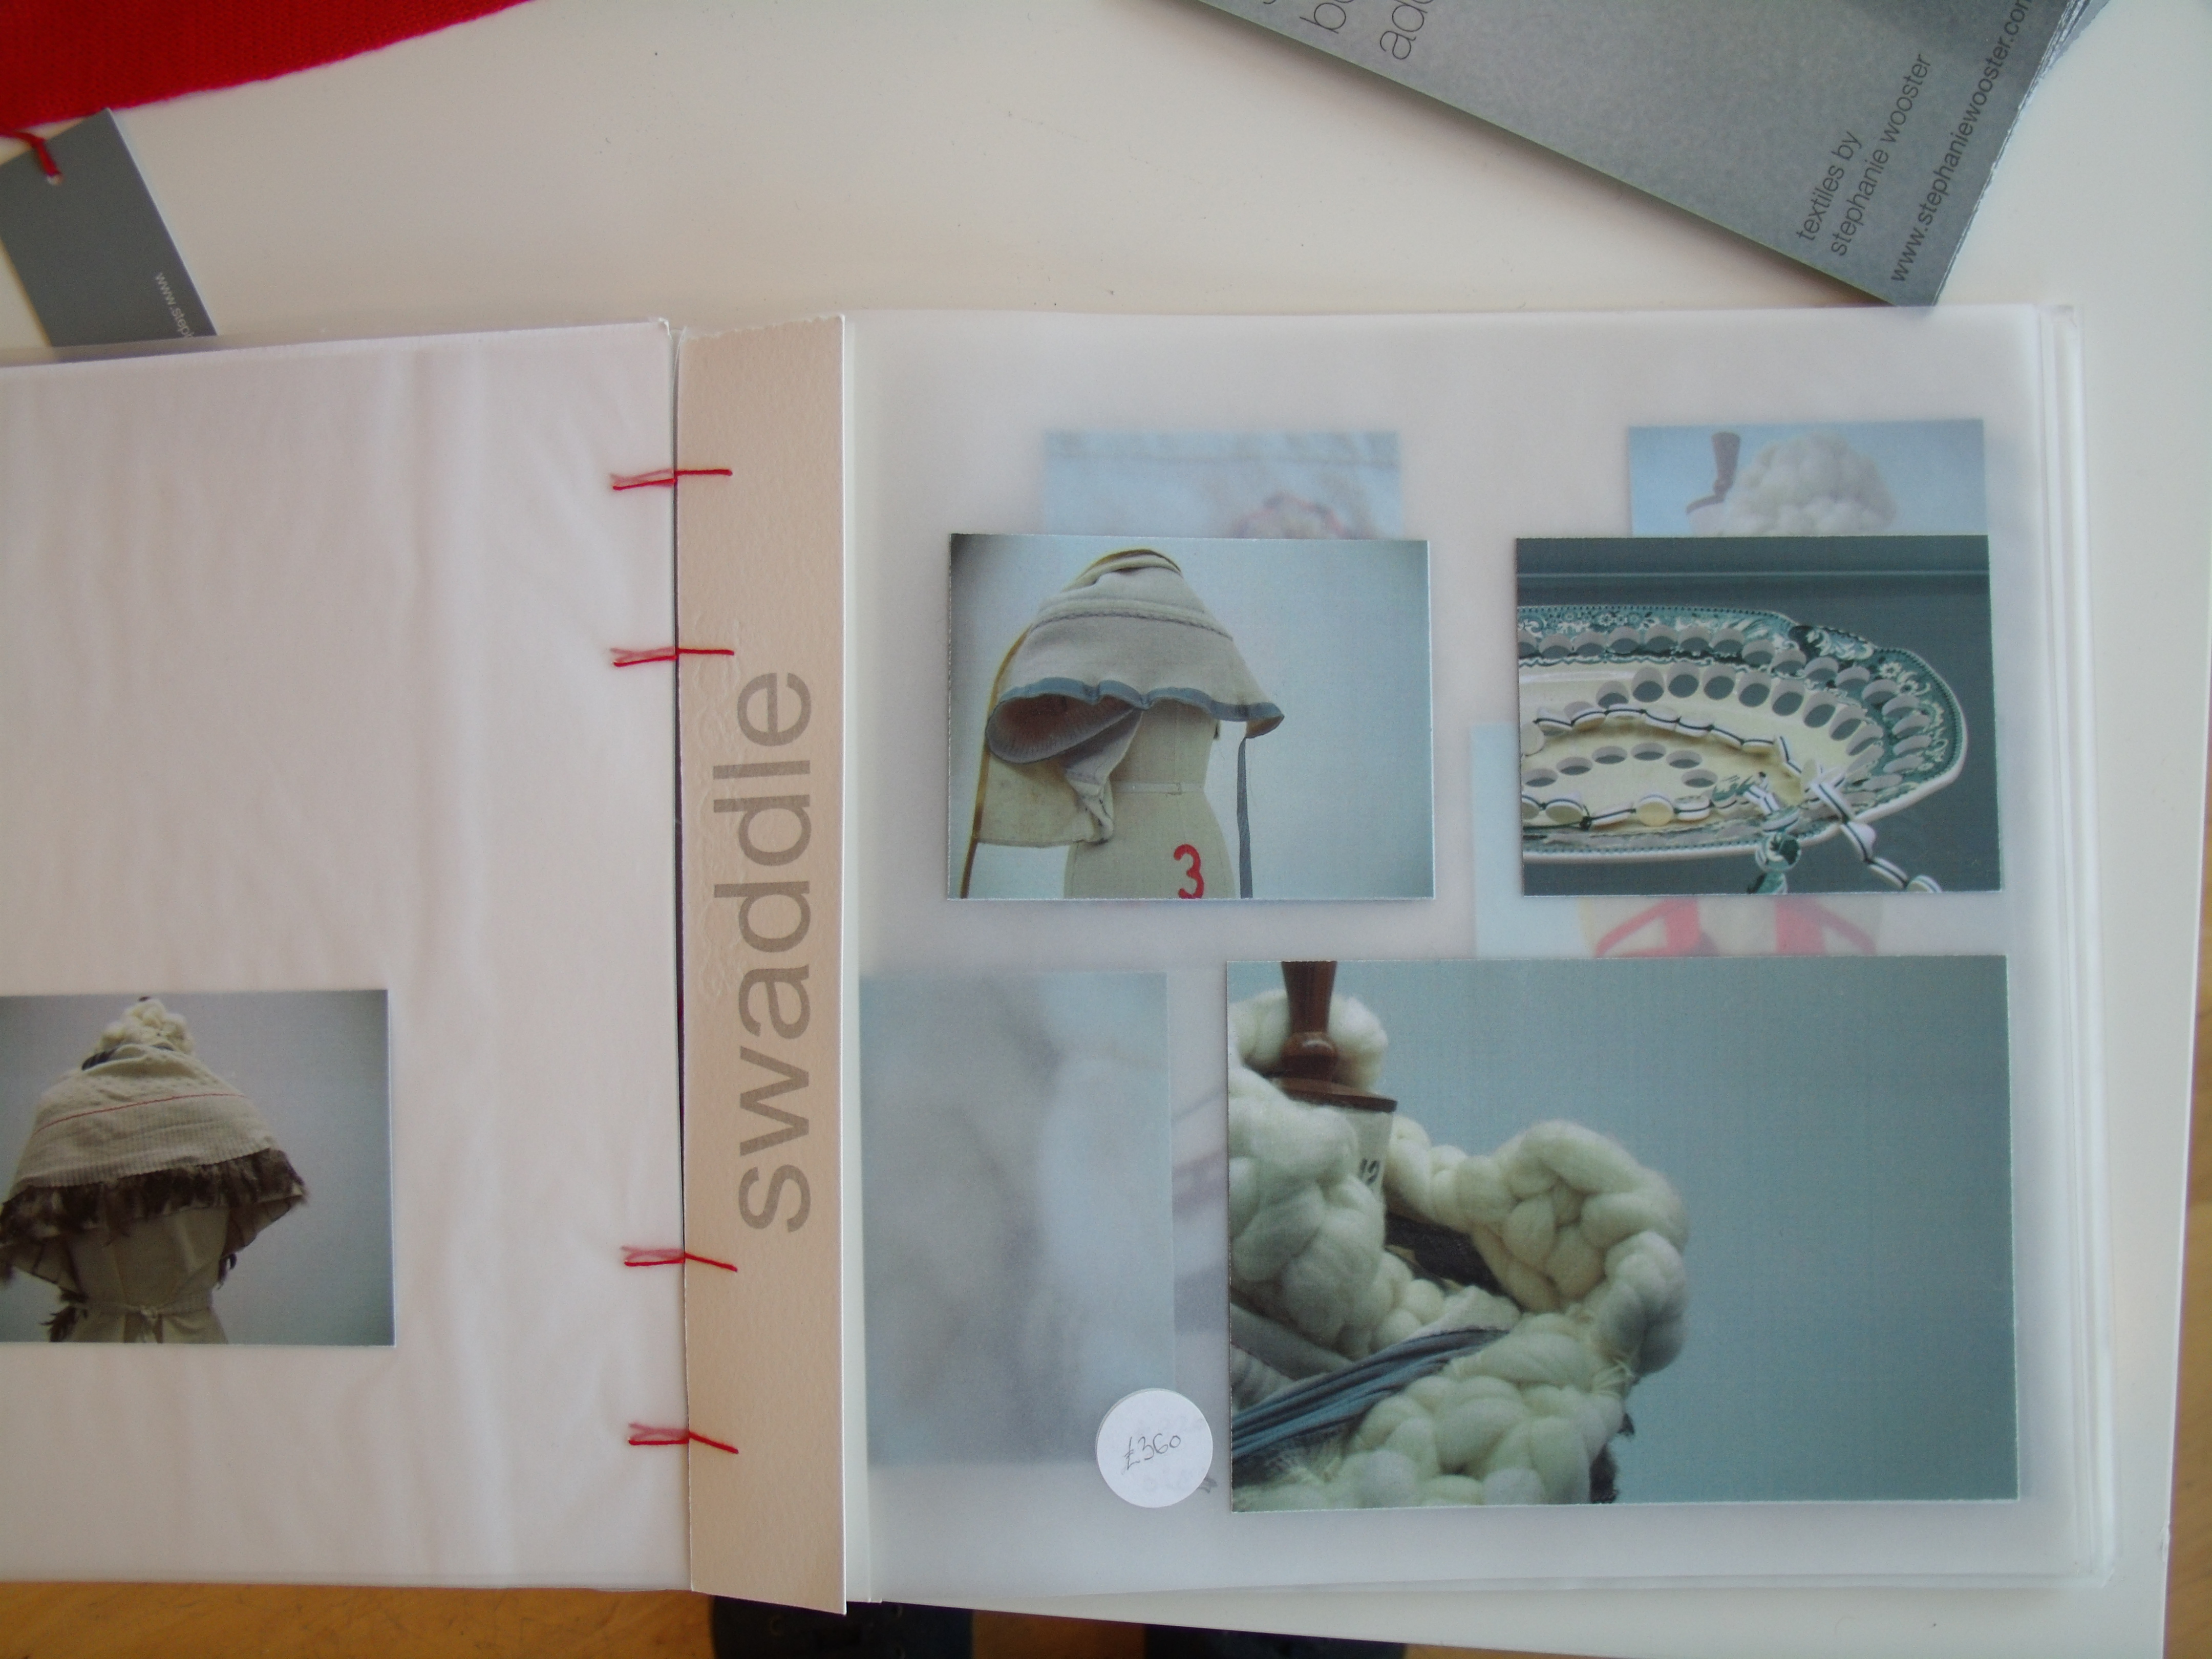
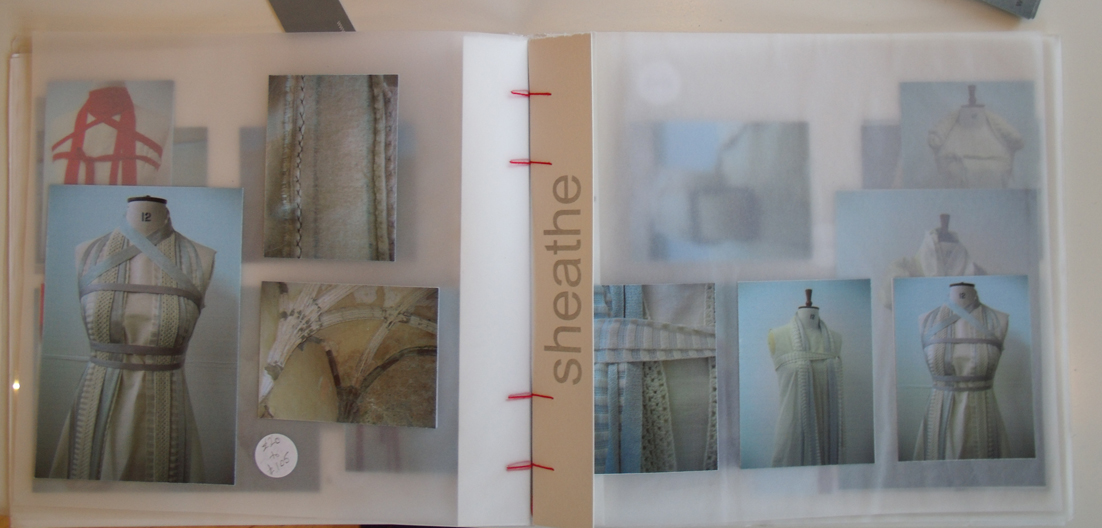
We have a wonderful new exhibition at Heart Space Studios. It is a collection by Stephanie Wooster ( who conducts unusual knit workshops with us) developed from her MA studies and it concerns itself with wrapping, tying and generally caressing the upper body. the names of the different pieces tell how they are perceived by the maker – Swaddle, Swathe, Shawl, Sheath, Mantle, Shroud. The work is embroidered, felted, machine knitted, plaited and patch-worked together, with feathers, braids and calico. It sets a calm but slightly surreal feeling to our small gallery space.
Steph starts to set up her exhibition
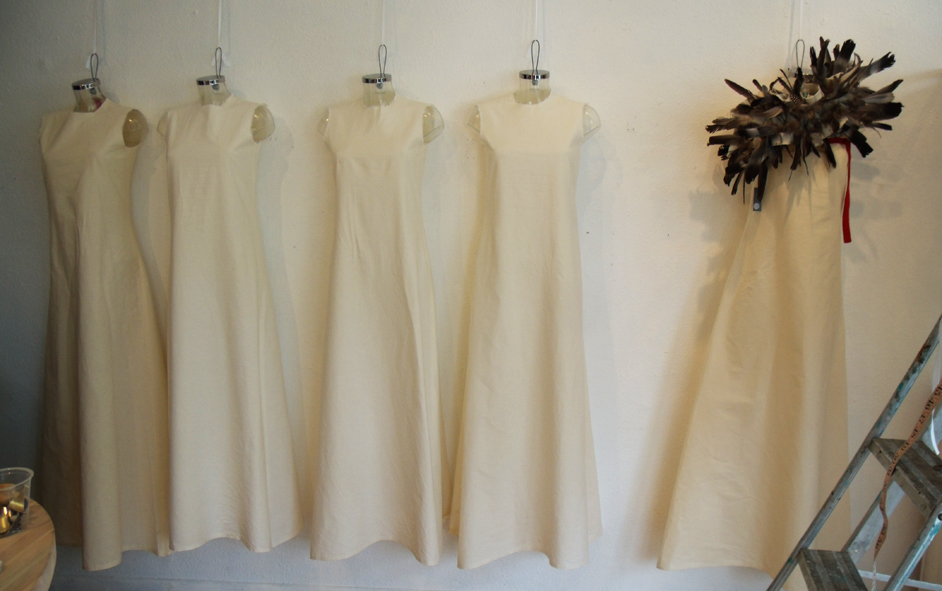
The first things brought in were a series of clear plastic torsos which were then dressed in simple calico shifts before being hung on the wall.
The calico shifts or shrouds?
then Steph started to dress them up; first the dramatic feathered collar was placed to set the atmosphere….
scarves and stoles begin to be layered
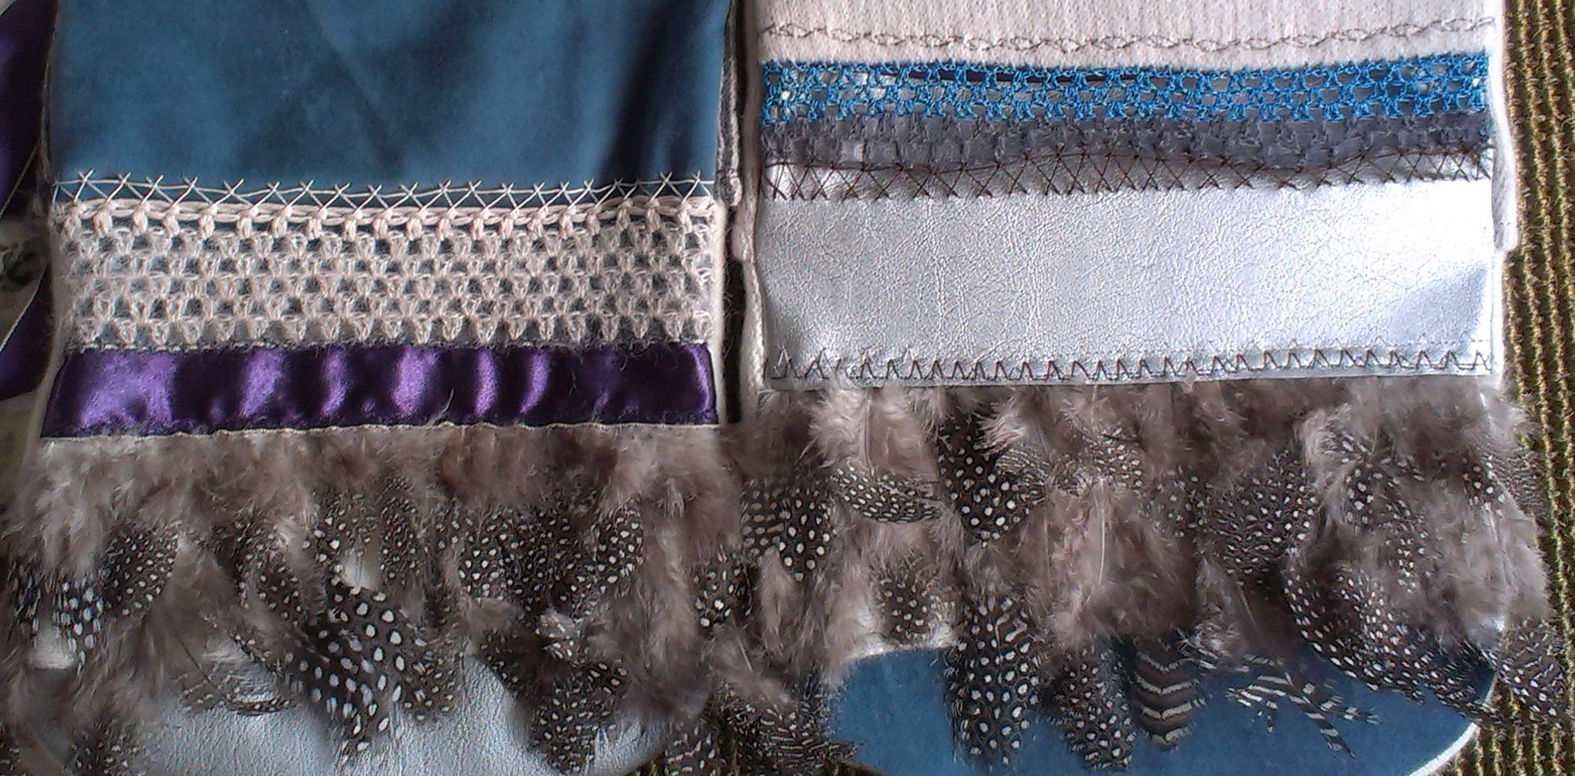
Then out came feathered scarves, stoles and wraps, hand knitted and coiled hanks of wool, even felted knitting with feathers as the motif….
felted feather design on machine knitted wrap.
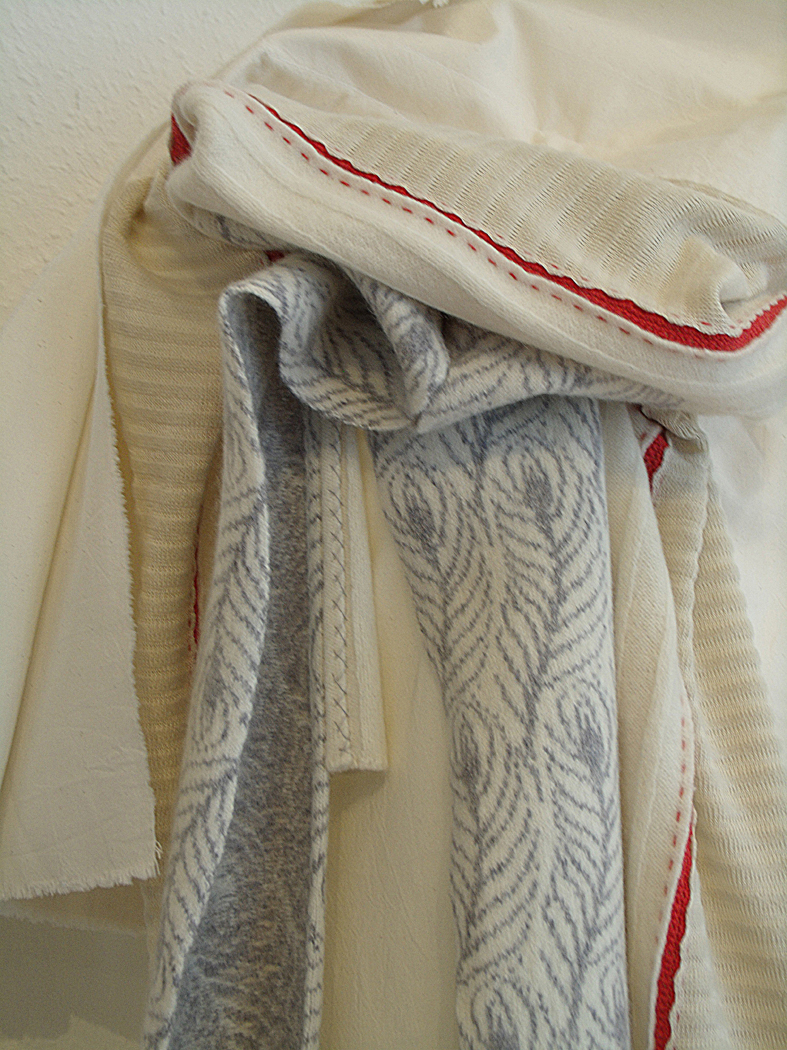
the large wraps, shawls or scarves, call them what you will – are made from several different textiles and hand stitched or even embroidered together often using a red knitted braid as a backing, this causes interesting lines to be drawn around the body when draped.
the feathered scarf with plaited woolen collar
the row of 4 pieces are really powerful and entice people to study them up close and personal…viewers are not quite sure what they are seeing, are these felted woven blankets, some unusual woolen ticking or simple striped knitting?
row of 4 pieces awaiting the extra exhibits.
When this group were placed Steph brought out a whole range of very finely machine knitted lengths in different colours and combinations, these can to worn any which way – I like them draped around the neck as an elegant sort of knitted necklace.
wall of fine knitted necklaces in brilliant colours and pattern combinations.
We like to have exhibitions of selling stuff at Heart Space, and most of these pieces are for sale, but Steph also brought a selection of beautifully refined knitted ribbons, that are carefully joined at the back so that they always behave well when draped! This is what I like to have for sale in the studios, exciting but wearable pieces with an edge, not fashion but style!
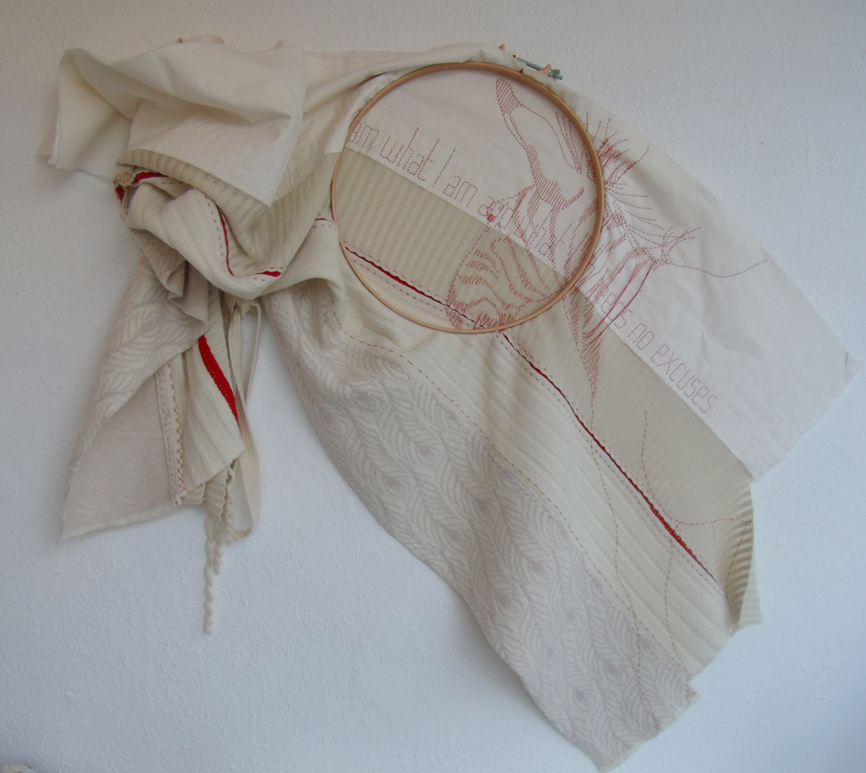
Also seen in far right of the picture is another knitted and embroidered piece ” I am what I am”
wall mounted scarf with embroidery ” I am what I am..”
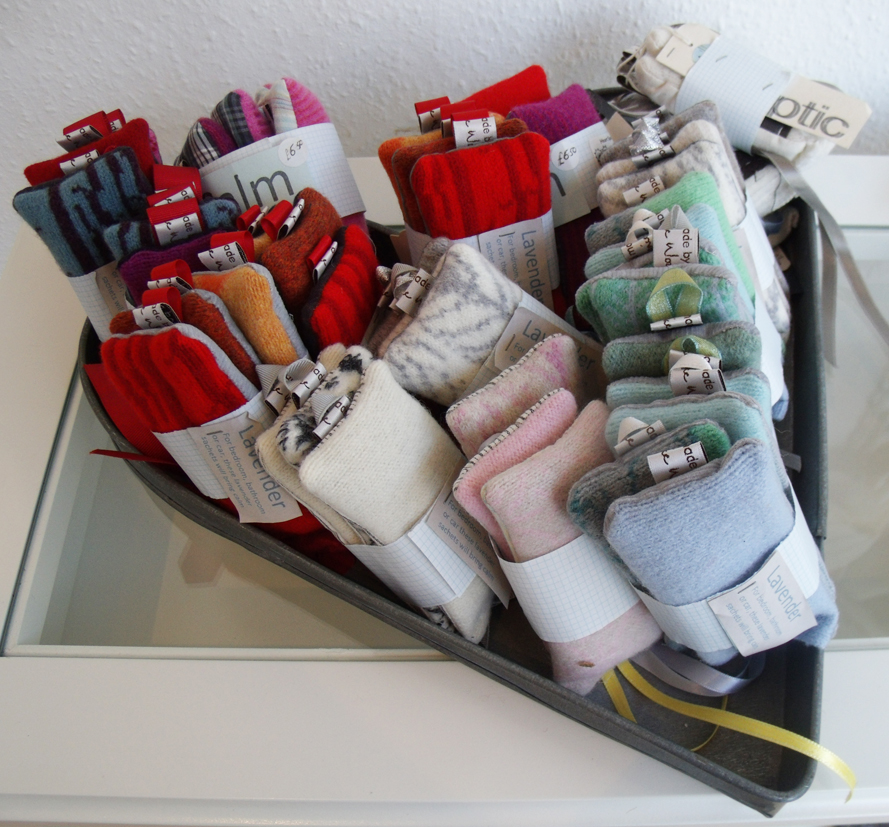
this was made for another exhibition and shown earlier in the year , Mending at the Museum, it was really good to see it again with these earlier pieces and interesting to see how new work develops out of completely different stimuli. Steph has also made a series of mixed media hot water bottle covers, developed from her samples at the Heart Space Mixed Media workshop earlier in the year, with more of her hand warmers( it is Autumn after all) and these have specially colour co-ordinated to the exhibition.
colour-co-ordinated hand warmers – heat them first in the microwave!
This is what intrigues me about many successful textile makers and designers, they can develop many different types of work, from applied art pieces for museum exhibitions, to practical hand crafted things for everyday use. This is the way many of us manage to make our living while finding time and energy to research and develop our own personal work. In fact without the research and development of private passions many new and commercial designs would never see the light of day.
work book showing stages of making as well as research inspiration for the collection.
Looking through this book lets us see how Steph links all sorts of unusual images and ideas and then literally knits them together to make new and exciting wearable textiles.
my totally moth eaten cashmere cardigan – but with darning still intact!
This is a sad story with a happy ending. My favourite cardigan that was included in my first ever post, Make Do and Mend, where I proudly showed the careful darning that I wore with pride, sadly, got lost. When I eventually found it pushed to the bottom of my laundry basket (don’t ask) it was totally ruined even beyond my restorative darning powers.
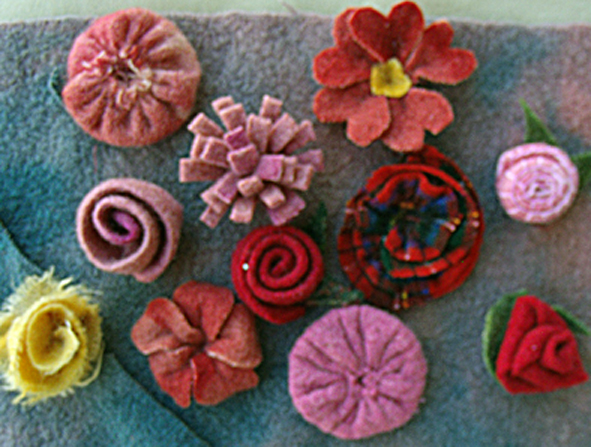
I decided to felt it by boiling it twice. The colours are so vibrant that I just had to try to find a use for it and I found the perfect solution when designing with some lovely felted woolen blanket flowers that Kirsten Hill-Nixon had brought along as a new idea for a class at Heart Space Studios.
the reds and pink selection- I really like the tartan rose.
the neutral colour selection
Kirsten will make the flowers in the morning class and I will develop the design and make session with them in the afternoon…but first I had to design something with what she had brought me, and she had brought me a whole selection of disparate flower heads – just as I has asked her to.
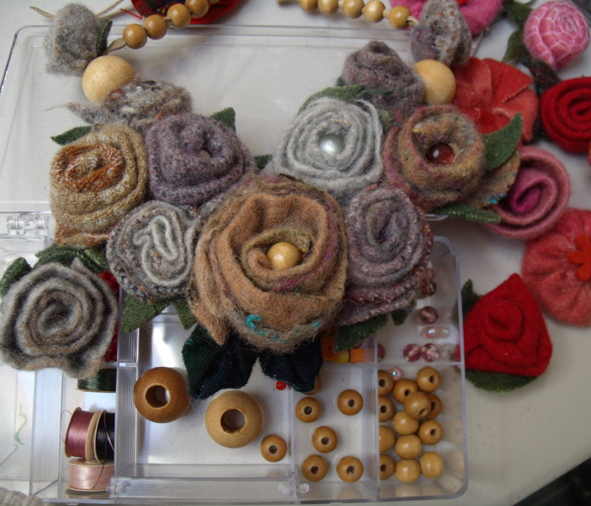
I made 2 colour sets of flowers. the neutrals were really soft and wooly, very tactile and I thought first to just make a heart out of them – well I would wouldn’t I? and in fact this is a really nice idea I may go back to…..
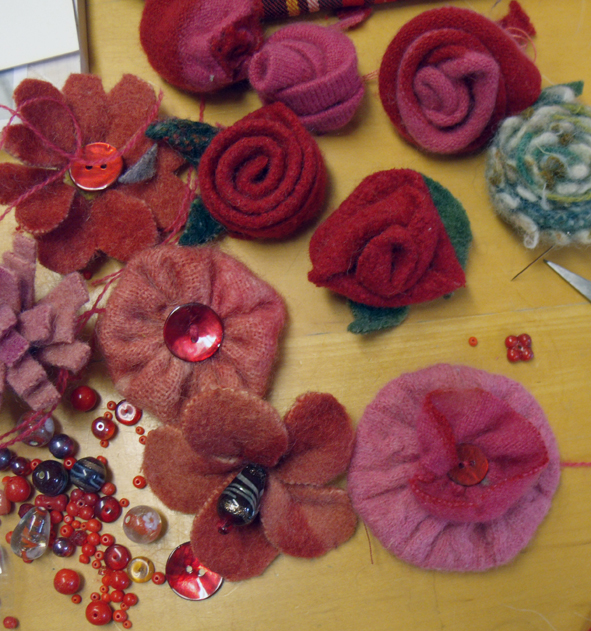
sewing on some beaded and buttoned centres
But then I imagined them as adorning a woolly winter jumper or cardigan, they aren’t heavy but they are bulky and a brooch seemed better than stitching them to a piece of clothing. But I had been given so many flowers that I soon decided on a necklace….
Kirsten’s red flowers arranged as necklace
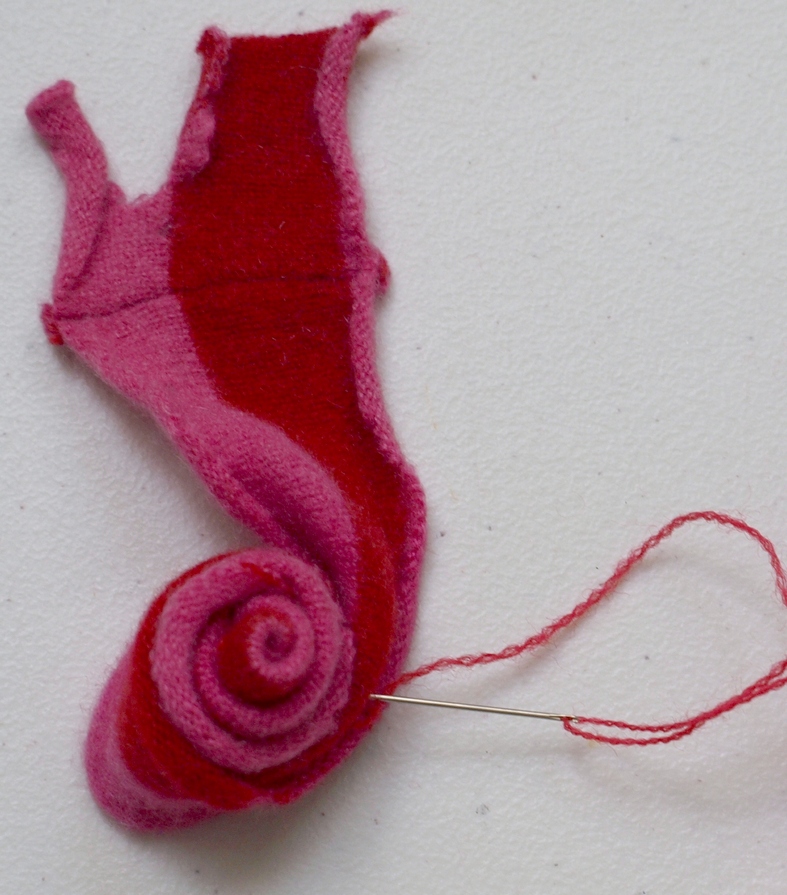
I set to work but when stitching them together without a backing fabric, soon realized that I needed just a few more roses….then I remembered my old ruined cardigan. I cut the sleeves into ribbons of different coloured stripes and stared to stitch the rose buds by simply rolling and folding the strips to suggest overlapping rose petals.
cut strips of sleeve being curled to start roses
stitching the rolled rose securely with matching fine wool thread
I had used this system many times as it is so easy – you just need to stitch as you go and control the folded edge, I found the way to do it in a vintage dressmaking manual from the 1930’s; the natural affinity to roll for cut knitting really helps the rose petal effect. I was starting to see a new life for all my old felted woolens.
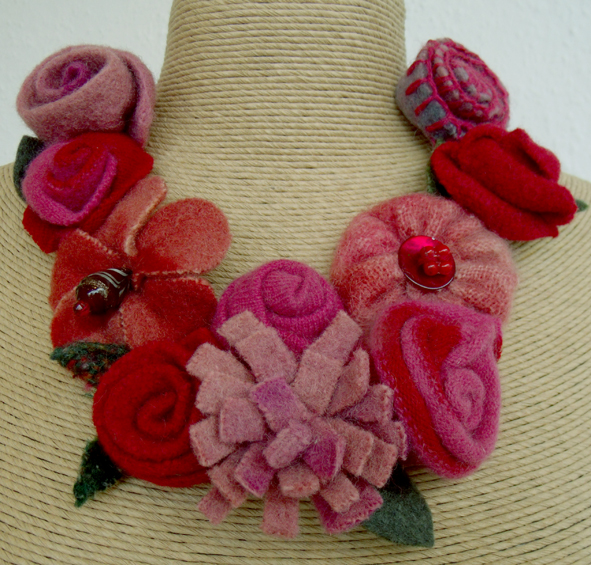
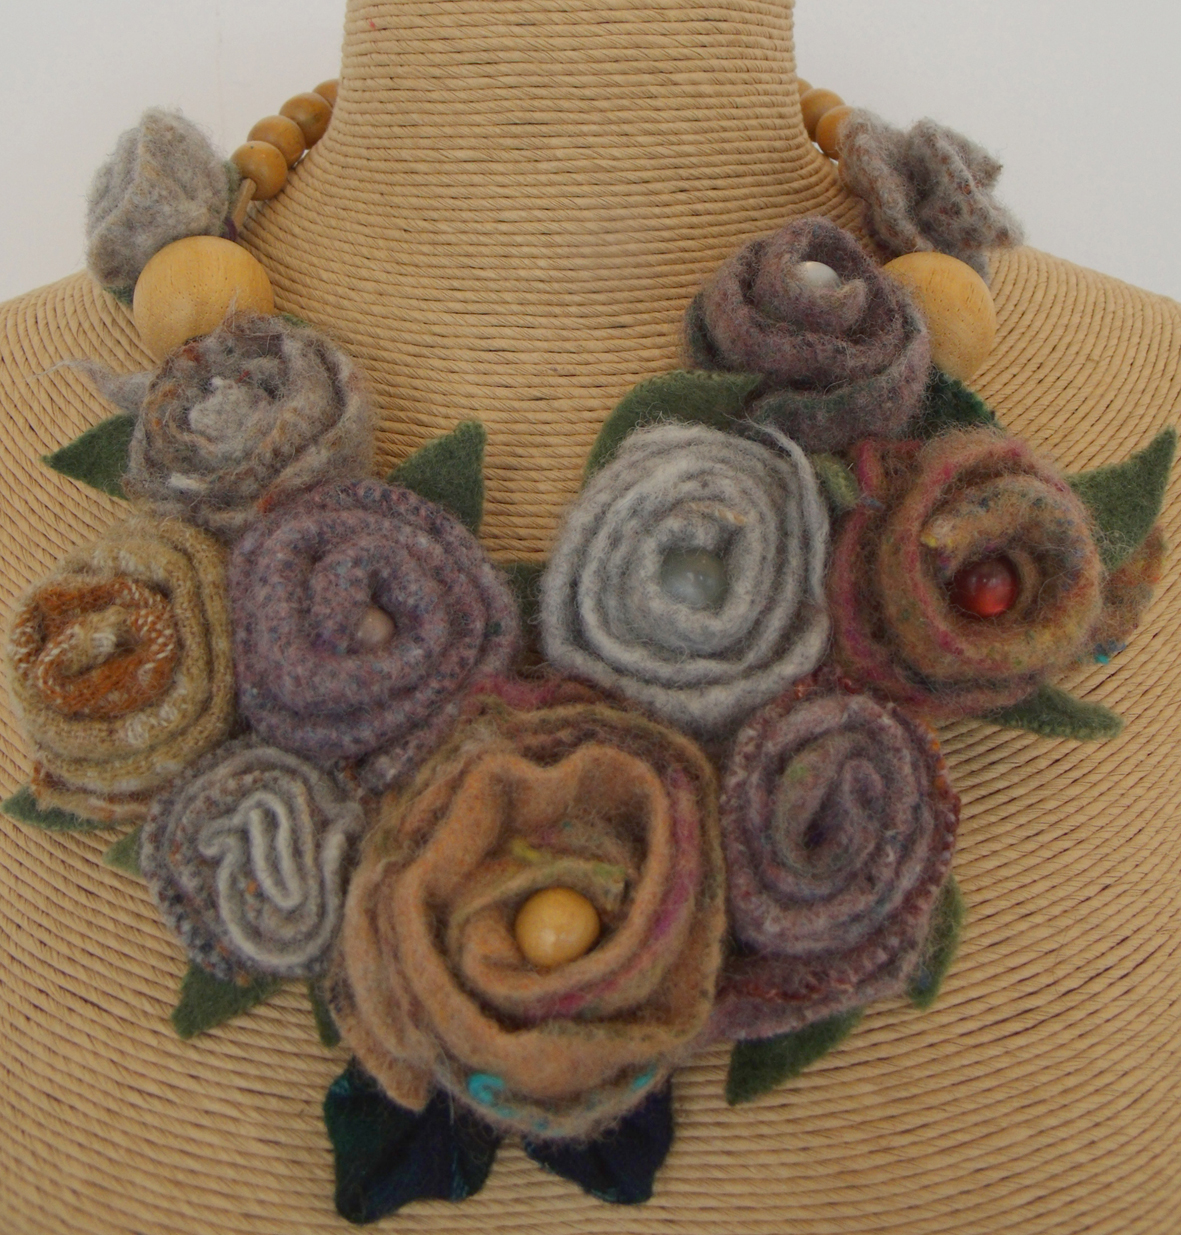
the finished necklace –
I inserted my knitted roses between Kirsten’s more substantial felt blanket ones, ( I really like her use of the blanket stitched edge for a fat rolled rose). She had provided leaves as well so they helped make the reds even stronger. Then I simply stitched 2 suede strips for ties onto the last roses and there it is – now for the neutral necklace.
the neutral necklace made of different blankets and added wooden beads.
this time I added wooden beads by threading them onto the leather strips to make a more decorative finish. Kirsten had filled some of the centres of the flowers with soft glowing beads so I added some wooden ones as well, the soft tones and texture of the wood feels just right for this sort of fabric.
finished felted blanket necklace
I was really getting into my stride, and now I just want to make more of these simple flowers pieces and I didn’t use the lively red tartan rose – so now I need to pluck up courage to felt my tartans and paisley scraps to use with my old washed out jumpers……
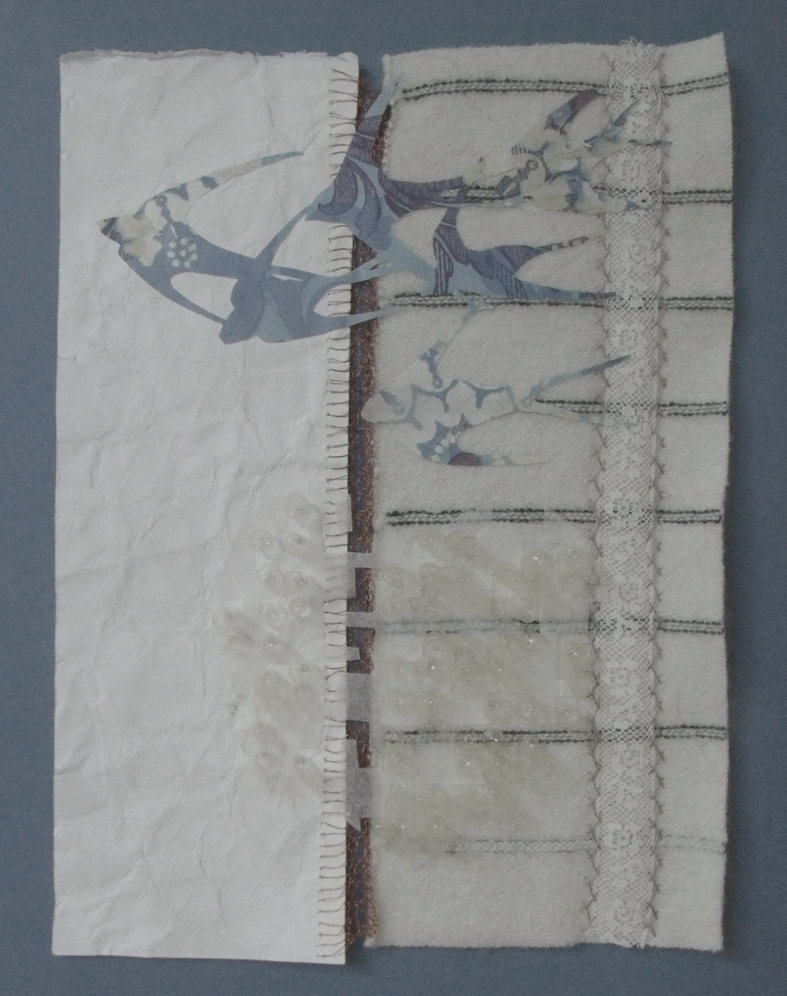
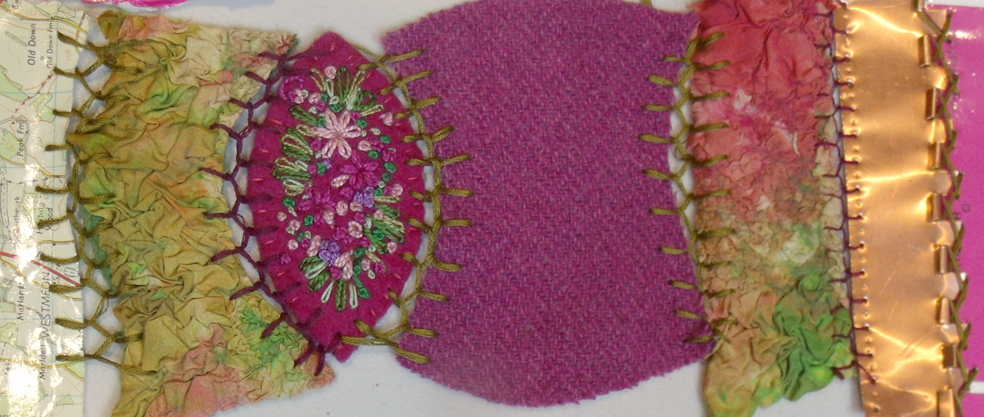
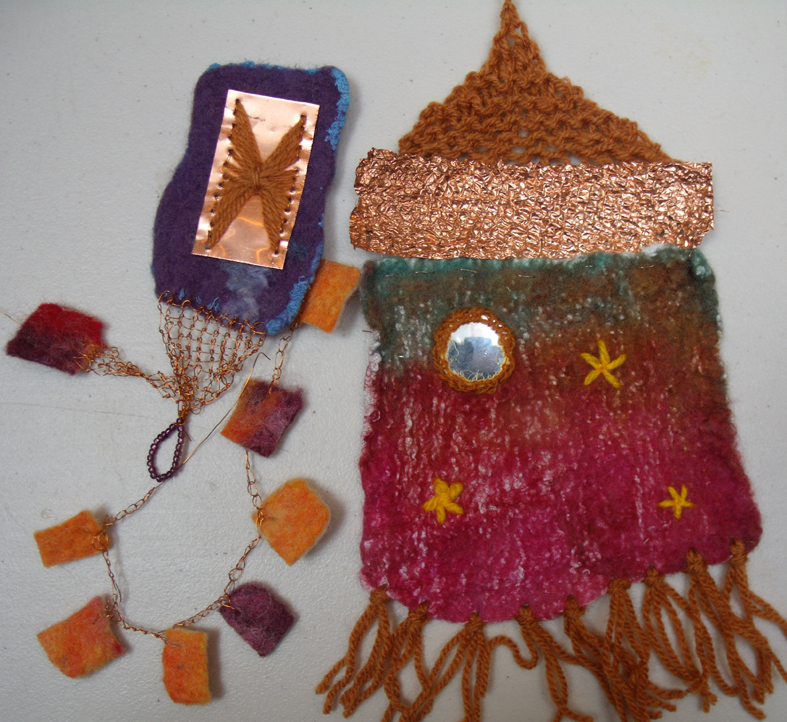
strip sampler of tweed, embroidery, nuno felt copper and paper- Kirsten Hill-Nixon
I am interested in developing a set of workshop using mixed media at Heart Space, think leathers, metals, ceramics, fabrics, glass and wood….. so I thought I could try the idea out on the people who work with us, all expert in their own field and up for a challenge.
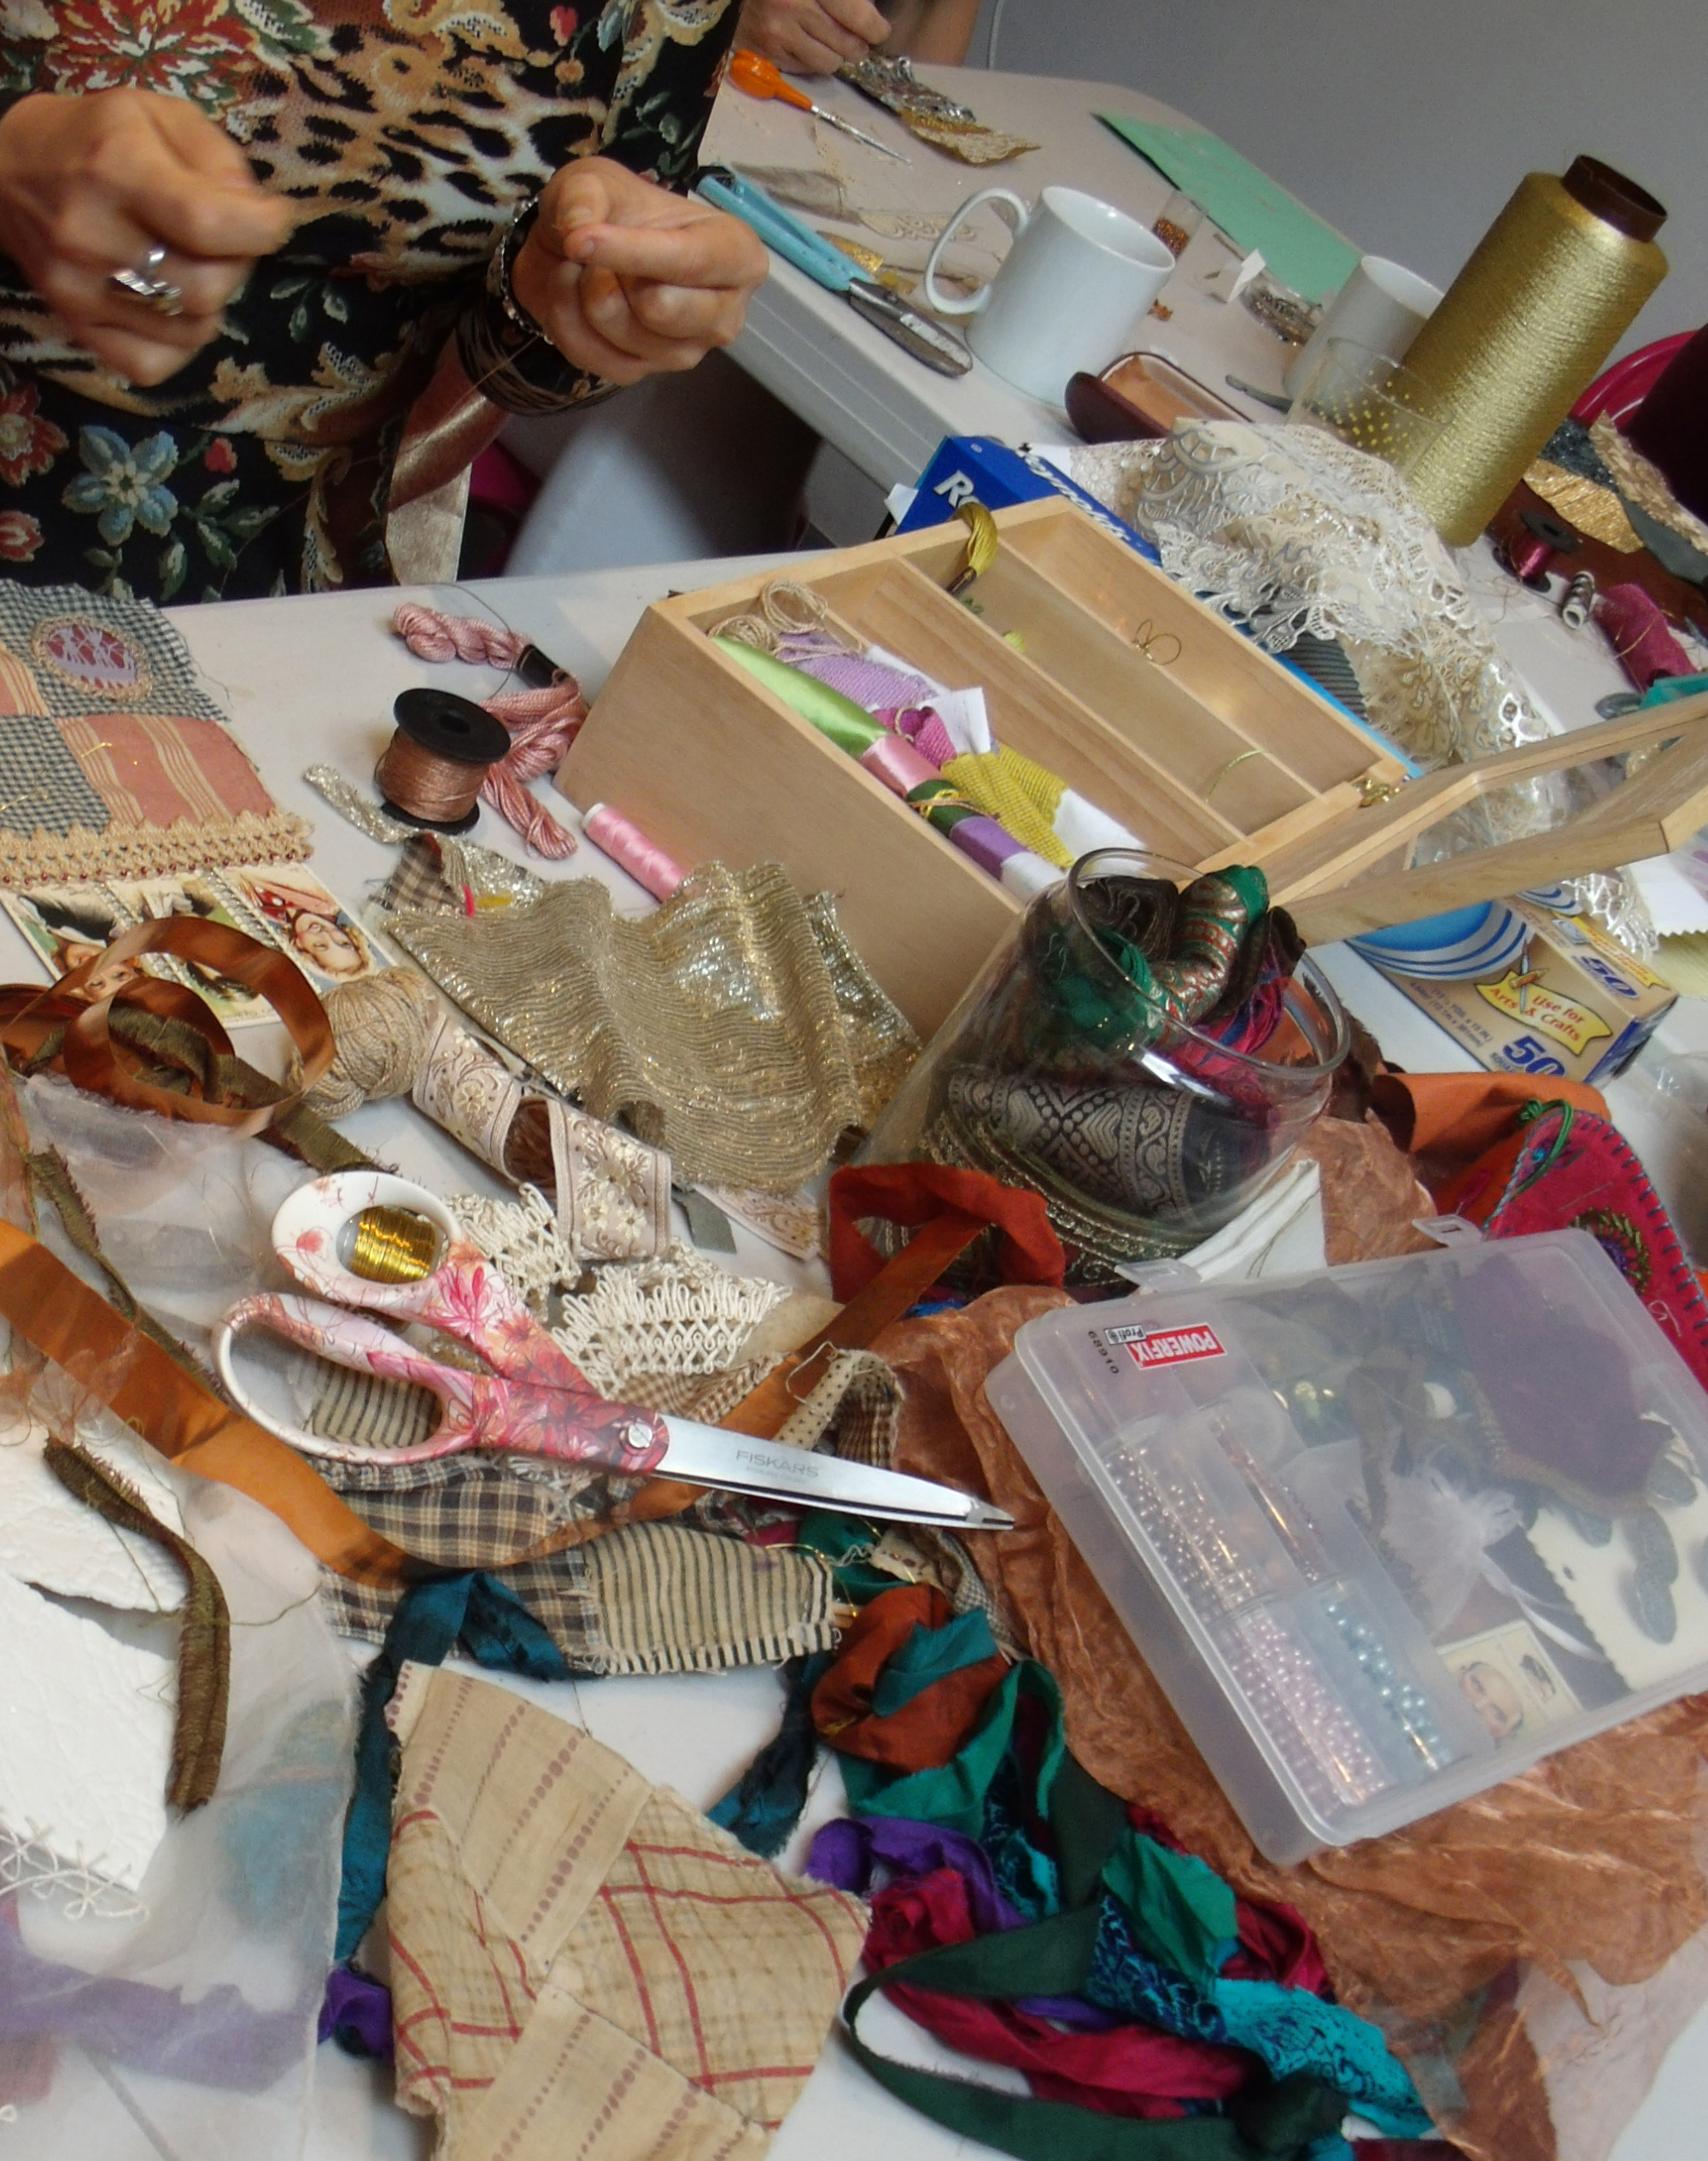
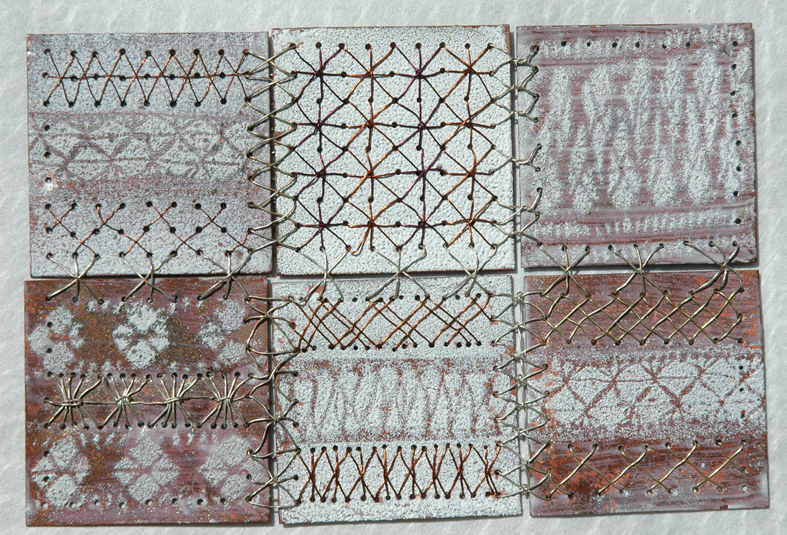
And as Crazy Patchwork samplers have been such a success at Heart Space Studios that I decided to run an Away Day for the tutors and staff to enjoy time making together. I asked everyone who could attend, to bring their own favourite materials and their tools. Each person would make either a strip sampler or a crazy square sampler by using decorative embroidery stitches to join the materials together.
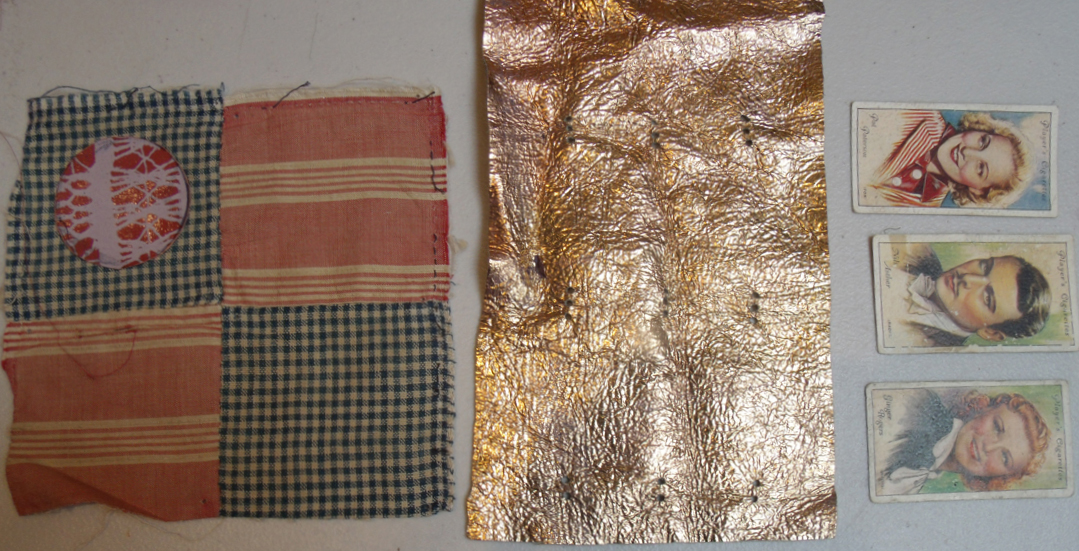
tutor’s own stash of hand made wool felt
the administrator’s collection of everything vintage
Most people brought their own stuff to share between the group, I am always impressed by the generosity of makers in workshops like this. The group dynamic is encouraged so that people really want to help one another. What is also an added bonus is finding a shared love of a particular technique or material, even makers of different ages and styles come together when they find they both appreciate a particular aspect of their chosen discipline.
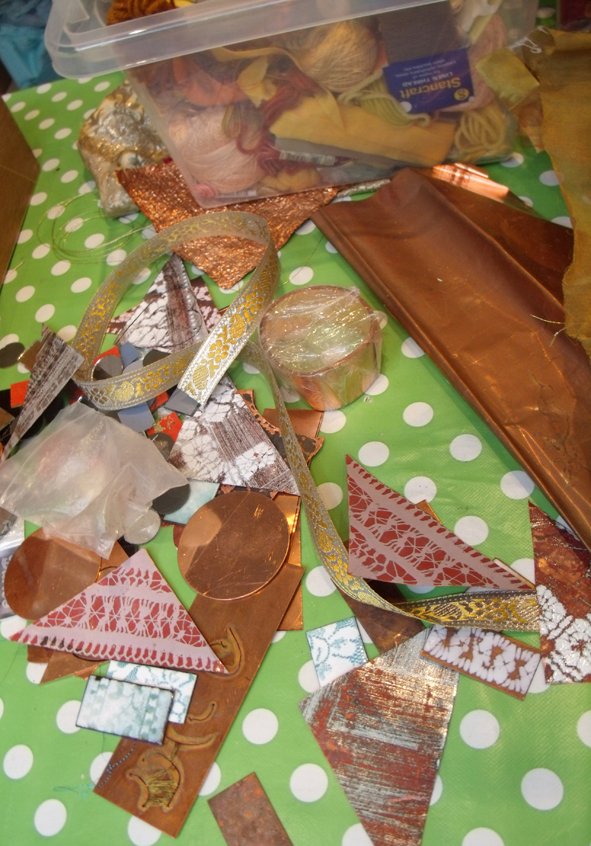
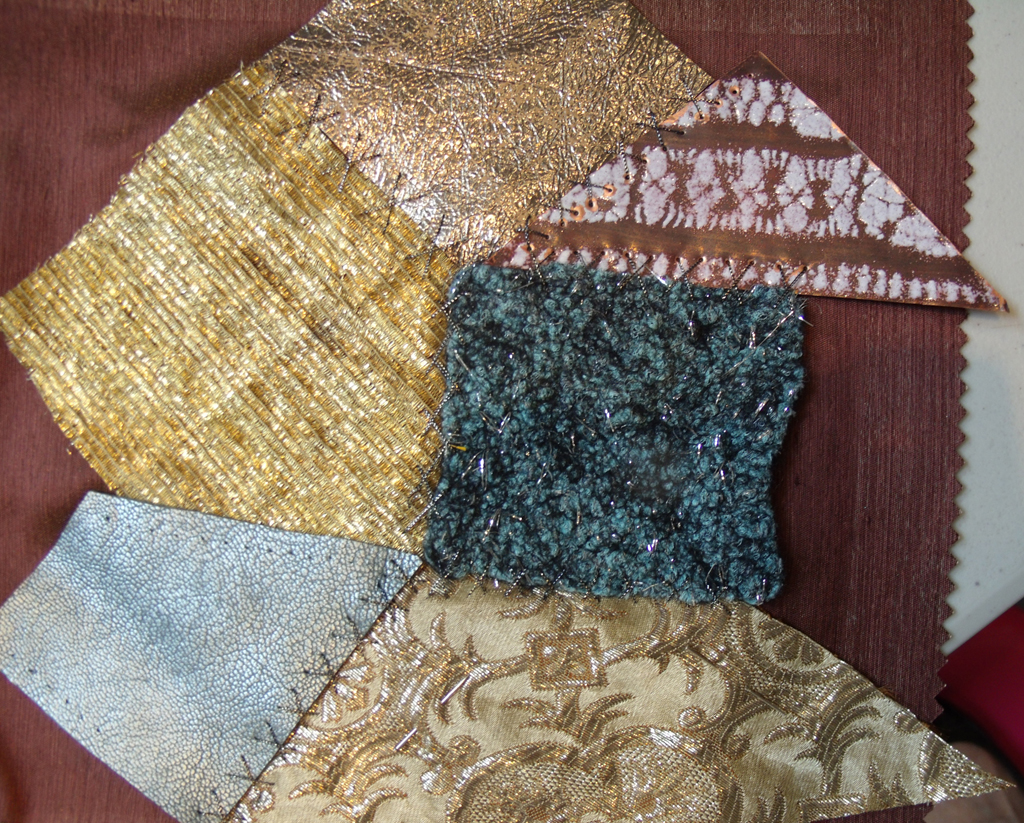
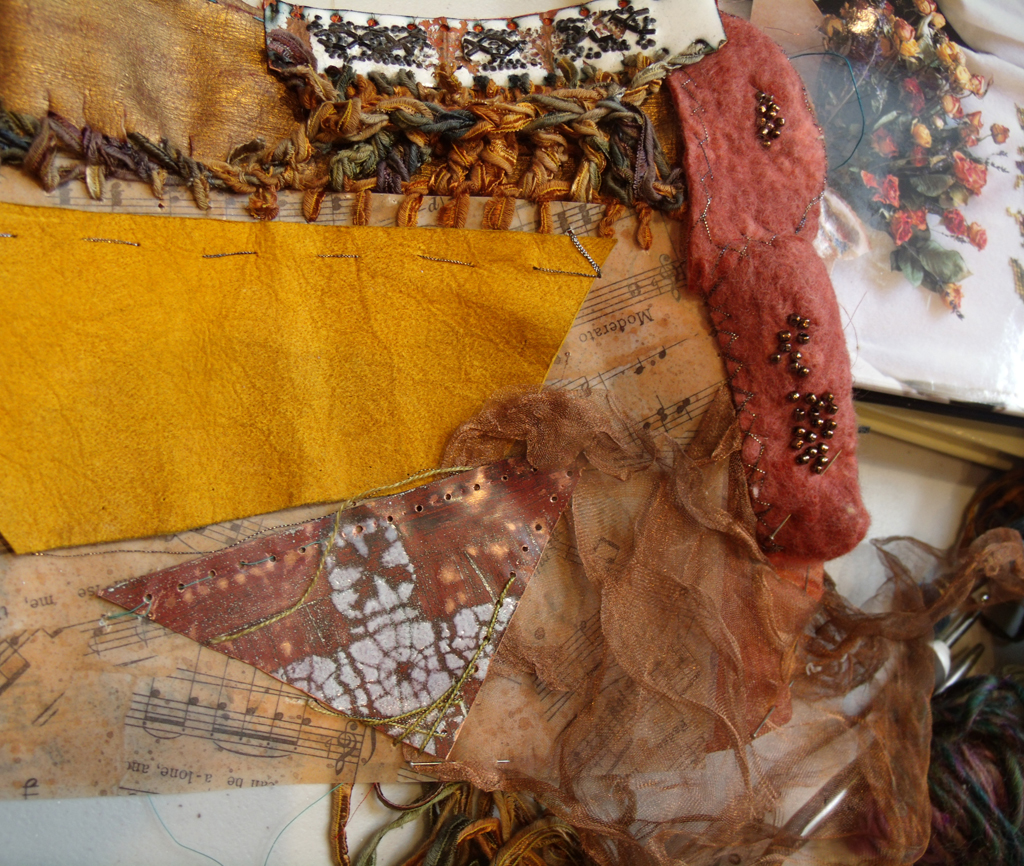
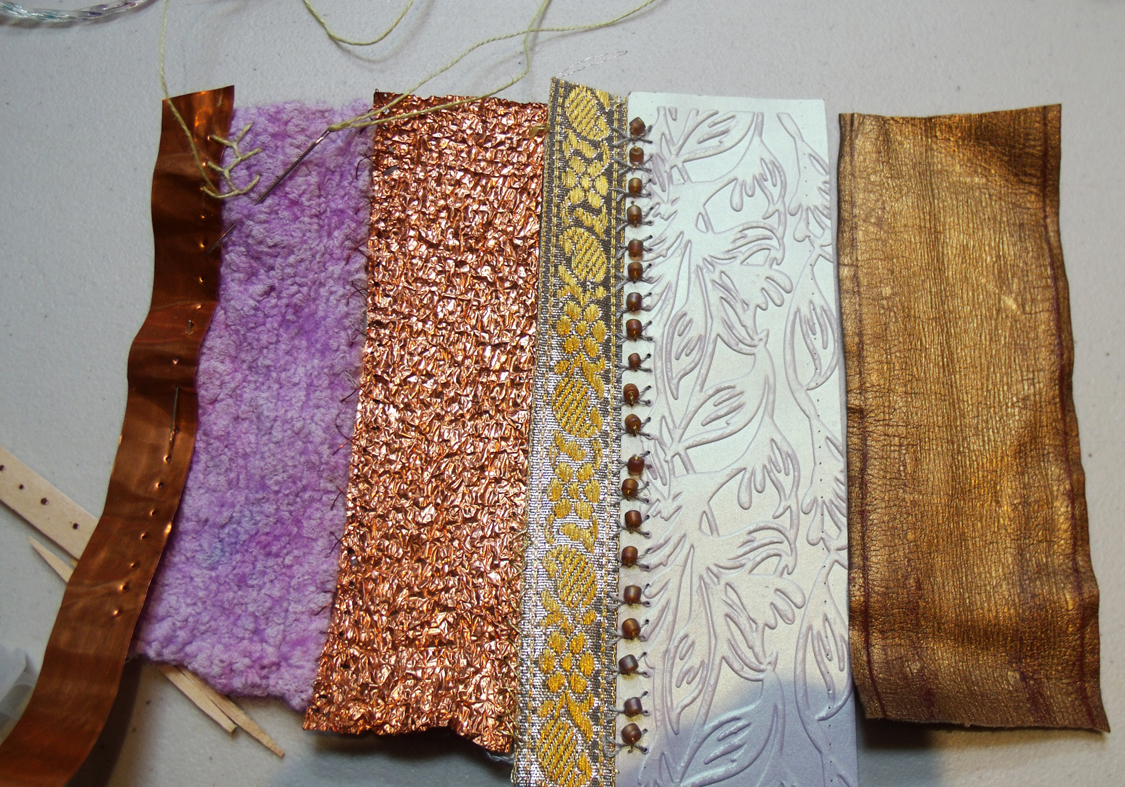
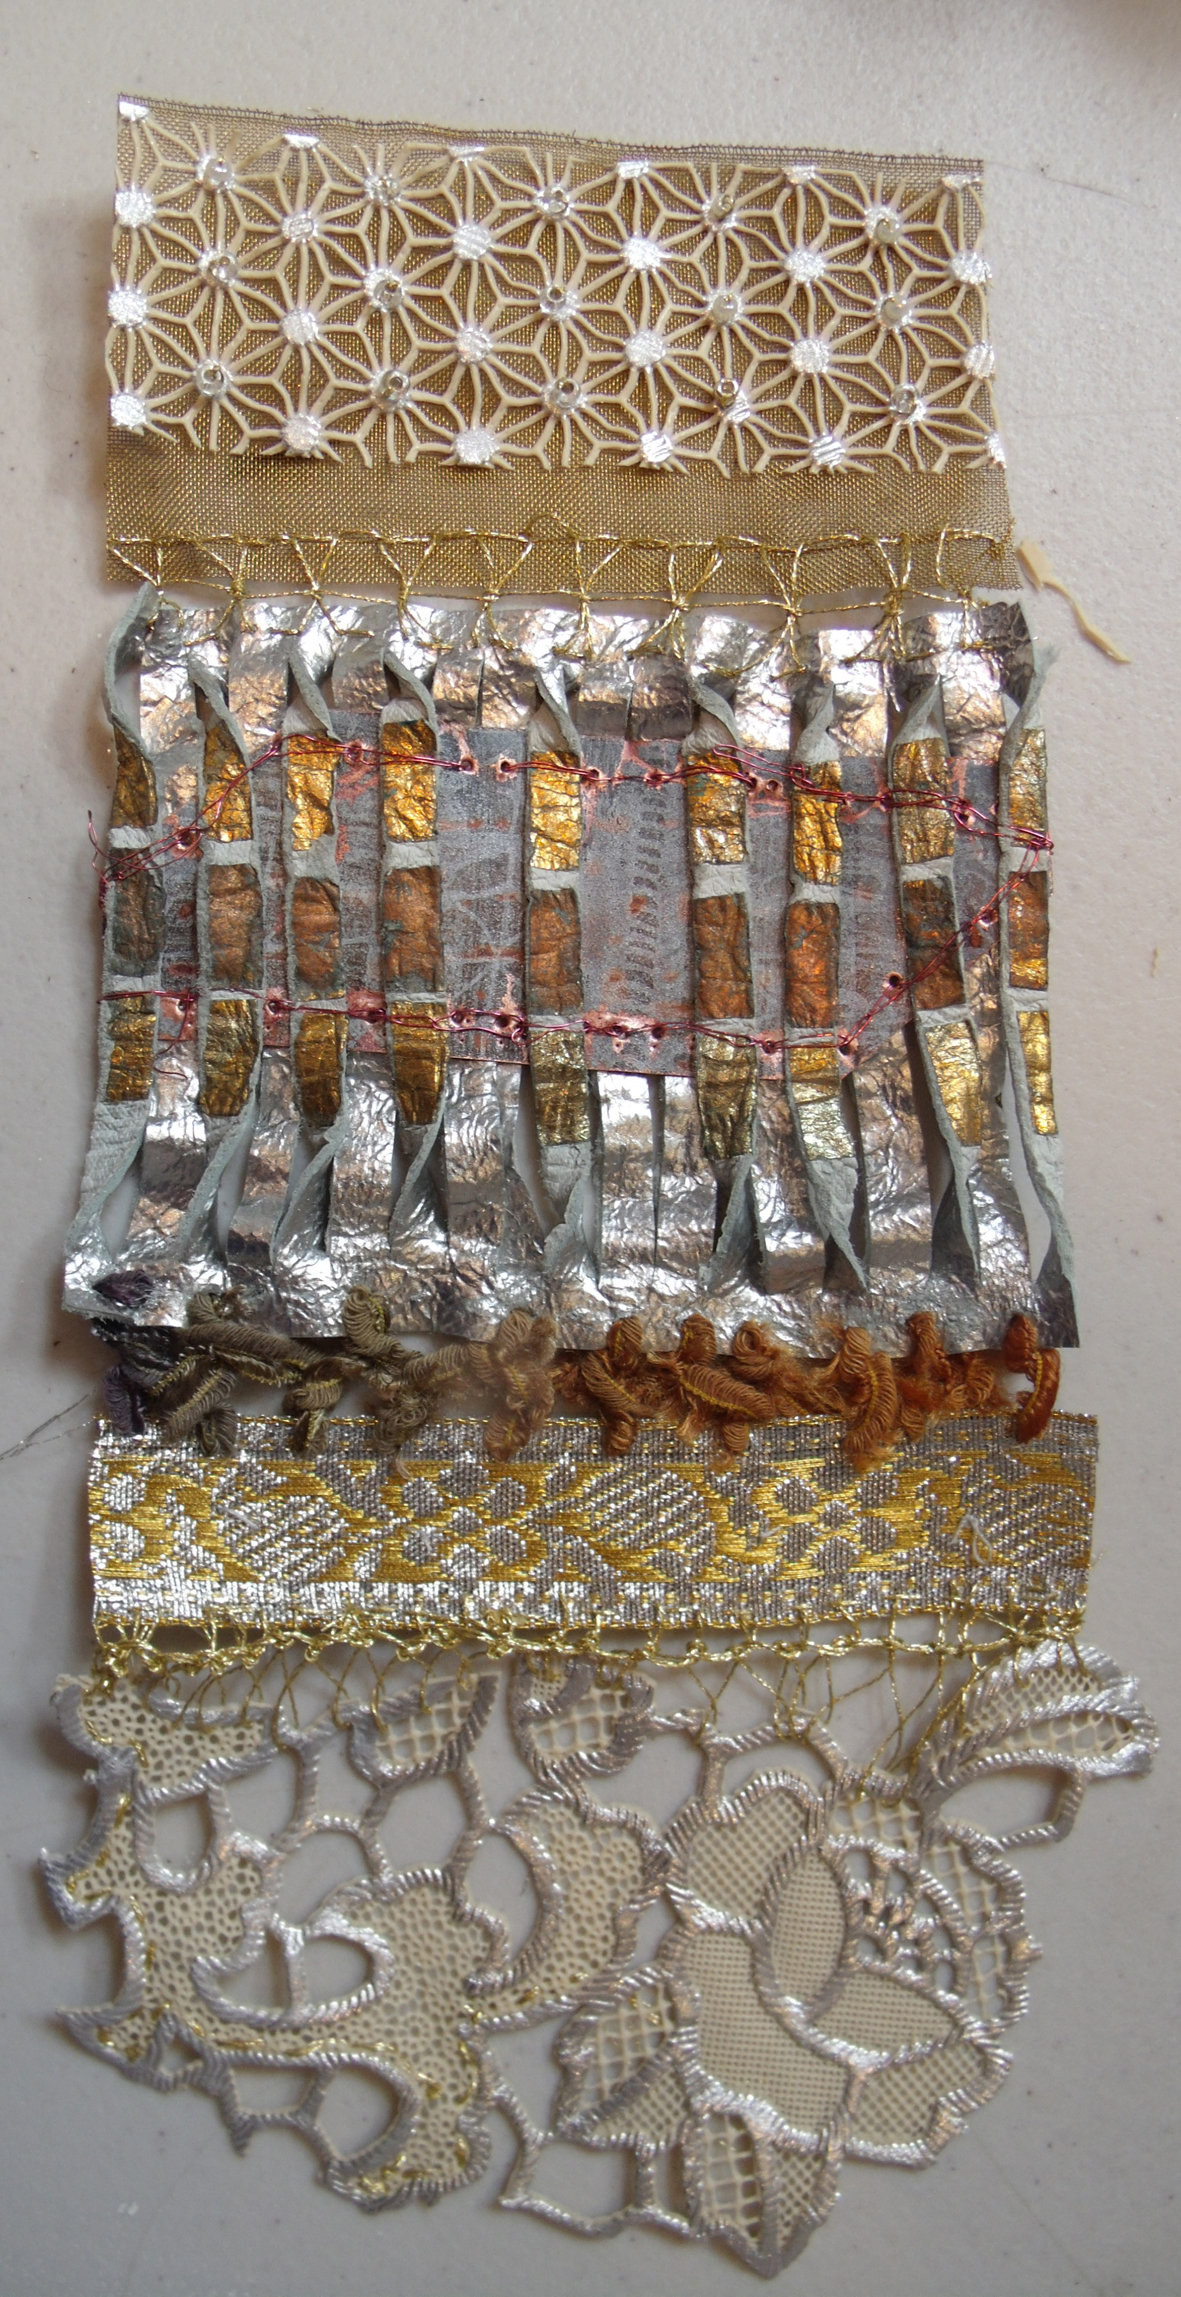
I also brought a large selection of materials from my home-based studios, all kinds of things: woven metal fabrics, stencilled enamels on copper, leathers, plastic lace, metallic damasks and other fabrics – and also the tools to drill stitch and manipulate them.
one of the best things about attending any materials based workshop is the abundance of new and unusual stuff that is introduced by people who are experienced in working with it – this can save days of researching.
my stash of copper discs, enamelled triangles and metallic braids
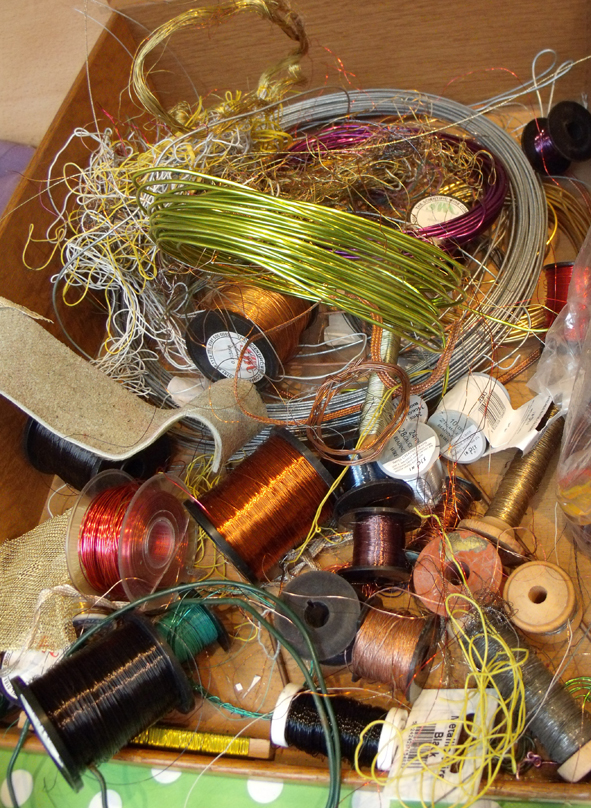
copper and aluminium wires for working with in any way possible.
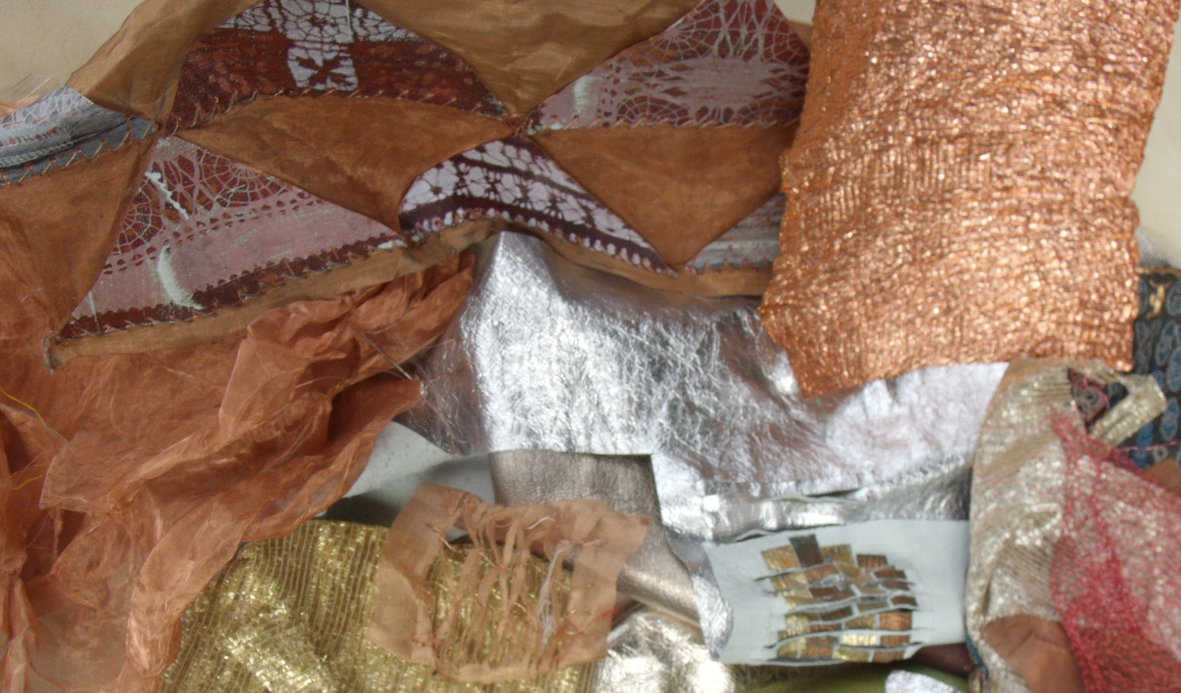
I particularly like metallic leathers and fabrics, so I brought lots of these in for everyone to sample, as well as scraps of thin copper, some patterned with vitreous enamel. such a shame I had no time to experiment with the other tutors’ materials for this research session.
metal meshes and pressed copper foil, enamel applique and metallic leathers.
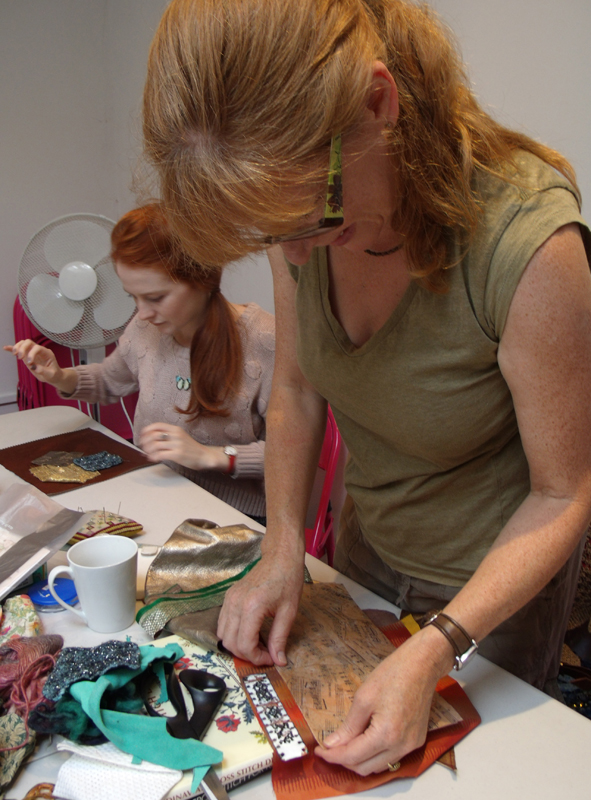
The task for the morning was to choose 3 different materials and join them together using their own preferred techniques or I would teach anyone various embroidery stitches and techniques. As the group comprised experts in knitting, stitching, crochet, felting, print as well as display, administration and even a drama student (a daughter on a flying visit), it proved to be a mixed bag of talents, attitudes and experiences. Perfect for generating new ideas and enthusiasms
colour co-ordinated mother and daughter
Everyone set to work choosing their 3 materials and laying them out, the strip sampler proved to be the most popular as it is the easiest to co-ordinate; odd crazy shapes take a lot longer to set up.For the task of joining two of the disparate materials together – colour, surface texture, weight of each material has to be considered as well as the selecting the technique.
traditional crazy shapes
strip sampler of cotton, leather and paper
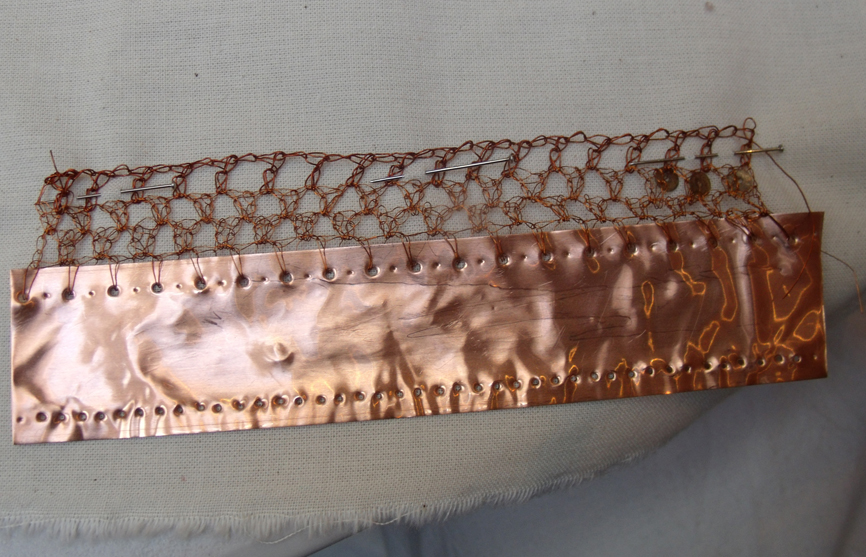
I showed everyone how to make regular holes in various surfaces, involving textile techniques – a tracing wheel, an old darning needle and a hammer! It works for me every time…..and off they went with mixed but interesting results.
marking out where to make the stitching holes on copper.
At first everyone just chose a colour co-ordinated or used an unusual type of thread to work with…
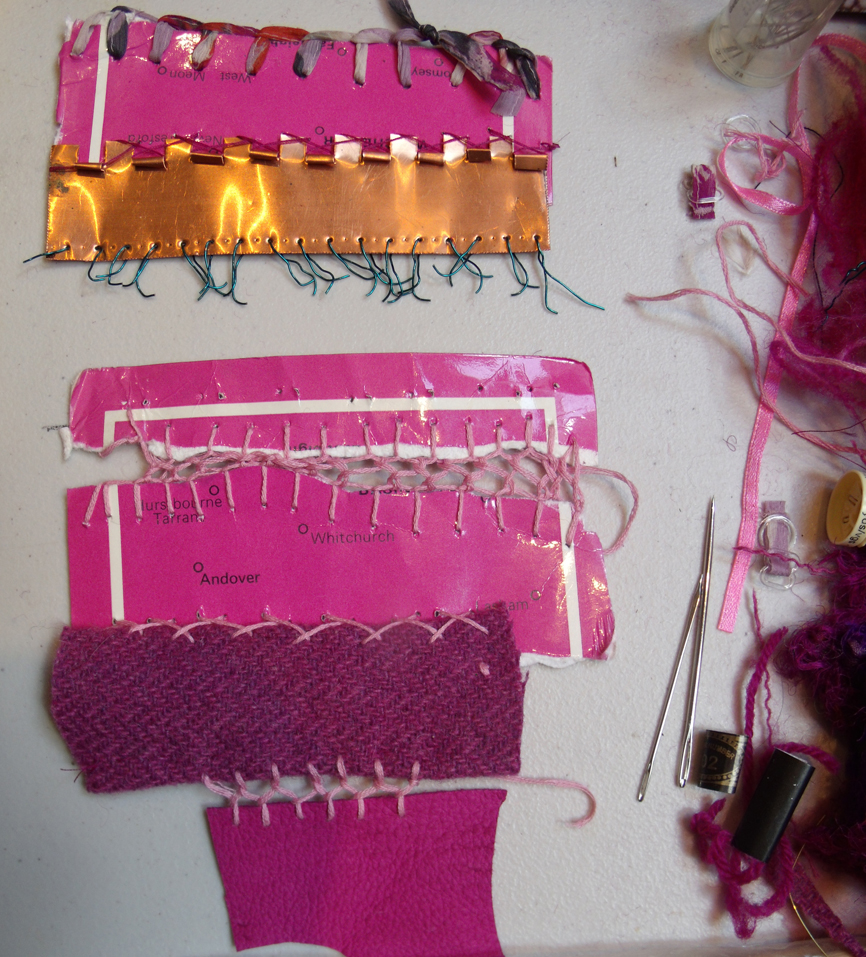
metallic leather, woven braid stitched together with silky knitting ribbon, awaiting the addition of a scrap of plastic tablecloth.
only to find that when stitched it looked very different than imagined. after a relaxed start the makers’ critical faculties began to kick in!
colour co-ordinated threads and second thoughts
I noticed that the knitters worked completely differently from the stitchers; they immediately made a start by adding a linking system to one edge of a piece of material either using crochet or knit to form an edge ready to accept the next piece of material – this gave them much more contemplation time for what comes next – the stitchers are able to join 2 pieces together simultaneously. Why had I not appreciated this before? However working the wire into fine leather was a fiddly affair – see below right.
knitting wool onto a copper foil strip
developing the crochet wire joining strip
Now I really must get the knitters to teach how to do this technique. When I first attempted to join metal together using my own stitching techniques I used a different system – making rows of simple cross stitches between the strips of vitreous enamelled copper pieces, so joining each at the same time. It took me some time to try the different insertion stitches. In fact it was an aversion to drilling all the holes that put me off developing this technique for a long time – but now I happily drill rows of holes for hours at a time – well not exactly ‘happily’….maybe I will get to like crochet after all.
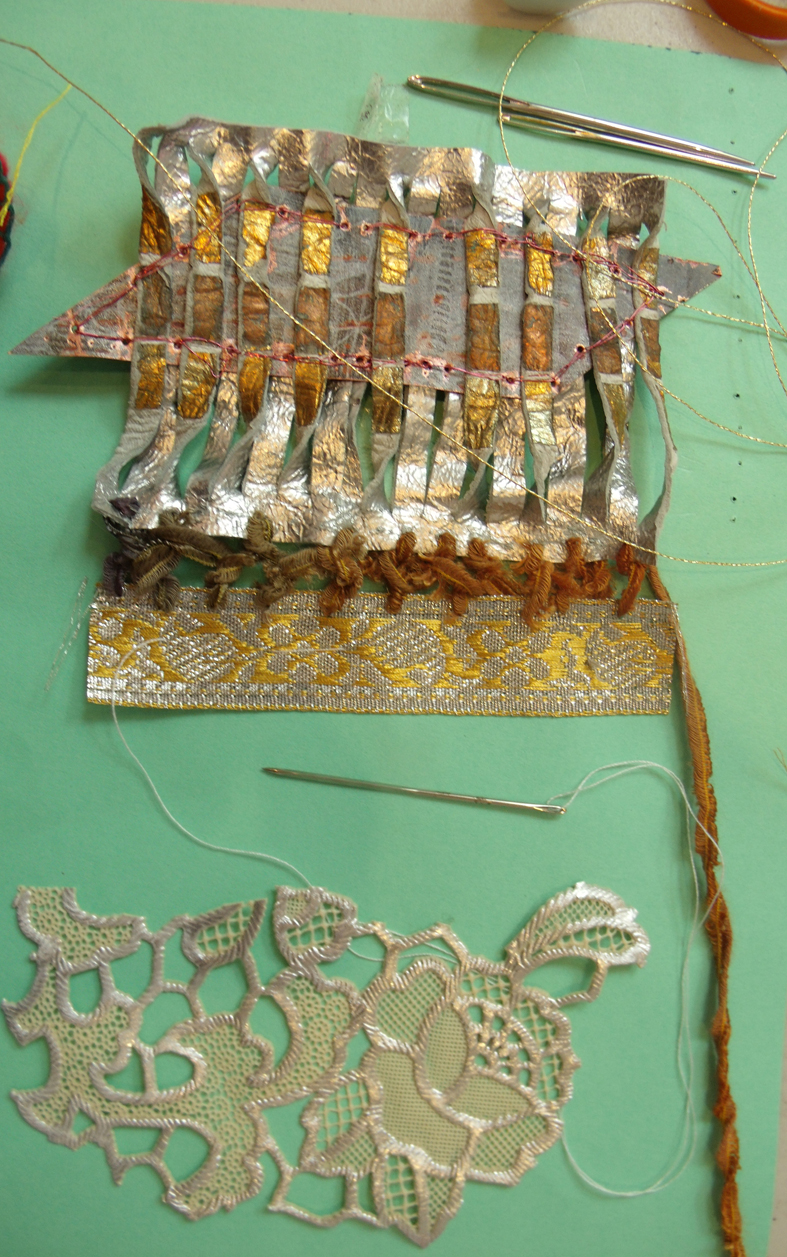
my very first attempt at joining metal with stitched wire
When the crochet wire was worked into some copper strips it was very successful…the strong steady base really helps achieve an even texture and the structure gives the metal wire movement and elasticity which is much more compatible to work into fabric.
copper wire crochet edge to copper foil strip
now the strips of materials are starting to look like they belong together
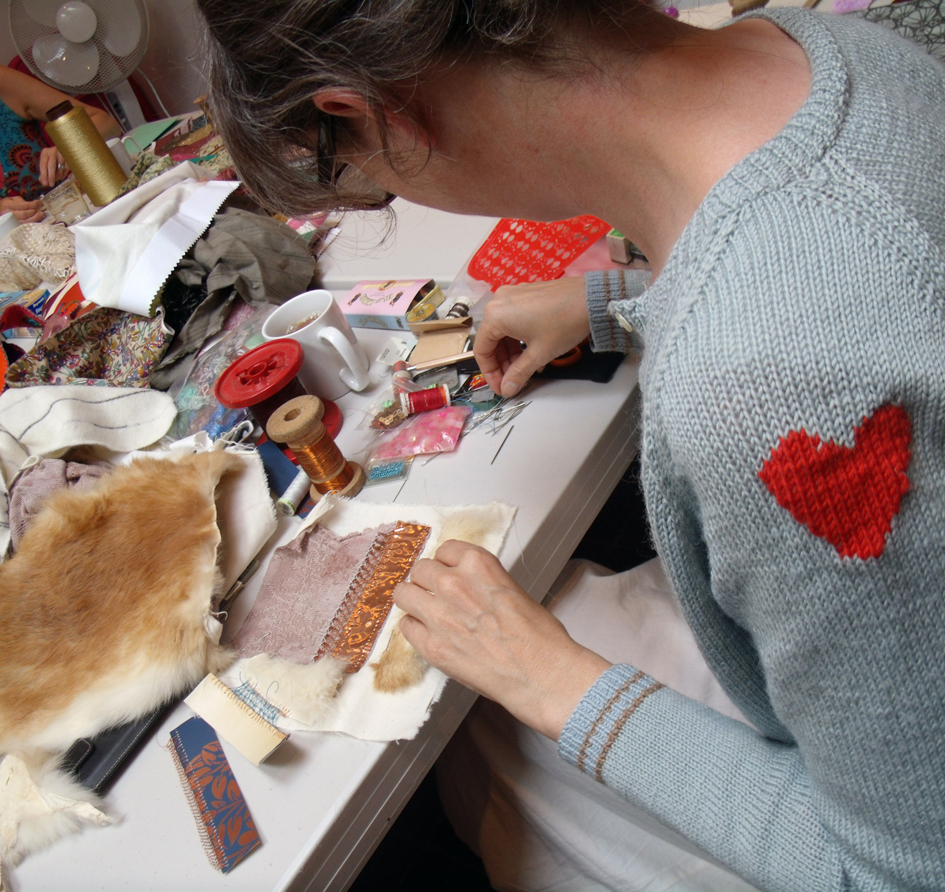
concentrating on the task in hand- and a heart on her sleeve
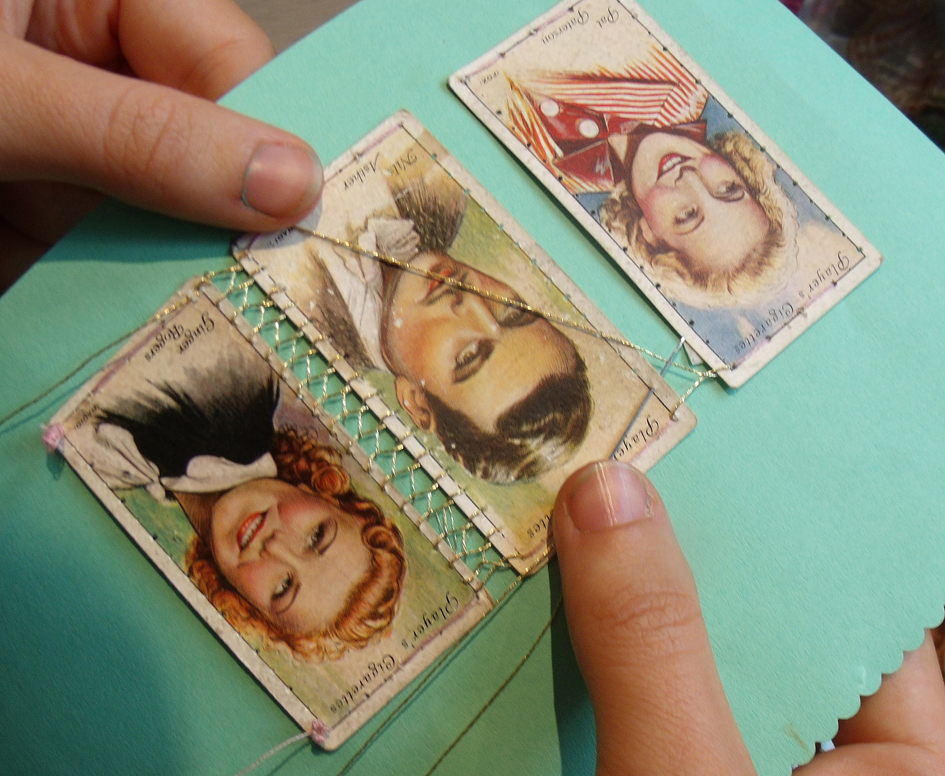
I showed several people how to embroider simple insertion stitches for a lace-like join…securing the fabric to a piece of card first to steady the gap between the pieces, a traditional technique found in my old embroidery manuals for white work.
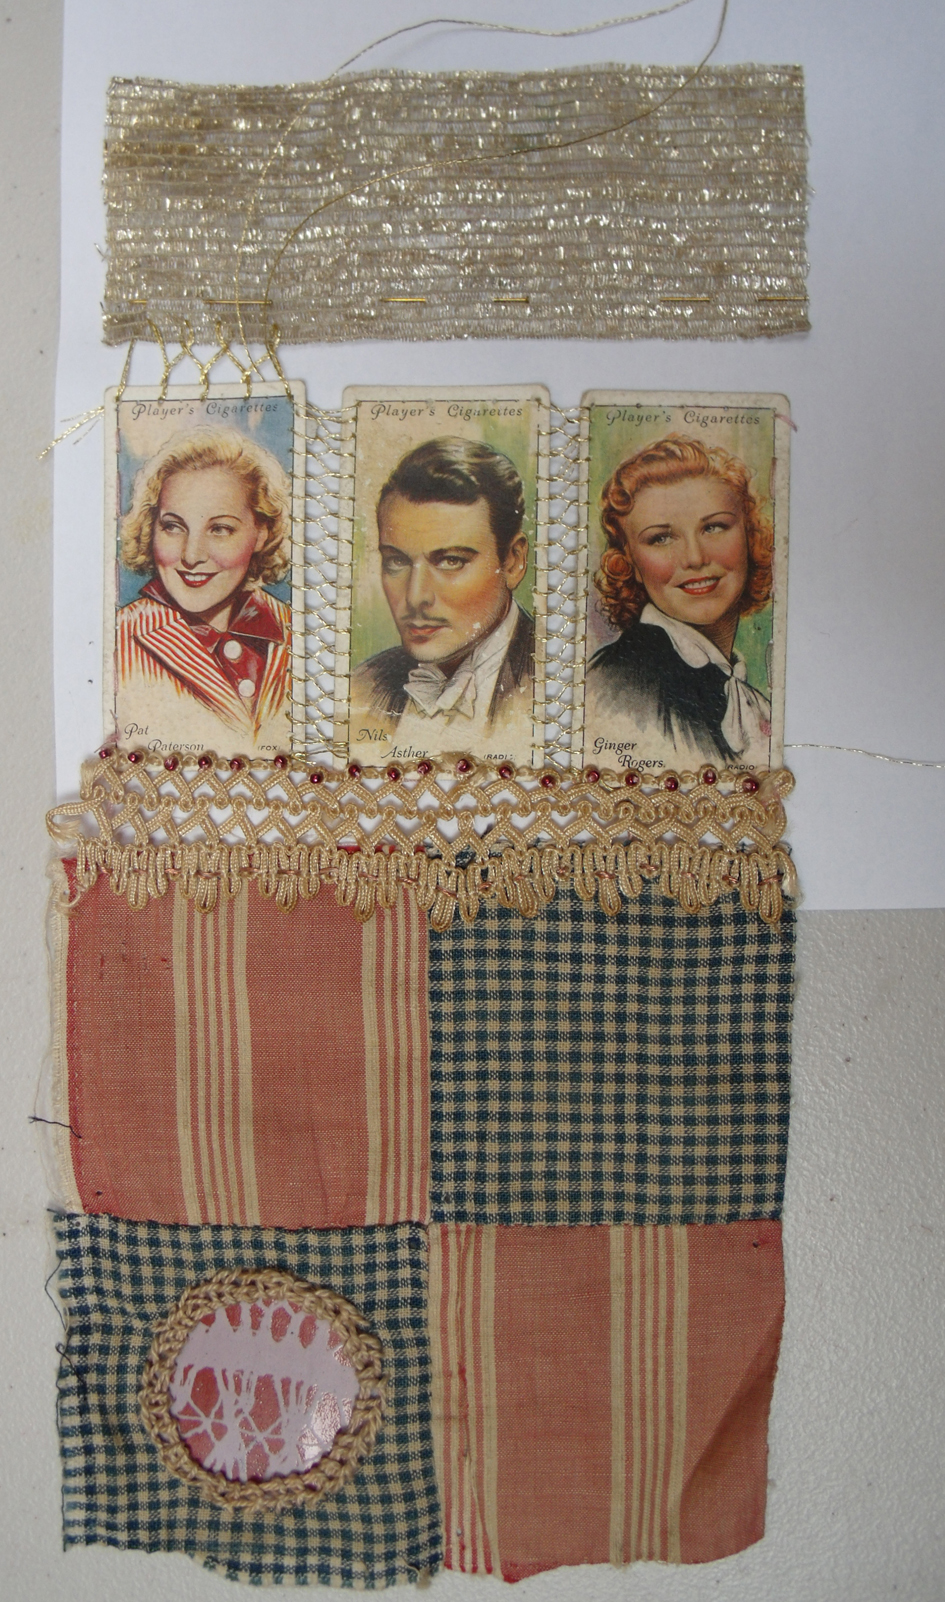
cigarette cards stitched onto paper to steady them ready for gold insertion stitching
Now the invention started to kick in…
insertion stitches and beaded braid for that vintage vibe – Sophie Bristol
a really crazy mix of materials crocheted together by Avril Best
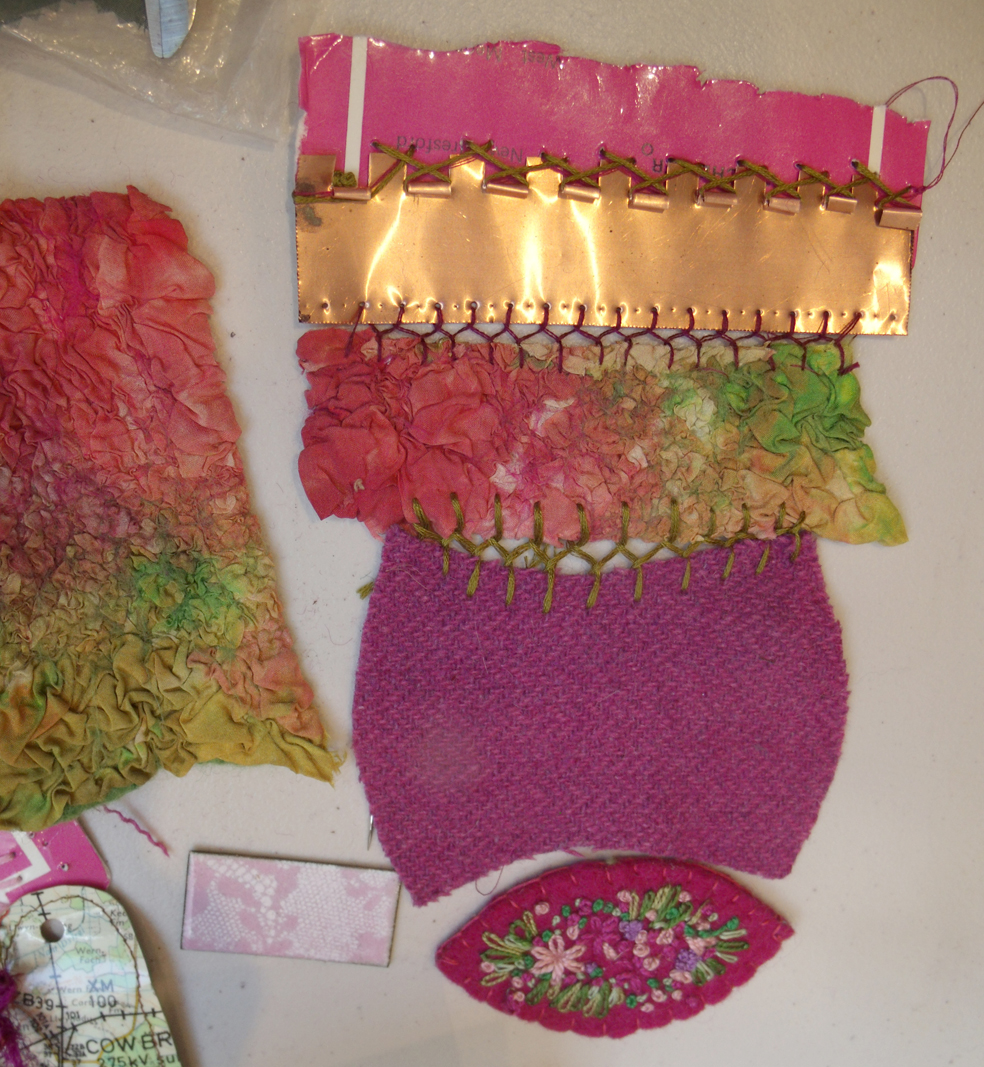
elegant beaded joining stitches between rows of leather, wallpaper, metallic braid, crumpled copper foil, nuno felted silk and drilled copper sheet – Debbie Bird
various knitted materials for joining disparate materials;- copper, copper wire, silk and wool nuno felt, shisha mirror in wool embroidery – Clare Griffel
ripped card, copper foil, nuno felted silk and wool, tweed and hand embroidery all joined together in crazy style – Kirsten Hill-Nixon.
interesting how the plastic tablecloth now looks like a precious fabric when seen with the other expensive elements, leather, woven brass and silver fabric. Jane-Marie Mahy
all things vintage – patchwork cotton, linen thread appliqued enamelled copper circle , cards and silver fabric. Sophie Bristol
pre machine knitted lace, crocheted copper wire with copper foil and wall paper – Steph Wooster.
And to prove that sampling really does inspire people here is new work from Steph – the day after the workshop she added some of the sampled techniques and materials to her range of knitted hot-water bottle-covers.
new knitted and embroidered samples – Steph Wooster
Everyone loves children’s art – either drawings or paintings; the pictures always have such energy and capture the spirit of the thing depicted – real or imagined. So when a visitor, Nadia Lanman, came to Heart Space Studios, to view my exhibition of ‘Mending Mottoes’ and asked if I would be interested in a commission to stitch one of her daughter’s drawings, I accepted at once – thinking “this is a challenge”
I asked to see several paintings and drawings so that we could make a decision which to depict, and really to see how difficult a challenge it would be. The price was also considered at this initial point as this was a thank-you and leaving present for the nursery school that 4-year-old Lola was leaving to go onto her primary school. Nadia brought in several, some simple line drawings and some full-on paintings. It became clear that Nadia really liked the rainbow painting (at the top of the post), water-colour paint on sugar paper…so typical of all children’s art – this was going to be a real challenge! It is one thing to stitch drawings but poster paint loaded on with energy ?
When we discussed pricing the piece I advised Nadia to go and buy a frame to keep the costs down; framing is really important but can be extremely costly, so I suggested choosing an A4 size as this was roughly the scale of the drawing papers that she had shown me – and an A size frame is easy to access; I promised her I would customise the frame if necessary.
Meanwhile I set about sampling the way to achieve the full-on colour.
first colour samples on shot pink silk
The first thing to research was the background colour, I found a yellow and pink shot silk fabric, that was about the same colour but slightly brighter than the sugar paper, this would save me having to dye the fabric – but how to get some background colour onto it first before I stitched it? i tried fabric paints but when dry it was like stitching hard leather. I needed the rainbow coloured in so I would not have to completely cover the ground with hand stitches – too time consuming, too expensive.
iron-on fabric dyes in pastel form
selecting thread colours to match paint
The next thing was to choose the threads. I had decided to stitch the whole piece in running stitches, this is the first stitch everyone ever learns to sew and it always looks both simple and innocent, so is a fitting choice for embroidering children’s art. Also I have used it a lot in my recent work, particularly when embroidering writing. I did think at this stage that machine embroidery would have been quicker to achieve the impression of saturated colour, but I am not a happy machine stitcher and felt that the mechanical aspect wasn’t in keeping with the subject; simple hand stitching was really the perfect technique to choose
I tried several yarns, silk and cotton and cottons and eventually chose a mixture of both, whatever would suit the paint colours.
directional stitching sample for rainbow and writing
I had photocopied the drawing and reduced the scale, to fit the frame, and to keep my fee as low as possible. I then drew onto this the direction of the paint brush, actually showing how Lola had swept the paint onto the paper, the lines would become running stitches, but first I had to sort out the message that Nadia wanted to send to the teachers on Lola’s behalf. “thankyou for my wings love Lola xx”
cut out photocopy and writing placement for the working drawing.
I had asked Nadia to get Lola to write it on a separate sheet of paper and then I traced it into position onto the photocopy – previously I had cut out the photocopy to gauge where to put the writing – a copy of this became my working drawing…..I have my own arcane ways of getting there!
I found this stitching really interesting, it had to be kept simple but needed to show the rhythm of the painted bands. Sadly the pastel once that it had been ironed to fix it was a bit too dull – but hey ho – it helped things go smoothly and quickly. What also helped was to draw the directional lines straight onto the dyed areas with a water-soluble pen to keep a track of the flow, they can be seen on the yellow band above. The last thing to do was to stitch the message again in running stitches, then wash and stretch the work and mount it in the frame.
finished and stretched embroidery
I so enjoyed this relatively simple stitched commission ( in comparison to the recent Thangka) that I thought it would be a good idea to run a class and now that I have sorted out how to express the rhythms and colours of paintings I think that I can show other people how to embroider their own children’s drawings – they would make great presents for anyone in the family. And when I told Nadia how her commission had inspired me to develop a new class, she immediately signed up for it!